Posts with «arduino» label

Non-Arduino powered by a piece of Computing history

Sometimes it is a blessing to have some spare time on your hands, specially if you are a hacker with lots of ideas and skill to bring them to life. [Matt] was lucky enough to have all of that and recently completed an ambitious project 8 months in the making – a Non-Arduino powered by the giant of computing history – Intel’s 8086 processor. Luckily, [Matt] provides a link to describe what Non-Arduino actually means; it’s a board that is shield-compatible, but not Arduino IDE compatible.

He was driven by a desire to build a single board computer in the old style, specifically, one with a traditional local bus. In the early days, a System Development Kit for Intel’s emerging range of  microprocessors would have involved a fair bit of discrete hardware, and software tools which were not all too easy to use.

Back in his den, [Matt] was grappling with his own set of challenges. The 8086 is a microprocessor, not a microcontroller like the AVR, so the software side of things are quite different. He quickly found himself locking horns with complex concepts such as assembly bootstrapping routines, linker scripts, code relocation, memory maps, vectors and so on. The hardware side of things was also difficult. But his goal was learning so he did not take any short cuts along the way.

[Matt] documented his project in detail, listing out the various microprocessors that run on his 8OD board, describing the software that makes it all run, linking to the schematics and source code. There’s also an interesting section on running Soviet era (USSR) microprocessor clones on the 8OD. He is still contemplating if it is worthwhile building this board in quantities, considering it uses some not so easy to source parts. If you are interested in contributing to the project, you could get lucky. [Matt] has a few spares of the prototypes which he is willing to loan out to anyone who can can convince him that they could add some value to the project.

Thanks for the tip, [Garrett]


Filed under: Arduino Hacks, Microcontrollers

You can now trade Pokémon with yourself, thanks to Arduino

Gotta catch 'em all. Gotta catch 'em all. Gotta catch 'em all. For some 17 years, those words have reverberated around coder Pepijn de Vos's mind, and thanks to an Arduino and some ingenuity, his dreams have now come true. Well, probably not, but a project like this deserves an epic back story. In reality, hobbyist de Vos has created a system for trading Pokémon from the first generation of the franchise with himself. The setup is actually pretty simple: connect a Game Boy, Game Boy Color or Game Boy Advance to an Arduino board via a Game Link Cable. Then, borrow de Vos's code (available on GitHub), and start trading Pokémon with the Arduino.

Filed under: Gaming

Comments

Via: Gizmodo, Hacker News

Source: Wishful Coding

Engadget 17 Feb 07:02
arduino  gameboy  gaming  pokemon  

Hat-Mounted Clock Requires Mirror For Wearer To Tell Time

[gfish] was planning on attending Burning Man and wanted to make something unique (and useful) to wear. He decided on a hat/clock hybrid. Just slapping a clock on a hat would be too easy, though. [gfish] wanted his hat to change time zones both via manual switches or physical location.

On the front of the hat there are 2 hands, as most clocks have. Each one is attached to one of two concentric shafts that run to the back of the hat. Each hand is individually controlled by an RC vehicle servo. Those of you familiar with RC servos know that a servos’ max rotation is about 180 degrees and is certainly not enough for a full revolution required by the clock. To fix this, there is a 3:1 gear set that allows a 120 degree rotation of the servo to move the clock hand a full 360 degrees. With this method, each hand can’t move past 12 and instead has to quickly move counter-clockwise to get where it needs to be in order to again start its journey around the clock face.

Mounted inside the hat there is an Arduino that controls the clock, a GPS shield to determine location and an RTC to maintain accurate time. Mounted on the side of the hat is a control panel that contains an overall on/off switch as well as a rotary switch for selecting a specific timezone or for engaging GPS mode. The whole thing is powered by a 9 volt battery.

If you like unnecessarily complicated top hats, check out this WiFi enabled message displaying one.


Filed under: clock hacks, wearable hacks
Hack a Day 14 Feb 21:00

Bill’s Arduino

Pokemon is a great game by itself, but when you realize that not all of the ‘mon are available in one game, trading is required for completion, and some pokemon aren’t available without either hacking or going to a Toys ‘R Us in 1997, you start to see how insidious this game can be. Figuring he could finally complete the game with an Arduino, [Pepijn] decided to build a pokemon storage system.

This build was inspired by an earlier post that also spoofed trades. Instead of building this project around a high-power micro, [Pepijn] decided to use an Arduino. The protocol Game Boys use to communicate with each other is extremely well documented, although that’s only half the battle. Each game using the link cable used specialized data structures for transfer, and after grepping through a disassembled Pokemon ROM,  [Pepijn] figured out how everything worked.

The completed hardware keeps one Pokemon in the EEPROM of an Arduino. It’s not very fast if you want to catch all 151 Pokemon in the Gen 1 games, but any way you look at it, you’re going to be catching a lot of Magikarp anyway.


Filed under: Arduino Hacks, nintendo gameboy hacks

Nightmare Metronome Reminds You That Time is Money

  TEMPO, TEMPO! is a piece of kinetic art in the form of a metronome with an audible spark. Or, according to creator Sanela Jahić, it’s “a kinetic object which form a narrative about accelerating the production process and enhancing work performance in order to increase competitiveness and improve profits.” […]

Read more on MAKE

Tindie Biz is Yelp For Manufacturing

Maker marketplace Tindie, an online store where Makers can buy and sell homemade gadgets, launched a beta service called Tindie Biz this week for finding and reviewing suppliers and manufacturers. “We hear stories of makers paying $20k for introductions to manufacturers or a startup losing $100k to middlemen that never produce,” […]

Read more on MAKE

Know Your Speed on Rollerblades

[Anurag] is a computer engineering student with a knack for rollerblading. Rollerblades are not a transportation device that are often fitted with speedometers, so [Anurag] took that more as a challenge and designed this Arduino-powered computer to give him more information on his rollerblade rides.

The device uses an Arduino as the brain, and counts wheel revolutions (along with doing a little bit of math) in order to calculate the speed of the rider. The only problem with using this method is that the wheels aren’t on the ground at all times, and slow down slightly when the rider’s foot is off the ground. To make sure he gets accurate data, the Arduino uses an ultrasonic rangefinder to determine the distance to the ground and deduce when it should be taking speed measurements.

In addition to speed, the device can also calculate humidity and temperature, and could be configured to measure any number of things. It outputs its results to a small screen, but it could easily be upgraded with Bluetooth for easy data logging. If speed is truly your goal, you might want to have a look at these motorized rollerblades too.


Filed under: transportation hacks

6-Axis Robot-Arm 3D Printer Runs on Arduino, Slings Spiderwebs

Most industrial robots run on proprietary systems, but this experimental KUKA arm uses an Arduino MEGA to 3D print in 6 axes, mimicking the shapes found in nature. Despite the size of this KUKA arm with a custom toolhead attachment — a 3D printer extruder — carefully looking at the […]

Read more on MAKE

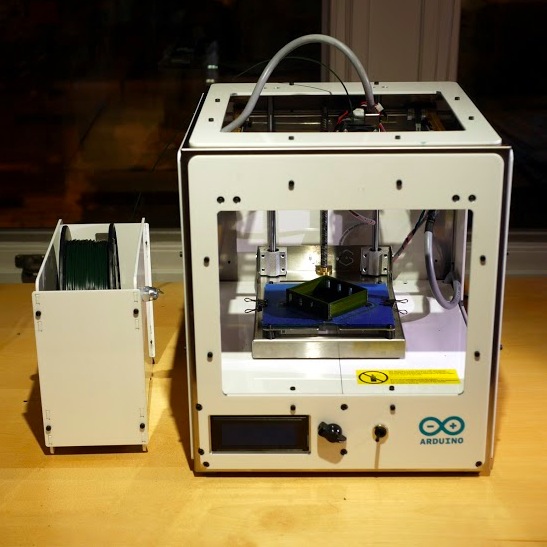
A tutorial about avoiding warping with Arduino Materia 101

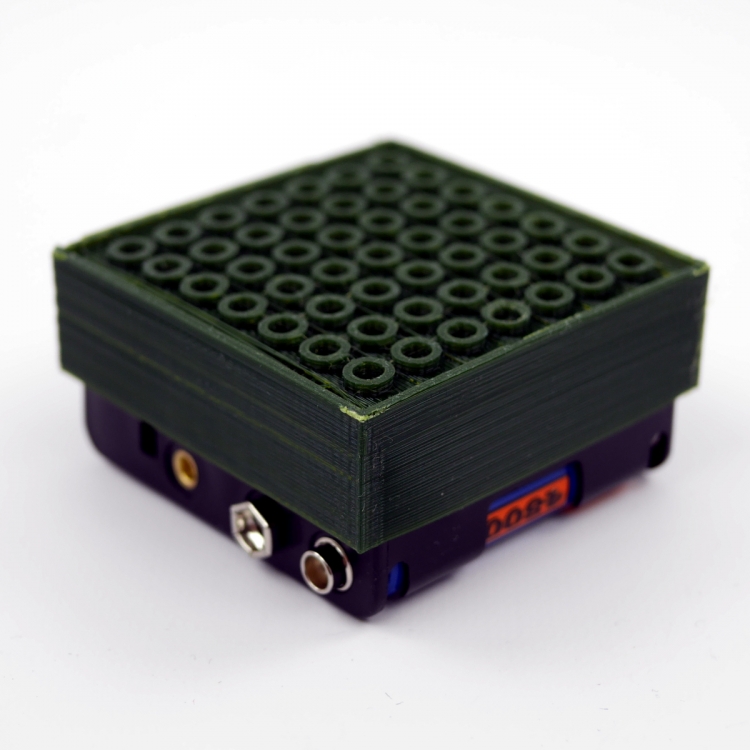
Some of you may have experienced that when you start to print a cube or box-shaped objects they can easily warp on the corners. The reason for this is the change of volume that plastic goes through when cooling down: it shrinks when becoming cooler. Even if PLA, the corn-based plastic we use on the Arduino Materia 101, shrinks much less than ABS, it can become a problem when printing things that require a high level of precision.

That’s why Kristoffer prepared a tutorial to solve the problem and shares some 3dprinting tricks with all of you. Follow the 5 steps of the tutorial and learn how to print without warping.

Check the previous tutorials on 3d printing with Material 101

Interested in getting in touch and showing your experiments? Join Kristoffer on the Arduino forum dedicated to Materia 101 and give us your feedback.

A Router Table with Height Control

The wood router is a versatile power tool which can be picked up at a low price. Nicer router setups are mounted underneath a table, with the cutting head poking through. This makes it easier and safer to work with the tool.

[Paul] combined his interest in electronics and woodworking by making a router table with automated controls [translation]. The neat part of this build is the automated height control, which ensures accurate cutting depth.

The router is mounted to a threaded rod, which allows it to be moved up and down by a motor. A low cost L298 motor driver provides the power to the motor, which is controlled by an Arduino Uno. A VCNL4020 based sensor board is used to measure distance and accurately set the router height. This tiny proximity sensor looks like a nifty chip, providing distance measurements up to 200 mm and an ambient light sensor in one package.

The routing table has an LCD display and buttons, allowing the user to dial in their desired height. The entire thing was built using recycled bits and well under $100 in new parts.


Filed under: tool hacks