Posts with «balance» label

Cheating the Perfect Wheelie With Sensors And Servos

Everyone remembers popping their first wheelie on a bike. It’s an exhilarating moment when you figure out just the right mechanics to get balanced over the rear axle for a few glorious seconds of being the coolest kid on the block. Then gravity takes over, and you either learn how to dismount the bike over the rear wheel, or more likely end up looking at the sky wondering how you got on the ground.

Had only this wheelie cheating device been available way back when, many of us could have avoided that ignominious fate. [Tom Stanton]’s quest for the perfect wheelie led him to the design, which is actually pretty simple. The basic idea is to apply the brakes automatically when the bike reaches the critical angle beyond which one dares not go. The brakes slow the bike, the front wheel comes down, and the brakes release to allow you to continue pumping along with the wheelie. The angle is read by an accelerometer hooked to an Arduino, and the rear brake lever is pulled by a hobby servo. We honestly thought the servo would have nowhere near the torque needed, but in fact it did a fine job. As with most of [Tom]’s build his design process had a lot of fits and starts, but that’s all part of the learning. Was it worth it? We’ll let [Tom] discuss that in the video, but suffice it to say that he never hit the pavement in his field testing, although he appeared to be wheelie-proficient going into the project.

Still, it was an interesting build, and begs the question of how the system could be improved. Might there be some clues in this self-balancing motorized unicycle?

Stecchino Game is all about Balancing a Big Toothpick

Stecchino demo by the creator

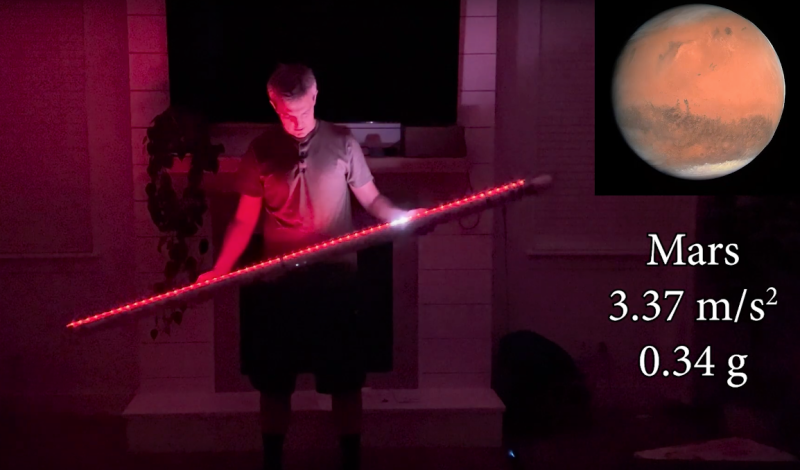
Self-described “Inventor Dad” [pepelepoisson]’s project is called Stecchino (English translation link here) and it’s an Arduino-based physical balancing game that aims to be intuitive to use and play for all ages. Using the Stecchino (‘toothpick’ in Italian) consists of balancing the device on your hand and trying to keep it upright for as long as possible. The LED strip fills up as time passes, and it keeps records of high scores. It was specifically designed to be instantly understood and simple to use by people of all ages, and we think it has succeeded in this brilliantly.

To sense orientation and movement, Stecchino uses an MPU-6050 gyro and accelerometer board. An RGB LED strip gives feedback, and it includes a small li-po cell and charger board for easy recharging via USB. The enclosure is made from a few layers of laser-cut and laser-engraved material that also holds the components in place. The WS2828B LED strip used is technically a 5 V unit, but [pepelepoisson] found that feeding them direct from the 3.7 V cell works just fine; it’s not until the cell drops to about three volts that things start to glitch out. All source code and design files are on GitHub.

Games are great, and the wonderful options available to people today allow for all kinds of interesting experimentation like a blind version of tag, or putting new twists on old classics like testing speed instead of strength.

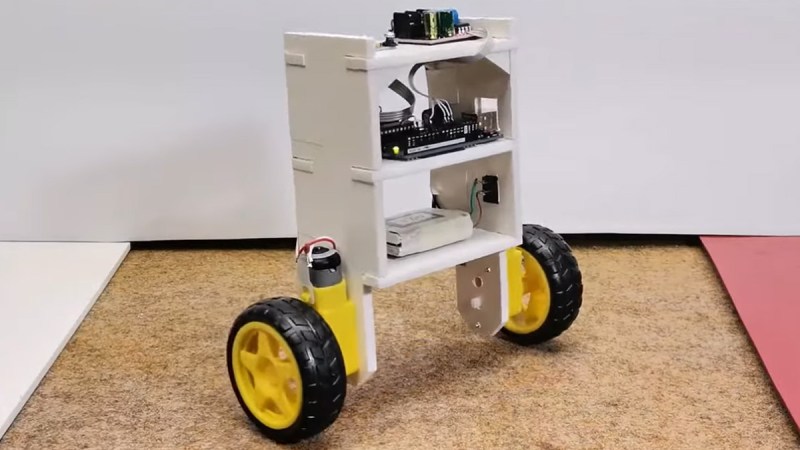
2 wheel self-balancing robot

2 wheel self-balancing robot

Quadrupede bluetooth Spider


After printing pieces to Prusa I3 is the new 4-legged spider with bluetooth comm :)


read more

Let's Make Robots 07 Jun 20:27
32 servo controler  6v  arduino  balance  battery  biped  bluetooth  fast  greek  grrobot  hands  head  hexapod  humanoid  led  legs  mg995  mini servo  move  one leg  program  relay  robot  robotics  servos  slow  ssc32  step  vb.net  walk  warior  

Ball Balancing Arduino-Style

If you have a good sense of balance, you can ride a unicycle or get on TV doing tricks with ladders. We don’t know if [Hanna Yatco] has a good sense of balance or not, but we do know her Arduino does. Her build uses the ubiquitous HC-SR04 SONAR sensor and a servo.

This is a great use for a servo since a standard servo motor without modifications only moves through part of a circle, and that’s all that’s needed for this project. A PID algorithm measures the distance to the ball and raises or lowers a beam to try to get the ball to the center.

Servos like this usually operate in radio control vehicles and they are very easy to drive. A pot coupled to the shaft generates a pulse that the servo internally compares to a pulse from the microcontroller. If the pulse is wider than the reference pulse, the motor drives in one direction. If the pulse is narrower than the reference, the motor operates in the other direction. Just how much it drives depends on how much difference there is between the two pulses. When the pulses match, the servo motor stops moving. This pulse arrangement is very simple to drive from a logic output on an Arduino or other microcontrollers.

The build details are a bit sparse, but you can see in the video the general layout, and she links to a similar project that inspired this one if you are looking for more details.

You can do the same trick in two dimensions if you prefer. Or perhaps you’d like to try using a time of flight sensor, instead.


Filed under: Arduino Hacks
Hack a Day 15 Dec 00:00

Two Wheeler is Gyroscope Stabilized


[Jim] loves gyros – not those newfangled MEMS devices, but old-fashioned mechanical gyroscopes. His obsession has pushed him to build this gyro stabilized two wheeler. We love watching hacks come together from simple basic materials and hand tools, with liberal amounts of hot glue to hold everything in place.  That seems to be [Jim's] philosophy as well.

This is actually the fifth incarnation of [Jim's] design. Along the way he’s learned a few important secrets about mechanical gyro design, such as balancing the motor and gyro assembly to be just a bit top-heavy. [Jim's] gyro is a stack of CDs directly mounted to the shaft of a brushed speed400 R/C airplane motor. The motor spins the CDs up at breakneck speed – literally. [Jim] mentions that they’ve exploded during some of his early experiments.

The gyroscope is free to move in the fore-aft direction. Side to side balance tilting is on the wheels themselves. The wheels are model airplane wheels, which have a curved tread. No cheating by using flat LEGO wheels in [Jim's] lab! A potentiometer measures the tilt angle of the gyro. The voltage from the pot is fed into an Arduino Uno which closes the loop by moving a servo mounted counterweight.

The vehicle is controlled with a regular R/C plane radio. A servo steers the front wheel while another DC motor drives the rear wheel. Not only is [Jim's] creation able to balance on its own, it can even make a U-Turn within a hallway.


Filed under: misc hacks
Hack a Day 08 May 12:00

How to: Super Simple Self-Balancing Robot Tutorial

Since the introduction of the segway, DIYers have been building their own self-balancing transportation devices.  Before you go off and build a full-size version, here’s a simple project to help you learn the basics of control system design (the software which powers the balancing act).  Essentially, a microcontroller reads sensors such as gyroscopes and accelerometers, then uses a PID algorithm to make minute adjustments to the robot’s wheels.

The little robot featured above is powered by an Arduino Nano and remotely controlled via bluetooth.  Additionally, the device features three potentiometers to fine tune the balancing algorithm.  Both the wheels and body were 3D printed.  To learn how to build your own minature self-balancing robot, check out the full project details and be sure to check out these three epic self-balancing posts:

Don’t Miss Out:

MPU6050 IMU - Gyro angle calc for balancing robot

Primary image

What does it do?

Balancing RObot

I'm building a balancing robot using Arduino Uno & a MPU6050 IMU.

I've never programed anything before so naturally I'm struggling a bit.

I've got some code that calculates an angle from the accelerometer reading & I need to do the same for the gyro reading to feed into a complimentary filter. However it's not working & I haven't figured out why. (I've used the lirbray built by Jeff Rowberg and some of his code too).

Please have a look at the code attached & see if you can help me out a little. 


Cost to build

Embedded video

Finished project

Number

Time to build

Type

URL to more information

Weight

read more

Printing and programming a self-balancer

The Hackaday staff isn’t in agreement on 3d printers. Some of us are very enthusiastic, some are indifferent, and some wonder what if they’re as widely useful as the hype makes them sound. But we think [Jason Dorweiler's] self balancing robot is as strong a case as any that 3d printing should be for everyone!

Don’t get us wrong. We love the robot project just for being a cool self-balancer. Seeing the thing stand on its own (video after the break) using an Arduino with accelerometer and gyroscope sensors is pure win. But whenever we see these we always think of all the mechanical fabrication that goes into it. But look at the thing. It’s just printed parts and some wooden dowels! How easy is that?

Sure, sure, you’ve got to have access to the printer, it needs to be well calibrated, and then you’ve got to make the designs to be printed out. But these hurdles are getting easier to overcome every day. After all, there’s no shortage of people to befriend who want nothing more than to show off their Makerbot/RepRap/etc.


Filed under: robots hacks