Posts with «misc hacks» label

Creating a Numbers Station Of Your Very Own

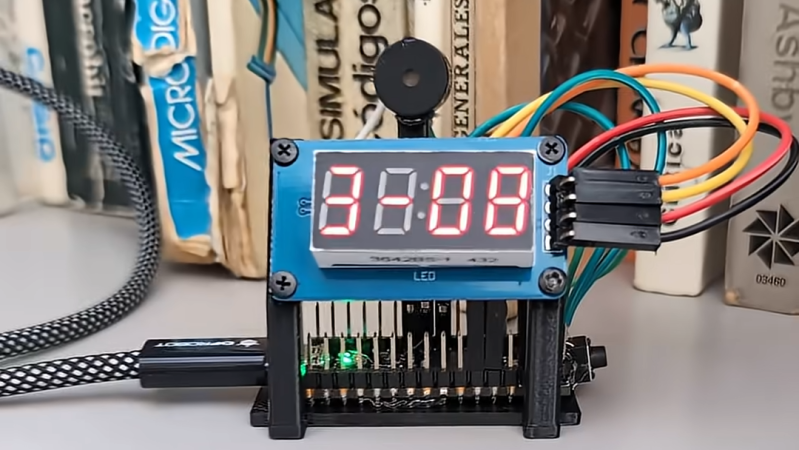
Numbers stations are a weird phenomenon where odd voices read out long strings of numbers or random codewords to the confusion of the vast majority of the listening audience. If you’ve ever wanted to build one of your own, you could follow the example of [AudioWanderer].

NumberMumble, as it’s called, is a numbers station emulator. It doesn’t signal spy networks or reveal national secrets. Instead, it randomly plays audio samples using an Arduino, including characteristic bursts of white noise that make it sound more authentic. It relies on the Mozzi library to help with audio tasks, including generating white noise and playing back samples. It’s also kitted out with a filter knob for varying the tone. Audio output is via PWM.

If you want to confuse your neighbours with oddball audio, put this thing on a radio transmitter and get broadcasting. But don’t, because that’s illegal without the proper licenses or — you know — if you happen to be a real spy. Video after the break.

Hack a Day 17 Mar 12:00

Darkroom Robot Automates Away the Tedium of Film Developing

Anyone who has ever processed real analog film in a darkroom probably remembers two things: the awkward fumbling in absolute darkness while trying to get the film loaded into the developing reel, and the tedium of getting the timing for each solution just right. This automatic film-developing machine can’t help much with the former, but it more than makes up for that by taking care of the latter.

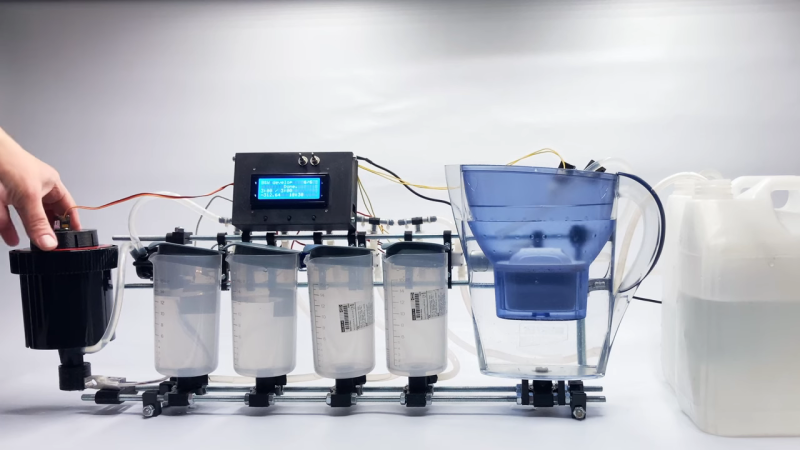
For those who haven’t experienced the pleasures of the darkroom — and we mean that sincerely; watching images appear before your eyes is straight magic — film processing is divided into two phases: developing the exposed film from the camera, and making prints from the film. [kauzerei]’s machine automates development and centers around a modified developing tank and a set of vessels for the various solutions needed for different film processes. Pumps and solenoid valves control the flow of solutions in and out of the developing tank, while a servo mounted on the tank’s cover gently rotates the reel to keep the film exposed to fresh solutions; proper agitation is the secret sauce of film developing.

The developing machine has a lot of other nice features that really should help with getting consistent results. The developing tank sits on a strain gauge, to ensure the proper amount of each solution is added. To avoid splotches that can come from using plain tap water, rinse water is filtered using a household drinking water pitcher. The entire rig can be submerged in a heated water bath for a consistent temperature during processing. And, with four solution reservoirs, the machine is adaptable to multiple processes. [kauzerei] lists black and white and C41 color negative processes, but we’d imagine it would be easy to support a color slide process like E6 too.

This looks like a great build, and while it’s not the first darkroom bot we’ve seen — we even featured one made from Lego Technics once upon a time — this one has us itching to get back into the darkroom again.

Building a Digital Compass With An Arduino

The magnetic compass has been a crucial navigational tool for around a thousand years or so, perhaps longer. While classical versions still work perfectly well, you can now get digital magnetometers that work in much the same way. [mircemk] decided to whip up a digital compass to demonstrate the value of these parts.

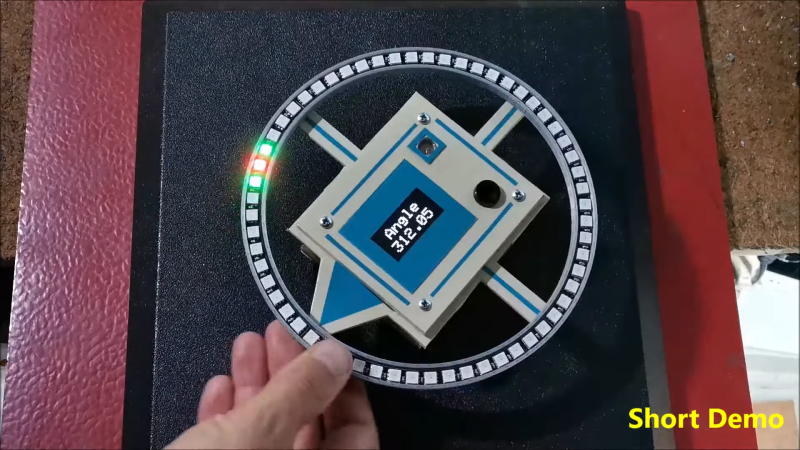
The build uses a HMC5883L magnetometer. While this can detect magnetic fields in three axes, just one is necessary for building a device that operates akin to a traditional compass. The output of the device is read by an Arduino Nano, which is hooked up to a string of WS2812B LEDs and a small OLED display. The LEDs display the bearing of magnetic north, while the OLED screen shows the current angle between the compass’s arrow and magnetic north.

It’s a tidy build that would be a great educational resource for teaching both electronics and navigational skills. We’ve seen similar projects before, like the hilarious Pizza Compass. Video after the break.

Hack a Day 12 Jul 21:00

Automatic Coin Sorter Brings Order to Your Coin Jar

Few things hold as much promise as the old coin jar. Unfortunately, what’s generally promised is tedium, as one faces the prospect of manually sorting, counting, and rolling the accumulated change of cash transactions past. Unless, of course, you’ve got a fancy automatic coin sorter like this one.

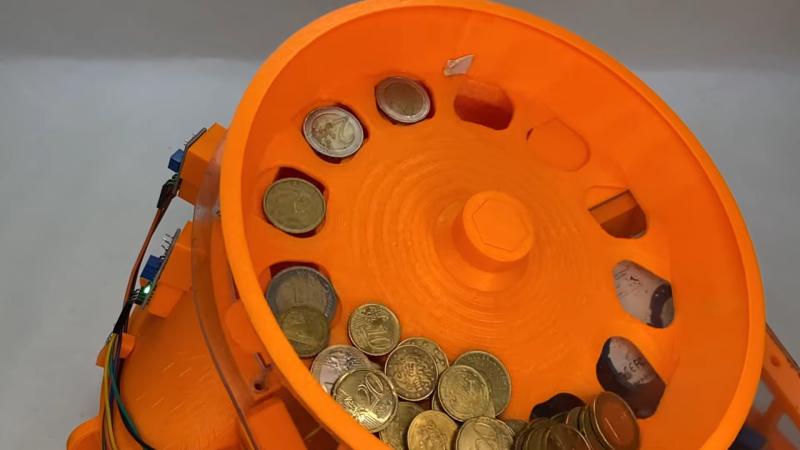
True, many banks have automatic coin sorters, but you generally have to be a paying customer to use one. And there’s always Coinstar and similar kiosks, but they always find a way to extract a fee, one way or another. [Fraens] decided not to fall for either of those traps and roll his own machine, largely from 3D-printed parts. The basic mechanism is similar to that used in commercial coin counters, with an angled bowl rotating over an array of holes sized to fit various coins. Holes in the bottom of the feed bowl accept coins fed from a hopper and transport them up to the coin holes. The smallest coins fall out of the bowl first, followed by the bigger coins; each coin drops into a separate bin after passing through an optical sensor to count the number of each on an Arduino. Subtotals and a grand total of the haul are displayed on a small LCD screen. The video below shows the build and the sorter in operation.

[Fraens] built this sorter specifically for Euro coins, but it should be easy enough to modify the sorting slots for different currencies. It’s not the first coin sorter we’ve seen, of course, and while we applaud its design simplicity and efficient operation, it can’t hold a candle to the style of this decidedly less practical approach.

Hack a Day 25 May 00:00

Quick and Dirty Microscope Motion Control for Focus Stacking

If you’ve spent much time looking through a microscope, you know that their narrow depth of field can be a bit challenging to deal with. Most microscopes are designed to only have a very thin slice of the specimen in focus, so looking at anything above or below that plane requires a focus adjustment. It’s tedious and fussy, and that makes it a perfect target for automation.

The goal behind [ItMightBeWorse]’s microscope mods is “focus stacking,” a technique where multiple images of the same sample taken at different focal planes can be stitched together so that everything appears to be in focus. Rather than twist knobs and take pictures manually, he built a simpler Arduino-based rig to do the job for him. Focus control is through a small stepper motor connected to the fine focus knob of the scope, while the DSLR camera shutter is triggered through a simple relay board. There’s also lighting control, with an RGB LED ring light that can change both the light level on the sample as well as the tint.

The code is very simple, and the setup is quite temporary looking, but the results are pretty impressive. We could do without the extreme closeup of that tick — nasty little arachnids — but the ant at the end of the video below has some interesting details. [ItMightBeWorse] doesn’t mention how the actual stacking is being done, but this CNC-based focus stacking project mentions a few utilities that take help with the post-processing.

The Seven-Segment Display That’s Also an Input Device

We’re used to seeing all manner of seven-segment displays, be they mechanical, electronic, or something in between. But what all these displays have in common is that they’re, you know, displays. Using them as inputs would just be crazy talk, right?

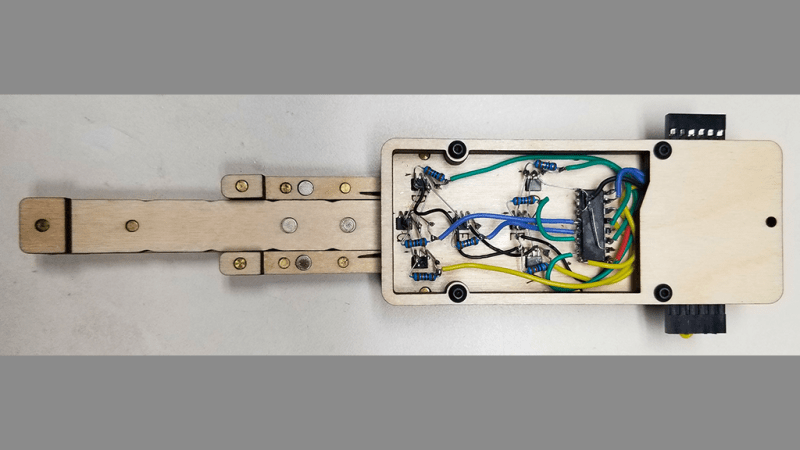
Perhaps, but we like where [Dave Ehnebuske] is going with “InSlide,” the seven-segment input device. The idea for this comes from the “DigiTag” display, which we covered back in October, and divides a standard seven-segment character into three vertical strips — two skinny ones for the outside vertical segments, and one wide strip holding the horizontal elements. By sliding these strips up and down relative to each other, the standard nine digits, plus a few other characters, can be composed.

[Dave]’s take on this theme started by building his display from laser-cut plywood pieces, which is a nice choice because of the good contrast between the white wood and the engraver segments. Next, he embedded rare earth magnets in the slides and installed seven Hall effect sensors in the frame. The sensors are connected to an Arduino Nano via a 74HC165 parallel-load shift register, which lets multiple modules be daisy-chained together. He also built an Arduino library to read the current state of the segments; it supports the full hexadecimal character set, or even duodecimal if you like.

[Dave] has shared the library, and it looks like you can get the build files for the mechanism from the original project. That’s good, because this looks ripe for hacking. It looks like it would be pretty easy to motorize a display like this by adding rack-and-pinion gearing and steppers — something like that could make an interesting clock.

Plumbing Valves as Heavy Duty Analog Inputs

Input devices that can handle rough and tumble environments aren’t nearly as varied as their more fragile siblings. [Alastair Aitchison] has devised a brilliant way of detecting inputs from plumbing valves that opens up another option. (YouTube) [via Arduino Blog]

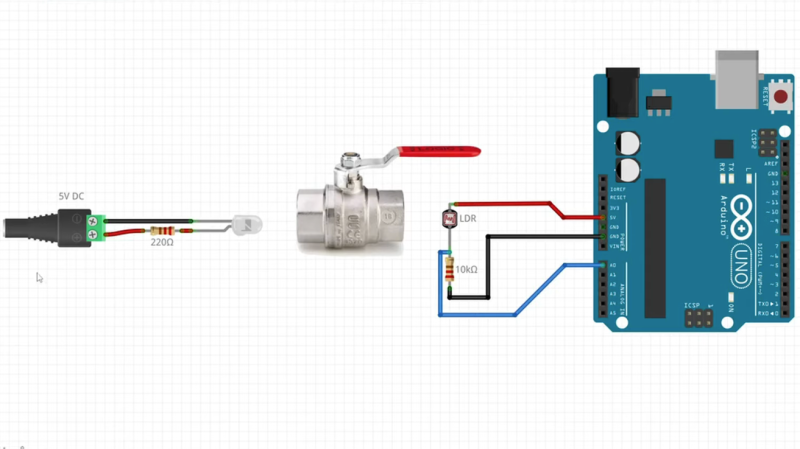
While [Aitchison] could’ve run the plumbing valves with water inside and detected flow, he decided the more elegant solution would be to use photosensors and an LED to simplify the system. This avoids the added cost of a pump and flow sensors as well as the questionable proposition of mixing electronics and water. By analyzing the change in light intensity as the valve closes or opens, you can take input for a range of values or set a threshold for an on/off condition.

[Aitchison] designed these for an escape room, but we can see them being great for museums, amusement parks, or even for (train) simulators. He says one of the main reasons he picked plumbing valves was for their aesthetics. Industrial switches and arcade buttons have their place, but certainly aren’t the best fit in some situations, especially if you’re going for a period feel. Plus, since the sensor itself doesn’t have any moving parts, these analog inputs will be easy to repair should anything happen to the valve itself.

If you’re looking for more unusual inputs, check out the winners of our Odd Inputs and Peculiar Peripherals contest or this typewriter that runs Linux.

This Arduino Pen Plotter Is Built for Speed

We see a lot of simple pen plotter projects around here, and while we appreciate them one and all, most of them are a little on the slow side. That’s OK — a glacial pace is sometimes all that’s needed, as long as it gets the job done. But there’s nothing wrong with putting the pedal to the metal, so to speak. And that’s exactly what this super-fast Arduino-based plotter is all about.

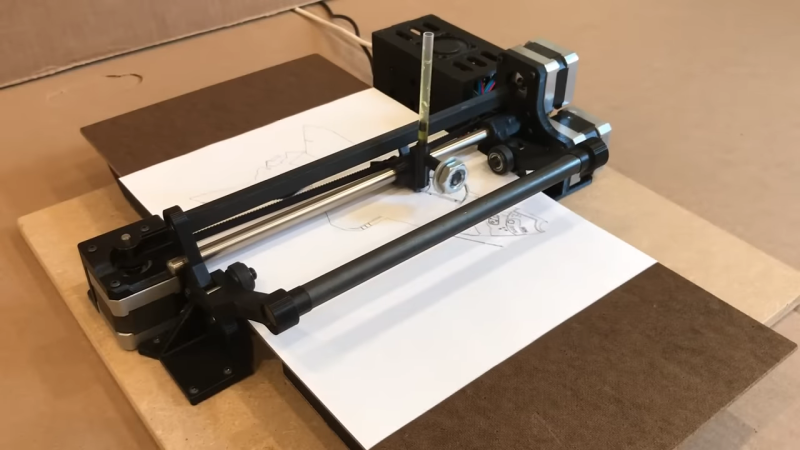
As the story goes, [IV Projects] felt the need for speed after building an earlier pen plotter project that worked, but failed to excite. With the additional goal of keeping the plotter easy to build with cheap parts, the design centers on a “grit roller drive” for the Y-axis — the one that actually moves the paper back and forth. And move it does, using Dremel tool sanding drums on a lightweight shaft to maximize acceleration. In fact, all the moving parts are kept as lightweight as possible, and the results really show — the three steppers really sing when this plotter is in action.

There are some really clever details in [IV Projects]’ design. We particularly like the way the pen lift mechanism works, and the surprise appearance of a clothespin spring as a belt tensioner was a real treat. Judging by the pile of rejected prototype parts, it took quite a bit of work to get this design right. If you’d like to build your own, STLs are available for the printed parts.

If you’re interested in what the other end of the speed scale looks like, check out this bare-minimum pen plotter.

Hack a Day 20 Jun 06:00
arduino  misc hacks  pen  plotter  stepper  x-y  

Pushing the Limits of a 16×2 LCD with Bad Apple!!

While low-contrast, blue-on-slightly-less-blue 16-character by 2-line LCDs are extremely popular, they really are made specifically for alphanumeric use. They do an admirable job of displaying a few characters, but they don’t exactly spring to mind as a display for non-character purposes. But displaying video on a 16×2 LCD is possible, as long as you’re willing to stretch the definition of “video” a bit and use some imagination while watching.

Normally, a 16×2 display can only display a single character in each spot, chosen from a fixed character set. But [arduinocelantano] was able to leverage the eight custom character slots the display allows to build up images from arbitrary 5×8 pixel bitmaps. After using ffmpeg to scale the original video to a viewport of eight characters, a Python program was used to turn every frame of the scaled video into code to generate the custom bitmaps for each chunk of the viewport. Even with the low refresh rate of the display and the shrunken frame size, the result is a recognizable video, helped no doubt by the choice of the shadow-puppet Bad Apple!! video. Check it out after the break to see how it looks.

We saw a similar rendering of the same video on LCD a while back; that effort was amazing in that it was an EEPROM-only implementation, along with a somewhat bigger LCD with better contrast. That project served as inspiration for [arduinocelantano]’s build here, which in some ways we think looks a bit better — perhaps it’s the inverted pixels. Either way, hats off to both builders for pushing past the normal constraints and teaching us something interesting.

The HackadayPrize2022 is Sponsored by:
Hack a Day 14 Jun 12:00

Meowing Box Will Befuddle Your Friends

If you don’t own a cat, hearing the sound of one meowing from somewhere in the house probably comes as quite a shock. The Cat Prank box built by [Reuben] promises to deliver such hilarity with aplomb. 

The idea is simple: hide the Cat Prank box in a cupboard or other space in a friend’s house, and it will meow from its secret location. When found, either the light sensor or motion sensor will trigger the yowling of an angry feline, with hopefully startling effects.

An Arduino Mini is the brains of the operation, paired with an XY-V17B sound module which plays the required animal wailings. There’s also a 433 MHz radio module that lets the prankster trigger meowing via remote control.

Code is available for those wishing to build their own. We’d love to see a mod with a time delay built in, so the device could be hidden and left to start meowing at some later date when the prankster is far away.

Similar work has graced these pages before, like the devilishly fiendish OpenKobold design. Just make sure your friends are receptive to such jokes before you go ahead and invest time and hardware in the prank!

Hack a Day 30 Jan 06:00