Posts with «tetris» label

Arduino Learns the Martial Arts with Nunchucks Input Device

There is a boring part of every computer introduction class that shows how a computer is made up of input, output, and processing. Maybe it wouldn’t be so boring if the input device was a nunchuck. [Brian Lough] thinks so and he belligerently asserts that nunchucks are the best input device ever. With a simple connection to a Wii controller and an associated library, you get access to an analog joystick, two buttons, and an accelerometer.

The nunchuck is meant to plug into a Wii controller and the connection is I2C, so that’s trivial to interface to an Arduino or other small microcontroller. The only issue is making the connection. We might have just snipped the wires, but [Brian] prefers to use a small breakout board that plugs into the stock connector and provides solder points for your own cable. There are options for the breakout boards, and [Brian] has his own design that you can get from OSHPark for about a buck for three boards. You can also just jam wire into the connector, but that’s not always robust.

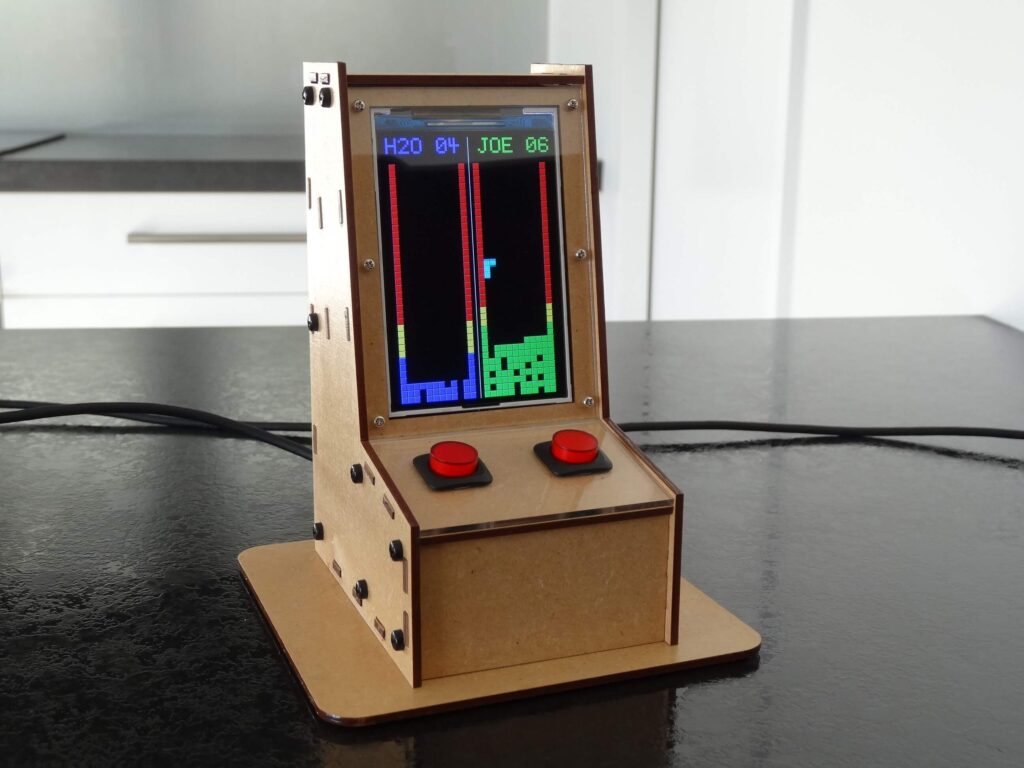
The controllers use 3.3V which isn’t unusual these days. There’s an available library that makes reading them easy. Obviously, not all applications will be a natural fit, but we did like them on the Tetris game [Brian] created. It is also natural for any kind of motion control like his gimbal mount example.

Even if you don’t have junk Wii controllers hanging around, they are common enough on the resale market and you can buy new third-party controllers without spending much. Makes us sorry we threw away ours in the last move.

If you want to get serious hacking a nunchuck, you can go full custom. Or, just give up, and turn one into a Raspberry Pi.

Hack a Day 27 Jan 06:00

An Arduino Tetris console inside of an NES controller

Tetris was as a perfect complement to Nintendo’s original Game Boy when it came out in 1989, and now “Copper Dragon” has been able to fit an entire system for it — sans monitor or speakers — inside of a faux NES controller

Impressively, this feat was accomplished with an Arduino Nano and a few passive components, producing not only very believable grayscale blocks, but also playing the familiar tune to accompany the video.

Two signal pins are used for the gray levels, plus a pin for sync, and video generation is programmed in AVR assembler code. Audio is not just PWM, but a simple DAC circuit created by charging and discharging a capacitor at the video line frequency.

I wanted to build a game console into the case of a small USB game pad (a NES controler look-alike). To make the work a challenge, I wanted to only use an Arduino Nano clocked at 16 MHz and some passive components (diodes are OK) and create the best possible video and audio signal that is imaginable with such restrictions.

As it turned out, a monochrome 288p video signal with 4 gray scales is possible when progamming the controller at machine level. 4-channel music is also possible.

My game of choice is Tetris in a version that comes pretty close to the original GameBoy version with a very similar audio track.

Arduino Blog 03 Mar 20:17

Casual Tetris Comes In At $9

[Michael Pick] calls himself the casual engineer, though we don’t know whether he is referring to his work clothes or his laid back attitude. However, he does like to show quick and easy projects. His latest? A little portable Tetris game for $9 worth of parts. There is an Arduino Pro Mini and a tiny display along with a few switches and things on a prototyping PC board. [Michael] claims it is a one day build, and we imagine it wouldn’t even be that much.

Our only complaint is that there isn’t a clear bill of material or the code. However, we think you could figure out the parts pretty easy and there are bound to be plenty of games including Tetris that you could adapt to the hardware.

The display looks suspiciously like an SSD1306 display which is commonly cloned. so that answers one question. These are just less than an inch of screen, but if you buy them from China that eats up almost half of the $9 budget. The Arduino is probably another $3. The other parts are cheap, but it is easy to imagine you might exceed $9 by a bit if you try to duplicate this.

Just from looking at the video, the code looks a lot like Tiny Tetris by [AJRussel], though there are a few others out there if you look. The rest should be pretty easy to puzzle out. Maybe [Michael] will add a link to the code, a bill of materials, and some specific wiring instructions.

Of course, if you just want Tetris, grab your transistor tester. We’ve even seen smaller versions of Tetris given away as business cards.

Hack a Day 29 Feb 06:00

A Tetris To Be Proud Of, With Only A Nano

Tetris may have first arrived in the West on machines such as the PC and Amiga, but its genesis at the hands of [Alexey Pajitnov] was on an Electronika 60, a Soviet clone of an early-1970s DEC PDP-11. Thus those tumbling blocks are hardly demanding in terms of processor power, and a game can be implemented on the humblest of hardware. Relatively modern silicon such as the Atmega328 in [c0pperdragon]’s Arduino Nano Tetris console should then have no problems, but to make that assumption is to miss the quality of the achievement.

In a typical home or desktop computer of the 1980s the processor would have been assisted by plenty of dedicated hardware, but since the Arduino has none of that the feat of creating the game with a 288p video signal having four gray scales and with four-channel music is an extremely impressive one. Beside the Nano there are only a few passive components, there are no CRT controllers or sound chips to be seen.

The entire device is packaged within a clone of a NES controller, with the passives on a piece of stripboard beside the Nano. There is a rudimentary resistor DAC to produce the grey scales, and the audio is not the direct PWM you might expect but a very simple DAC created by charging and discharging a capacitor at the video line frequency. The results can be seen and heard in the video below the break, and though we’re sure we’ve heard something like that tune before, it looks to be a very playable little game.

Hack a Day 28 Feb 09:00

Mini Tetris cabinet commands waitstaff to fetch more water and coffee

Remembering to refill water and coffee cups at regular intervals certainly has to be a challenge for restaurant waitstaff, but not for servers at one diner thanks to Mark Wilson’s, “TetrisWaterRun” project.

Wilson’s device takes the form of a miniature arcade cabinet, with two “players” named H2O and JOE controlling Tetris playfields.

As each block drops, some complete a line, while others leave spaces, eventually stacking up to a yellow warning level, along with a red section for overdue. Each game/playfield is started with its interface button, which also lights up intermittently to indicate drink warnings. A buzzer is included, so that there’s even less of an excuse for unfilled drinks. The build was prototyped on an Arduino Uno and now runs on a Nano for space savings, with a 320×480 LCD screen displaying the game.

Big And Glowy Tetris Via Arduino

Tetris was a breakout hit when it was released for the Nintendo Game Boy in 1989, in much the same way that Breakout was a breakout hit in arcades in 1976. Despite this, gamers of today expect a little more than a tiny monochrome LCD with severe motion blur problems. Enter the LED Tetris build from [Electronoobs].

The build relies on a hacker favourite, the WS2812B LED string. The LEDs are set up in a 8×16 matrix to create the familiar Tetris playfield. Buttons and a joystick are then installed on the front panel to allow the player to control the action. An Arduino Mega runs the show, with a DFPlayer used to play the famous theme music as the cherry on top.

It’s a fun build that would be an awesome addition to any hacker’s coffee table. Big glowing LEDs make everything better, after all – this ping-pong ball display is a great example of the form. Video after the break.

Hack a Day 06 Sep 16:30

Play Tetris on a Transistor Tester, Because Why Not?

[Robson] had been using the same multimeter since he was 15. It wasn’t a typical multimeter, either. He had programmed it to also play the Google Chrome jumping dinosaur game, and also used it as a badge at various conferences. But with all that abuse, the ribbon cable broke and he set about on other projects. Like this transistor tester that was just asking to have Tetris programmed onto its tiny screen.

The transistor tester is a GM328A made for various transistor testing applications, but is also an LCR meter. [Robson]’s old meter didn’t even test for capacitance but he was able to get many years of use out of that one, so this device should serve him even better. Once it was delivered he set about adding more features, namely Tetris. It’s based on an ATmega chip, which quite easy to work with (it’s the same chip as you’ll find in the Arduino Uno but [Robson’s] gone the Makefile route instead of spinning up that IDE). Not only did he add more features, but he also found a mistake in the frequency counter circuitry that he fixed on his own through the course of the project.

If you’ve always thought that the lack of games on your multimeter was a total deal breaker, this project is worth a read. Even if you just have a random device lying around that happens to be based on an ATmega chip of some sort, this is a good primer of getting that device to do other things as well. This situation is a fairly common one to be in, too.

Building Badges The Hard Way

What’s a hacker to do to profess his love for his dearest beloved? [Nitesh Kadyan] built his lady-love this awesome LED pendant – the LED BLE Hearty Necklace Badge.

The hardware is pretty vanilla by today’s hacker standards. An ATMega328p  does most of the heavy lifting. An HM-11 BLE module provides connection to an Android mobile app. Two 74HC595 shift registers drive 16 columns of red LEDs and a ULN2803 sinks current from the 8 rows. The power section consists of a charger for the 320mAh LiPo and an LDO for the BLE module. All the parts are SMD with the passives mostly being 0603, including the 128 LEDs.

128 LEDs soldered wrong way around

[Nitesh] didn’t get a stencil made for his first batch of boards, so all the parts were painstakingly soldered manually and not in a reflow oven. And on his first board, he ended up soldering all of the LED’s the wrong way around. Kudos to him for his doggedness and patience.

The Arduino code on the ATmega is also quite straightforward. All characters are stored as eight bytes each in program memory and occupy 8×8 pixels on the matrix. The bytes to be displayed are stored in a buffer and the columns are left shifted fast enough for the marquee text effect. The Android app is built by modifying a demo BLE app provided by Google. The firmware, Android app, and the KiCAD design files are all hosted on his Github repository.

[Nitesh] is now building a larger batch of these badges to bring them to hillhacks – the annual hacker-con for making and hacking in the Himalayas. Scheduled for later this month, you’ll have to sign up on the mailing list for details and if you’d like to snag one of these badges. To make it more interesting, [Nitesh] has added two games to the code – Tetris and Snakes. Hopefully, this will spur others to create more games for the badge, such as Pong.

Mimimalist Arduino Gaming Platform

A pretty color LCD screen, an Arduino, a buzzer and a joystick is all you need for a minimalist gaming console for under $20. At least, that’s all [João Vilaça] needed to get this sweet version of Tetris up and running. (He’s working on Breakout right now.)

It’s a testament to the current state of the hardware hacking scene that [João] could put this device together in an afternoon for so cheap, presumably after waiting a while for shipments from China. The 320×240 SPI color TFT LCD screen used to cost twice as much as this whole project did. And wiring it up is a simple matter of connecting this pin to that pin. Almost child’s play.

Equally impressive is the state of open source software. A TFT library from Seeed Studios makes the screen interface a piece of cake. [João] wrote his own sound and joystick code, and of course the Tetris gameplay itself, but it’d be much more than a few weeks’ work without standing on the shoulders of giants. Check out [João]’s Github for the project code and stick with us after the break for a demo video and some of our other favorite Arduino gaming hacks.


Now, we’ve seen a whole lot of Arduino-based gaming platforms around here before, and they range from the simplistic black-and-white to the bells-and-whistles of the Gameduino which tacks an FPGA onto your Arduino to enable sprites, awesome sound, and VGA output. But we’ve also got a place in our hearts for simplicity and comprehensibility, and [João]’s device and code has got those in spades.

If you’re ready to push your Arduino skills beyond blinking LEDs, [João]’s game project should be on your reading / building list. We can’t wait to see Breakout.


Filed under: Arduino Hacks
Hack a Day 28 May 03:00
arduino  arduino hacks  avr  game  lcd  tetris  

This playable Tetris T-shirt requires you to touch yourself

In the 30 years since Alexey Pajitnov first launched Tetris, the world's most popular game has regularly been immortalized in fashion. Luxembourgian Mark Kreger wanted to do the same, but instead of cooking up a colorful print, he's staving off boredom with something much more interactive: a playable Tetris T-shirt. Featuring 128 LEDs powered by an Arduino Uno microcontroller, Kreger's marvellous tee requires only four rechargeable AA batteries to power the game. It'll keep score and display level numbers -- the only thing it appears to be lacking is the super-funky soundtrack.

Filed under: Gaming, Wearables

Comments

Via: Time

Source: Mark Kerger (YouTube)

Engadget 05 Jul 04:10
arduino  game  gaming  t-shirt  tetris  wearables