Posts with «attiny hacks» label

Mini Ultrasonic Levitation Kit is an Exercise in Sound Minimalist Design
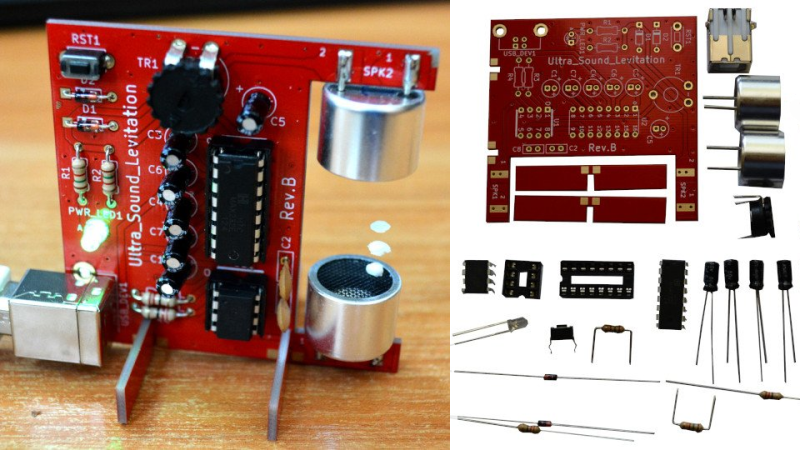
For those that haven’t heard, ultrasonic levitation is a process by which two or more ultrasonic transducers are set opposite to each other and excited in such a way as to create a standing wave between them. The sound is, as the name implies, ultrasonic — so outside the range of human hearing — but strong enough so that the small, light objects can be positioned and held fixed in mid-air where there’s a pressure minimum in the standing wave. [Olimex] has created a small ultrasonic levitation kit that exemplifies this phenomena.

The kit itself is made using through-hole components, with an ATTiny85 as the core microcontroller to drive two TCT40-16T ultrasonic speakers, and a MAX232 to provide a USB interface. Two slotted rectangular PCB pieces that solder connect to the main board, provide a base so that the device stands upright when assembled. The whole device is powered through the USB connection, and the ultrasonic speakers output in the 40KHz range providing enough power to levitate small Styrofoam balls.

The project is, by design, an exercise in minimalism, providing a kit that can be easily assembled, and providing code that can be easily flashed onto the device, examined and modified. All the design files, including the bill of materials, KiCAD schematics, and source code are provided under an open source hardware license to allow for anyone wanting to know how such a project works, or to extend it themselves, ample opportunity. [Olimex] also has the kit for sale for those not wanting to source boards and parts themselves.

We’ve featured ultrasonic levitation devices before, from bare bones system driven by a NE555 to massive phased arrays.

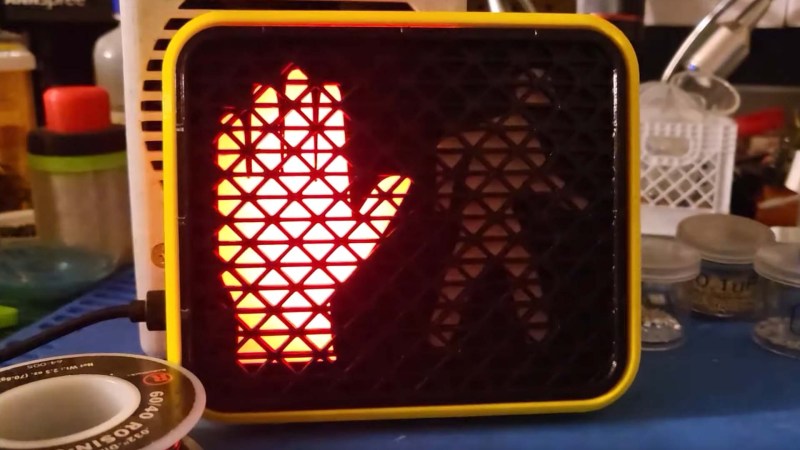
Don’t Walk Past This 3D Printed Pedestrian Crossing Light

There’s just something so pleasing about scaled-down electronic replicas, and this adorable 3D printed pedestrian crossing light by [sjm4306] is no exception.

Although a little smaller than its real-world counterpart, the bright yellow housing and illuminated indicators on this pedestrian lamp are instantly recognizable due to their ubiquitous use throughout the United States. The handful of printed parts are held together using friction alone, which makes assembly a literal snap. The ‘safety grill’ with its many angles ended up being one of the most tedious parts of the build process, but the effort was definitely justified, as it just wouldn’t look right without it.

A suitably minuscule ATtiny85 drives a pair of LED strips that effectively mimic the familiar symbols for ‘Walk’ and ‘Don’t Walk’. [sjm4306] has designed the board and case in such a way to accommodate a variety of options. For example, there’s just enough room to squeeze in a thin battery, should you want to power this contraption on-the-go. If you don’t have an ATtiny85 on hand, the board also supports an ATmega328p or even an ESP8266.

All the build details are available over on Hackaday.io. While it’s billed as a ‘night light’, we think this could be an awesome platform for an office toy, similar to this office status light project. Or if you’ve somehow already got your hands on a full-size pedestrian lamp, why not hook it up to the Internet?

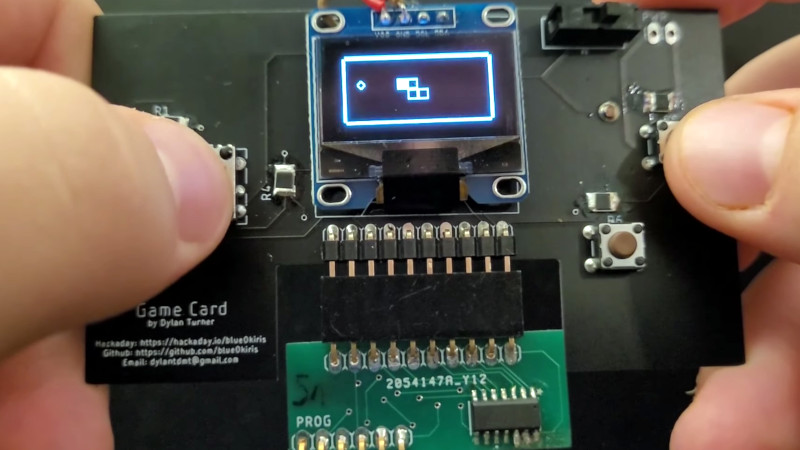
DIY Handheld Game Puts its Brains on a Removable Cart

Over the years we’ve seen plenty of homebrew handheld game systems that combine an AVR microcontroller, a few buttons, and an small OLED display. We’ve even seen some of them turned into commercial products, such as the Arduboy. They’re simple, cheap, and with the right software, a lot of fun. But being based on an MCU, most of them share the same limitation of only being able to hold a single game at any one time.

But not the Game Card, by [Dylan Turner]. This handheld was specifically designed so that games could be easily swapped out using physical cartridges. But rather than trying to get the system’s microcontroller to boot code from an external flash chip, the system relocates the MCU to the removable cartridge. That might seem a bit overkill, but given how cheap the ATTINY84A on each cartridge is, it’s not exactly going to break the bank.

With the microcontroller on the cartridge, the only hardware that stays behind on the Game Card is the SSD1306 128×64 OLED display, buttons, and the battery. That means the handheld is effectively non-functional unless a game is slotted in, but that could be said of most early cartridge-based game systems as well. On the other hand, it also opens up the possibility of producing cartridges with more powerful microcontrollers down the line.

Using a different microcontroller for each game is a neat hack, but it’s not the only solution to the problem. We previously saw a community effort to add expandable storage to the Arduboy in the form of a DIY cartridge, which ultimately led to the development of an official flash chip upgrade for the handheld.

Tiny Machine Learning On The Attiny85

We tend to think that the lowest point of entry for machine learning  (ML) is on a Raspberry Pi, which it definitely is not. [EloquentArduino] has been pushing the limits to the low end of the scale, and managed to get a basic classification model running on the ATtiny85.

Using his experience of running ML models on an old Arduino Nano, he had created a generator that can export C code from a scikit-learn. He tried using this generator to compile a support-vector colour classifier for the ATtiny85, but ran into a problem with the Arduino ATtiny85 compiler not supporting a variadic function used by the generator. Fortunately he had already experimented with an alternative approach that uses a non-variadic function, so he was able to dust that off and get it working. The classifier accepts inputs from an RGB sensor to identify a set of objects by colour. The model ended up easily fitting into the capabilities of the diminutive ATtiny85, using only 41% of the available flash and 4% of the available ram.

It’s important to note what [EloquentArduino] isn’t doing here: running an artificial neural network. They’re just too inefficient in terms of memory and computation time to fit on an ATtiny. But neural nets aren’t the only game in town, and if your task is classifying something based on a few inputs, like reading a gesture from accelerometer data, or naming a color from a color sensor, the approach here will serve you well. We wonder if this wouldn’t be a good solution to the pesky problem of identifying bats by their calls.

We really like how approachable machine learning has become and if you’re keen to give ML a go, have a look at the rest of the EloquentArduino blog, it’s a small goldmine.

We’re getting more and more machine learning related hacks, like basic ML on an Arduino Uno, and Lego sortings using ML on a Raspberry Pi.

Debugging an Arduino with an Arduino

As every Hackaday reader knows, and tells us at every opportunity in the comments, adding an Arduino to your project instantly makes it twice as cool. But what if, in the course of adding an Arduino to your project, you run into a problem and need to debug the code? What if you could use a second Arduino to debug the first? That would bring your project up to two Arduinos, instantly making it four times as awesome as before you started! Who could say no to such exponential gains?

Debugging an ATTiny85

Not [Wayne Holder], that’s for sure. He writes in to let us know about a project he’s been working on for a while that allows you to debug the execution of code on an Arduino with a second Arduino. In fact, the target chip could even be another AVR series microcontroller such as a the ATTiny85. With his software you can single-step through the code, view and modify values in memory, set breakpoints, and even disassemble the code. Not everything is working fully yet, but what he has so far is very impressive.

The trick is exploiting a feature known as “debugWIRE” that’s included in many AVR microcontrollers. Unfortunately documentation on this feature is hard to come by, but with some work [Wayne] has managed to figure out how most of it works and create an Arduino Sketch that lets the user interact with the target chip using a simple menu system over the serial monitor, similar to the Bus Pirate.

[Wayne] goes into plenty of detail on his site and in the video included after the break, showing many of the functions he’s got working so far in his software against an ATTiny85. If you spend a lot of time working on AVR projects, this looks like something you might want to keep installed on an Arduino in your tool bag for the future.

Debugging microcontroller projects can be a huge time saver when your code starts running on real hardware, but often takes some hacking to get working.

USB Arduino into AVR TPI Programmer

Turning an Arduino of virtually any sort into a simple AVR 6-pin ISP programmer is old hat. But when Atmel came out with a series of really tiny AVR chips, the ATtiny10 and friends with only six pins total, they needed a new programming standard. Enter TPI (tiny programming interface), and exit all of your previously useful DIY AVR programmers.

[Kimio Kosaka] wrote a dual-purpose TPI and ISP firmware for the ATmegaxxUn chips that are used as a USB-serial bridge on the Unos, and constitute the only chip on board a Leonardo or Micro. The catch? You’re going to have to do a little bit of fine-pitch soldering. Specifically, [Kosaka-san] wants you to get access to an otherwise obscured signal by drilling out a via. We’d do it just for that alone.

The rest of the procedure is to flash a DFU USB bootloader into the Arduino, then load up the flash-programmer code. Your former Arduino is now capable of flashing both old-school ISP AVR chips, as well as the tiny little ones that require TPI.

If you’re having deja vu, yes we have covered a DIY TPI programmer before, but it required a bespoke uploader software on your host computer. [Kosaka]’s version appears to the host as an Atmel programmer, and you can use any of the standard tools. And you get to try your hand at some fun fine-pitch solder work. That’s win-win!


Filed under: ATtiny Hacks
Hack a Day 06 Jan 09:01

DIY I2C Devices with ATtiny85

[Pawel] has a weather station, and its nerve-center is a Raspberry Pi. He wanted to include a light sensor but the problem is, the Pi doesn’t have a built-in ADC to read the voltage off the light-dependent resistor that he (presumably) had in his junk box. You can, of course, buy I2C ADC chips and modules, but when you’ve already got a microcontroller that has ADC peripherals on board, why bother?

[Pawel] wired up a tremendously simple circuit, downloaded some I2C slave-mode code, and added an LED for good measure. It’s all up on GitHub if you’re interested.

Bright by Day, Dark by Night!

We’re covering this because we rarely see people coding for I2C slave devices. Everyone and their mom uses I2C to connect to sensors, for which the Arduino “Wire” library or “i2c-tools” on the Pi do just fine. But what do you do when you want to make the I2C device? [Pawel]’s project makes use of TinyWireS, a slave-mode SPI and I2C library for AVR ATtiny Arduino projects.

Here, [Pawel] just wanted a light sensor. But if you’re building your own devices, the sky is the limit. What’s the most esoteric I2C sensor that you can imagine? (And is it really the case that we haven’t seen an I2C slave device hack since 2010?)


Filed under: ATtiny Hacks
Hack a Day 07 Nov 09:00

One Dollar Board Targets Students

The Raspberry Pi was made to be inexpensive with an eye toward putting them into schools. But what about programs targeted at teaching embedded programming? There are plenty of fiscally-starved schools all over the world, and it isn’t uncommon for teachers to buy supplies out of their own pockets. What could you do with a board that cost just one dollar?

That’s the idea behind the team promoting the “One Dollar Board” (we don’t know why they didn’t call it a buck board). The idea is to produce a Creative Commons design for a simple microcontroller board that only costs a dollar. You can see a video about the project, below.

Despite being licensed under Creative Commons, there isn’t much detail available that we could find. It appears the board uses an 8 pin Atmel CPU (and the FAQ indicates that the board will use the Arduino IDE). We’re guessing that it’s essentially a Digispark / Adafruit Trinket / ATtiny85 with V-USB installed.

The crowdfunding campaign page lists the following details:

  • CPU: 8-bit
  • GPIO (input and output ports): 6
  • USB Interface: Yes
  • Memory: Flash 8 kBytes (expandable to 256 kBytes)
  • Spaces for expansions: WiFi ESP8266, Memory 24C256, H bridge L293
  • Voltage: 5V
  • Indicator LEDs: 2
  • Reset Button: Yes
  • Fitting Spaces: 4 (compatible with Arduíno UNO or similar)
  • Quick Guide: The English board comes with a printed guide in other languages.

If it is an ATTtiny85-based design, two of those “GPIO” pins will be eaten up by the USB programmer, and maybe two more by the indicator LEDs. And some of that 8 kB of flash is consumed by the bootloader. In short, it’s not going to be able to do everything all at once. Still, it could be just the thing for getting your feet wet.

But the real story is the price. The dollar price tag doesn’t include shipping or taxes, of course, but even getting the price down that low is impressive. Time will tell if the market has an appetite for a dollar board. If we had to guess, the real value will be in ready-made course material.

There are plenty of educational boards out there, but few (if any) cost a buck.


Filed under: Arduino Hacks, ATtiny Hacks, Crowd Funding

ATtiny Does 170×240 VGA With 8 Colors

The Arduino is a popular microcontroller platform for getting stuff done quickly: it’s widely available, there’s a wealth of online resources, and it’s a ready-to-use prototyping platform. On the opposite end of the spectrum, if you want to enjoy programming every bit of the microcontroller’s flash ROM, you can start with an arbitrarily tight resource constraint and see how far you can push it. [lucas]’s demo that can output VGA and stereo audio on an eight-pin DIP microcontroller is a little bit more amazing than just blinking an LED.

[lucas] is using an ATtiny85, the larger of the ATtiny series of microcontrollers. After connecting the required clock signal to the microcontroller to get the 25.175 Mhz signal required by VGA, he was left with only four pins to handle the four-colors and stereo audio. This is accomplished essentially by sending audio out at a time when the VGA monitor wouldn’t be expecting a signal (and [lucas] does a great job explaining this process on his project page). He programmed the video core in assembly which helps to optimize the program, and only used passive components aside from the clock and the microcontroller.

Be sure to check out the video after the break to see how a processor with only 512 bytes of RAM can output an image that would require over 40 KB. It’s a true testament to how far you can push these processors if you’re determined. We’ve also seen these chips do over-the-air NTSC, bluetooth, and even Ethernet.


Filed under: ATtiny Hacks

Now Let’s See The World’s Largest Arduino

A few days ago we saw what would have been a killer Kickstarter a few years ago. It was the smallest conceivable ATtiny85 microcontroller board, with resistors, diodes, a USB connector, and eight pins for plugging into a breadboard. It’s a shame this design wasn’t around for the great Arduino Minification of Kickstarter in late 2011; it would have easily netted a few hundred thousand dollars, a TED talk, and a TechCrunch biopic.

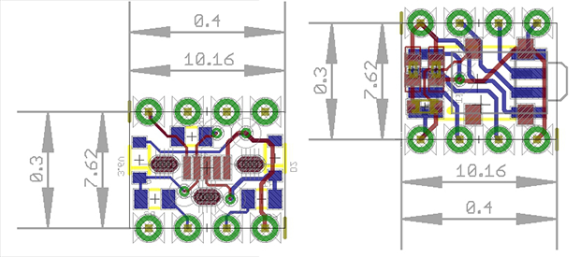
[AtomSoftTech] has thrown his gauntlet down and created an even smaller ‘tiny85 board. it measures 0.4in by 0.3in, including the passives, reset switch, and USB connector. To put that in perspective, the PDIP package of the ‘tiny85 measures 0.4 x 0.4. How is [Atom] getting away with this? Cheating, splitting the circuit onto two stacked boards, or knowing the right components, depending on how you look at it.

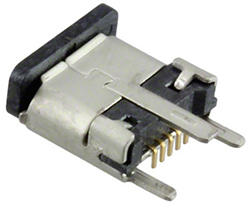
[Atom] is using a few interesting components in this build. The USB connector is a surface mount vertical part, making the USB cord stick out the top of this uC board. The reset button is extremely small as well, sticking out of the interior layer of the PCB sandwich.

[AtomSoft] has the project up on OSH Park ($1.55 for three. How cool is that?), and we assume he’ll be selling the official World’s Smallest Arduino-compatible board at Tindie in time.


Filed under: Arduino Hacks, ATtiny Hacks