Posts with «servo motor» label

Hackaday Prize 2023: Bolt Bot Micro Servo Droids

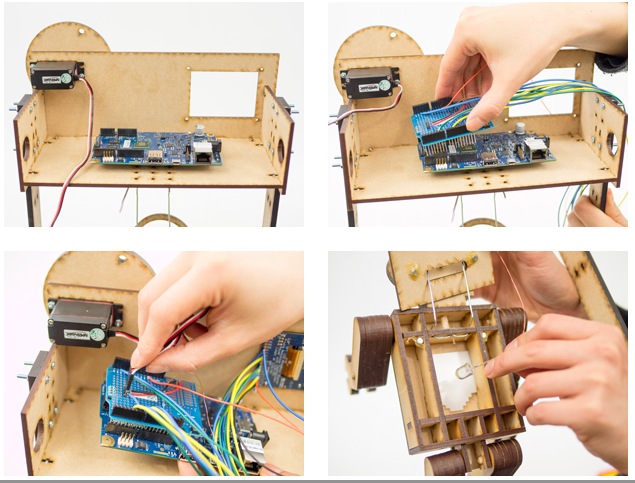
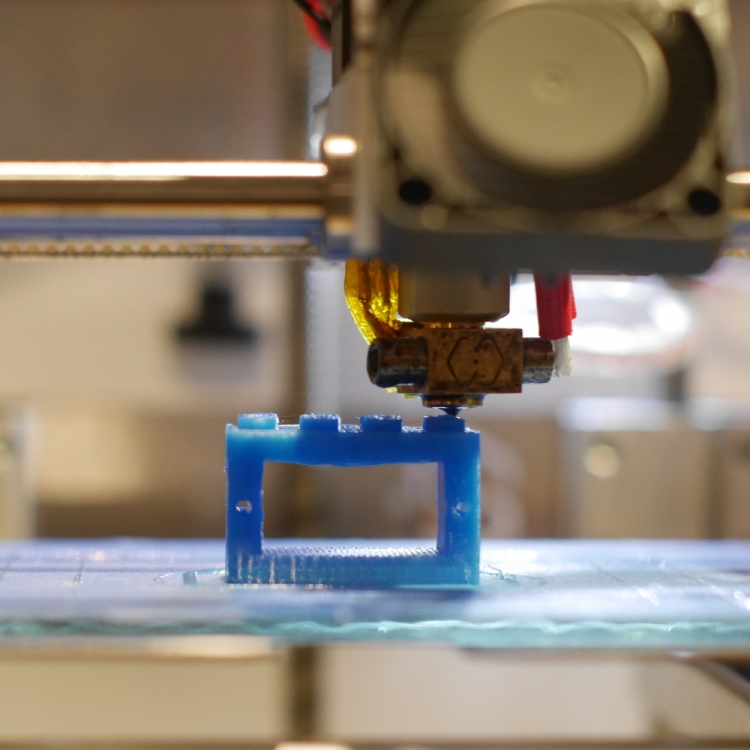
This Hackaday prize entry from [saul] is the beginning of a reconfigurable kit of 3D printed parts and servo motors for robotics learning. With just access to a printer, a few cheap-as-chips servo motors, an Arduino, and some nuts and bolts, you could be hacking together robot walkers within a few hours of starting!

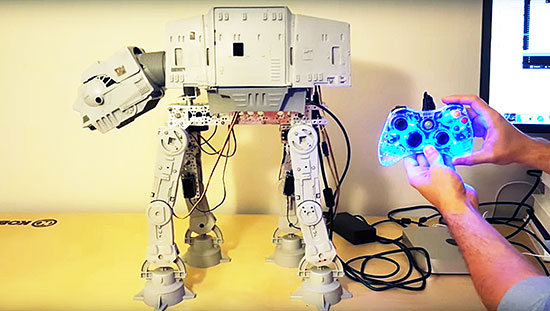
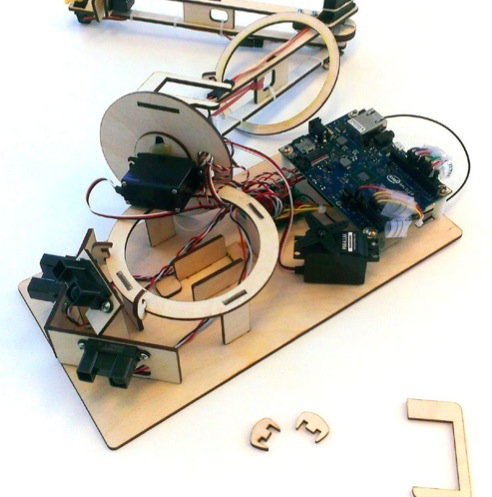
Bolt Bots is very simple to understand, with all the mechanics and wiring out there in the breeze, but strictly for indoor use we reckon. If you want to add remote control to your application, then drop in one of the ubiquitous 
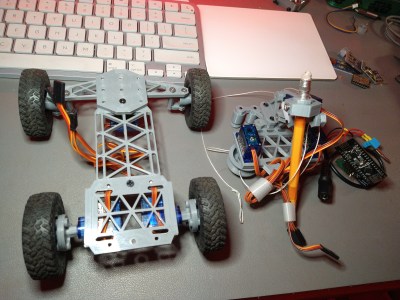
nRF24L01 boards and build yourself a copy of the remote control [saul] handily provides in this other project.

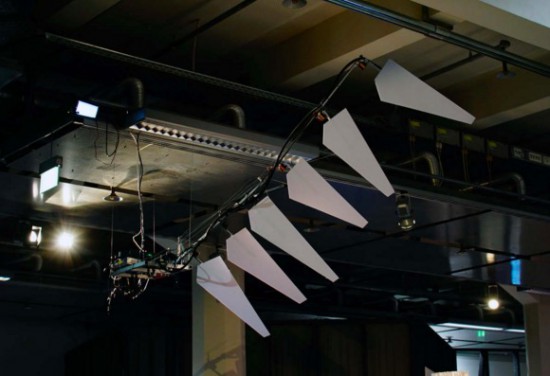
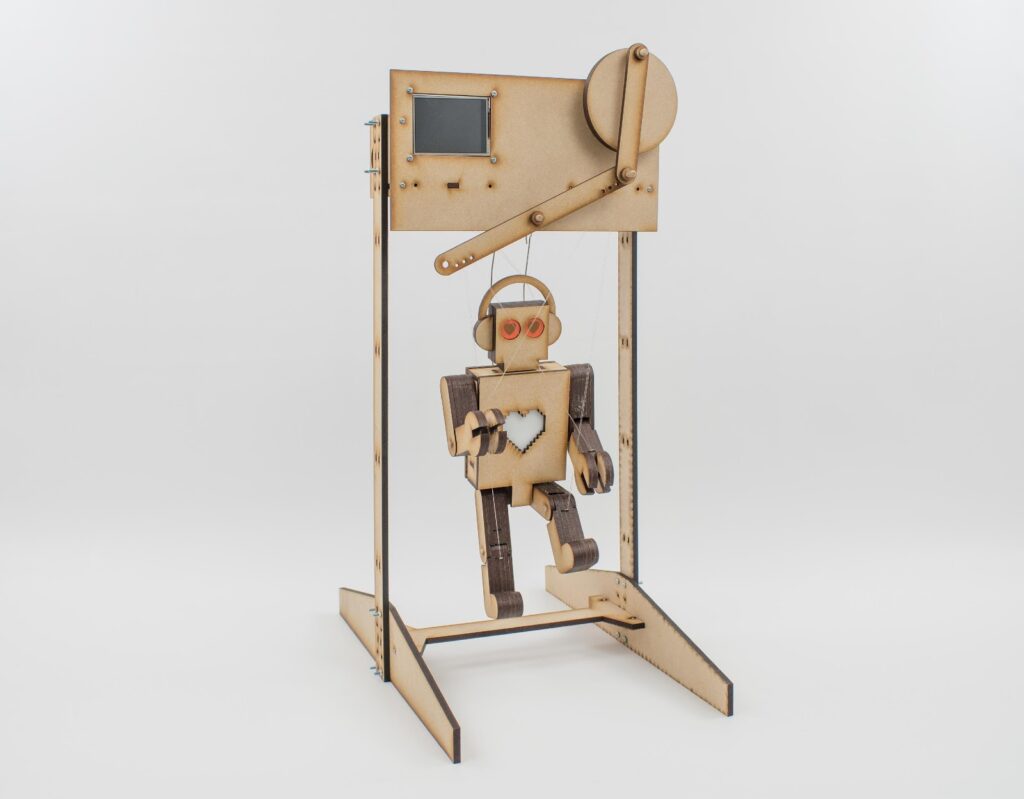
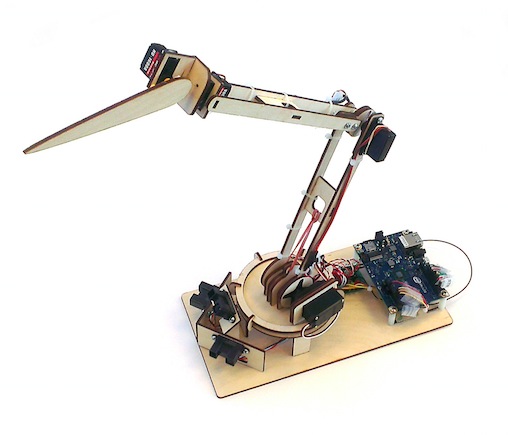
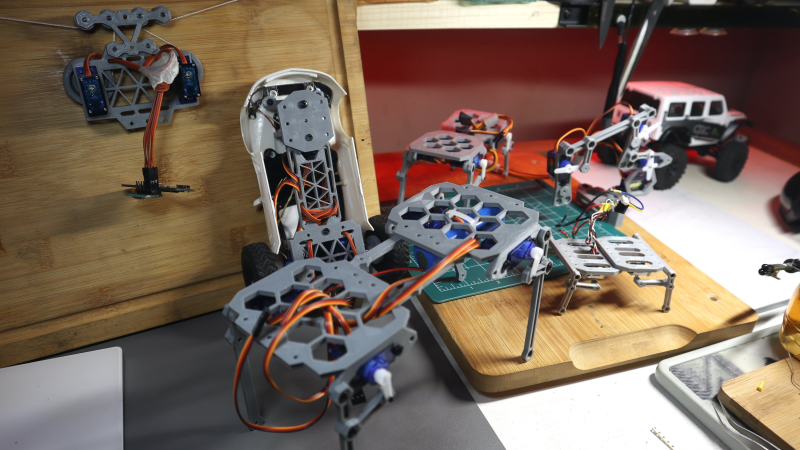
There really isn’t a great deal we can say about this, as it’s essentially a build kit with quite a few configuration options, and you just have to build with it and see what’s possible. We expect the number of parts to proliferate over time giving even more options. So far [saul] demonstrates a few flavors of ‘walkers’, a rudimentary ‘robot arm’, and even a hanging drawbot.

The bolt hardware can be found in this GitHub repo, and the remote control code in this second one.

Servo-based designs are sometimes sneered at due to their dubious accuracy and repeatability, but with a little of effort, this can be vastly improved upon. Also, multi-legged walkers need multiple servos and controllers to drive ’em. Or do they?

The HackadayPrize 2023 is Sponsored by:

Ultrasonic Sensor Helps You Enforce Social Distancing

If you’re going outside (only for essential grocery runs, we hope) and you’re having trouble measuring the whole six feet apart from other people deal by eye, then [Guido Bonelli] has a solution for you. With a standard old HC-SR04 ultrasonic sensor, an audio module and a servo to drive a custom gauge needle he’s made a device which can warn people around you if they’re too close for comfort.

As simple as this project may sound like for anyone who has a bunch of these little Arduino-compatible modules lying around and has probably made something similar to this in their spare time, there’s one key component that gives it an extra bit of polish. [Guido] found out how intermittent the reliability of the ultrasonic sensor was and came up with a clever way to smooth out its output in order to get more accurate readings from it, using a bubble sort algorithm with a twist. Thirteen data points are collected from the sensor, then they are sorted in order to find a temporal middle point, and the three data points at the center of that sort get averaged into the final output. Maybe not necessarily something with scientific accuracy, but exactly the kind of workaround we expect around these parts!

Projects like these to help us enforce measures to slow the spread of the virus are probably a good bet to keep ourselves busy tinkering in our labs, like these sunglasses which help you remember not to touch your face. Make sure to check out this one in action after the break!

AvoRipe Takes A Firm Grip On The Ultimate First World Food Problem

You don’t have to be an extinct mammal or a Millennial to enjoy the smooth, buttery taste of an avocado. Being psychic on the other hand is definitely an advantage to catch that small, perfect window between raw and rotten of this divaesque fruit. But don’t worry, as modern problems require modern solutions, [Eden Bar-Tov], [Elan Goldberg], and [Mizpe Ramon] built the AvoRipe, a device to notify you when your next avocado has reached that window.

Taking both the firmness and color of an avocado as indicators of its ripeness into account, the team built a dome holding a TCS3200 color sensor as stand for the avocado itself, and 3D printed a servo-controlled gripper with a force sensor attached to it. Closing the gripper’s arms step by step and reading the force sensor’s value will determine the softness the avocado has reached. Using an ESP8266 as centerpiece, the AvoRipe is turned into a full-blown IoT device, reporting the sensor readings to a smartphone app, and collecting the avocado’s data history on an Adafruit.IO dashboard.

There is unfortunately one big drawback: to calibrate the sensors, a set of nicely, ripe avocados are required, turning the device into somewhat of a chicken and egg situation. Nevertheless, it’s a nice showcase of tying together different platforms available for widescale hobbyist projects. Sure, it doesn’t hurt to know how to do each part from scratch on your own, but on the other hand, why not use the shortcuts that are at our disposal to remove some obstacles — which sometimes might include programming itself.

Robot Hand Goes Wireless

We can’t decide if [MertArduino’s] robotic hand project is more art or demonstration project. The construction using springs, fishing line, and servo motors isn’t going to give you a practical hand that could grip or manipulate anything significant. However, the project shows off a lot of interesting construction techniques and is a fun demonstration for using nRF24L01 wireless in a project. You can see a video of the contraption, below.

A glove uses homemade flex sensors to send wireless commands to the hand. Another Arduino drives an array of servo motors that make the fingers flex. You don’t get fine control, nor any real grip strength, but the hand more or less will duplicate your movements. We noticed one finger seemed poorly controlled, but we suspect that was one of the homemade flex sensors going rouge.

The flex sensors are ingenious, but probably not very reliable. They consist of a short flexible tube, an LED and a light-dependent resistor. We’re guessing a lot of factors could change the amount of light that goes around a bent tube, and that may be what’s wrong with the one finger in the video.

We’d love to try this project using some conductive bag flex sensors. Although this hand doesn’t look like a gripper, we wondered if it could be used for sign language projects.


Filed under: wireless hacks

These boxes make music out of metal and wood

Les Boites Mécaniques are a set of four automated boxes that produce music out of wood and metal. These experimental instruments enable anyone to explore the magic of making sound by pressing buttons on a remote, which activate each respective device to vibrate, knock, and rub materials.

The boxes were developed by Kogumi‘s Anatole Buttin and Yan Godat for educational electronic music workshops, and can be played either solo or in unison. There’s even a mode that allows users to control it all via MIDI notes on a computer.

In terms of hardware, each box is equipped with an Arduino Uno, a TLC59711 LED driver, step motors with AccelStepper library and a 3D-printed microstep driver.

You can watch how it all comes together to create a unique sound below!

Arduino Blog 27 Oct 11:19

Making a Vintage Star Wars AT-AT toy walk with an Arduino

Dave Stein is a software engineer during the day and a tinkerer on Arduino projects in his free time after work. He submitted on the blog his first Arduino project with the goal of powering his old AT-AT Walker toy (mid 1980s) with Arduino Uno and make it walk and perform some of the functions we see in the Star Wars movies.

AT-AT (All Terrain Armored Transport) are four-legged combat walkers 22.5mt (73.8ft) tall of the Galactic Empire, one of its most famous military symbols introduced  in “Star Wars V: The Empire strikes back”, and we may see them again in the next weeks on “Star Wars: The Force Awakens” the upcoming episode of the saga opening December 18th.

The AT-AT walker toy updated by Dave is controlled by a wired Xbox 360 controller that interfaces with a computer and transports a signal to the Arduino Uno for walker movement:

The left and right triggers move the walker forward and backward while the right stick moves the head horizontally. If you have ever played with this toy you may remember it was clumsy and difficult to move. In my project I wanted to learn about and conquer the difficulties of quadrupedal movement. The realization process for my project involved a massive amount of trial and error, research, and failures. I have to say that I failed many more times than I succeeded with configuring the servos with the Arduino. I went down many long roads to learn about prototyping with the breadboard, soldering, and redesigns of the final product. The most difficult part of the project aside from adjusting the gait of the walker for balance and movement was providing enough power to the servos without frying the microcontroller or any of the components. I was finally able to overcome these difficulties by implementing the Adafruit servo shield.

Check AtAt Project website for all info, parts list and upcoming tutorial!

Just imagine your ears were like wings

Wing is an interactive installation created by Dmitry Morozov  and commissioned by the Center for Art and Media (ZKM) in Karlsruhe, special for GLOBALE: Exo-Evolution exhibition, 2015. It’s a 2,5-meter wing that can be flapped by visitors thanks to compact dermal myLeaographic sensors (sensors measuring the electrical potential of muscles) installed  behind their ears and connected to an Arduino Uno:

The main idea of the project is an ironical and at the same time serious research on the topic of development of new instruments and prostheses as “extensions” of human body and accordingly its possibilities and potentials, which are being revealed by new technologies. At the same time, it’s an attempt to stimulate people to perceive and train the body in a different way, expanding the limits of self-control and self-organisation in order to adapt to the new conditions. At the same time, just like many spiritual practices aiming at the elevation of human soul through deep relaxation and control over seemingly uncontrollable muscles, this project uses the metaphor of flying as a reward for the ability to direct your mind to solving of non-standard tasks.

Build a Touchscreen Controlled Marionette with Intel Galileo

Making gets really interesting and fun especially when mixing laser cut shapes, servo motor, tft screen, MDF, plexiglass and Intel Galileo Gen 2. After you assemble the parts and follow the steps of this tutorial, you’ll be able to control the puppet through an interface on the screen. Enjoy the tutorial!

We are going to have a little fun with the Intel® Galileo development board. This time around, we’ll make a simple puppet control system. We’ve put together a “running robot” marionette with a simple mechanism that uses a continuous servo. We’ll be use a touchscreen interface to control various outputs using sliders and switches.

As always, you can modify the designs to suit your needs. We will teach you how to incorporate touchscreens, and make the interface necessary for controlling the Intel® Galileo Gen 2 board.

Just so you know, the instructions this time around are quite long. That’s due to the assembly of the marionette. I would review the assembly instructions fully before attempting to put it together. While it looks long and complicated, if you group the parts, it much simpler.

So, let’s start the puppet show!

Follow the link and start making!

Design a LEGO-compatible servo holder and print it with Materia 101

This week we are presenting you a new tutorial on 3d printing of Lego-compatible pieces with Materia 101. Kristoffer designed a brick with the parametric 3d modeler FreeCAD that can hold a small servo. Following the 10-step instructions  you can easily add wheels to robots built in LEGO and  use specific servos with different sizes.


Check the previous tutorials on 3d printing with Material 101

Interested in getting in touch and showing your experiments? Join Kristoffer on the Arduino forum dedicated to Materia 101 and give us your feedback.

Make your lasercut datamonster with Intel Galileo

Datamonsters are creatures that respond to you. They can see you and respond to your presence and movement. In addition to responding to immediate interactions, they can also be influenced by events happening in the world outside.


The project you see in the picture was made by Lucas Ainsworth  using Intel Galileo board and needs 3 main things:

- a physical structure
The physical structure uses commonly available materials and a relatively easy-to build wooden kit pattern, so that the physical form “gets out of the way”
as much as possible. If you cut this kit and put it together, you will have a robot with 5 joints: waist rotation, waist elevation, mid-body elevation, neck rotation, and head movement.

- sensing
For this version, we’re using 3 long range active IR sensors for simplicity and low cost. This sensor pack estimates object location in 3D space. Next gen could possibly use a webcam and OpenCV to include face-detection and motion in addition to presence.

- software
This is where the fun is and where the most work remains to be done. We have code for the Arduino IDE (written for the Intel Galileo board) that you
can use to calibrate and control your monster. If you use our code unchanged, you’ll have some basic reactions to objects, and a connection over WiFi to Thingspeak. Thingspeak is an easy-to-use repository for data collected from the internet or any data sources you create.

You can make your own Datamonster following the detailed documentation at this link. The Galileo code to get started (for the Arduino IDE) is on GitHub.