Posts with «retro» label

NFC Hidden In Floppy Disk For Retro-Themed PC

As we all look across a sea of lifeless, nearly identically-styled consumer goods, a few of us have become nostalgic for a time when products like stereo equipment, phones, appliances, homes, cars, and furniture didn’t all look indistinguishable. Computers suffered a similar fate, with nearly everything designed to be flat and minimalist with very little character. To be sure there are plenty of retro computing projects to recapture nostalgia, but to get useful, modern hardware in a fun, retro-themed case check out this desktop build from [Mar] that hides a few unique extras.

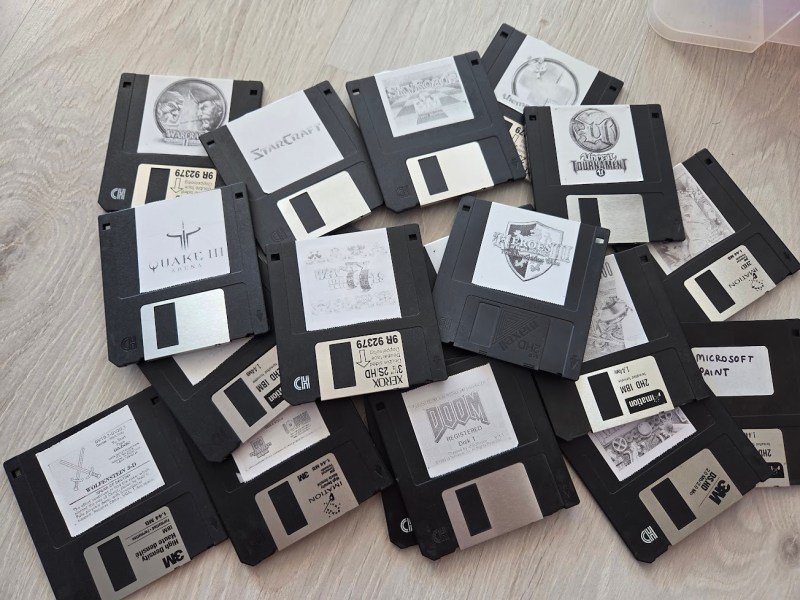
The PC itself is a modern build with an up-to-date operating system, but hidden in a 386-era case with early-90s styling. The real gem of this build though is the floppy disk drive, which looks unaltered on the surface. But its core functionality has been removed and in its place an Arduino sits, looking for NFC devices. The floppy disks similarly had NFC tags installed so that when they interact with the Arduino,it can send a command to the computer to launch a corresponding game. To the user it looks as though the game loads from a floppy disk, much like it would have in the 90s albeit with much more speed and much less noise.

Modern industrial design is something that we’ve generally bemoaned as of late, and it’s great to see some of us rebelling by building unique machines like this, not to mention repurposing hardware like floppy drives for fun new uses (which [Mar] has also open-sourced on a GitHub page). It’s not the first build to toss modern hardware in a cool PC case from days of yore, either. This Hot Wheels desktop is one of our favorites.

Hack a Day 30 Aug 06:00

Noble Graphs: Displaying Data With Neon Like Its 1972

In the days before every piece of equipment was an internet-connected box with an OLED display, engineers had to be a bit more creative with how they chose to communicate information to the user. Indicator lights, analog meters, and even Nixie tubes are just a few of the many methods employed, and are still in use today. There are, however, some more obscure (and arguably way cooler) indicators that have been lost to time.

[Aart Schipper] unearthed one such device while rummaging around in his father’s shed: a pair of Burroughs Bar Graph Glow-Transfer Displays. These marvelous glowing rectangles each have two bars (think the left and right signals on an audio meter, which is incidentally what they were often used for), each with 201 neon segments. Why 201, you may ask? The first segment on each bar is always illuminated, acting as a “pilot light” of sorts. This leaves 200 controllable segments per channel. Each segment is used to “ignite” its neighboring segment, something the manufacturer refers to as the “Glow-Transfer Principle.” By clever use of a three-phase clock and some comparators, each bar is controlled by one analog signal, keeping the wire count reasonably low.

Don’t get us wrong, the warm, comforting glow of Nixie tubes will always have a special place in our hearts, but neon bar graphs are just hard to beat. The two do have a similar aesthetic though, so here’s hoping we see them used together in a project soon.

Thanks to [Jan] for the tip!

Hack a Day 18 Oct 03:00
arduino  neon  nixie  parts  retro  

Raspberry Pi Simulates the Real Analog TV Experience

If you’ve laid hands on a retro analog TV, have the restoration bug, and you plan to make the final project at least somewhat period-correct, you face a bit of a conundrum: what are you going to watch? Sure, you can serve up just about any content digitally these days, but some programs just don’t feel right on an old TV. And even if you do get suitably retro programming, streaming isn’t quite the same as the experience of tuning your way through the somewhat meager selections as we did back in the analog days.

But don’t worry — this Raspberry Pi TV simulator can make your streaming experience just like the analog TV experience of yore. It comes to us from [Rodrigo], who found a slightly abused 5″ black-and-white portable TV that was just right for the modification. The battery compartment underneath the set made the perfect place to mount a Pi, which takes care of streaming a variety of old movies and shorts. The position of the original tuning potentiometer is read by an Arduino, which tells the Pi which “channel” you’re currently tuned to.

Composite video is fed from the Pi’s output right into the TV’s video input, and the image quality is just about what you’d expect. But for our money, the thing that really sells this is the use of a relay to switch the TV’s tuner back into the circuit for a short bit between channel changes. This gives a realistic burst of static and snow, just like we endured in the old days. Hats off to [Rodrigo] for capturing everything that was awful about TV back in the day — Mesa of Lost Women, indeed! — but still managing to make it look good.

Hack a Day 20 Jun 12:00

This Old Mouse: Building a USB Adapter for a Vintage Depraz Mouse

When [John Floren] obtained a vintage Depraz mouse, he started out being content to just have such a great piece of history in his possession. But if you’re like him, you know it’s not enough to just have something. What would it be like to use it?

To find out, [John] embarked on a mission to build a USB adapter for his not so new peripheral.
Originally used in very early terminals with a Unix GUI, the Depraz mouse utilizes an unusual male DE9 connector rather than the more familiar female DB9 used in RS232 serial mice. Further deviating from the norm, he found that the quadrature encoders were connected directly to the DE9 connector.

Armed with an Arduino Pro Mini and some buggy sample code, he got to work. The aforementioned buggy code was scrapped and a fresh sketch for the Arduino Pro Mini gave the Depraz mouse the USB interface it lacked. [John] also found that he wasn’t the first hardware hacker to have modified the mouse for their use. Be sure to read to the end the article to find out about the vintage surprise lurking in the mouse shell itself! A demonstration of the mouse in action can be seen in the video below the break.

Looking for a fun mouse hack? Perhaps you’d like to use your more modern USB mouse on a retro computer, or try your hand at recreating an early Apple mouse for use in modern computers.

Wireless Controllers For Retro Gaming

There’s no limit to the amount of nostalgia that can be minted through various classic platforms such as the NES classic. The old titles are still extremely popular, and putting them in a modern package makes them even more accessible. On the other hand, if you still have the original hardware things can start getting fussy. With modern technology it’s possible to make some changes, though, as [PJ Allen] did by adding wireless capabilities to his Commodore 64.

Back when the system was still considered “modern”, [PJ] tried to build a wireless controller using DTMF over FM radio. He couldn’t get it to work exactly right and ended up shelving the project until the present day. Now, we have a lot more tools at our disposal than analog radio, so he pulled out an Arduino and a few Bluetooth modules. There’s a bit of finesse to getting the old hardware to behave with the modern equipment, though, but once [PJ] worked through the kinks he was able to play his classic games like Defender without the limitations of wired controllers.

The Commodore 64 was incredibly popular in the ’80s and early ’90s, and its legacy is still seen today. People are building brand new machines, building emulators for them, or upgrading their hardware.

An Arduino From The Distant Past

Arduinos are a handy tool to have around. They’re versatile, cheap, easy to program, and have a ton of software libraries to build on. They’ve only been around for about a decade and a half though, so if you were living in 1989 and wanted to program a microcontroller you’d probably be stuck with an 8-bit microprocessor with no built-in peripherals to help, reading from a physical book about registers and timing, and probably trying to get a broken ribbon cable to behave so it would actually power up. If you want a less frustrating alternate history to live in, though, check out the latest project from [Marek].

He discovered some 6502 chips (Polish language, Google Translate link) that a Chinese manufacturer was selling, but didn’t really trust that they were legitimate. On a lark he ordered some and upon testing them he found out that they were real 6502s. Building an 8-bit computer is something he’d like to do, but in the meantime he decided to do a project using one of these chips as a general-purpose microcontroller similar to a modern Arduino. The project has similar specs as an Arduino too, including 8kB of RAM memory, 8kB of I/O address space, and various EPROM capabilities. [Marek] went on to build a shield board for it as well, for easy access to some switches and LEDs. It’s a great build that anyone interested in microcontrollers should check out.

Keep in mind that an ATtiny45 has 8 bits like the 6502 but only costs around $1 USD, whereas a 6502 would have cost around $200 in today’s dollars. It’s really only in modern times that we can appreciate the 6502 as a cheap 8-bit microcontroller for that reason alone, but we can also appreciate how it ushered in a computer revolution since competing Intel and Motorola chips cost around six times more before it showed up. They became so popular in fact that people still regularly use them to build retrocomputers of all kinds.

Arduino Altair 8800 Simulator

Browse around eBay for an original Altair 8800 and you quickly find that the price range is in the thousands of dollars. If you are a collector and have some money in your pocket maybe that’s okay. But if you want the Altair 8800 experience on a budget, you can build yourself a clone with an Arduino. [David] kindly shared the build details on his Arduino Project Hub post. Using an Arduino Due (or a Mega for 25% of original speed), the clone can accurately reproduce the behavior of the Altair’s front panel elements. We covered a similar project in the past, using the Arduino Uno.

While not overly complicated to build one, you will need a fair amount of patience so you can solder all the 36 LEDs, switches, transistors, and resistors but in the end, you’ll end up with a brand new computer to play with.  In 1975, an assembled Altair 8800 Computer was selling for $621 and $439 for an unassembled version. Sourced right, your clone would be under 50 bucks. Not bad.

The simulator comes with a bunch of software for you to try out and even games like Kill-the-Bit and Pong. BASIC and Assembler example programs are included in the emulator software and can easily be loaded.

In addition, the simulator includes some extra functions and built-in software for the Altair which are accessible via the AUX1/AUX2 switches on the front panel (those were included but not used on the original Altair). From starting different games to mount disks in an emulated disk drive, there are just too many functions to describe here. You can take a look at the simulator documentation for more information.

In case you don’t know already, here’s how to play Kill-the-Bit:


Filed under: Arduino Hacks

New Project: Ye Olde Brushless Motor

3D-print this 1872 replica Electro-Magnetic Engine that works like your drone's modern motors.

Read more on MAKE

The post Ye Olde Brushless Motor appeared first on Make: DIY Projects, How-Tos, Electronics, Crafts and Ideas for Makers.

This Nixie Tube Speedometer Gives Retro-Futuristic Life to a 70s Motorcycle

Nixie tubes are interesting pieces of equipment. They have a "retro-futuristic" look that has great appeal to electronics hackers.

Read more on MAKE

The post This Nixie Tube Speedometer Gives Retro-Futuristic Life to a 70s Motorcycle appeared first on Make: DIY Projects, How-Tos, Electronics, Crafts and Ideas for Makers.

48 Solenoids Transform This 1960s Typewriter into a Computer Printer

Several years ago, Chris Gregg, a Tufts University lecturer and computer engineer, received a letter from his friend Erica. This wouldn’t be so unusual, except that it was typed on an actual typewriter, not a printer. Gregg is a fan of vintage typewriters, but, as with myself, makes many mistakes, […]

Read more on MAKE

The post 48 Solenoids Transform This 1960s Typewriter into a Computer Printer appeared first on Make: DIY Projects, How-Tos, Electronics, Crafts and Ideas for Makers.