Posts with «star wars» label

Spherical Quadruped Arduino Robot

[Greg06] started learning electronics the same way most of us did: buy a few kits, read a few tutorials, and try your hardest to put a few things together. Sound familiar? After a while, you noticed your skills started increasing, and your comfort level with different projects improved as well. Eventually, you try your hand at making your own custom projects and publishing your own tutorials.
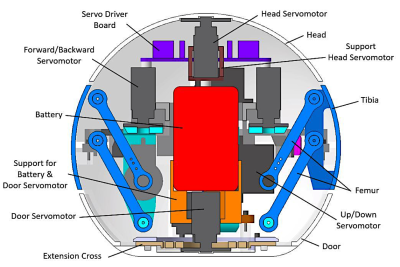
Few are lucky to have a first-project as elaborate as [Greg06’s] quadruped robot. We don’t know about you, but for some of us, we were satisfied with blinking two LEDs instead of just one.

[Greg06’s] robot has a quadruped based, housed within a 3D printed spherical body. The legs are retractable and are actuated by tiny servo motors inside the body. [Greg06] even included an ultrasonic distance sensor for the obstacle avoidance mechanism. Honestly, if it weren’t for the ultrasonic distance sensor protruding from the spherical body, you might think that the entire robot was just a little Wiffle ball. This reminds us of another design we’ve seen before.

If that weren’t enough, the spherical head can rotate, widening the range of the ultrasonic distance sensor and obstacle avoidance mechanism. This is accomplished by attaching another servo motor to the head.

Pretty neat design if you ask us. Definitely one of the coolest quadrupeds we’ve seen.

Building D-O, The Cone Face Droid

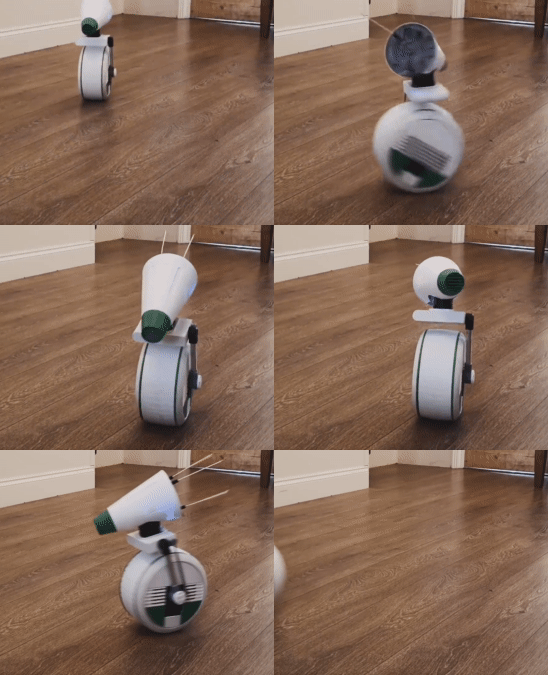
For many of us, movies are a great source of inspiration for projects, and the Star Wars films are a gift that just keeps giving. The D-O droid featured and the Rise of Skywalker is the equivalent of an abandoned puppy, and with the help of 3D printing, [Matt Denton] has brought it to life. (Video, embedded below.)

D-O is effectively a two-wheeled self-balancing robot, with two thin drive wheels on the outer edges of the main body. A wide flexible tire covers the space between the two wheels, where the electronics are housed, without actually forming part of the drive mechanism. The main drive motors are a pair of geared DC motors with encoders to allow closed-loop control down to very slow speeds. The brains of the operation is an Arduino MKR-W1010 GET on a stack that consists of a motor driver, shield, IMU shields, and prototyping shield. [Matt] did discover a design error on the motor driver board, which caused the main power switching MOSFET to burst into flames from excessive gate voltage. Fortunately he was able to work around this by simply removing the blown MOSFET and bridging the connection with a wire.
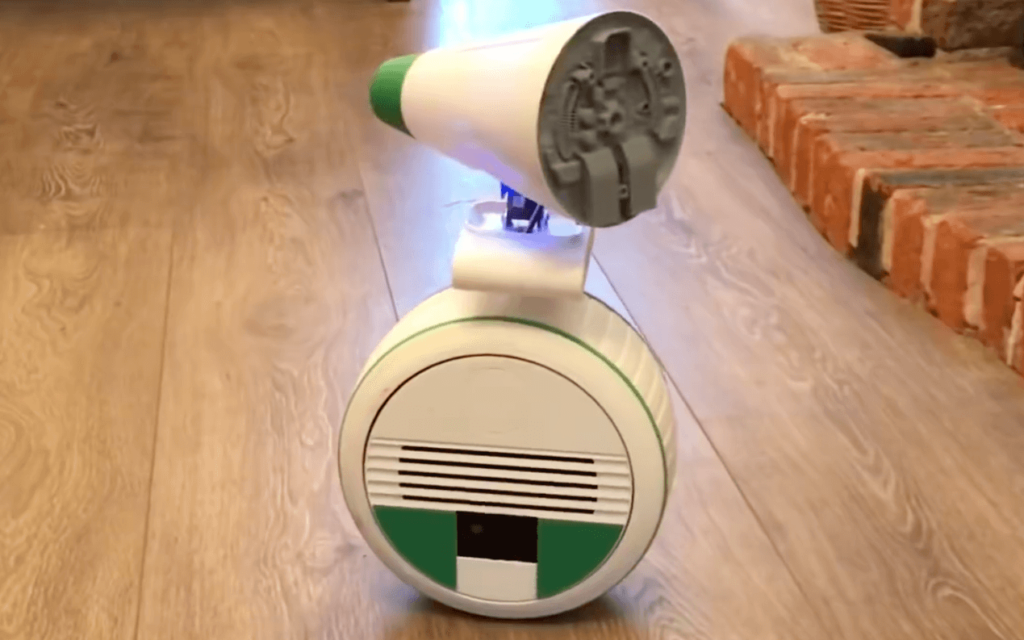
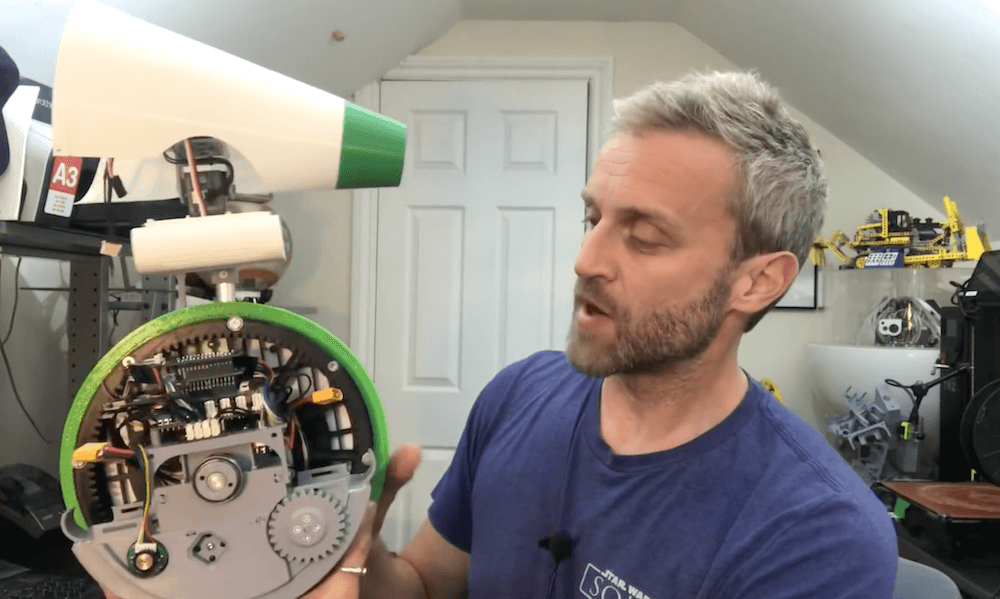
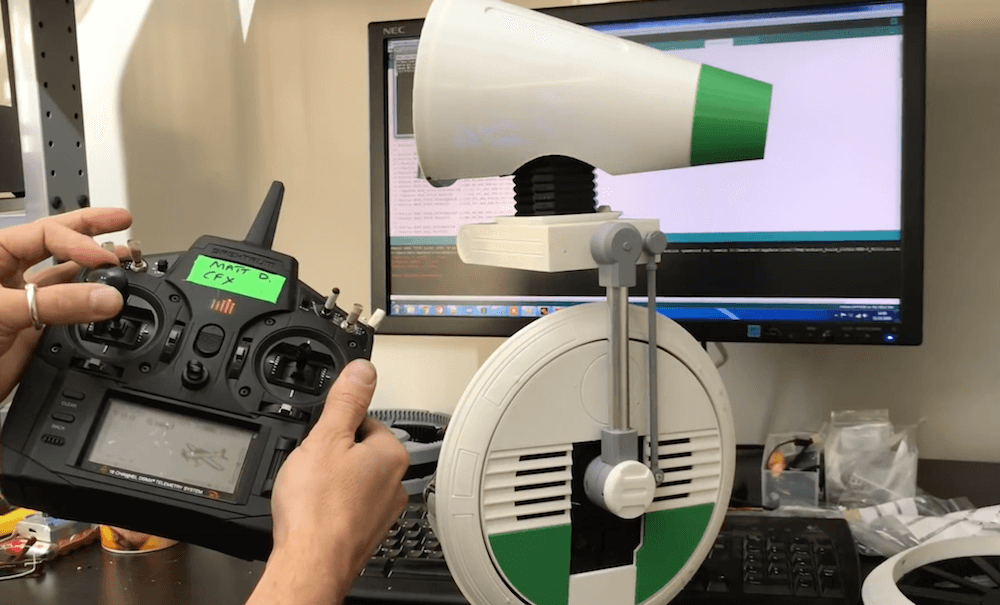
The head-on D-O is very expressive and [Matt] used four servos to control its motion, with another three to animate the three antennas on the back of its head. Getting all the mechanics to move smoothly without any slop took a few iterations to get right, and the end result looks and moves very well.

[Matt] worked on the film himself, so he based his build on a design by [Michael Baddeley], another prolific droid builder, to avoid breaching his NDA. He covers the entire development and testing process in a series of videos, and will be releasing the design files and instructions when it’s done.

This YouTuber recreated the D-O droid from Star Wars: Episode 9 with Arduino

While it’s yet to make its premiere, Matt Denton has already built the D-O droid from Star Wars: The Rise of Skywalker using a MKR WiFi 1010 for control, along with a MKR IMU Shield and a MKR Motor Carrier

The droid scoots around on what appears to be one large wheel, which conceals the Arduino boards as well as other electronics, batteries, and mechanical components. Denton’s wheel design is a bit more complicated mechanically than it first appears, as its split into a center section, with thin drive wheels on the side that enable differential steering.

On top, a cone-shaped head provides sounds and movement, giving the little RC D-O a ton of personality. The droid isn’t quite finished as of the video below, but given how well it works there, the end product should be amazing!

Star Wars-themed Mastermind with an Arduino Mega

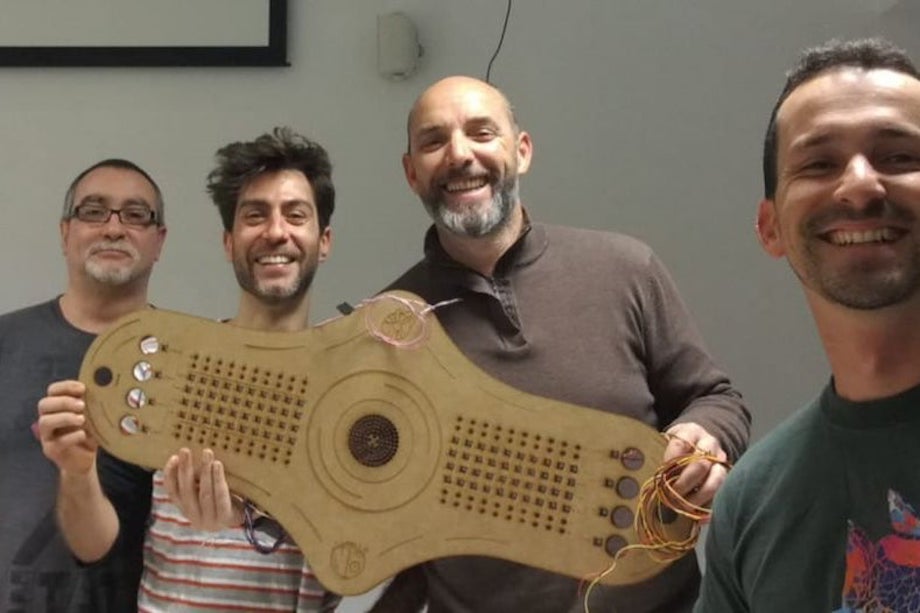
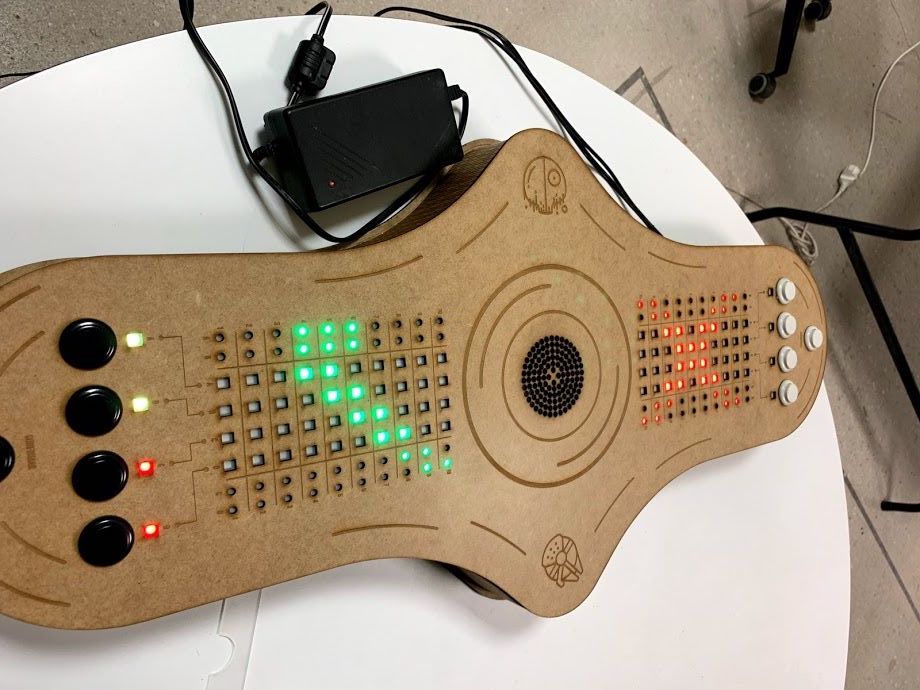
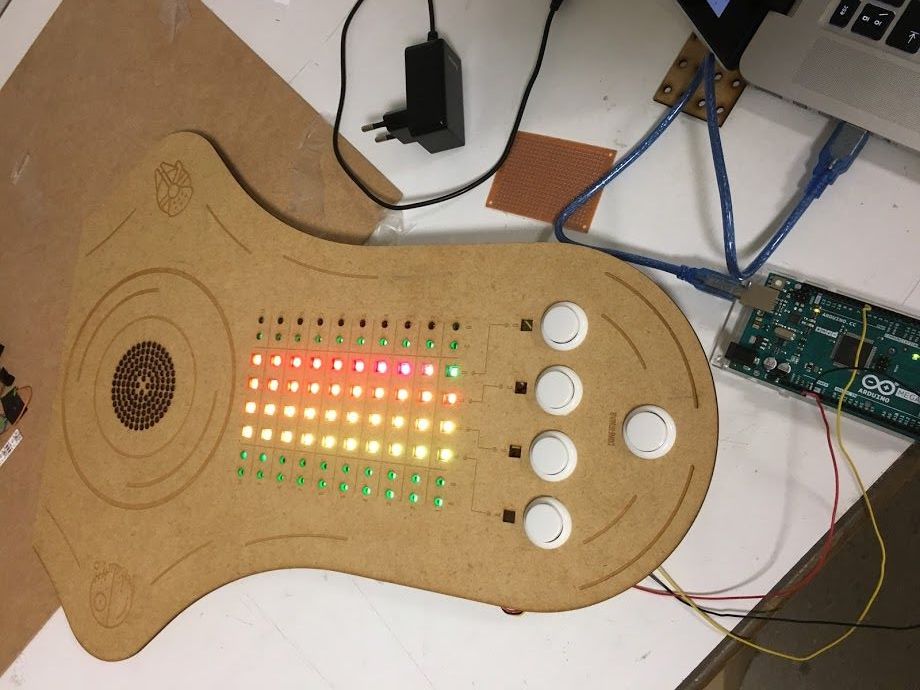
Mastermind is a game where one player attempts to guess a secret combination of colored pegs. It normally requires a second player to act as the judge, giving hints in the form of secondary pegs as to whether the other participant is on the right track. Maker “luisdel” decided to put a new spin on things using an Arduino Mega to display RGB LEDs on a Star Wars-themed play field. This automation allows players to directly compete, rather than taking turns.

In action, each player uses a series of buttons to enter light codes, with 10 tries at guessing the correct combination. No human judge is needed, so it’s a race to see who can unlock this critical sequence first and save—or further subjugate—the galaxy!

These are adverse times for rebellion. Although the Death Star has been destroyed, the Imperial troops are using free hardware and Arduino as a secret weapon.

That is the advantage of free technologies, any person (either good or bad) can use them.

In a hidden base located on the planet Anoat, they are building a 3D printer capable of replicating Imperial Destroyer.

The only solution to defeat the Empire is that a group of rebels commanded by Luke Skycuartielles and Obi-Wan Banzi, defeat the imperial troops and get the key that will give access to the plans to destroy the secret weapon.

This key consists of 4 colors and you have 10 attempts to get it deciphered. There are only four rules:

1. The colors can be repeated

2. A white light indicates that you have hit the right color and position

3. A violet light indicates that you have hit the color but not the position

4. If there is no light you have not guessed the color or the position.

You must hurry since at the other extreme, the evil Darth Ballmer will try to get the key before you. In that case, you will not be able to find out what it is and you will not have access to the plans of the secret weapon. Your mission will have failed.

Little Padawan, may the force accompany you to decipher the key and thus be able to save the galaxy.

Arduino Blog 28 May 14:08

Recreating the Death Star Trench Run scene with LEGO

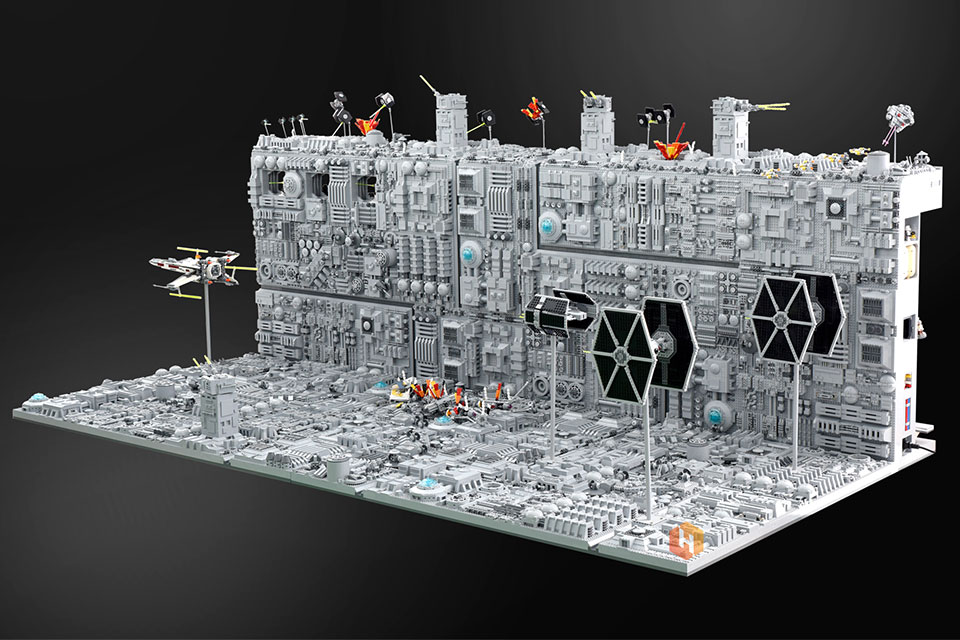
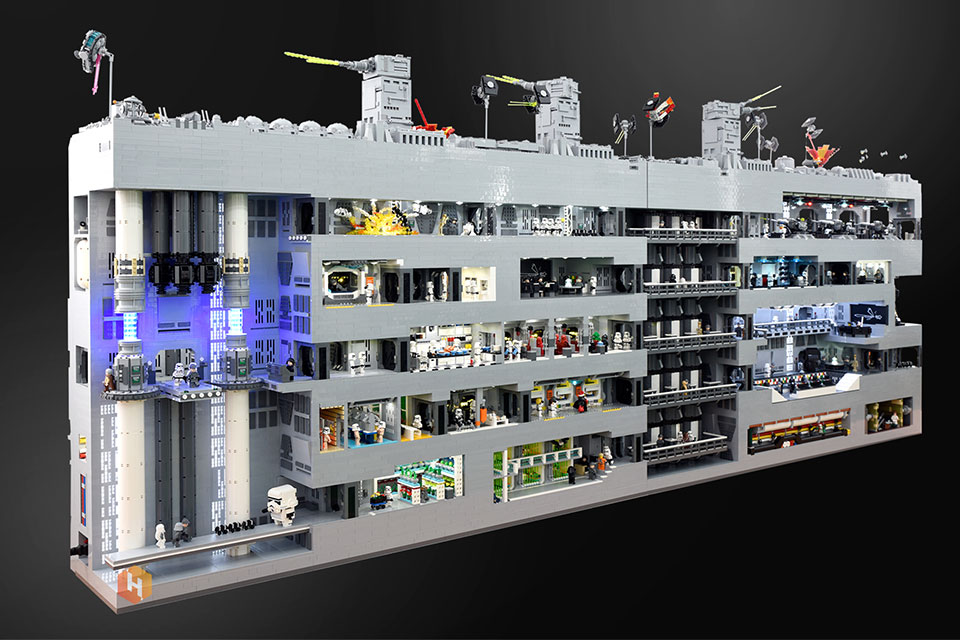
South Korean LEGO Certified Professional Wani Kim, with the help of Olive Seon, has created an incredible replica of the Death Star Trench Run scene from Star Wars: Episode IV – A New Hope.

The LEGO diorama—which measures 2,680mm (8.79 feet) long, 1,370 mm (4.49 feet) deep, and stands 1,100 mm (3.60 feet) tall— features defensive turrets, along with Luke’s X-Wing, the wreckage of another Rebel ship, and Vader and two TIE Fighters in pursuit.

The build required 80,000 LEGO bricks to complete and even includes a cutaway of the back, revealing the insides of this astronomical object. If that wasn’t enough, an Arduino was used to coordinate flashing effects to further enhance this iconic recreation. 

Additional images of this impressive project, plus some of Kim’s other work, can be found on his Instagram page.

Arduino Blog 09 Jan 21:37

Star Wars mouse droid reveals hidden scrolling LED display

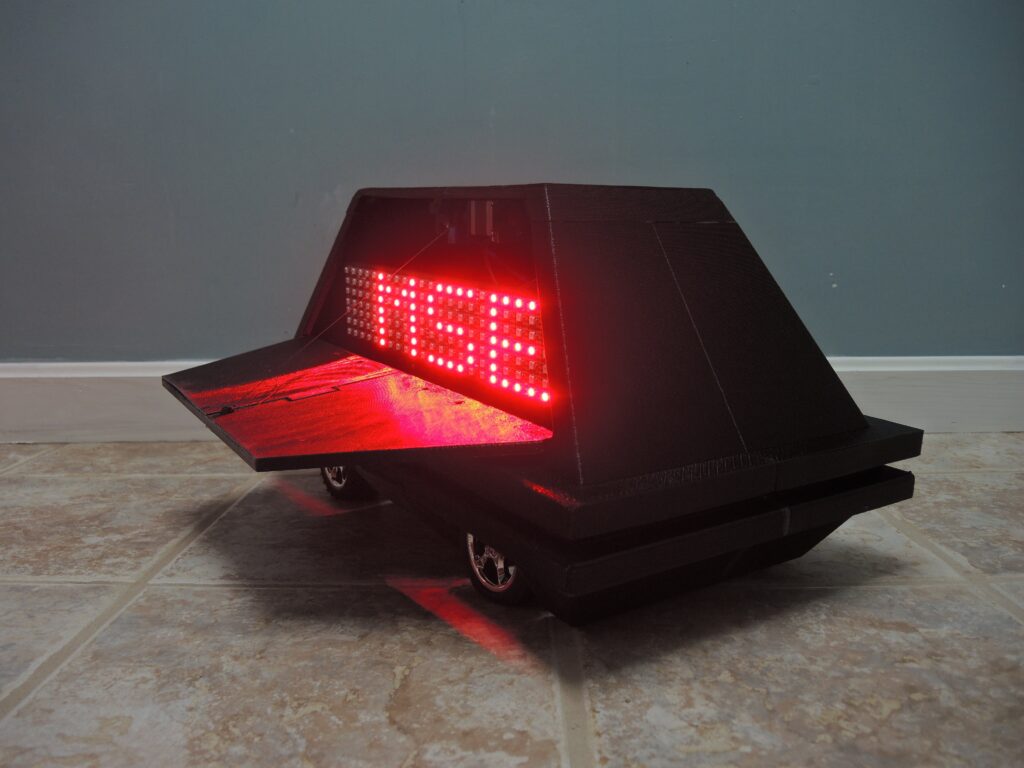
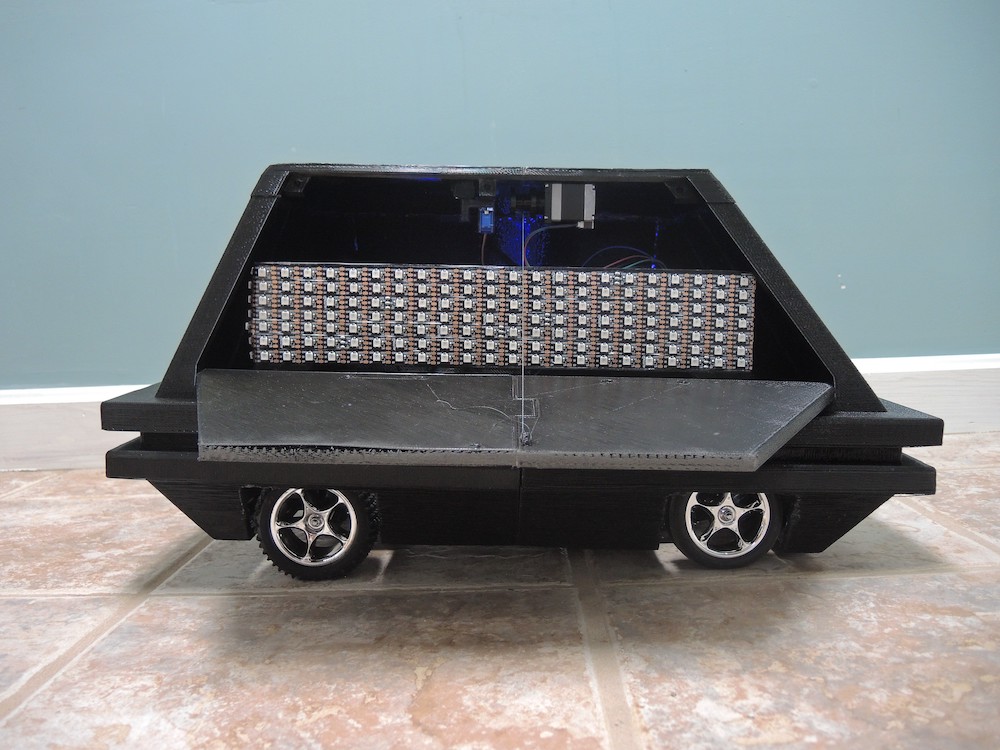
In several iterations of the Star Wars saga, small black droids can be seen scurrying around imperial installations. While they tend to fade into the background or provide a fun distraction in the movies, the mouse droid by Potent Printables acts as a sort of physical messaging app. It’s able to travel to the correct location, then pop open to unveil a scrolling LED sign.

Potent Printables can trigger the side door using a Bluetooth app on his phone. On command, an RC servo pushes it open, and lowers it down using a stepper motor/reel setup. An Arduino Uno along with an Adafruit Motor Shield are used for control, while an HC-05 module enables communication with the system.  

Check out the latest video in this build series below!

This Week in Making: Build Your Own Speakers, Construct a Lightsaber, and More

This week, 3D print your own speaker system, build a device that will allow you to open your door with your hand, or construct a lightsaber.

Read more on MAKE

The post This Week in Making: Build Your Own Speakers, Construct a Lightsaber, and More appeared first on Make: DIY Projects and Ideas for Makers.

Star Wars fan builds an Arduino-powered R4-P17 replica

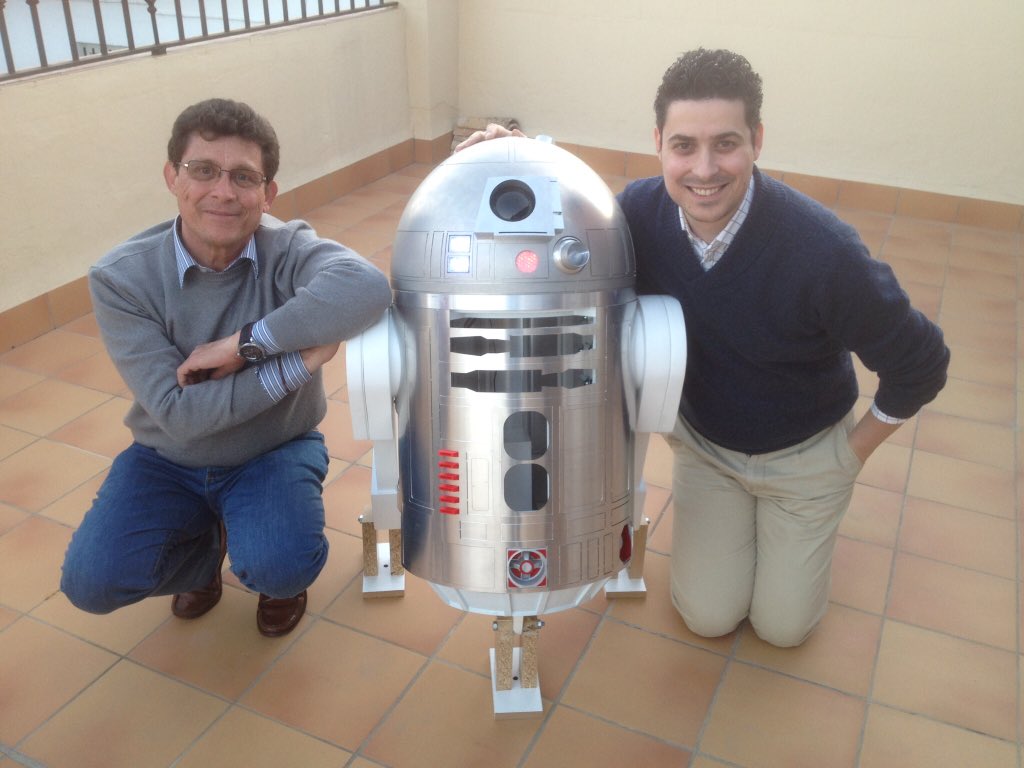
Alejandro Clavijo, together with his father Jerónimo, spent two years building the first official fan-made model of the R4-P17 Star Wars droid. For those not familiar with this family of droids, R4-P17 was the robot companion to the young Obi-Wan Kenobi.

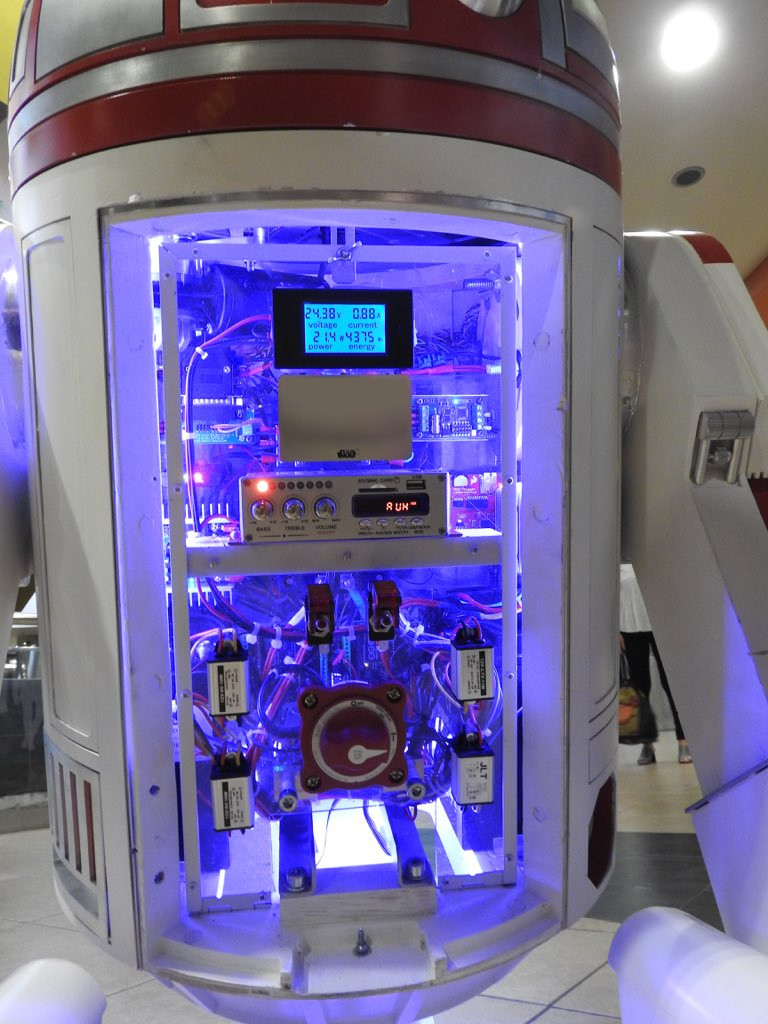
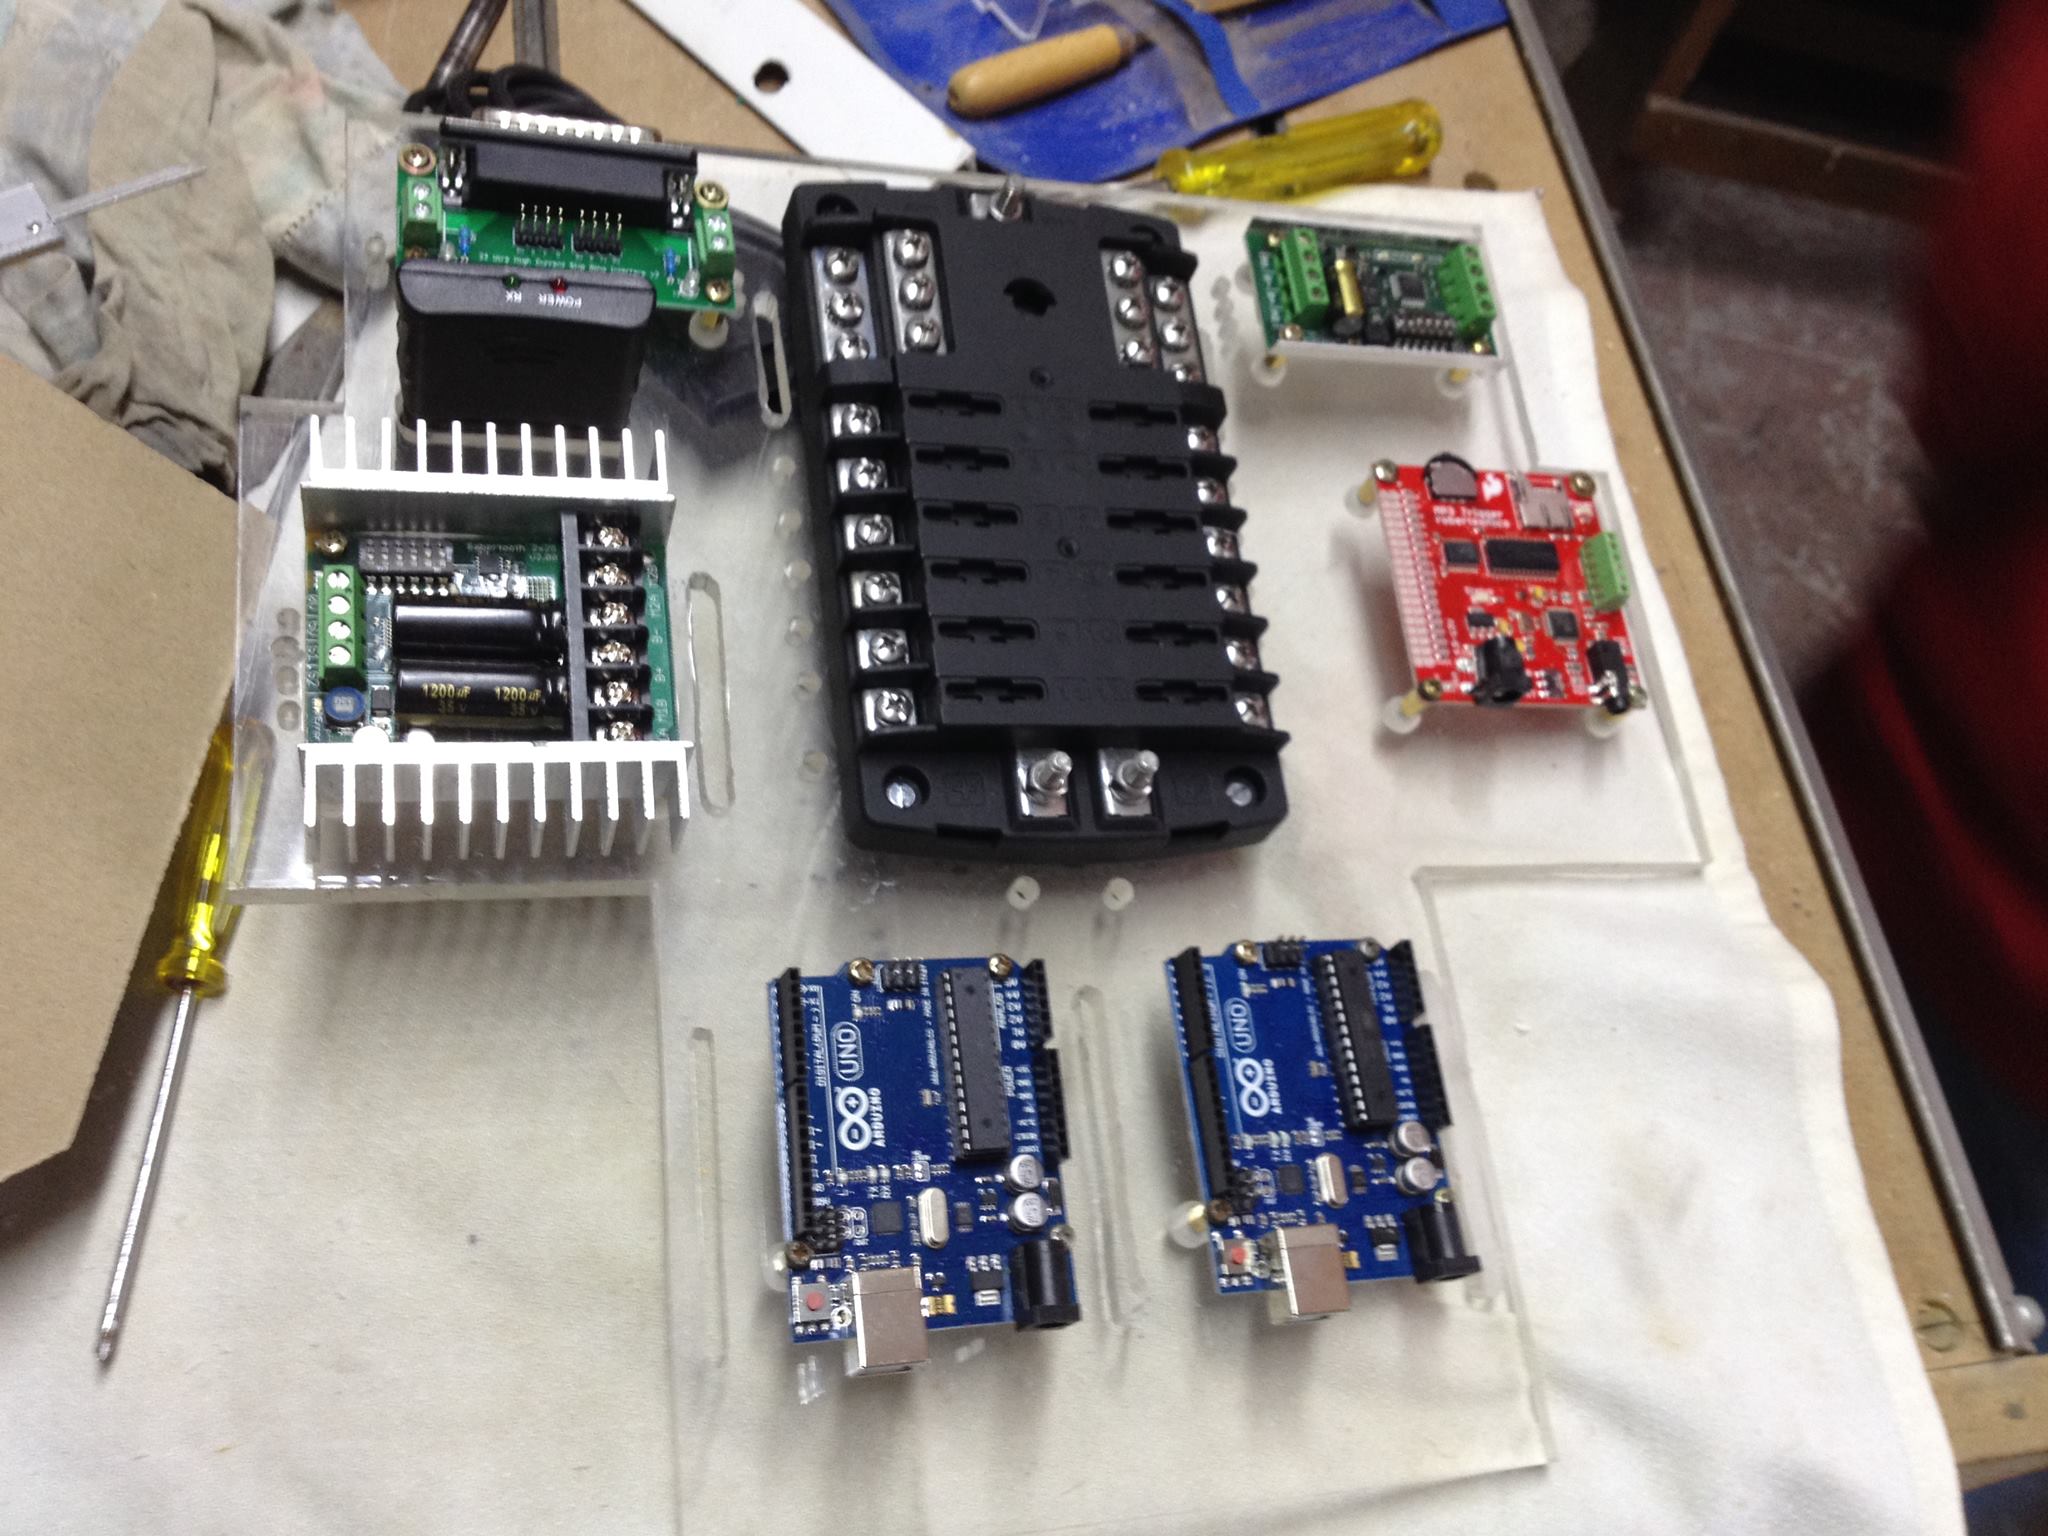
The replica is made of aluminum and wood, and runs on four Arduino boards. Impressively, the project has also been approved by Lucasfilm, the studio behind the saga, allowing Clavijo to bring it to official Star Wars events all over the world.

Clavijo sent us a bunch photos showing R4-P17’s construction, and more can be found over on its website. As you can imagine, the robot has been a big hit, already making several appearances on TV and in a number of blogs.

When not recreating Star Wars characters, Clavijo spends his days working as an engineer and has designed controls for “clean rooms” using Arduino Uno. You can see his design–made with CATIA–on Thingiverse.

Arduino Blog 13 Nov 19:40

StarMAT greets visitors with the Imperial March

Strong is the Force, with this Padawan. To coincide with the latest installment of the continuing saga from a galaxy far, far away, [Rohit Gupta] built a Star-Wars themed interactive doormat. The doormat detects a footstep using capacitive sensing and plays a random Star Wars audio clip like the opening theme or the Imperial March or a famous phrase from the movie. Check out the video below the break.

The current setup is temporarily breadboarded, but we are sure it will be popular enough with his visitors to make him tidy it up. The hardware consists of an Arduino with an audio shield connected to a pair of speakers. A capacitive wire loop under the mat and a capacitive sensor tuned to the mat size wire take care of the sensing.

When Earth people step on the mat, the sensor triggers the Arduino to play a random audio clip from the SD card. The capacitive sensing is taken care by the TP223 1-key touch pad detector chip (PDF), which he mounted on a home etched board with SMD parts. The whole bundle is powered by a small “power bank” battery pack like the ones used to charge mobile phones.


Filed under: Arduino Hacks

Shoot First with Home-Built Star Wars Target Practice