Posts with «lilypad» label

Kick the habit with a cigarette smoke-detecting shirt

You’ve heard it before, smoking is bad for your health. However, despite the countless warnings, millions of people continue to use cigarettes–including 7th grade student Petter’s dad. Mindful of this, the young Maker came up with a new way to shame smokers into quitting.

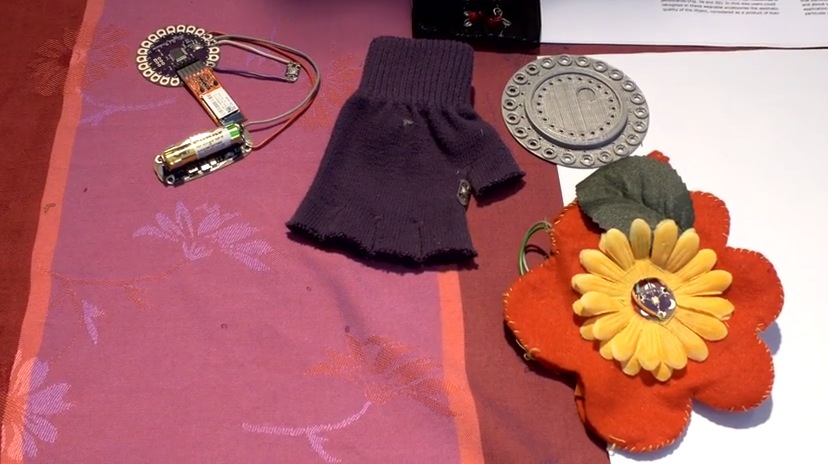
The aptly named “Cigarette Smoke Detecting Shirt” consists of an Arduino LilyPad, a smoke sensor, and three LED sequins, all sewn into the t-shirt using conductive thread. When cigarette smoke is sensed, one of three different lights illuminate alongside a message to embarrass the wearer such as “stinky breath,” “yellow teeth,” or “lung cancer.”

In the future, Petter hopes to finish the prototype and start making more shirts to sell on Etsy. Whether or not this idea takes off, it’s pretty cool nonetheless. As Adafruit puts it, “This is such a fine example of a project that works on an issue and gets students excited about STEM.”

Cosmic Bitcasting is a wearable radiation detector

Cosmic Bitcasting is a digital art and science project emerging from the idea of connecting the human body with the cosmos by creating a wearable device with embedded light, sound and vibration that will provide sensory information on the invisible cosmic radiation that surrounds us. This open-source project actually works by detecting secondary muons generated by cosmic rays hitting the Earth’s atmosphere that pass through the body.

Artist Afroditi Psarra and experimental physicist Cécile Lapoire worked together to develop a prototype of the wearable cosmic ray detector during a one-month residency at Etopia in Zaragoza, and is currently on display at the Etopia-Center for Art and Technology in Zaragoza as part of the exhibition REVERBERADAS.

Cosmic Bitcasting is comprised of an Arduino Lilypad, High Flex 3981 7×1 fach Kupfer blank conductive thread from Karl Grimm, Pure Copper Polyester Taffeta Fabric by Less EMF, white SMD LEDs, a coin cell vibration motor, and an IRL3103 MOSFET with a 100 Ohm resistor to drive the motor.

Intrigued? Take a look at the video below and read the diary of the residency to learn more!


Visualizing Ballet Movements with E-Traces

When we think of wearable technologies, ballet shoes aren’t the first devices that come to mind. In fact, the E-Traces pointé shoes by [Lesia Trubat] may be the first ever “connected ballet shoe.” This project captures the movement and pressure of the dancer’s feet and provides this data to a phone over Bluetooth.

The shoes are based on the Lilypad Arduino clone, which is designed for sewing into wearables. It appears that 3 force sensitive resistors are used as analog pressure sensors, measuring the force applied on the ground by the dancer’s feet. A Lilypad Accelerometer measures the acceleration of the feet.

This data is combined in an app running on an iPhone, which allows the dancer to “draw” patterns based on their dance movements. This creates a video of the motion based on the dance performed, and also collects data that can be used to analyze the dance movements after the fact.

While these shoes are focused on ballet, [Lesia] points out that the same technique could be extended to other forms of dance for both training and visualization purposes.


Filed under: wearable hacks

What have you built with Arduino? Interview 10&11 #MFRome14

Maker Faire Rome video interviews – “What have you built with Arduino?” – A couple of new protagonists for our short series:

  • Collective City Memory – Wearable Arduino Tech, university project by Assunta Matassa
  • Insettoteca – Remote-controlled Terrarium by Hacklab Terni


Explore playlist on Youtube >>

Arduino Blog 14 Jan 15:52

E-traces creates visual sensations from ballerinas

Electronic Traces is an interactive project designed to allow ballet dancers to recreate their movements in  digital pictures using a customizable mobile application. It was prototyped by product-designer Lesia Trubat mixing technological, artisanal skills and using Arduino Lilypad, force sensitive resistors and accelerometer:

The concept of Electronic Traces is based on capturing dance movements and transforming them into visual sensations through the use of new technologies. To do this we focused on the ballet shoes themselves, which through the contact with the ground, and thanks to Lilypad Arduino technology, record the pressure and movement of the dancer’s feet and send a signal to an electronic device. A special application will then allow us to show this data graphically and even customize it to suit each user, through the different functions of this app.

The user can then view all the moves made in video format, extract images and even print them. Dancers can interpret their own movements and correct them or compare them with the movements of other dancers, as graphs created with motion may be the same or different depending on the type of movements execute.


Becoming Alina with a couple of interactive Gauntlets

We’ve been amazed by the great projects coming up the week before Halloween on Twitter and Gplus community and still being submitted to our blog.

Leah Libresco published an Instructables about a pair of interactive gauntlets made with Arduino Lilypad:

This Halloween, I decided to be Alina Starkov from the Grisha Trilogy by Leigh Bardugo. In the books, she’s the one and only Sun Summoner, doing magic with light and heat.

Since those powers were beyond me, I put together a set of Arduino-controlled gauntlets instead, that would light up on gesture commands and slip under my sleeves. [This set up, with a few tweaks, would probably serve you well for Iron Man, too]

Instead of using a single position value from the accelerometer to turn the LEDs on and off, I picked two different triggers, so that it would be easy to *choose* whether I wanted my hands illuminated when they were straight out in front of me (a necessity, since I plan to host a party in these!)

Full construction and code are available at this link, below you can see the project in action!

A couple of interactive pads made with Lilypad Arduino

Agy Lee is an active member of the Singapore maker community and shared with us on the Arduino G+ Plus Community the interactive pad she prototyped using Lilypad Arduino:


She was inspired by the Sensor Demo Mat made by Kenneth Larsen some months before and that you can make yourself following this Instructables!

Arduino Blog 19 Aug 21:55

Leah Buechley: Crafting the Lilypad Arduino

I’ll never forget the first time I heard about Lilypad Arduino. I was astounded and said, “You can make LEDs light up and you stitch it with conductive thread? How does that work?” It wasn’t until years later, after experimenting with the board that I finally got to meet Leah […]

Read more on MAKE

Wireless Controlled Robotic Hand made with Arduino Lilypad

Gabri295 published on Instructable a tutorial for a project created during his last year of high school.  It’s  an artificial hand controlled by a glove with 5 flex sensors and Arduino Lilypad . The artificial hand reproduces the movements of the hand wearing the glove.

The components you need to control glove are:
• an elastic glove;
• Lilypad Arduino board (there are different versions, which usually only have 4 analog inputs, so pay attention and buy the one in the image);
• Shield to connect the Xbee module;
• 5 Flex sensors;
• 5 resistors: 47 K?;
• battery pack with 3×1.5 V batteries (Lilypad can be powered from 2.7 to 5.5 V, so 4.5 V it’s ok);
• LilyPad FTDI adapter (quite optional).

The materials needed for the robotic hand are:

• a steel structure for the palm of the hand and wood for the fingers;
• Arduino UNO board;
• 5 servomotors;
• to connect the servomotors I used the Robot_Shield from FuturaElettronica, which has also a switching regulator to power the entire circuit, but you can use any shield made for that;
• Shield to connect the XBee module (I made an horrible one, but it’s economic and I needed to make it small because of the size of the Robot_Shield, you can buy even XBee shields which have also pins to connect the servomotors);
• fishing wires;
• 9 V Battery.

Below you can take a look at the schematic and then follow the steps to make one yourself!


Arduino Blog 24 Jun 21:46

Flexible Arduino Sure to Be A Hit


Wearable, lightweight hacks have long been dominated by the Lilypad. This will probably change with the introduction of the Printoo. Using printable circuit technology, the Printoo takes a modular approach to enable hackers, makers, and engineers alike to construct flexible circuits that can be put on almost anything, including paper!

Powered by the all too familiar ATmega328, the Printoo core module is fully compatible with the Ardunio IDE. The modular design enables functionality with several other printed devices including displays, batteries, sensors and even LED strips to make many different projects possible. One of the most interesting modules is the 1.5 volt, 500 micron thick electrochromic display.

Be sure to check out their Kickstarter, which has a nice video that demonstrates the project. If funded, they will be available in October in case you want to get your hands on one. Or feel free to make your own. Just be sure to let us know if you do!


Filed under: Arduino Hacks, wearable hacks