2025 Pet Hacks Contest: Feline Facial Recognition Foils Food Filching
Cats are no respecters of personal property, as [Joe Mattioni] learned when one of his cats, [Layla] needed a special prescription diet. Kitty didn’t care for it, and since the other cat, [Foxy]’s bowl was right there– well, you see where this is going. To keep [Layla] out of [Foxy]’s food and on the vet-approved diet, [Joe] built an automatic feeding system with feline facial recognition. As you do.
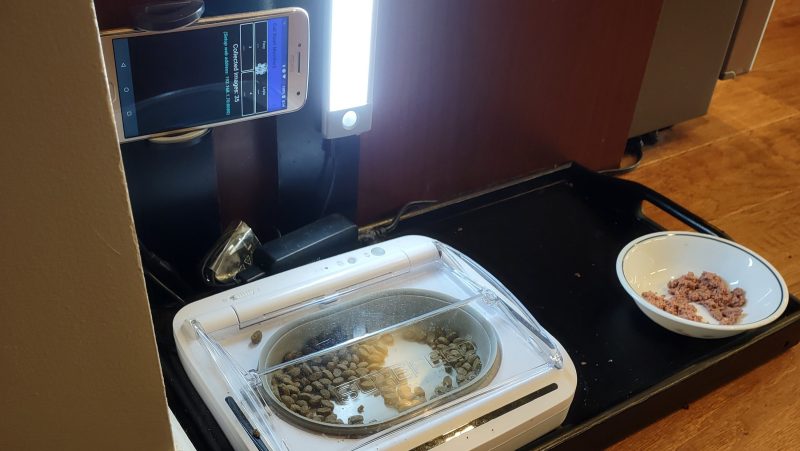
The hardware consists of a heavily modified feed bowl with a motorized lid that was originally operated by motion-detection, an old Android phone running a customized TensorFlow Lite model, and hardware to bridge them together. Bowl hardware has yet to be documented on [Joe]’s project page, aside from the hint that an Arduino (what else?) was involved, but the write up on feline facial recognition is fascinating.
See, when [Joe] started the project, there were no cat-identifying models available– but there were lots of human facial recognition models. Since humans and cats both have faces, [Joe] decided to use the MobileFaceNet model as a starting point, and just add extra training data in the form of 5000 furry feline faces. That ran into the hurdle that you can’t train a TFLite model, which MobileFaceNet is, so [Joe] reconstructed it as a Keras model using Google CoLab. Only then could the training occur, after which the modified model was translated back to TFLite for deployment on the Android phone as part of a bowl-controller app he wrote.
No one, [Joe] included, would say that this is the easiest, fastest, or possibly even most reliable solution– a cat smart enough not to show their face might sneak in after the authorized feline has their fill, taking advantage of a safety that won’t close a bowl on a kitty’s head, for example–but that’s what undeniably makes this a hack. It sounds like [Joe] had a great learning adventure putting this together, and the fact that it kept kitty on the proper diet is really just bonus.
Want to go on a learning adventure of your own? Click this finely-crafted link for all the details about this ongoing contest.