Posts with «3d printer hacks» label

Simple Hack Lets Smartphone Take Resin Printer Time-Lapses
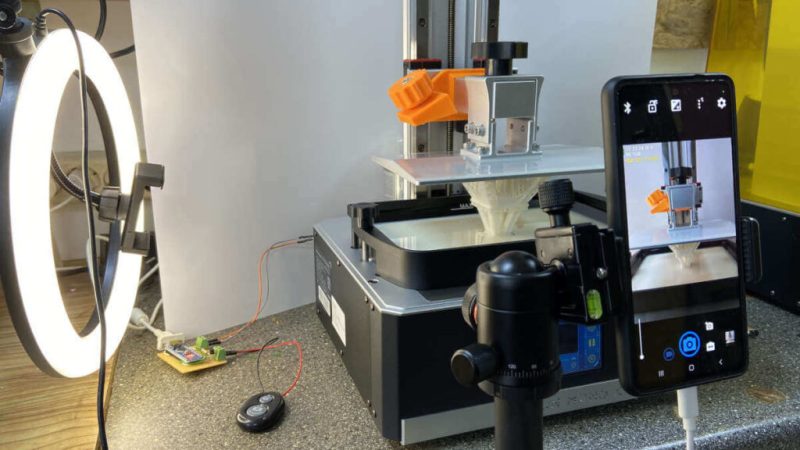
With how cheap they’re getting, everyone seems to be jumping on the resin printer bandwagon. They may not be able to fully replace your trusty old FDM printer, but for certain jobs, they just can’t be beaten. Sadly though, creating those smooth time-lapse videos of your prints isn’t quite as easy to do as it is on their filament-based counterparts.

Not as easy, perhaps, but not impossible. [Fraens] found a way to make time-lapses on any resin printer, and in a wonderfully hacky way. First, you need to find a smartphone, which shouldn’t be too hard, given how often we all tend to upgrade. [Fraens] recommends replacing the standard camera app on the phone with Open Camera, to prevent it from closing during the long intervals with nothing happening. The camera is triggered by any readily available Bluetooth dongle, which is connected via a simple transistor circuit to an Arduino output. To trigger the shutter, a light-dependent resistor (LDR) is connected to one of the microcontroller’s inputs. The LDR is placed inside the bed of the resin printer — an Anycubic Photon in this case — where light from the UV panel used to cross-link the resin can fall on it. A simple bit of Arduino code triggers the Bluetooth dongle at the right moment, capturing a series of stills which are later stitched together using DaVinci Resolve.

The short video below shows the results, which look pretty good to us. There are other ways to do this, of course, but we find the simplicity of this method pleasing.

Get Pumped for This Miniature Gym

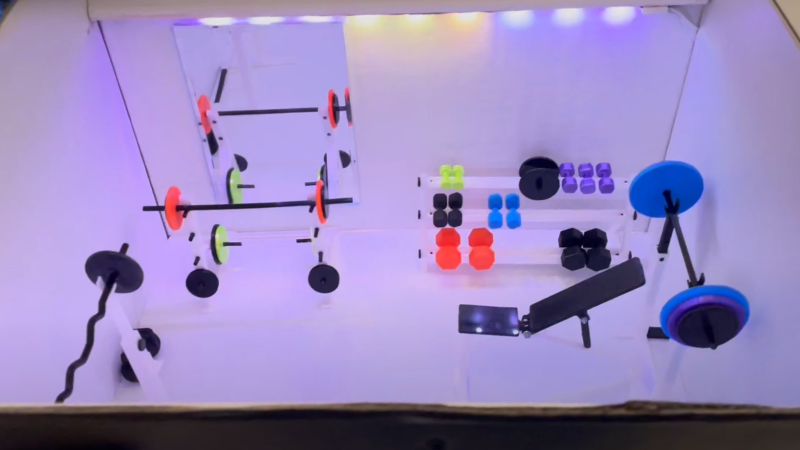
[Duncan McIntyre] lives in the UK but participated in a secret Santa gift exchange for his Dutch friends’ Sinterklaas celebration. In traditional maker fashion, [Duncan] went overboard and created a miniature gym gift box, complete with flashing lights, music and a motorized lid.

[Duncan] used [TanyaAkinora]’s 3D printed tiny gym to outfit the box with tiny equipment, with a tiny mirror added to round out the tiny room. An ATmega328P was used as the main microcontroller to drive the MP3 player module and A4988 stepper motor controller. The stepper motor was attached to a drawer slide via a GT2 timing belt and pulley to actuate the lid. Power is provided through an 18V, 2A power supply with an LM7805 providing power to the ATmega328P and supporting logical elements. As an extra flourish, [Duncan] added some hardware audio signal peak detection, fed from the speaker output, which was then sampled by the ATmega328P to be able to flash the lights in time with the playing music. A micro switch detects when the front miniature door is opened to begin the sequence of lights, song and lid opening.

[Duncan] provides source on GitHub for those curious about the Arduino code and schematics. We’re fans of miniature pieces of ephemera and we’ve featured projects ranging from tiny 3D printed tiny escalators to tiny arcade cabinets.

Video after the break!

Servo Plotter Needs Nothing Exotic

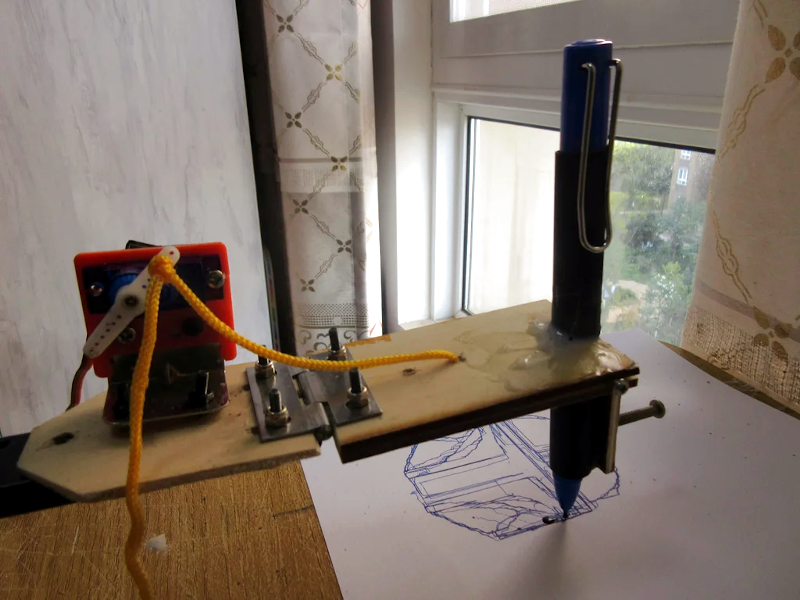
Although the widespread use of 3D printers has made things like linear bearings and leadscrews more common, you still can’t run down to your local big-box hardware store and get them. However, you can get drawer slides and any hobby shop can sell you some RC servos. That and an Arduino can make a simple and easy plotter. Just ask [JimRD]. You can also watch it do its thing in the video below.

Of course, servos aren’t usually what you use in a plotter. But the slides convert the rotation of the servo into linear motion. One servo for X and one for Y is all you need. Another microservo lifts the pen up and down using a hinge you could also get from a hardware store.

Is it pretty? No. Does it do amazing artwork? No, again. But it is the kind of thing you could probably throw together from things you happen to have hanging around, especially if you are about to trash an old desk or cabinet with slides in it.

This would make a great rainy day project. We are suckers for simple plotter projects even though you could just mate a pen to your 3D printer or CNC machine. Those won’t fit your whiteboard, though.

Tesla Model S Gets Boost with Jet Engine Upgrade

Tesla is well known for making cars that can accelerate quickly, but there’s always room for improvement. [Warped Perception] decided that his Tesla Model S P85D needed that little bit of extra oomph (despite the 0-60 MPH or 0-97 km/h time of 3.1 seconds), so he did what any sensible person would: add three jet turbines to the back of his car.

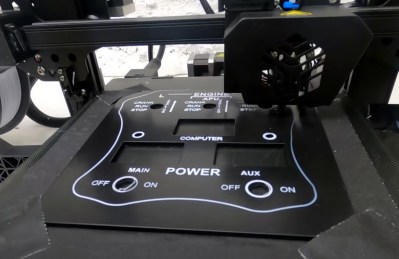
The best part of this particular build is the engineering and fabrication that made this happen. With over 200 pieces and almost all personally fabricated, this is a whirlwind of a build. The control panel is first, and there’s a particularly clever technique of 3D printing the lettering directly onto the control panel for the flat stuff. Then for the pieces with angles that would prevent the head from moving freely, he printed onto a plastic sheet in reverse, applied glue, then stuck the letters to the plate as a sheet. A top layer of clear coat ensures the letters won’t come off later.

Using a 3D printer to apply lettering on the control panel.

He installed the control electronics in the trunk with wiring strung from the car’s front to the rear. Three Arduinos serve as controllers for the jets. Afterward, came the bracket to hold the engines and attach it to the car’s underside. Unfortunately, supplies were a little hard to come by, so he had to make do with what was on hand. As a result it didn’t come out as strong as he would have hoped, but it’s still pretty impressive.

[Warped Perception] does a few tests before taking it out on the road. Then, he shifted the car into neutral and could drive the car solely on jet power, which was one of his goals. While we don’t love the idea of testing a jet engine on public roads, it certainly would discourage tailgaters.

Next, he finds a quieter road and does some speed tests. Unfortunately, it was drizzling, and the pavement was damp, putting a damper on his 0-60 standing times. Electric-only he gets 4.38 seconds, and turning on the jets plus electric shaves that down to 3.32 seconds. Overall, an incredible build that’s sure to draw a few curious glances whenever you’re out on the town.

If you’re looking to upgrade your Tesla, perhaps instead of jet engines, you might opt for a robot to plug it in for you?

Don’t Walk Past This 3D Printed Pedestrian Crossing Light

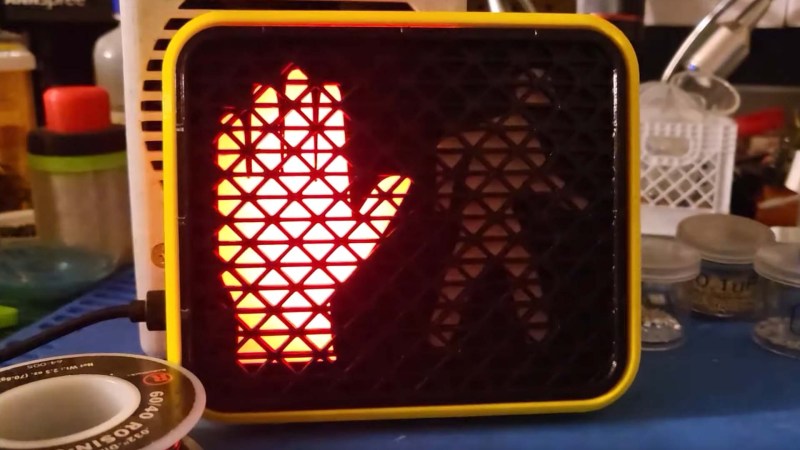
There’s just something so pleasing about scaled-down electronic replicas, and this adorable 3D printed pedestrian crossing light by [sjm4306] is no exception.

Although a little smaller than its real-world counterpart, the bright yellow housing and illuminated indicators on this pedestrian lamp are instantly recognizable due to their ubiquitous use throughout the United States. The handful of printed parts are held together using friction alone, which makes assembly a literal snap. The ‘safety grill’ with its many angles ended up being one of the most tedious parts of the build process, but the effort was definitely justified, as it just wouldn’t look right without it.

A suitably minuscule ATtiny85 drives a pair of LED strips that effectively mimic the familiar symbols for ‘Walk’ and ‘Don’t Walk’. [sjm4306] has designed the board and case in such a way to accommodate a variety of options. For example, there’s just enough room to squeeze in a thin battery, should you want to power this contraption on-the-go. If you don’t have an ATtiny85 on hand, the board also supports an ATmega328p or even an ESP8266.

All the build details are available over on Hackaday.io. While it’s billed as a ‘night light’, we think this could be an awesome platform for an office toy, similar to this office status light project. Or if you’ve somehow already got your hands on a full-size pedestrian lamp, why not hook it up to the Internet?

Big ‘F’ Key to Pay Big Respects

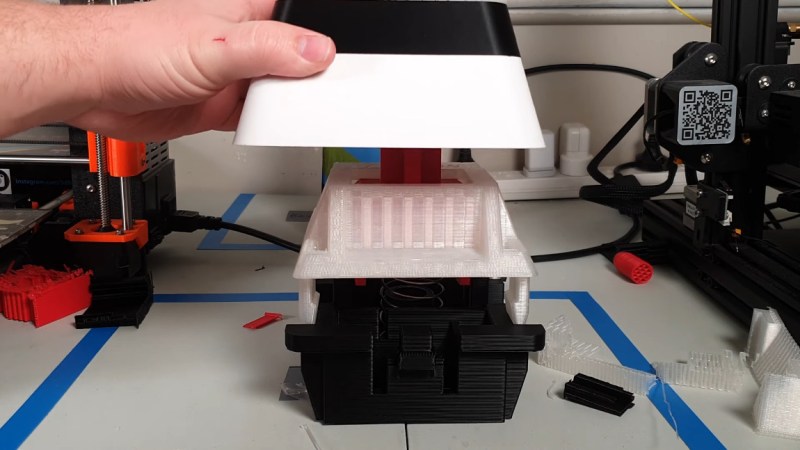
So your ally was slain. Your comrade has fallen. And somehow, that capital F coming from that tiny key is supposed to convey your respect? Please. What you need is a giant, dedicated F key that matches the size of your respect. And [Jaryd_Giesen] is gonna teach you how to build your own. Well, kind of. Between the Thingiverse build guide and the hilarious build video below, you’ll get the gist.

One of the coolest things about this build is the custom spring. Between a birthday time crunch and lockdown, there was just no way to source a giant spring in two days, so [Jaryd] printed a cylinder with a hole in it to chuck into a drill and stand in for a lathe. Ten attempts later, and the perfect spring was in there somewhere.

We love the level of detail here — making a pudding-style keycap to match the main keyboard is the icing on this clacky cake. But the best part is hidden away inside: the stem of the giant switch actuates a regular-sized key switch because it’s funnier that way. Since it’s a giant Gateron red, it doesn’t exactly clack, but it doesn’t sound linear, either, mostly because you can hear the printed pieces rubbing together. Check out the build video after the break, and hit up the second video if you just want to hear the thing.

Seeing things embiggened is one of our favorite things around here. Some things are just for looks, but other times they’re useful tools.

If you just want to hear it, here’s a link to the exact timestamp.

[via r/gaming]

RAMPS Rebuild Keeps Robox 3D Printer Out of Junk Bin

A 3D printer is a wonderful invention, but it needs maintenance like every machine that runs for long hours. [Rob Ward] had a well-used Robox 3D printer that was in need of some repairs, but getting the necessary replacement parts shipped to Australia was cost-prohibitive. Rather than see a beloved printer be scrapped as e-waste, he decided to rebuild it using components that he could more easily source. Unfortunately the proprietary software and design of the Robox made this a bit difficult, so it was decided a brain transplant was the best path forward.

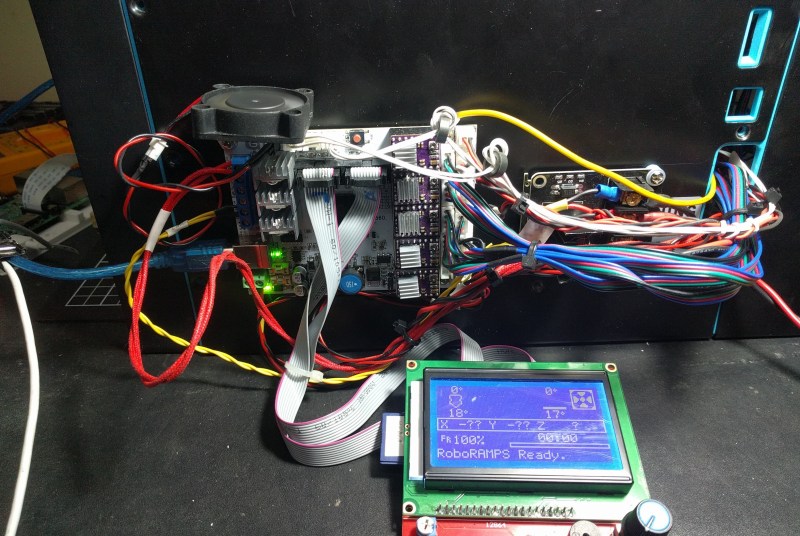
Step one was to deduce how the motors worked. A spare RAMPS 1.4 board and Arduino Mega2560 made short work of the limit switches and XYZ motors. This was largely accomplished by splicing into the PCBs themselves. The Bowden filament driver motor had a filament detector and an optical travel sensor that required a bit of extra tuning, but now the challenging task was next: extruding.

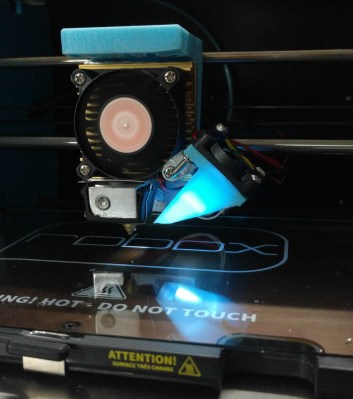
The printer’s new custom hotend.

With a cheap CR10 hot end from an online auction house, [Rob] began modifying the filament feed to feed in a different direction than the Robox was designed for (the filament comes in at a 90-degree angle on the stock Robox). A fan was needed to cool the filament feed line. Initial results were mixed with lots of blockages and clogs in the filament. A better hot end and a machined aluminum bracket for a smoother path made more reliable prints.

The original bed heater was an excellent heater but it was a 240 VAC heater. Reluctant to having high voltages running through his hacked system, he switched them out for 12 VDC adhesive pads. A MOSFET and MOSFET buffer allowed the bed to reach a temperature workable for PLA. [Rob] upgraded to a GT2560 running Marlin 2.x.x.

With a reliable machine, [Rob] stepped back to admire his work. However, the conversion to the feed being perpendicular to the bed surface had reduced his overall build height. With some modeling in OpenSCAD and some clever use of a standard silicone sock, he had a solution that fed the wire into the back of the hot end, allowing to reclaim some of the build height.

It was a long twelves months of work but the write-up is a joy to read. He’s included STL and SCAD files for the replacement parts on the printer. If you’re interested in seeing more machines rebuilt, why not take a look at this knitting machine gifted with a new brain.

Robot Arm Adds Freedom to 3D Printer

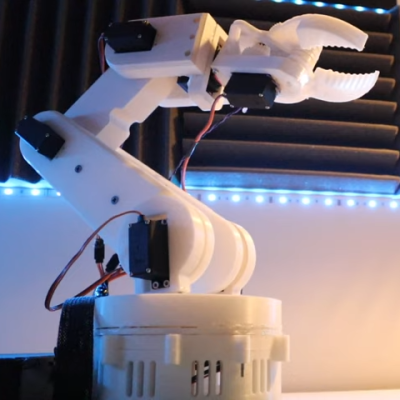
3D printers are an excellent tool to have on hand, largely because they can print other tools and parts rapidly without needing to have them machined or custom-ordered. 3D printers have dropped in price as well, so it’s possible to have a fairly capable machine in your own home for only a few hundred dollars. With that being said, there are some limitations to their function but some of them can be mitigated by placing the printer head on a robot arm rather than on a traditional fixed frame.

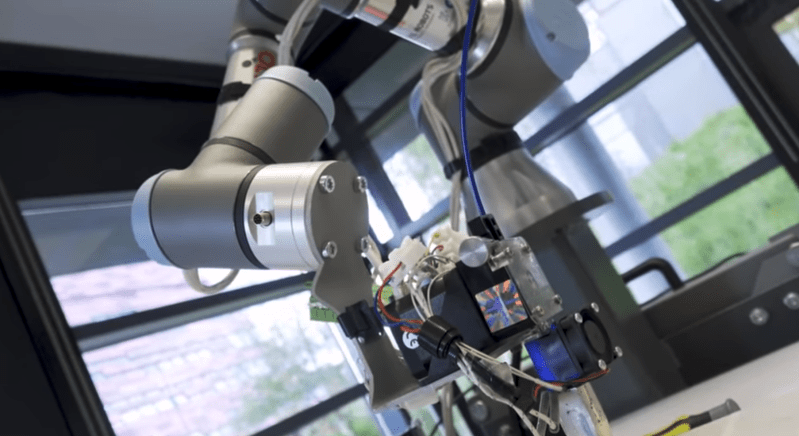
The experimental 3D printer at the University of Nottingham adds a six-axis robotic arm to their printer head, which allows for a few interesting enhancements. Since the printer head can print in any direction, it allows material to be laid down in ways which enhance the strength of the material by ensuring the printed surface is always correctly positioned with respect to new material from the printer head. Compared to traditional 3D printers which can only print on a single plane, this method also allows for carbon fiber-reinforced prints since the printer head can follow non-planar paths.

Of course, the control of this printer is much more complicated than a traditional three-axis printer, but it is still within the realm of possibility with readily-available robotics and microcontrollers. And this is a hot topic right now: we’ve seen five-axis 3D printers, four-axis 3D printers, and even some clever slicer hacks that do much the same thing. Things are finally heating up in non-planar 3D printing!

Thanks to [Feinfinger] for the tip!

3D Printed Gesture-Controlled Robot Arm is a Ton of Tutorials

Ever wanted your own gesture-controlled robot arm? [EbenKouao]’s DIY Arduino Robot Arm project covers all the bases involved, but even if a robot arm isn’t your jam, his project has plenty to learn from. Every part is carefully explained, complete with source code and a list of required hardware. This approach to documenting a project is great because it not only makes it easy to replicate the results, but it makes it simple to remix, modify, and reuse separate pieces as a reference for other work.

[EbenKouao] uses a 3D-printable robotic gripper, base, and arm design as the foundation of his build. Hobby servos and a single NEMA 17 stepper take care of the moving, and the wiring and motor driving is all carefully explained. Gesture control is done by wearing an articulated glove upon which is mounted flex sensors and MPU6050 accelerometers. These sensors detect the wearer’s movements and turn them into motion commands, which in turn get sent wirelessly from the glove to the robotic arm with HC-05 Bluetooth modules. We really dig [EbenKouao]’s idea of mounting the glove sensors to this slick 3D-printed articulated gauntlet frame, but using a regular glove would work, too. The latest version of the Arduino code can be found on the project’s GitHub repository.

Most of the parts can be 3D printed, how every part works together is carefully explained, and all of the hardware is easily sourced online, making this a very accessible project. Check out the full tutorial video and demonstration, embedded below.

3D printing has been a boon for many projects, especially those involving robotic arms. All kinds of robotic arm projects benefit from the advantages of 3D printing, from designs that focus on utility and function, to clever mechanical designs that reduce part count in unexpected ways.

Lego Ziplining Robot Climbs for Claps

The internet has given us plenty of cool robotics projects, but we don’t think we’ve seen one zipline before. At least not until now.

This cool little ziplining robot is courtesy of the folks over at [Tart Robotics]. As they described it, the robot moves using a 4-bar linkage mechanism with the motor’s torque “transferred to the arm mechanisms through a pair of bevel gears and a worm drive.” Even cooler, the robot is activated by clapping. The faster you clap, the faster the robot moves. That’s sure to wow your friends at your next virtual hacker meetup.

They had to do a bit of custom 3D printing work to get a few of the Lego components to connect with their non-Lego off-the-shelf bits, so that took a bit of time. Specifically, they had some cheap, non-branded DC motors that they used that did not naturally mate with the Lego Technic components used to create the rest of the robot’s body. Nothing a few custom 3D printing jobs couldn’t solve.

It always amazes us what cool contraptions you can put together with a few Lego blocks. What’s your favorite Lego project?