Posts with «linux» label

Because You Can: Linux On An Arduino Uno

There are a few “Will it run” tropes when it comes to microcontrollers, one for example is “Will it run Doom?“, while another is “Will it run Linux?”. In one of the lowest spec examples of the last one, [gvl610] has got an up-to-date Linux kernel to boot on a vanilla Arduino Uno. And your eyes didn’t deceive you, that’s a full-fat kernel rather than the cut-down μClinux for microcontrollers.

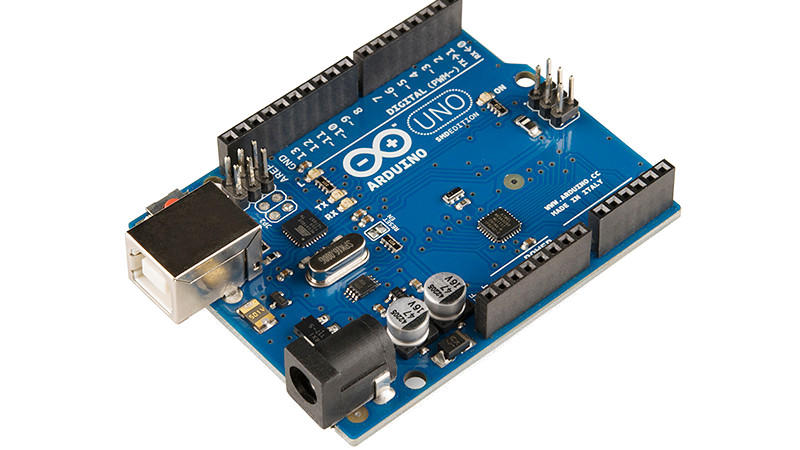
Those of you who’ve been around a while will probably have guessed how this was done, as the ATmega328 in the Uno has no MMU and is in to way powerful enough for the job. It’s running an emulator, in this case just enough RISC-V to be capable, and as you’d imagine it’s extremely slow. You’ll be waiting many hours for a shell with this machine.

The code is written in pure AVR C, and full instructions for compilation are provided. Storage comes from an SD card, as the ATmega’s meagre 32k is nowhere near enough. If you’re having a bit of deja vu here we wouldn’t blame you, but this one is reputed to be worse than the famous 2012 “Worst PC Ever“, which emulated ARM instead of RISC-V.

Thanks [Electronics Boy] for the tip!

Hack a Day 14 Oct 06:00

Converting an 80s Typewriter Into a Linux Terminal

Typewriters may be long past their heyday, but just because PCs, word processor software, and cheap printers have made them largely obsolete doesn’t mean the world is better off without them. Using a typewriter is a rich sensory experience, from the feel of the keys under your fingers that even the clickiest of PC keyboards can’t compare with, to the weirdly universal sound of the type hitting paper.

So if life hands you a typewriter, why not put it back to work? That’s exactly what [Artillect] did by converting an 80s typewriter into a Linux terminal. The typewriter is a Brother AX-25, one of those electronic typewriters that predated word processing software and had a daisy wheel printhead, a small LCD display, and a whopping 8k of memory for editing documents. [Artillect] started his build by figuring out which keys mapped to which characters in the typewriter’s 8×11 matrix, and then turning an Arduino and two multiplexers loose on the driving the print head. The typewriter’s keyboard is yet used for input, as the project is still very much in the prototyping phase, so a Raspberry Pi acts as a serial monitor between the typewriter and a laptop. The video below has a good overview of the wiring and the software, and shows the typewriter banging out Linux command line output.

For now, [Artillect]’s typewriter acts basically like an old-school teletype. There’s plenty of room to take this further; we’d love to see this turned into a cyberdeck complete with a built-in printer, for instance. But even just as a proof of concept, this is pretty great, and you can be sure we’ll be trolling the thrift stores and yard sales looking for old typewriters.

Arduino Yùn Rev.2 is here!

Since its launch in 2013, the Yùn–a small Linux machine and a microcontroller in a small Arduino form factor–found its way into hundreds of thousands of projects and professional applications. Last year, we decided that it was time for a refresh and began working hard to develop a true open-source design, with more compelling features and better overall software support.

The new board, which is expected to hit the market in the second half of April, will include enhanced functionality and compatibility with its predecessor.

Why a New Yùn

The Yùn enjoyed tremendous success; however, it ended up being affected by the internal issues we dealt with over the past couple of years and support has been quite intermittent.

For example, the board was never really an open-source product and the software had some challenges that we wanted to fix, especially from a security point of view.

What’s New in Rev.2

Hardware:  

  • Much better, more robust power supply
  • New Ethernet connector with a clever mounting solution that enables the use of all possible shields with no risk for accidental short circuits
  • Horizontal USB connector to save vertical space
  • Improved USB hub

Software: 

  • Software stack updated to OpenWRT latest version, including all patches
  • SSL support on the bridge Arduino / Linux bridge

Yùn Rev.2 is scheduled to begin shipping in April. Until then, you can stay up-to-date by clicking “NOTIFY ME” on our store

You can now use Arduino to program Linux IoT devices

Today, at Embedded Linux Conference 2018, Arduino announced the expansion of the number of architectures supported by its Arduino Create platform for the development of IoT applications. With this new release, Arduino Create users can manage and program a wide range of popular Linux® single-board computers like the AAEON® UP² board, Raspberry Pi® and BeagleBone® as if they were regular Arduino boards. Multiple Arduino programs can run simultaneously on a Linux-based board and interact and communicate with each other, leveraging the capabilities provided by the new Arduino Connector. Moreover, IoT devices can be managed and updated remotely, independently from where they are located.

To further simplify the user journey, Arduino has also developed a novel out-of-the-box experience for Raspberry Pi and BeagleBone boards, in addition to Intel®  SBCs, which enables anyone to set up a new device from scratch via the cloud without any previous knowledge by following an intuitive web-based wizard. Arduino plans to continue enriching and expanding the set of features of Arduino Create in the coming months.

“With this release, Arduino extends its reach into edge computing, enabling anybody with Arduino programming experience to manage and develop complex multi-architecture IoT applications on gateways,” said Massimo Banzi, Arduino CTO. “This is an important step forward in democratizing access to the professional Internet of Things.”

“At Arduino we want to empower anyone to be an active player in the digital world. Being able to run Arduino code and manage connected Linux devices is an important step in this direction, especially for IoT applications that need more computing power, like AI and computer vision,” added Fabio Violante, Arduino CEO.

Linux support comes to Arduino Create

We’re excited to announce a new update to the Arduino Create web platform, which will enable fast and easy development and deployment of IoT applications with integrated cloud services on Linux-based devices.

What this means is that users will be able to program their Linux boards as if they were regular Arduinos. Multiple Arduino programs can run simultaneously on a Linux board and programs can communicate with each other leveraging the capabilities of the new open source Arduino Connector. 

Arduino Create Cloud now allows users to manage individual IoT devices, and configure them remotely and independently from where they are located. To further simplify the user journey, we’ve also developed a novel “out of the box” experience that will let anyone set up a new device from scratch via the cloud without any previous knowledge by following an intuitive web-based wizard

The initial release has been sponsored by Intel® and supports X86/X86_64 boards. As a reference implementation, a simplified user experience has been designed for the AAEON® UP² board, although other platforms are already supported by the Arduino Create Cloud platform, such as the Intel® NUC, Dell Wyse®, Gigabyte™ GB-BXT.

In the coming months, we plan to expand support for Linuxbased IoT devices running on other hardware architectures. Until then, you can find more information here and follow the tutorials below to help get you going:


A Concept for a Robot that I am planning to build

A Concept for a Robot that I am planning to build

Jetsonbot

Primary image

What does it do?

Avoid obstacles with vision

Hardware overview is in the video with a better description.

Jetson TK1 processes images from the USB webcam and the two Raspberry Pi NoIR cameras then sends commands to the Arduino Mega in order to move autonomously around the environment avoiding obstacles.

The software is custom written and uses OpenCV for image processing.  No ROS, no SLAM, no neural nets or whatever.

Cost to build

Embedded video

Finished project

Number

Time to build

Type

URL to more information

Weight

In Bed With an Arduino, Fighting Sleep Apnea

Sometimes the journey is as interesting as the destination, and that’s certainly the case with [Marc]’s pursuit of measuring his sleep apnea (PDF, talk slides. Video embedded below.). Sleep apnea involves periods of time when you don’t breathe or breathe shallowly for as long as a few minutes and affects 5-10% of middle-aged men (half that for women.) [Marc]’s efforts are still a work-in-progress but along the way he’s tried a multitude of things, all involving different technology and bugs to work out. It’s surprising how many ways there are to monitor breathing.

Debugging the Eeonyx conductive fabric approach

His attempts started out using a MobSenDat Kit, which includes an Arduino compatible board, and an accelerometer to see just what his sleeping positions were. That was followed by measuring blood O2 saturation using a cheap SPO2 sensor that didn’t work out, and one with Bluetooth that did work but gave results as a graph and not raw data.

Next came measuring breathing by detecting airflow from his nose using a Wind Sensor, but the tubes for getting the “wind” from his nose to the sensor were problematic, though the approach was workable. In parallel with the Wind Sensor he also tried the Zeo bedside sleep manager which involves wearing a headband that uses electrical signals from your brain to tell you what sleep state you’re in. He particularly liked this one as it gave access to the data and even offered some code.

And his last approach we know of was to monitor breathing by putting some form of band around his chest/belly to measure expansion and contraction. He tried a few bands and an Eeonyx conductive textile/yarn turned out to be the best. He did run into noise issues with the Xbee, as well as voltage regulator problems, and a diode that had to be bypassed.

But while [Marc]’s list of approaches to monitor sleep is long, he hasn’t exhausted all approaches. For example there’s monitoring a baby using lasers to detect whether or not the child is still breathing.

[Via Adafruit]


Filed under: Medical hacks
Hack a Day 14 Jul 00:00

Discover the latest Arduino build for ARM Linux

As many of you already noticed, we recently released a new “Linux ARM” version of the Arduino IDE available for download on our website together with the usual “Linux 32bit” and “Linux 64bit.”

This release enables you to run the Arduino Software (IDE) on many of the mini PC boards based on ARM6+ processors currently on the market, including Raspberry Pi, C.H.I.P., BeagleBone, UDOO… just to name a few.


The Linux ARM release has been strongly supported by our community and we would like to thank all the people that helped to make this happen: GitHub handles @CRImier, @NicoHood, @PaulStoffregen, @ShorTie8, and to everyone that patiently tested and reported problems.

If you are interested (and brave!), you can read the full story and explore the complete list of collaborators below:

https://github.com/arduino/Arduino/pull/3549
https://github.com/arduino/arduino-builder/issues/105
https://github.com/arduino/Arduino/pull/4457
https://github.com/arduino/Arduino/pull/4517

Disclaimer: The release is “experimental,” meaning that it mostly works but some boards do not work or may not produce the desired result… enjoy imperfection and give us feedback on Github!