Posts with «hacking» label

More WiFiChron variants

This post shows two WiFiChron mods, that look more like finished projects rather than just experiments.

First one uses the WiFiChron board connected on I2C to two Adafruit Quad Alphanumeric Displays (I2C addresses 0x70 and 0x71). The WiFiChron software has similar adaptation as the one for HDSP clock (see this post for details).


Did I mention that two plexiglass plates are still waiting to be cut and screwed in the standoffs?

This (poor) video shows it in action.

The interesting thing about the Chinese clones (of the Adafruit displays) I had in hand is that each module has one (2 digit) display red and the other orange. Initially I thought it's a manufacturing error, but after checking, it seems that this is intended (for reasons I do not understand).

The second one is an "HDSP clock" with a 8-character display with 16-segment LED modules, introduced here, cased in a LEGO enclosure.

After cutting the top of board off (since there is no HDSP-2534) and a little filing of all sides, the PCB fit perfectly between the LEGO bricks.


For this display, the line that has to be enabled (un-commented) in DAL.h is:

#define DISPLAY_HT16K33


Alternative displays for HDSP or WiFiChron clocks

So you would like to build your own HDSP clock or WiFiChron clock but you find the HDSP-2534 display too small or too expensive. Why not just replace it with a bigger 8-character display, like the 1-inch 8 x 16-segment or two cascaded Adafruit 0.54" 4 x 14-segment backpacks? We have you covered, in software. Both these displays are now supported, as extension classes of the DAL (Display Abstraction Layer), together with the 128x64 I2C OLED and the HT1632-based 32x8 LED matrix display (used to be from Sure  Electronics). Support could be further extended to LCD displays (think big font on 40x4), MAX6955 with 8 x 16 segment etc., basically anything that can show 8 alphanumeric characters (numbers only, like regular Nixie tubes, would not suffice).

Below are some examples.

Two Adafruit 4-character backpacks are connected on I2C, addresses 0x70 (default) and 0x71, handled by class DisplayAda14seg, which in turn uses the Adafruit_LEDBackpack library.


To enable this display, uncomment the line (in DAL.h, comment out the rest):
#define DISPLAY_ADA_14SEG  // 2 x Adafruit 4x14seg displays;

Functionality for the 8x32 (or 16x32) LED matrix display is implemented in class DisplayHT1632, which is based on code recycled from Wise Clock 4. To enable this display, simply uncomment the line (in DAL.h, comment out the others):
#define DISPLAY_HT1632	 // Sure 8x32 LED matrix controlled by HT1632;


To accommodate the 8 characters on a 32-pixel line, fontTiny had to be used (each character is 4 pixels wide).

Note the connections for the HT1632 display (in DisplayHT1632.cpp):
#define HT1632_DATA 4 // Data pin (pin 7 of display connector)
#define HT1632_CS         3      // Chip Select (pin 1 of display connnector)
#define HT1632_WRCLK 2 // Write clock pin (pin 5 of display connector)
#define HT1632_CLK 5 // clock pin (pin 2 of display connector)

Other possible definitions in DAL.h are:
//****************************************************************************************
// Define the display you wish to use here.
// Comment out the ones not used.

//#define DISPLAY_HDSP2534 // original HDSP-2534 display in HDSP clock;
//#define DISPLAY_HUB08 // TODO: 8x32 LED matrix display with cascading shift registers (?)
//#define DISPLAY_DL1414 // 2 x DL1414; tested June 23, 2018 (http://timewitharduino.blogspot.com/2018/06/wifichron-adapter-for-dl-1414-displays.html)
//#define DISPLAY_HT16K33 // my 8x16-segment driven by HK16K33, tested Jul 26, 2020;
//#define DISPLAY_OLED // I2C OLED; tested
#define DISPLAY_HT1632 // Sure 8x32 LED matrix controlled by HT1632; tested Aug 14, 2020;
//#define DISPLAY_MAX6955 // TODO: 8x16 segment driven by MAX6955
//#define DISPLAY_LCD1602 // TODO: classic LCD 16x2 (or better 40x4, with big font);
//#define DISPLAY_ADA_14SEG // 2 x Adafruit 4x14seg displays, wired on 0x70 and 0x71 I2C addresses; tested Jul 26, 2020;

// show time on the 60-pixel Adafruit Neopixel ring;
//#define _ADD_NEOPIXEL_
//****************************************************************************************


And so on.


Alternative displays for HDSP or WiFiChron clocks

So you would like to build your own HDSP clock or WiFiChron clock but you find the HDSP-2534 display too small or too expensive. Why not just replace it with a bigger 8-character display, like the 1-inch 8 x 16-segment or two cascaded Adafruit 0.54" 4 x 14-segment backpacks? We have you covered, in software. Both these displays are now supported, as extension classes of the DAL (Display Abstraction Layer), together with the 128x64 I2C OLED and the HT1632-based 32x8 LED matrix display (used to be from Sure  Electronics). Support could be further extended to LCD displays (think big font on 40x4), MAX6955 with 6x16 segment etc., basically anything that can show 8 alphanumeric characters (numbers only, like regular Nixie tubes, would not suffice).

Below are some examples.

Two Adafruit 4-character backpacks are connected on I2C, addresses 0x70 (default) and 0x71, handled by class DisplayAda14seg, which in turn uses the Adafruit_LEDBackpack library.


To enable this display, uncomment the line (in DAL.h, comment out the rest):
#define DISPLAY_ADA_14SEG  // 2 x Adafruit 4x14seg displays;

Functionality for the 8x32 (or 16x32) LED matrix display is implemented in class DisplayHT1632, which is based on code recycled from Wise Clock 4. To enable this display, simply uncomment the line (in DAL.h, comment out the others):
#define DISPLAY_HT1632	 // Sure 8x32 LED matrix controlled by HT1632;


To accommodate the 8 characters on a 32-pixel line, fontTiny had to be used (each character is 4 pixels wide).

Other possible definitions in DAL.h are:
//****************************************************************************************
// Define the display you wish to use here.
// Comment out the ones not used.

//#define DISPLAY_HDSP2534 // original HDSP-2534 display in HDSP clock;
//#define DISPLAY_HUB08 // TODO: 8x32 LED matrix display with cascading shift registers (?)
//#define DISPLAY_DL1414 // 2 x DL1414; tested June 23, 2018 (http://timewitharduino.blogspot.com/2018/06/wifichron-adapter-for-dl-1414-displays.html)
//#define DISPLAY_HT16K33 // my 8x16-segment driven by HK16K33, tested Jul 26, 2020;
//#define DISPLAY_OLED // I2C OLED; tested
#define DISPLAY_HT1632 // Sure 8x32 LED matrix controlled by HT1632; tested Aug 14, 2020;
//#define DISPLAY_MAX6955 // TODO: 8x16 segment driven by MAX6955
//#define DISPLAY_LCD1602 // TODO: classic LCD 16x2 (or better 40x4, with big font);
//#define DISPLAY_ADA_14SEG // 2 x Adafruit 4x14seg displays, wired on 0x70 and 0x71 I2C addresses; tested Jul 26, 2020;

// show time on the 60-pixel Adafruit Neopixel ring;
//#define _ADD_NEOPIXEL_
//****************************************************************************************


And so on.


HDSP clock with SCD5583 display

Here is another interesting "intelligent" LED matrix display, whose name actually makes some sense (unlike HDSP-2354, among many others): SCD5583A. I reckon it means: "Serial Character Display with 5x5x8 dot matrix". 3 is the code for green (0 for red, 1 for yellow).
This display is now obsolete (replaced by touch screens in avionics, the industry for which it was designed), but it is still available on ebay for a reasonable price (except for incredibly high shipping cost).

Compared to other intelligent displays like the above-mentioned HDSP-2534 employed by the HDSP clock (hence the bland unimaginative name), SCD558X does not have an internally-defined font and requires the user to provide one. This makes it a little more complicated to use, but also allows for more flexibility, making it truly international (non-English character set). Even more, each pixel can be addressed individually, like a graphical 5x40 LED matrix.
The fact that is serial means fewer pins are required for interfacing (3 control pins in this case) and less driving circuitry (no need for the external shift register).

The photo below shows the display connected to an Arduino and running the HDSP sketch adapted for SCD5833.


Practically, the HDSP sketch uses only one function to write to display, aptly called "writeDisplay()", that needs to be re-written. The support for SCD5583 is provided by the class SCD5583, shown below (header + cpp files, compiled with Arduino IDE 1.8.13).

#ifndef _SCD5583_H_
#define _SCD5583_H_

#include  "Arduino.h"

class SCD5583
{
  public:
    SCD5583(byte loadPin, byte dataPin, byte clkPin);
    void clearMatrix();
    void setBrightness(byte b);
    void writeLine(char text[9]);

  private:
    void _sendData(byte data);
    void _getCharDefinition(byte* rows, char c);
    void _selectIndex(byte position);

    byte _loadPin;
    byte _dataPin;
    byte _clkPin;
};

#endif // _SCD5583_H_
-----------------------------------------------
#include "SCD5583.h"
#include "font5x5.h"

#define MAX_CHARS 8   // set to 10 for SCD5510X (10 digits) or to 4 for SCD554X (4 digits);
#define NUM_ROWS  5

SCD5583::SCD5583(byte loadPin, byte dataPin, byte clkPin)
{
  pinMode(loadPin, OUTPUT);
  pinMode(dataPin, OUTPUT);
  pinMode(clkPin, OUTPUT);
  _loadPin = loadPin;
  _dataPin = dataPin;
  _clkPin  = clkPin;
  clearMatrix();
//  setBrightness(0);
}

void SCD5583::clearMatrix()
{
  _sendData(B11000000);
}

void SCD5583::setBrightness(byte b)
{
  if (b > 0 && b < 7)
  {
     _sendData(B11110000 + b);
  }
}

void SCD5583::_selectIndex(byte position)
{
   _sendData(B10100000 + position);
}

void SCD5583::_sendData(byte data)
{
  byte mask = 1;
  digitalWrite(_loadPin, LOW);
  digitalWrite(_clkPin,  LOW);
  for (byte i = 0; i < 8; i++)
  {
    digitalWrite(_dataPin, mask & data? HIGH : LOW);
    digitalWrite(_clkPin, HIGH);
//  delay(10);
    digitalWrite(_clkPin, LOW);
    mask = mask*2;
  }
  digitalWrite(_loadPin, HIGH);
}

void SCD5583::_getCharDefinition(byte* rows, char c)
{
  for (byte i = 0; i < NUM_ROWS; i++)
  {
    rows[i] = font5x5[((c- 0x20) * NUM_ROWS) + i];
  }
}

void SCD5583::writeLine(char* text)
{
  byte rows[NUM_ROWS];
  for (int i = 0; i < MAX_CHARS; i++)
  {
    _selectIndex(i);
    _getCharDefinition(rows, text[i]);
    for (int r = 0; r < NUM_ROWS; r++)
    {
      _sendData(rows[r]);
    }
  }
}

As mentioned previously, the font must be provided too (content of file "font5x5.h" shown below):

#ifndef _FONT5X5_H_
#define _FONT5X5_H_

// ascii characters 0x41-0x7a (32-127);
static unsigned char font5x5[] =
{
  0x00, 0x20, 0x40, 0x60, 0x80, // space
  0x04, 0x24, 0x44, 0x60, 0x84, // !
  0x0A, 0x2A, 0x40, 0x60, 0x80, // "
  0x0A, 0x3F, 0x4A, 0x7F, 0x8A, // #
  0x0F, 0x34, 0x4E, 0x65, 0x9E, // $
  0x19, 0x3A, 0x44, 0x6B, 0x93, // %
  0x08, 0x34, 0x4D, 0x72, 0x8D, // &
  0x04, 0x24, 0x40, 0x60, 0x80, // '
  0x02, 0x24, 0x44, 0x64, 0x82, // (
  0x08, 0x24, 0x44, 0x64, 0x88, // )
  0x15, 0x2E, 0x5F, 0x6E, 0x95, // *
  0x04, 0x24, 0x5F, 0x64, 0x84, // +
  0x00, 0x20, 0x40, 0x64, 0x84, // ,
  0x00, 0x20, 0x4E, 0x60, 0x80, // -
  0x00, 0x20, 0x40, 0x60, 0x84, // .
  0x01, 0x22, 0x44, 0x68, 0x90, // /
  0x0E, 0x33, 0x55, 0x79, 0x8E, // 0
  0x04, 0x2C, 0x44, 0x64, 0x8E, // 1
  0x1E, 0x21, 0x46, 0x68, 0x9F, // 2
  0x1E, 0x21, 0x4E, 0x61, 0x9E, // 3
  0x06, 0x2A, 0x5F, 0x62, 0x82, // 4
  0x1F, 0x30, 0x5E, 0x61, 0x9E, // 5
  0x06, 0x28, 0x5E, 0x71, 0x8E, // 6
  0x1F, 0x22, 0x44, 0x68, 0x88, // 7
  0x0E, 0x31, 0x4E, 0x71, 0x8E, // 8
  0x0E, 0x31, 0x4F, 0x62, 0x8C, // 9
  0x00, 0x24, 0x40, 0x64, 0x80, // :
  0x00, 0x24, 0x40, 0x6C, 0x80, // ;
  0x02, 0x24, 0x48, 0x64, 0x82, // <
  0x00, 0x3F, 0x40, 0x7F, 0x80, // =
  0x08, 0x24, 0x42, 0x64, 0x88, // >
  0x0E, 0x31, 0x42, 0x64, 0x84, // ?
  0x0E, 0x35, 0x57, 0x70, 0x8E, // @
  0x04, 0x2A, 0x5F, 0x71, 0x91, // A
  0x1E, 0x29, 0x4E, 0x69, 0x9E, // B
  0x0F, 0x30, 0x50, 0x70, 0x8F, // C
  0x1E, 0x29, 0x49, 0x69, 0x9E, // D
  0x1F, 0x30, 0x5E, 0x70, 0x9F, // E
  0x1F, 0x30, 0x5E, 0x70, 0x90, // F
  0x0F, 0x30, 0x53, 0x71, 0x8F, // G
  0x11, 0x31, 0x5F, 0x71, 0x91, // H
  0x0E, 0x24, 0x44, 0x64, 0x8E, // I
  0x01, 0x21, 0x41, 0x71, 0x8E, // J
  0x13, 0x34, 0x58, 0x74, 0x93, // K
  0x10, 0x30, 0x50, 0x70, 0x9F, // L
  0x11, 0x3B, 0x55, 0x71, 0x91, // M
  0x11, 0x39, 0x55, 0x73, 0x91, // N
  0x0E, 0x31, 0x51, 0x71, 0x8E, // O
  0x1E, 0x31, 0x5E, 0x70, 0x90, // P
  0x0C, 0x32, 0x56, 0x72, 0x8D, // Q
  0x1E, 0x31, 0x5E, 0x74, 0x92, // R
  0x0F, 0x30, 0x4E, 0x61, 0x9E, // S
  0x1F, 0x24, 0x44, 0x64, 0x84, // T
  0x11, 0x31, 0x51, 0x71, 0x8E, // U
  0x11, 0x31, 0x51, 0x6A, 0x84, // V
  0x11, 0x31, 0x55, 0x7B, 0x91, // W
  0x11, 0x2A, 0x44, 0x6A, 0x91, // X
  0x11, 0x2A, 0x44, 0x64, 0x84, // Y
  0x1F, 0x22, 0x44, 0x68, 0x9F, // Z
  0x07, 0x24, 0x44, 0x64, 0x87, // [
  0x10, 0x28, 0x44, 0x62, 0x81, // \
  0x1C, 0x24, 0x44, 0x64, 0x9C, // ]
  0x04, 0x2A, 0x51, 0x60, 0x80, // ^
  0x00, 0x20, 0x40, 0x60, 0x9F, // _
  0x0A, 0x2A, 0x40, 0x60, 0x80, // '
  0x00, 0x2E, 0x52, 0x72, 0x8D, // a
  0x10, 0x30, 0x5E, 0x71, 0x9E, // b
  0x00, 0x2F, 0x50, 0x70, 0x8F, // c
  0x01, 0x21, 0x4F, 0x71, 0x8F, // d
  0x00, 0x2E, 0x5F, 0x70, 0x8E, // e
  0x04, 0x2A, 0x48, 0x7C, 0x88, // f
  0x00, 0x2F, 0x50, 0x73, 0x8F, // g
  0x10, 0x30, 0x56, 0x79, 0x91, // h
  0x04, 0x20, 0x4C, 0x64, 0x8E, // i
  0x00, 0x26, 0x42, 0x72, 0x8C, // j
  0x10, 0x30, 0x56, 0x78, 0x96, // k
  0x0C, 0x24, 0x44, 0x64, 0x8E, // l
  0x00, 0x2A, 0x55, 0x71, 0x91, // m
  0x00, 0x36, 0x59, 0x71, 0x91, // n
  0x00, 0x2E, 0x51, 0x71, 0x8E, // o
  0x00, 0x3E, 0x51, 0x7E, 0x90, // p
  0x00, 0x2F, 0x51, 0x6F, 0x81, // q
  0x00, 0x33, 0x54, 0x78, 0x90, // r
  0x00, 0x23, 0x44, 0x62, 0x8C, // s
  0x08, 0x3C, 0x48, 0x6A, 0x84, // t
  0x00, 0x32, 0x52, 0x72, 0x8D, // u
  0x00, 0x31, 0x51, 0x6A, 0x84, // v
  0x00, 0x31, 0x55, 0x7B, 0x91, // w
  0x00, 0x32, 0x4C, 0x6C, 0x92, // x
  0x00, 0x31, 0x4A, 0x64, 0x98, // y
  0x00, 0x3E, 0x44, 0x68, 0x9E, // z
  0x06, 0x24, 0x48, 0x64, 0x86, // {
  0x04, 0x24, 0x44, 0x64, 0x84, // |
  0x0C, 0x24, 0x42, 0x64, 0x8C, // }
  0x00, 0x27, 0x5C, 0x60, 0x80, // ~
};

#endif  // _FONT5X5_H_

And finally, the changes in HDSP.ino are:

1. add the following line at the top:
#include "SCD5583.h"

// SCD5583 pins: LOAD to D4, DATA to D5, SDCLK to D3;
SCD5583 scd(4,5,3);
2. replace the function writeDisplay() written for HDSP-2534, with the following:
void writeDisplay()
{
  scd.writeLine(displayBuffer);
}

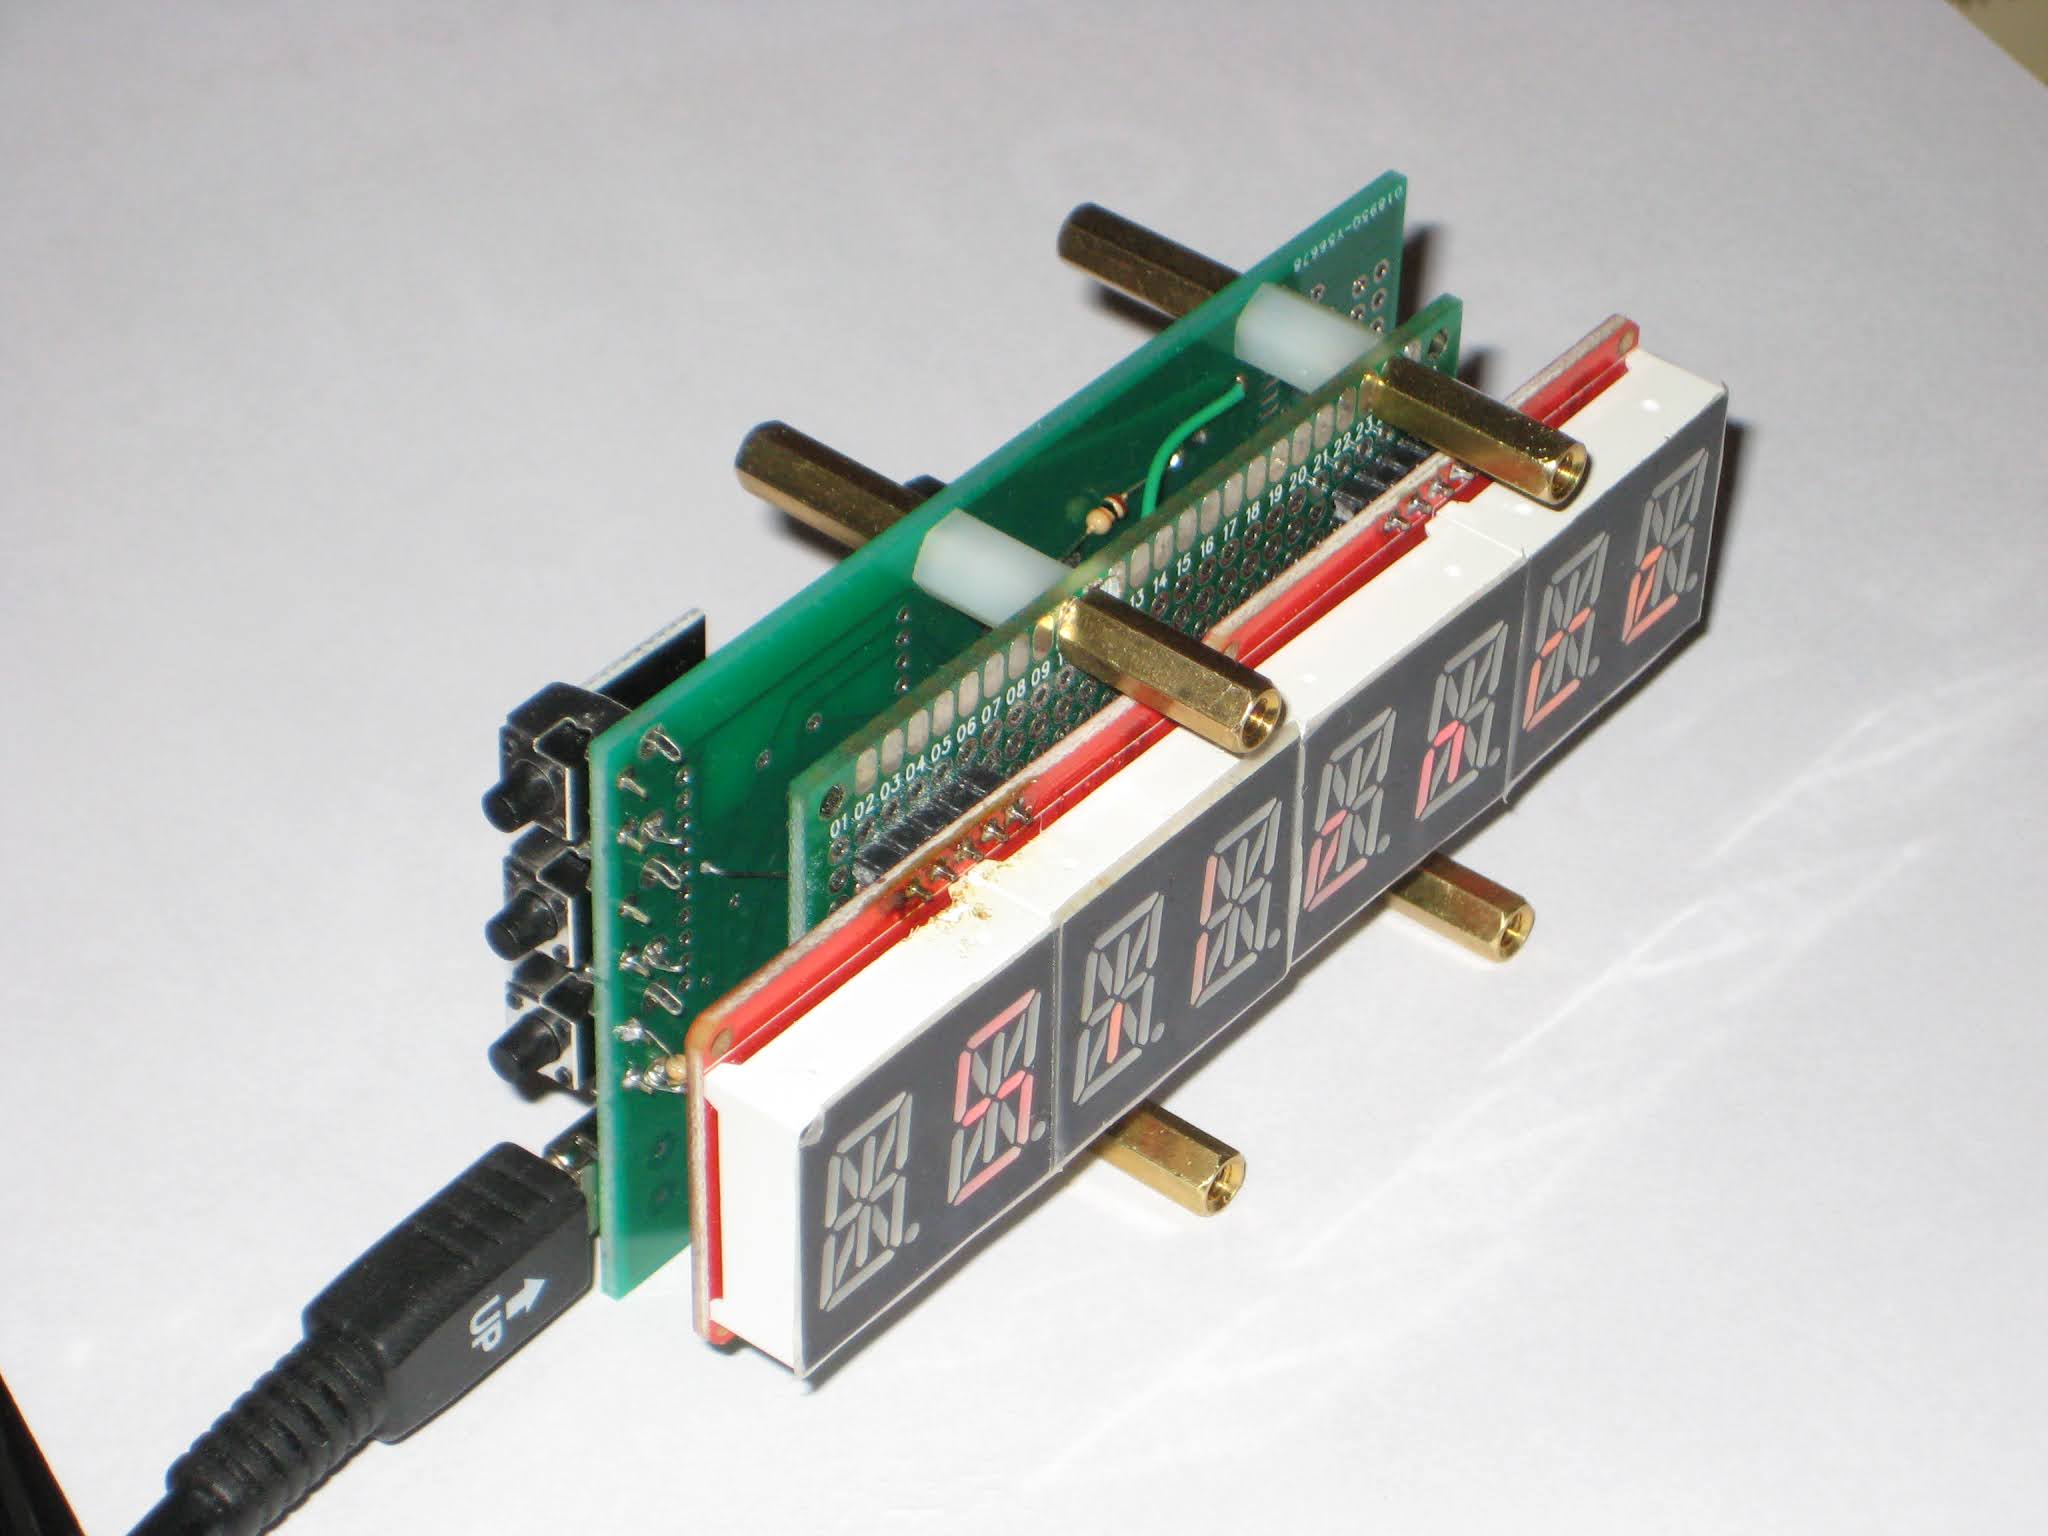
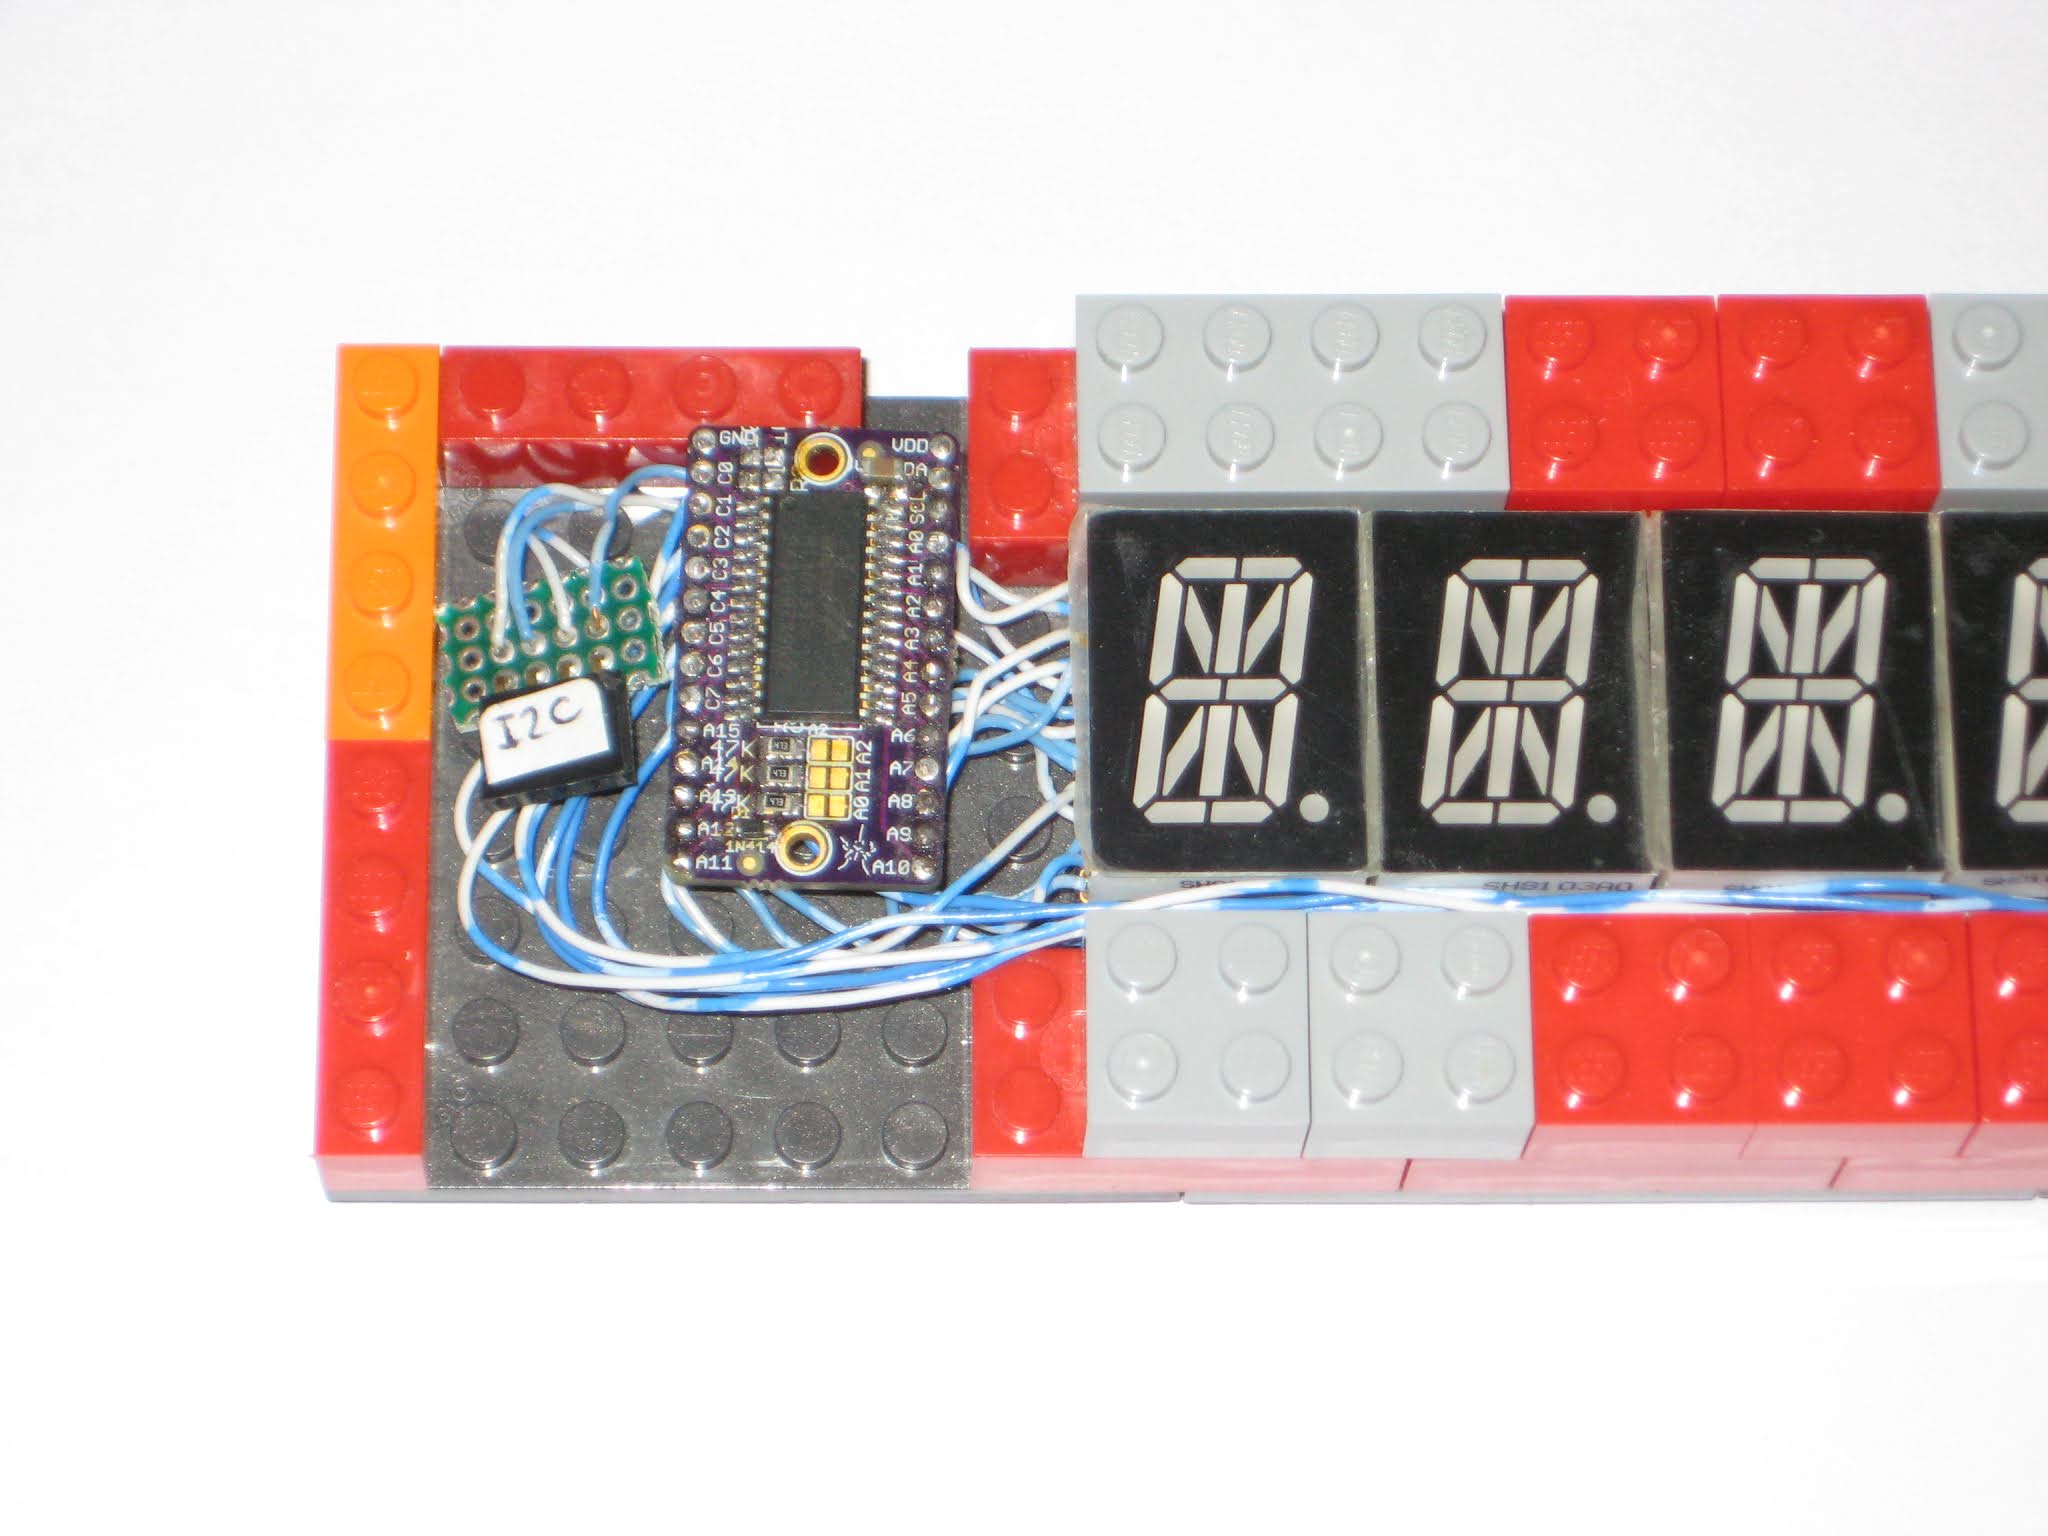
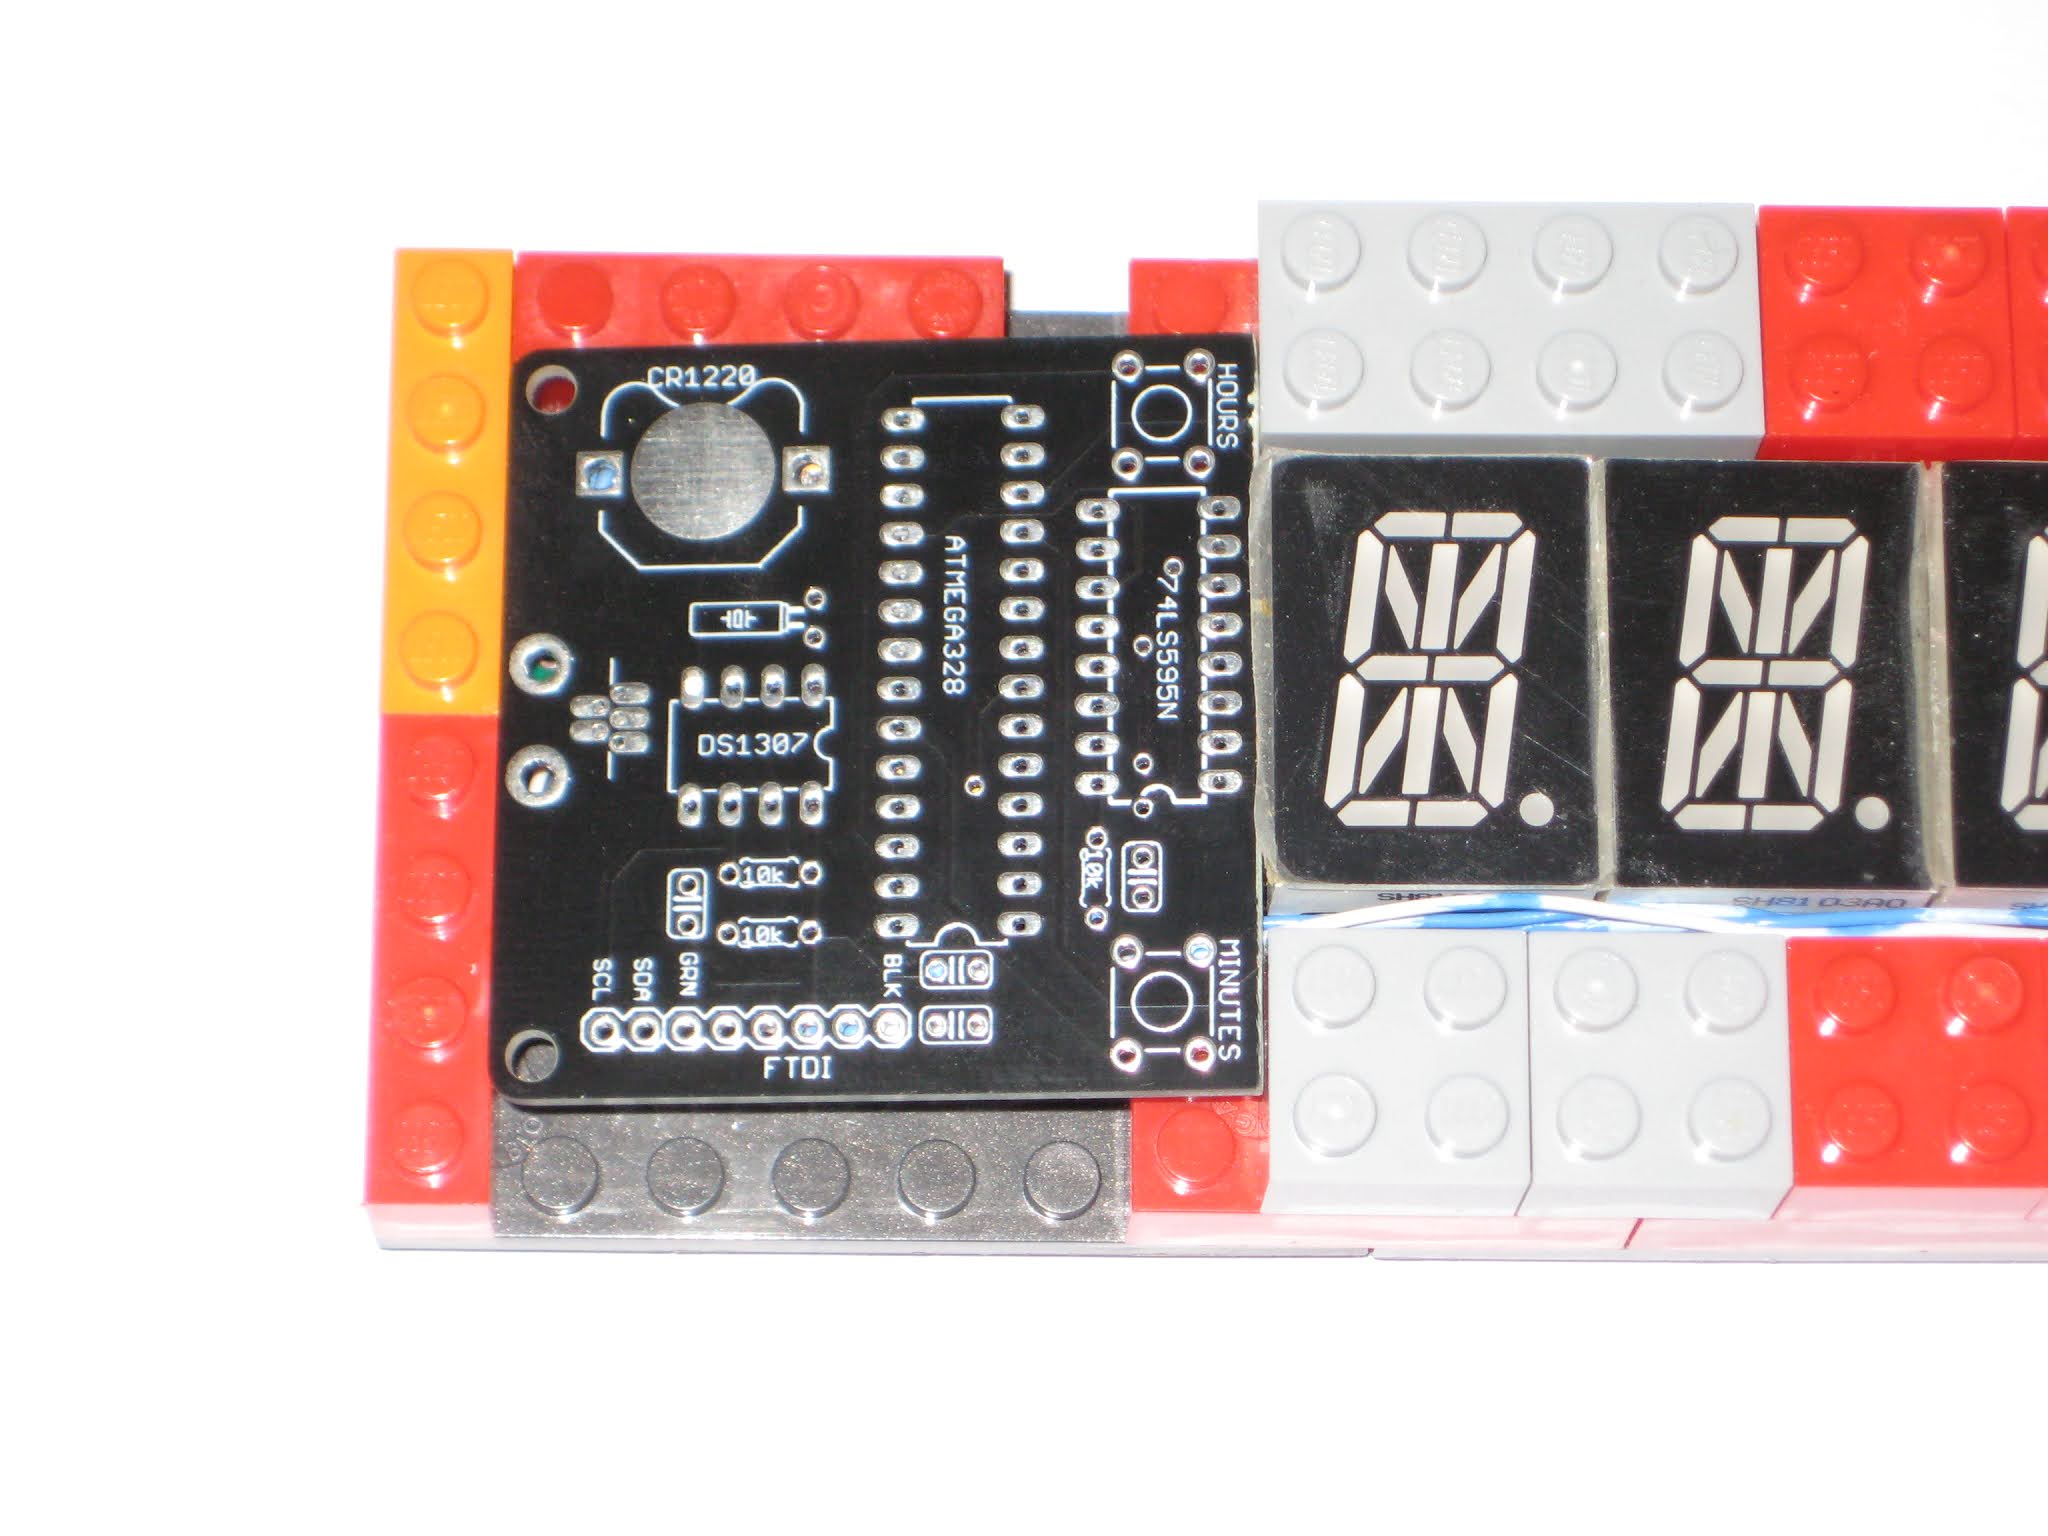
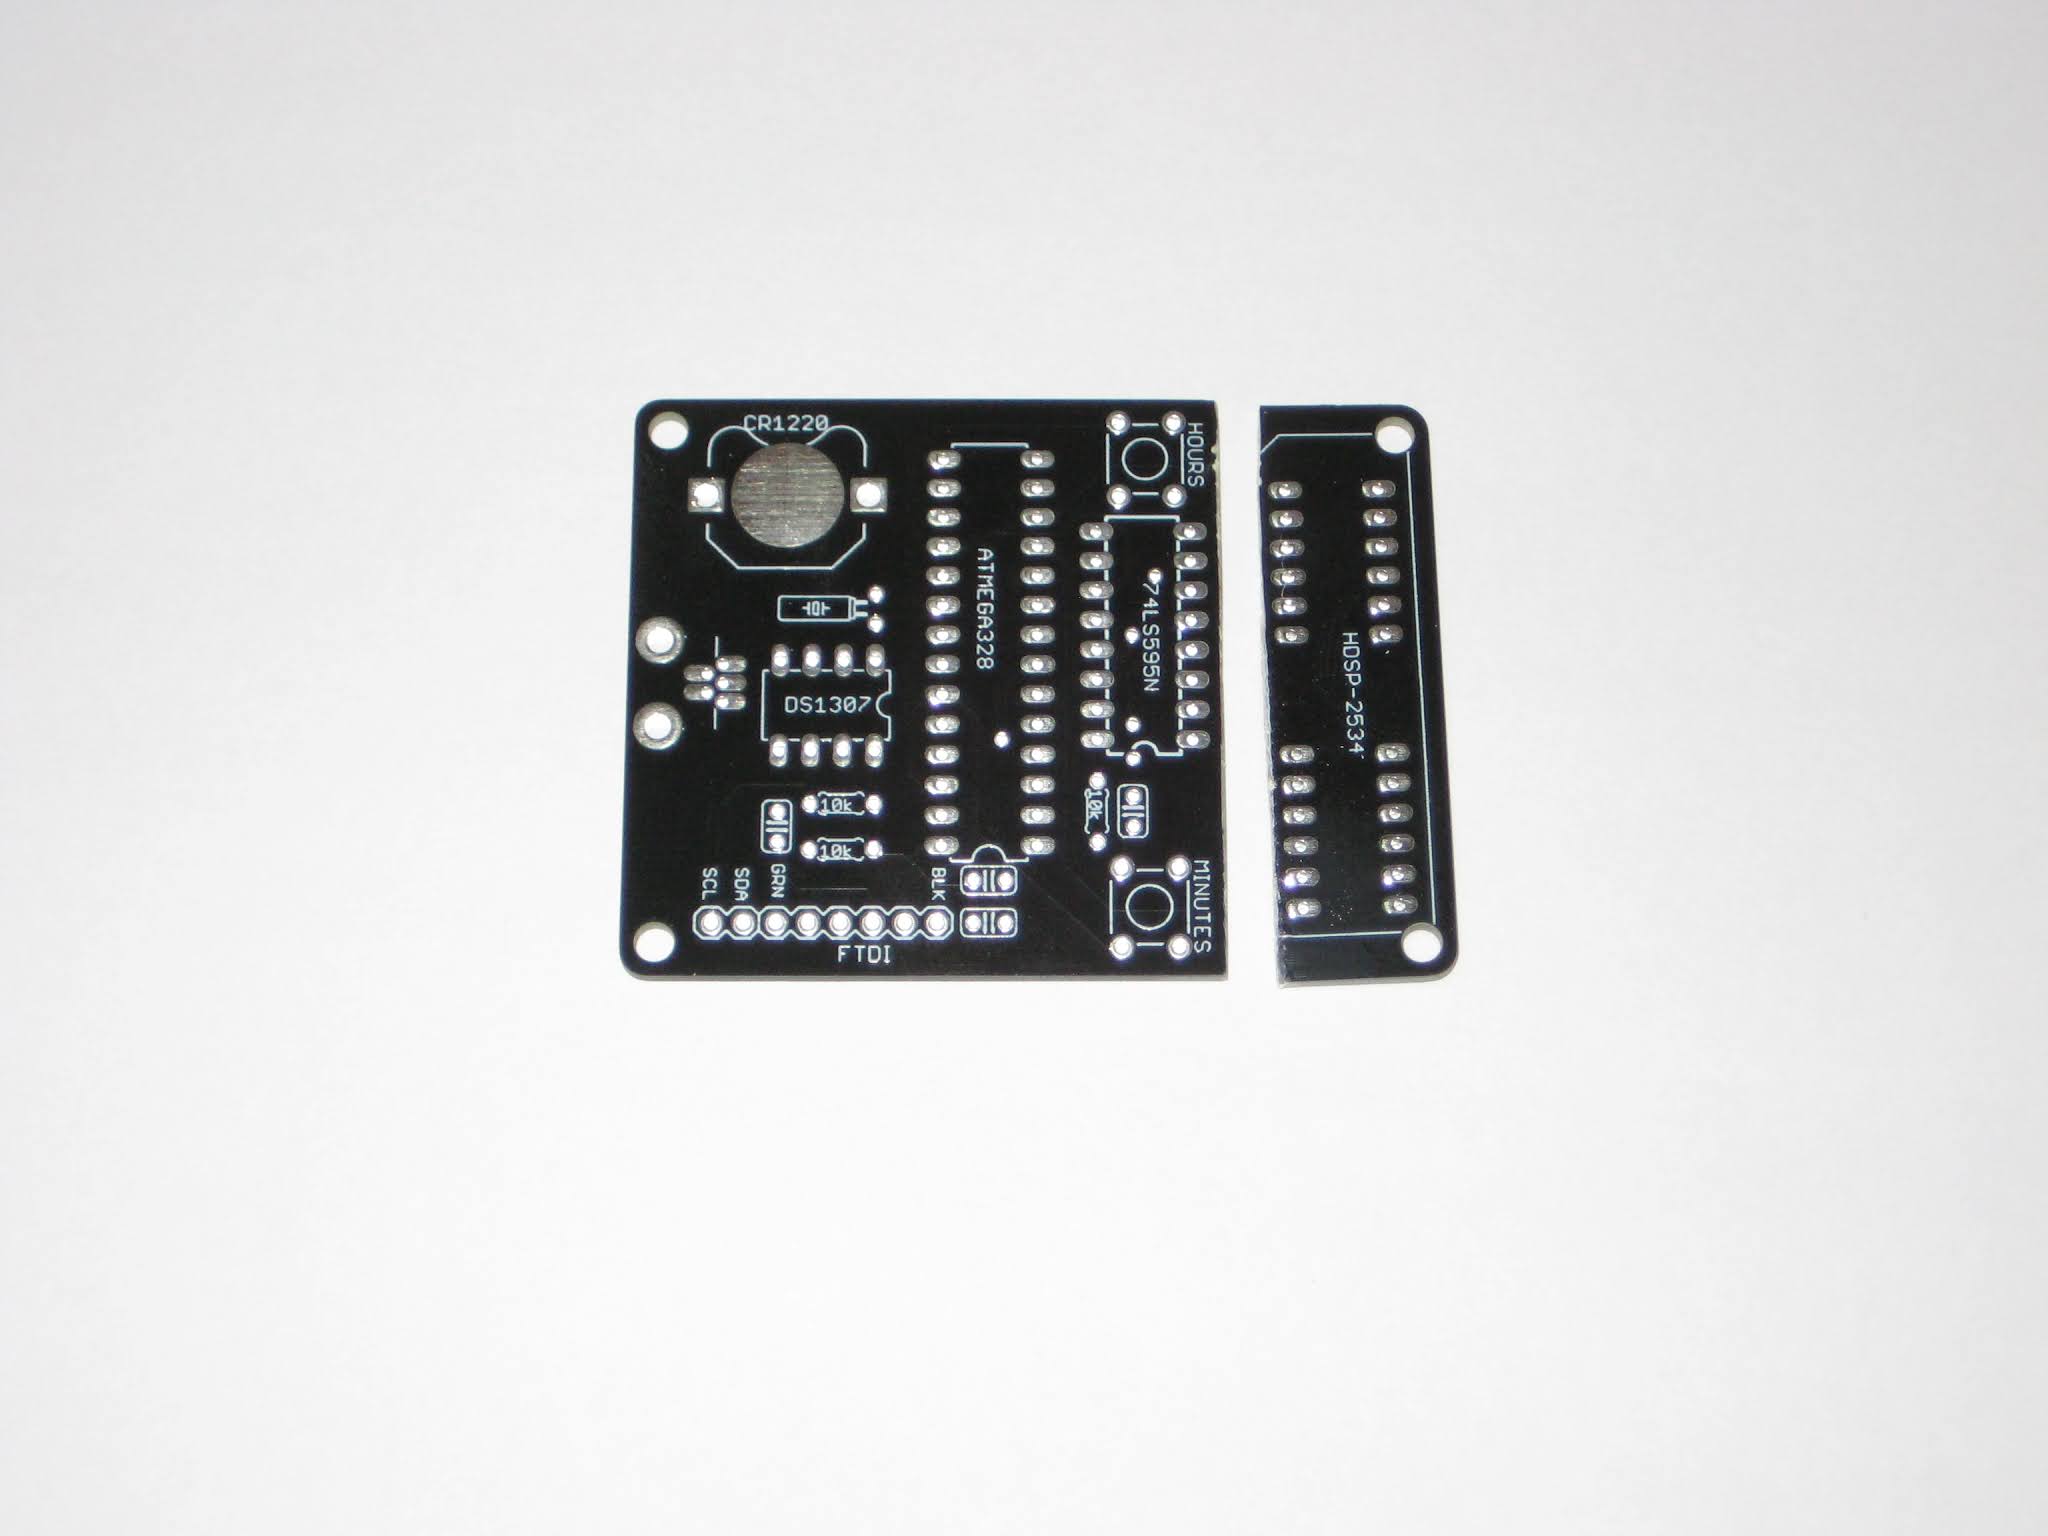
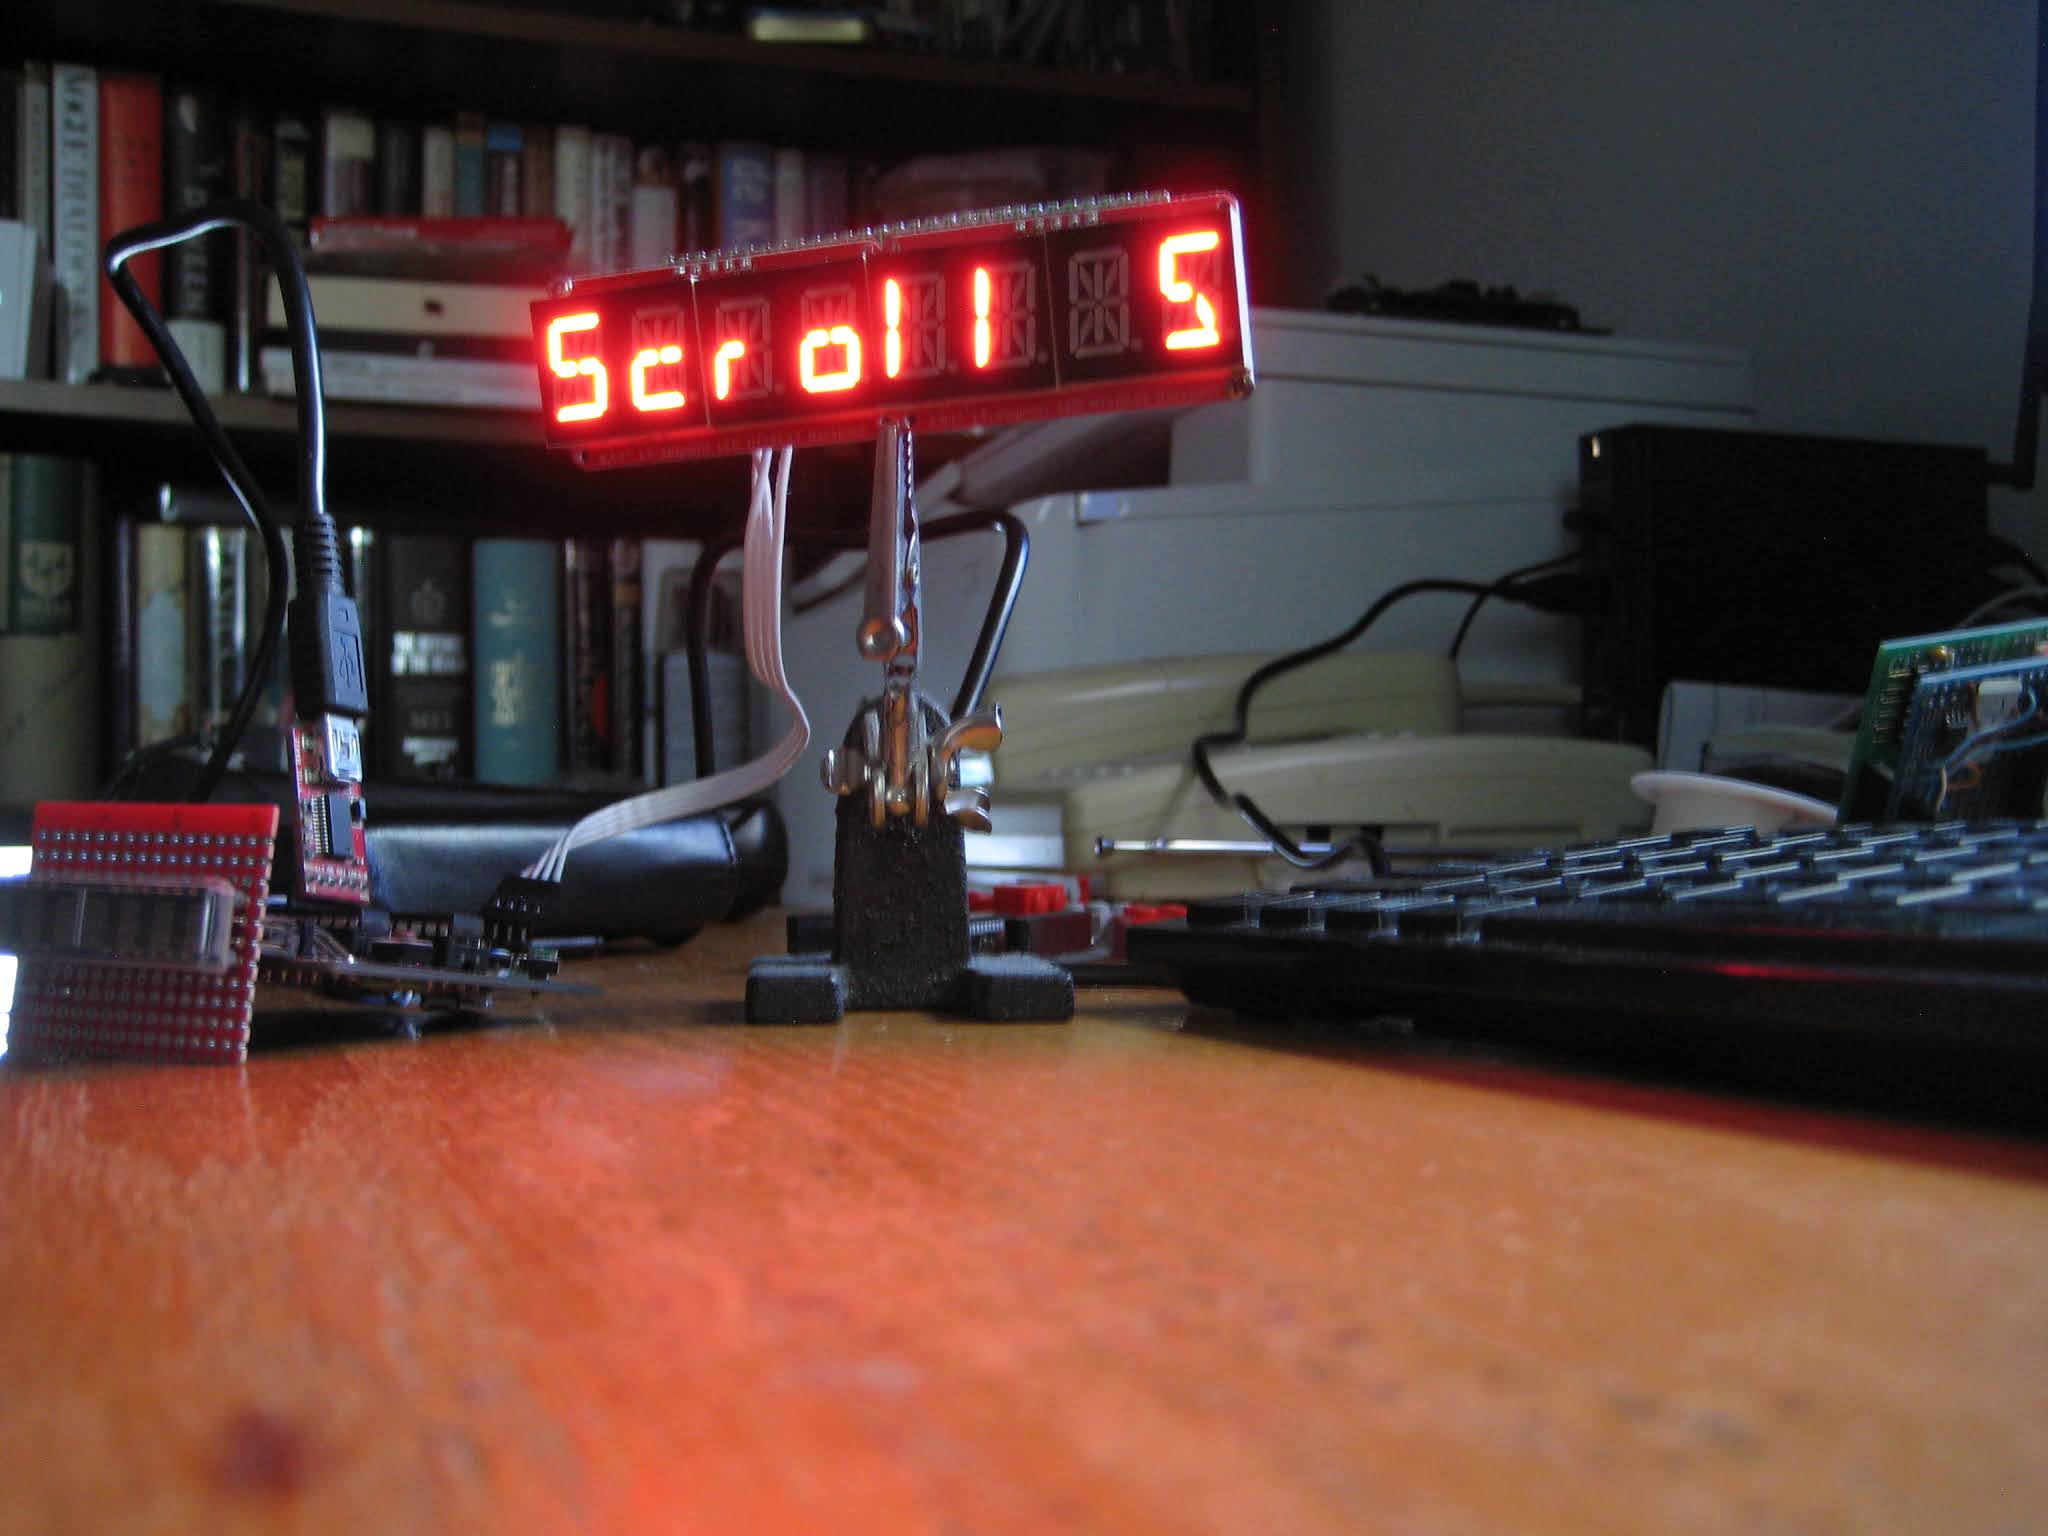
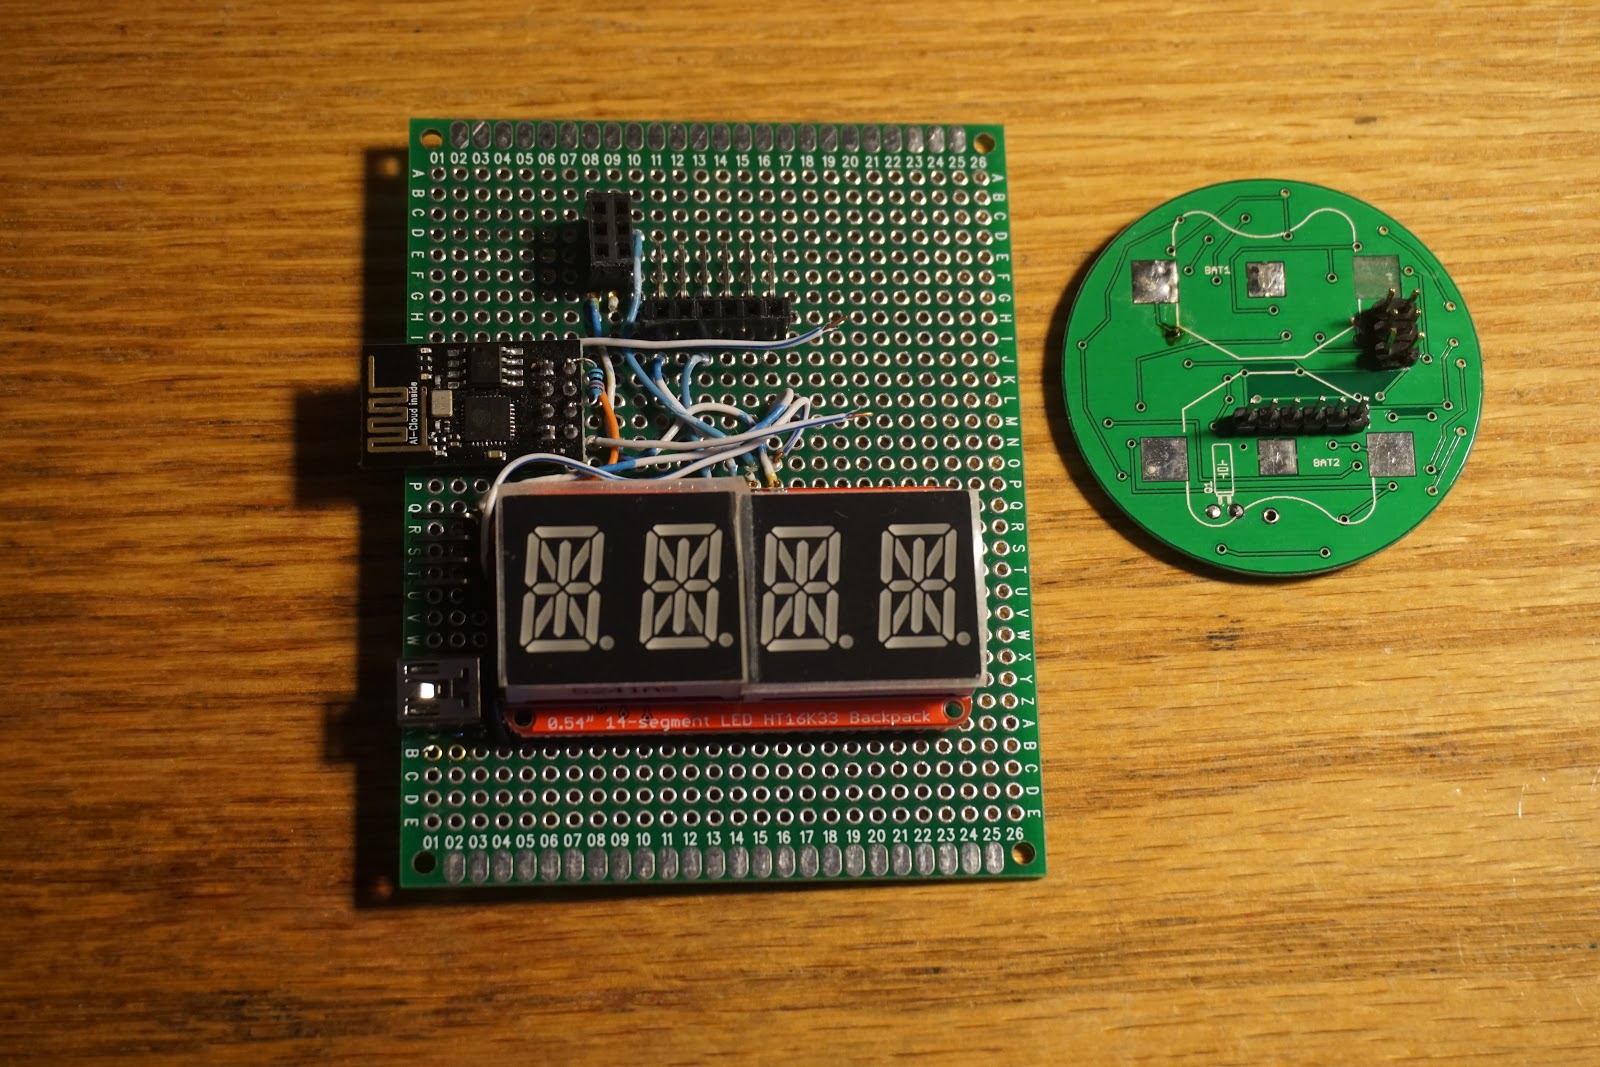
Hardware-wise, some re-wiring is required on the HDSP board, starting with the removal of the 595 shift register. Then, D3, D4 and D5 (ATmega328 pins 5, 6, 11) must be connected respectively to SDCLK, LOAD and DATA pins (1, 2, 27) of the SCD5583 display.

And there you have it, a working HDSP clock with SCD5583 display.

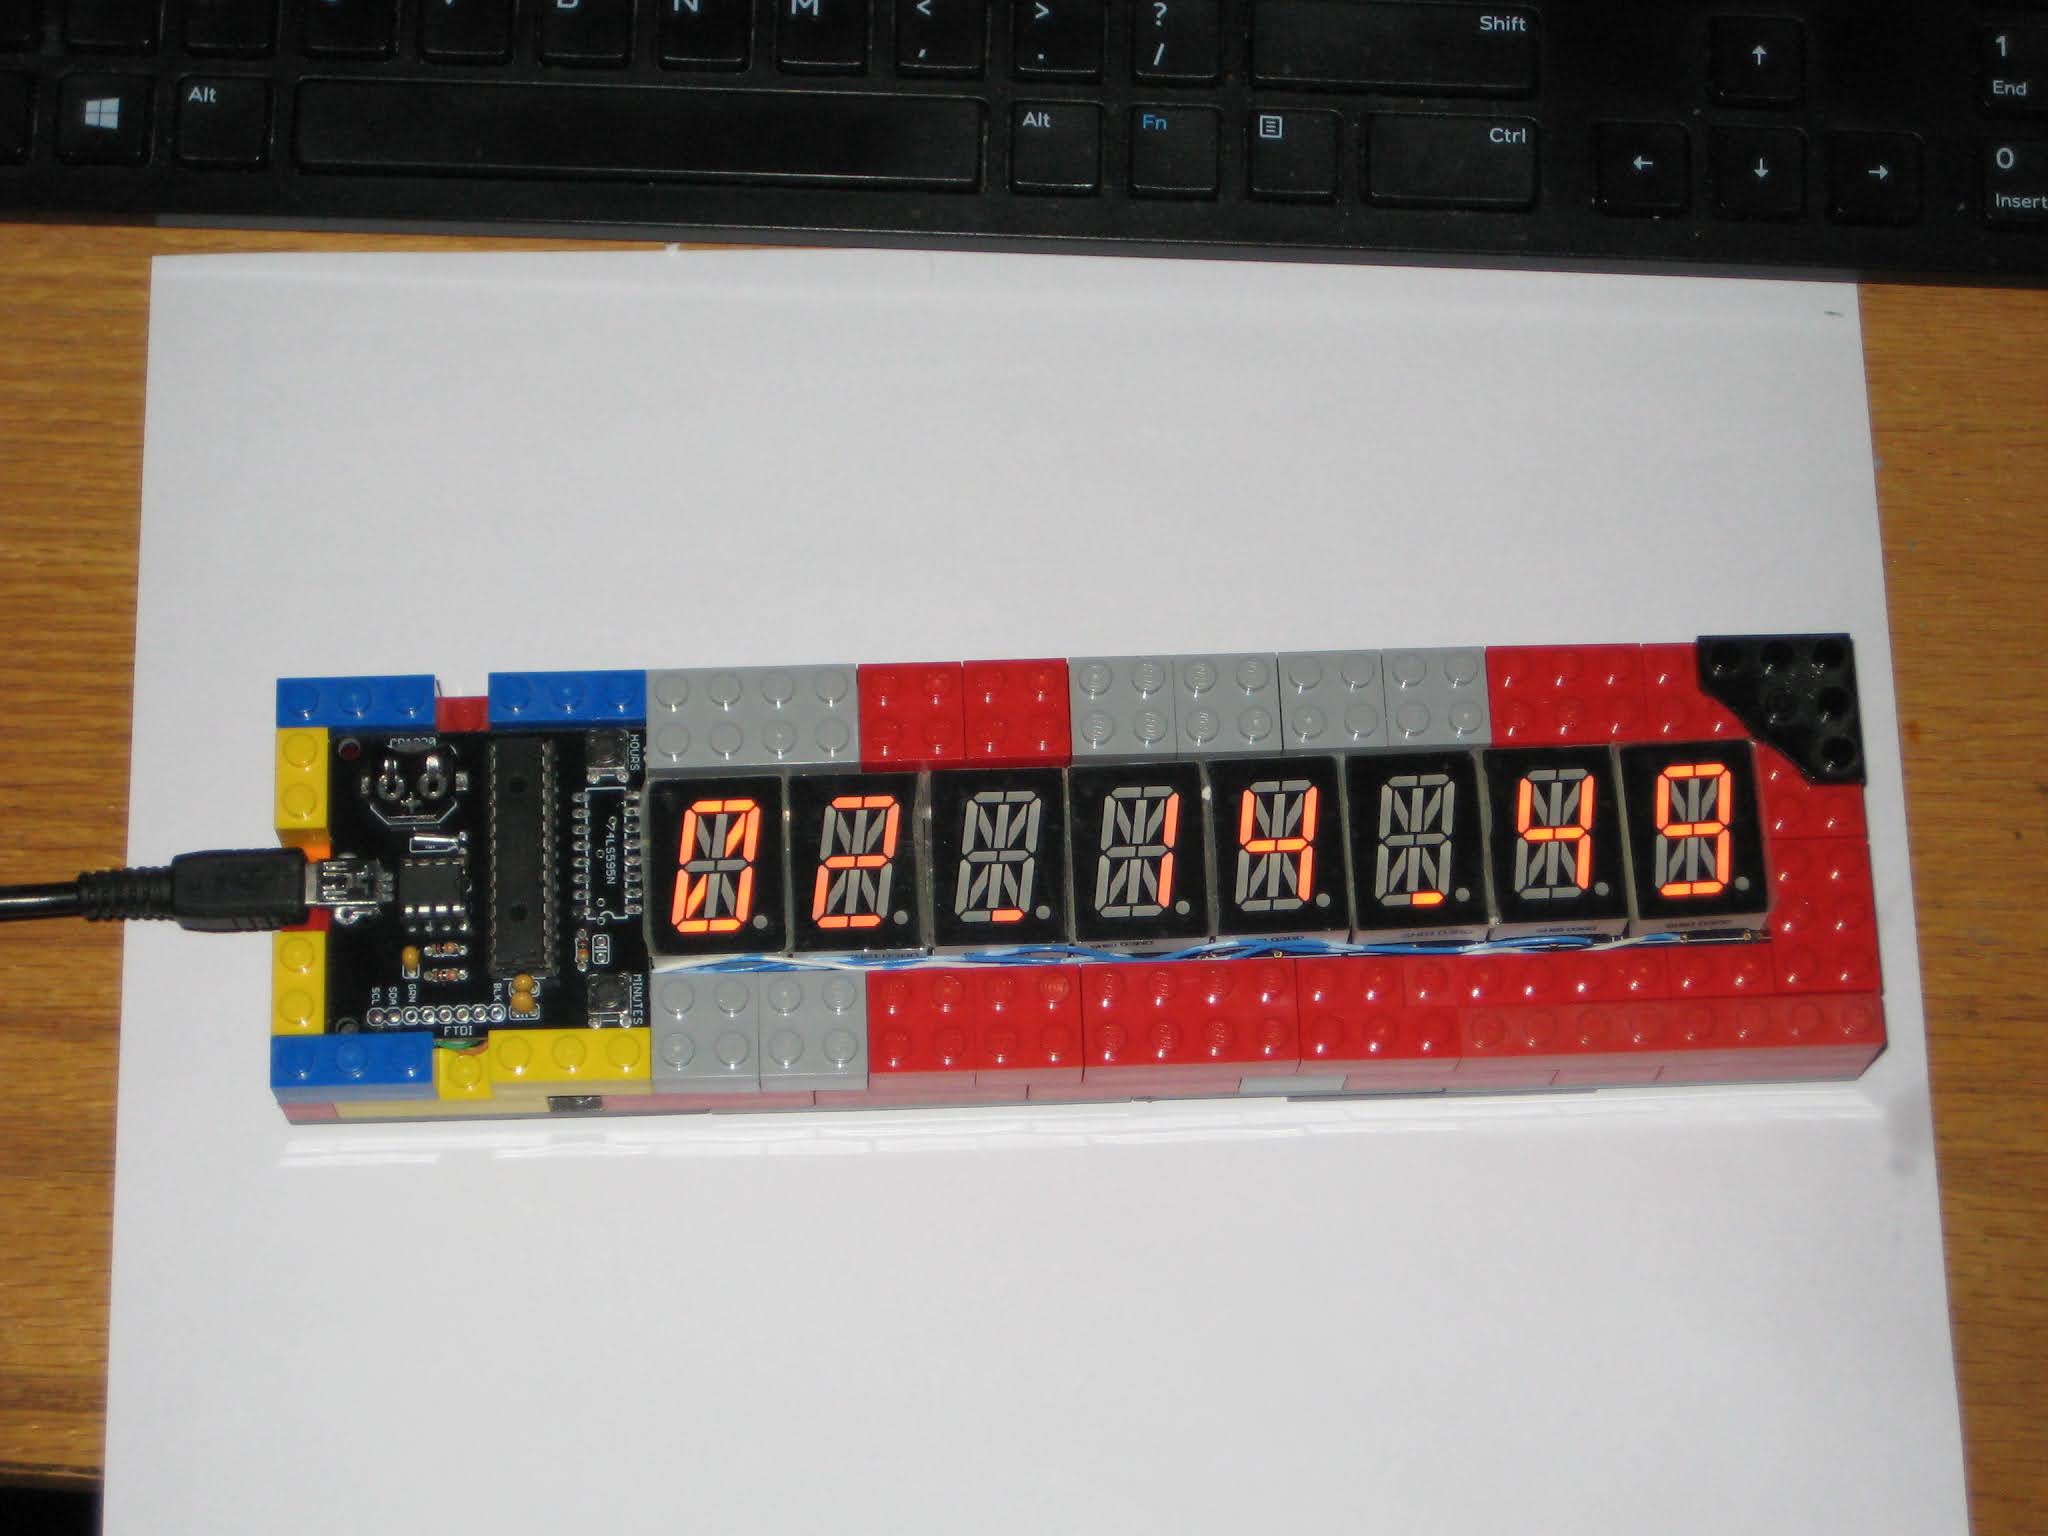
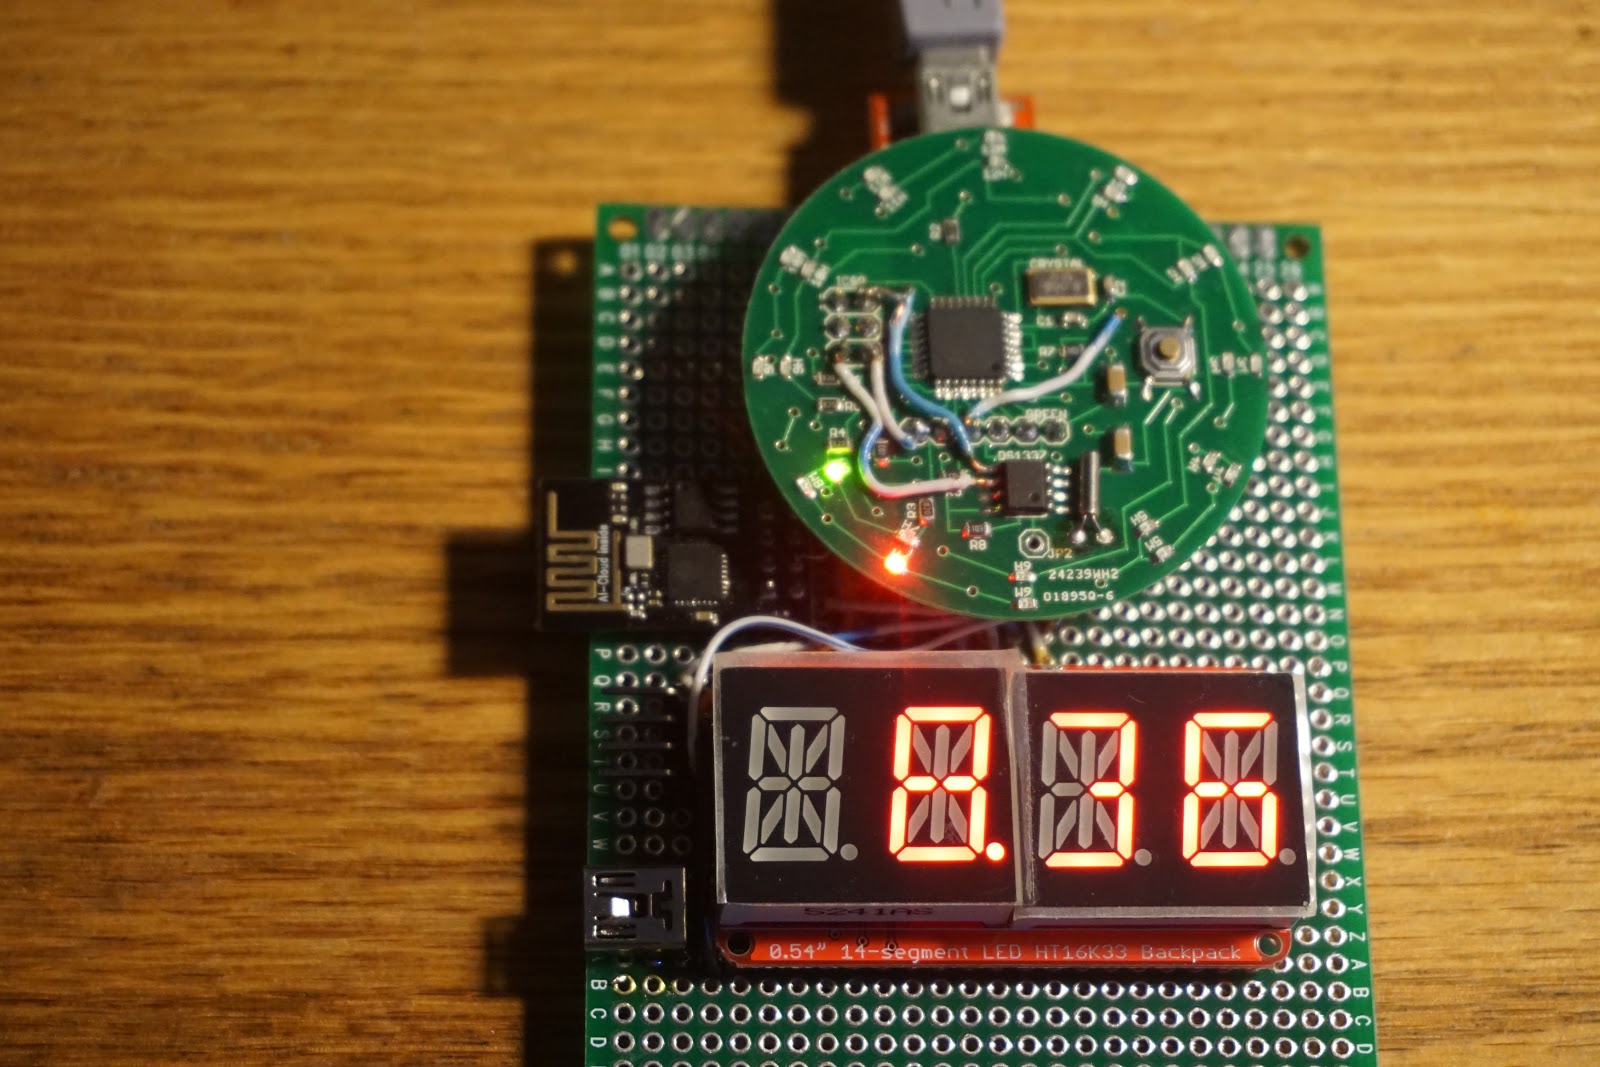
It is worth mentioning that the measured current drawn was between 10mA (lowest brightness) and 20mA (highest), and that it works similarly well when powered by 3V3.


Hackaday Links: April 26, 2020

Gosh, what a shame: it turns out that perhaps 2 billion phones won’t be capable of COVID-19 contact-tracing using the API that Google and Apple are jointly developing. The problem is that the scheme the two tech giants have concocted, which Elliot Williams expertly dissected recently, is based on Bluetooth LE. If a phone lacks a BLE chipset, then it won’t work with apps built on the contact-tracing API, which uses the limited range of BLE signals as a proxy for the physical proximity of any two people. If a user is reported to be COVID-19 positive, all the people whose BLE beacons were received by the infected user’s phone within a defined time period can be anonymously notified of their contact. As Elliot points out, numerous questions loom around this scheme, not least of which is privacy, but for now, something like a third of phones in mature smartphone markets won’t be able to participate, and perhaps two-thirds of the phones in developing markets are not compatible. For those who don’t like the privacy-threatening aspects of this scheme, pulling an old phone out and dusting it off might not be a bad idea.

We occasionally cover stories where engineers in industrial settings use an Arduino for a quick-and-dirty automation solution. This is uniformly met with much teeth-gnashing and hair-rending in the comments asserting that Arduinos are not appropriate for industrial use. Whether true or not, such comments miss the point that the Arduino solution is usually a stop-gap or proof-of-concept deal. But now the purists and pedants can relax, because Automation Direct is offering Arduino-compatible, industrial-grade programmable controllers. Their ProductivityOpen line is compatible with the Arduino IDE while having industrial certifications and hardening against harsh conditions, with a rich line of shields available to piece together complete automation controllers. For the home-gamer, an Arduino in an enclosure that can withstand harsh conditions and only cost $49 might fill a niche.

Speaking of Arduinos and Arduino accessories, better watch out if you’ve got any modules and you come under the scrutiny of an authoritarian regime, because you could be accused of being a bomb maker. Police in Hong Kong allegedly arrested a 20-year-old student and posted a picture of parts he used to manufacture a “remote detonated bomb”. The BOM for the bomb was strangely devoid of anything with wireless capabilities or, you know, actual explosives, and instead looks pretty much like the stuff found on any of our workbenches or junk bins. Pretty scary stuff.

If you’ve run through every binge-worthy series on Netflix and are looking for a bit of space-nerd entertainment, have we got one for you. Scott Manley has a new video that goes into detail on the four different computers used for each Apollo mission. We knew about the Apollo Guidance Computers that guided the Command Module and the Lunar Module, and the Launch Vehicle Digital Computer that got the whole stack into orbit and on the way to the Moon, but we’d never heard of the Abort Guidance System, a backup to the Lunar Module AGC intended to get the astronauts back into lunar orbit in the event of an emergency. And we’d also never heard that there wasn’t a common architecture for these machines, to the point where each had its own word length. The bit about infighting between MIT and IBM was entertaining too.

And finally, if you still find yourself with time on your hands, why not try your hand at pen-testing a military satellite in orbit? That’s the offer on the table to hackers from the US Air Force, proprietor of some of the tippy-toppest secret hardware in orbit. The Hack-A-Sat Space Security Challenge is aimed at exposing weaknesses that have been inadvertantly baked into space hardware during decades of closed development and secrecy, vulnerabilities that may pose risks to billions of dollars worth of irreplaceable assets. The qualification round requires teams to hack a grounded test satellite before moving on to attacking an orbiting platform during DEFCON in August, with prizes going to the winning teams. Get paid to hack government assets and not get arrested? Maybe 2020 isn’t so bad after all.

Teardown of an Old Dimmer Switch

The 40+ year-old dimmer (made by Nortron Industries Limited in Milton, Ontario) in my attic broke down. Electronically, the dimming circuit still worked, but mechanically, the push button got stuck.
This is what's inside, for the curious.


The active component in the circuit is Q2006LT, a "quadrac" which, according to the datasheet, "is an internally triggered Triac designed for AC switching and phase control applications. It is a Triac and DIAC in a single package, which saves user expense by eliminating the need for separate Triac and DIAC components".

The "reversed-engineered" schematic looks like this:


For those who want to understand more on how the triac-controlled dimmer works, this article provides an in-depth explanation.

The 250V capacitors may be reused in a Nixie high-voltage (~170V) power source. For a hoarder, both the choke and the potentiometer (push button removed) look good.

I will report back on the internals of the replacement switch in 40 years or so, when it breaks down. I hope I/it last(s) that long.

Wise time with Arduino 15 Mar 22:29
general  hacking  review  

Hacking DWex into combo analog-digital clock

DWex, my forgotten watch, was not a successful project, probably because I rushed its design, I spent more money on it than I planned and I did not follow up with revisions. DWex was also not offered as a kit, but as an assembled board with SMD components, not easily hackable or expandable, pretty much a dead end from hardware perspective. Its idea is still sound though, after so many years: mostly sleep, to conserve battery, then, at a press of a button, flicker some LEDs to indicate the time.

This rainy Easter weekend I stumbled upon the few DWex boards I still have, and they brought back memories. One thought lead to another, and I found myself, characteristically (I am the "penny wise, pound foolish"- kind), soldering around once again. So here I am, writing another useless post, about another useless project, on how to convert time, money and energy into joy, sometimes mixed with frustration, when things don't work on the first try (as it's usually the case).

DWex is equivalent to a smaller wsduino (ATmega328 + RTC), with 24 LEDs. Why not recycle it into something physically "bigger", by adding extras (alphanumeric display, micro switches, ESP8266, OLED etc.)?
The design of the DWex board has a few peculiarities:
  • RTC chip is DS1337, with support for alarms;
  • the on-board CR2025 3V battery powers the whole watch, not only the RTC (there is no time keeping without a battery);
  • FTDI connector does not have Vcc wired, relying instead on the battery to power the processor while uploading the sketch;
  • the ATmega328 processor is clocked with an external 8MHz crystal, thus making the board compatible with LilyPad 328;
  • pins available are D11, D12 and D13, all broken out on the ISP connector (unused are also D2 and D10, but they would need to be wired directly from the processor's pins);
  • features only one button.
But the most particular aspect of DWex is the way it shows the time on the analog round face, by blinking LEDs on request (button push). This is actually not suitable for continuous display, simply because it is confusing to make sense of non-stop blinking LEDs.
OK, so enough complaining. Here is what we plan to do:
  • add a 4-digit alphanumeric Adafruit I2C 0.54" display;
  • add ESP8266 module to sync the clock on NTP;
  • add toggle switch for setting up wifi parameters (for ESP8266);
  • use RTC's alarm capability; add toggle switch and buzzer (or other audio module) for alarm mode;
  • add OLED (I2C) for displaying messages, info etc;
  • modify the software, a combination of DWex and WiFiChron, to support all of the above features, plus change the way the time is shown on the analog face (no more sleep, no button press to show the time);
  • add "seconds" mode, on the digital display;
  • maybe adapt the 8-character-based menu system from WiFiChron to 4-character (by showing only the first 1 or 2 letters of the menu);
  • add 3V3/500mA regulator to the board.


This will be a work-in-progress for a while, especially on the software (which I will publish later).

Wise time with Arduino 22 Apr 14:59
dwex  hacking  

Hacking DWex into combo analog-digital clock

DWex, my forgotten watch, was not a successful project, probably because I rushed its design, I spent more money on it than I planned and I did not follow up with revisions. DWex was also not offered as a kit, but as an assembled board with SMD components, not easily hackable or expandable, pretty much a dead end from hardware perspective. Its idea is still sound though, after so many years: mostly sleep, to conserve battery, then, at a press of a button, flicker some LEDs to indicate the time.

This rainy weekend I stumbled upon the few DWex boards I still have, and they brought back memories. One thought lead to another, and I found myself, characteristically (I am the "penny wise, pound foolish"- kind), soldering around once again. So here I am, writing another useless post, about another useless project, on how to convert time, money and energy into joy, sometimes mixed with frustration, when things don't work on the first try (as it's usually the case).

DWex is equivalent to a (smaller) wsduino (ATmega328 + RTC), with 20 LEDs. Why not recycle it into something (physically) "bigger" by adding extras (alphanumeric display, micro switches, ESP8266, OLED)?
The design of the DWex board has a few peculiarities:
  • RTC chip is DS1337, with support for alarms;
  • the on-board CR2025 3V battery powers the whole watch, not only the RTC (there is no time keeping without a battery);
  • FTDI connector does not have Vcc wired, relying instead on the battery to power the processor while uploading the sketch;
  • the ATmega328 processor is clocked with an external 8MHz crystal, thus making the board compatible with LilyPad 328;
  • pins available are D11, D12 and D13, all broken out on the ISP connector (unused are also D2 and D10, but they would need to be wired directly from the processor's pins);
  • features only one button.
But the most particular aspect of DWex is the way it shows the time on the analog round face, by blinking LEDs on request (button push). This is actually not suitable for continuous display, simply because it is confusing to make sense of non-stop blinking LEDs.
OK, so enough complaining. Here is what we plan to do:
  • add a 4-digit alphanumeric Adafruit I2C 0.54" display;
  • add ESP8266 module to sync the clock on NTP;
  • add toggle switch for setting up wifi parameters (for ESP8266);
  • use RTC's alarm capability; add toggle switch and buzzer (or other audio module) for alarm mode;
  • add OLED (I2C) for displaying messages, info etc;
  • modify the software, a combination of DWex and WiFiChron, to support all of the above features, plus change the way the time is shown on the analog face (no more sleep, no button press to show the time);
  • add "seconds" mode, on the digital display;
  • maybe adapt the 8-character-based menu system from WiFiChron to 4-character (by showing only the first 1 or 2 letters of the menu);
  • add 3V3/500mA regulator to the board.


This will be a work-in-progress for a while.

Wise time with Arduino 22 Apr 14:59
dwex  hacking