Posts with «automation» label

Battery Bot Makes Sure Cordless Tool Packs Are Always Topped Up

There was a time not that long ago when every tool was cordless. But now, cordless power tools have proliferated to the point where the mere thought of using a plain old wrist-twisting screwdriver is enough to trigger a bout of sympathetic repetitive injury. And the only thing worse than that is to discover that the batteries for your tools are all dead.

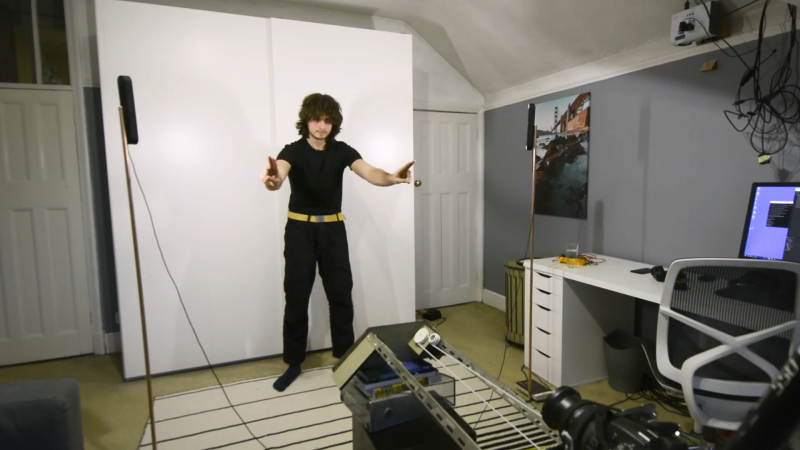
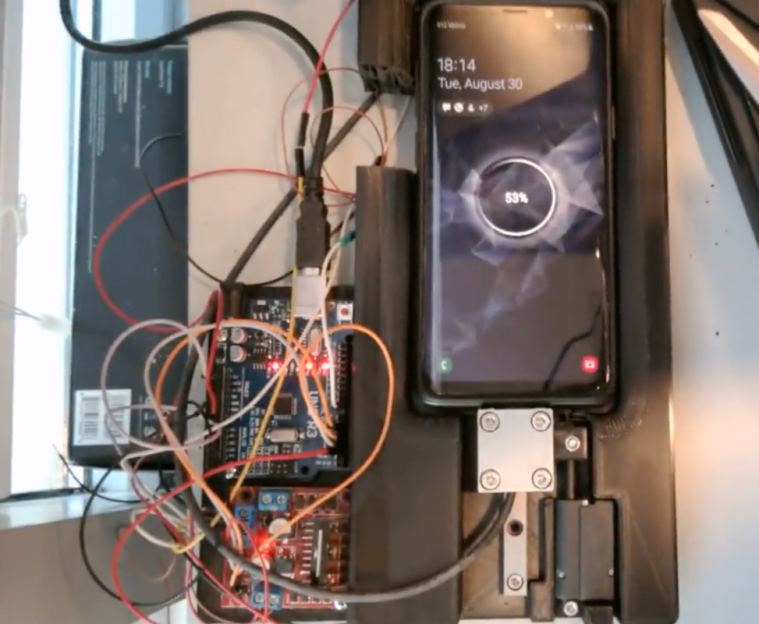
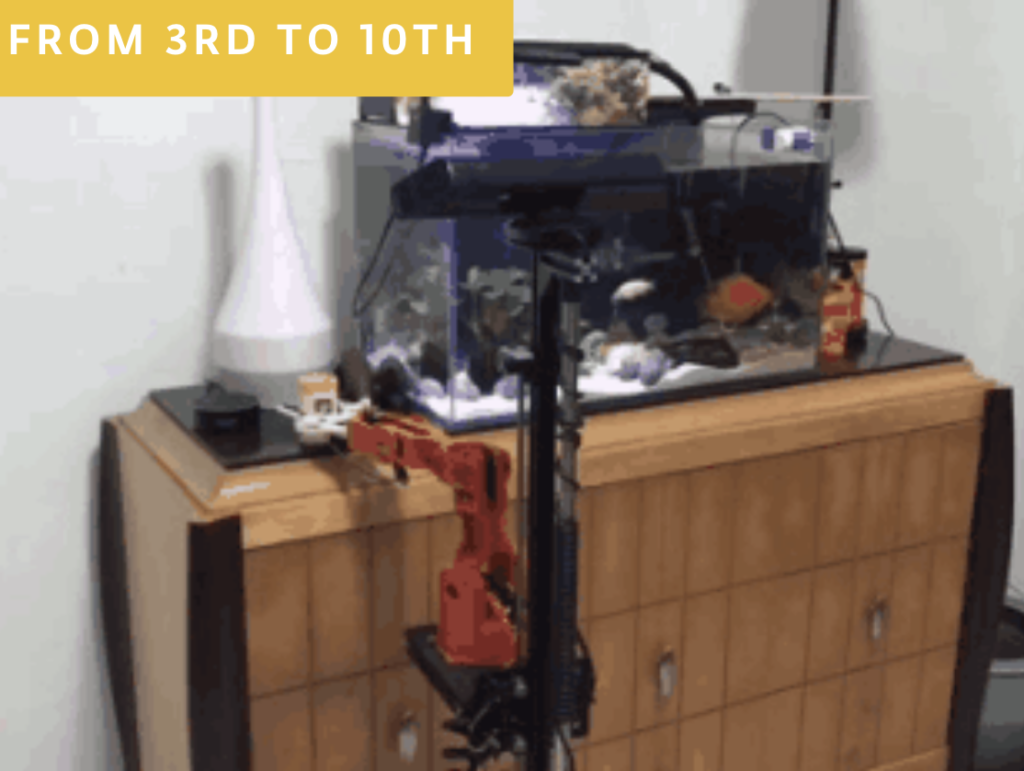
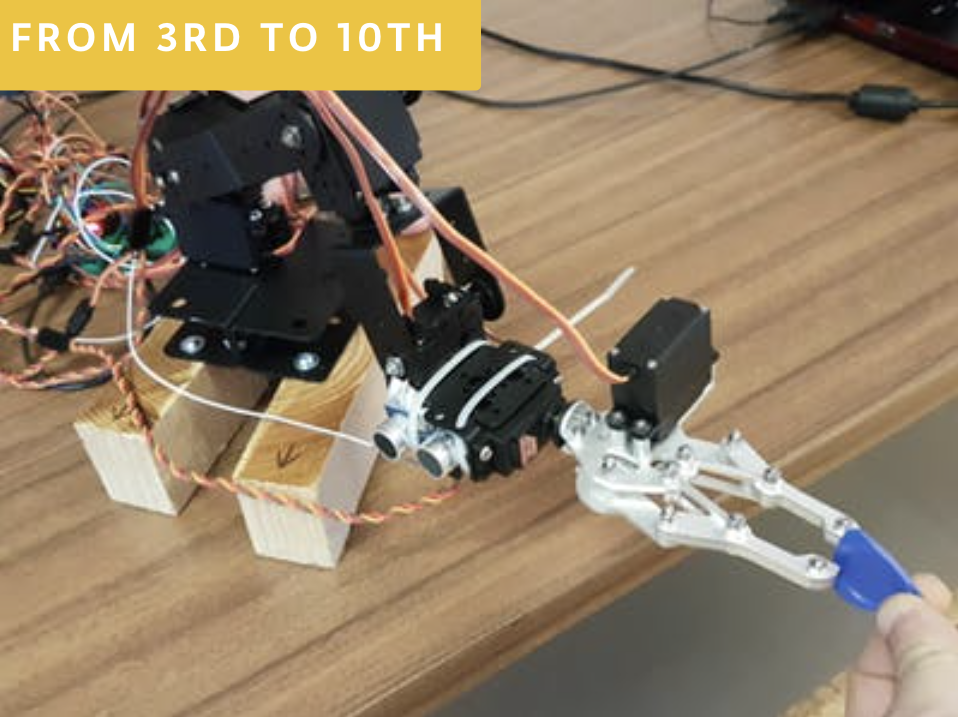
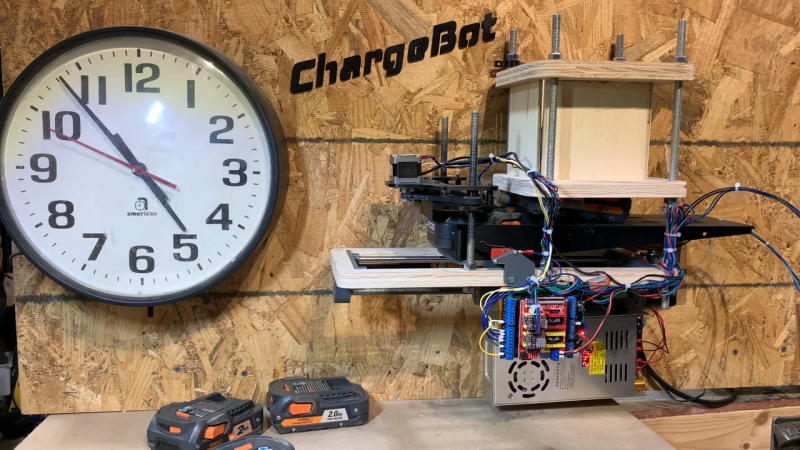
As [Lance] from the “Sparks and Code” channel freely admits, the fact that his impressive collection of batteries is always dead is entirely his fault, and that’s what inspired his automatic battery charging robot. The design is pretty clever; depleted batteries go into a hopper, under which is a 3D-printed sled. Batteries drop down into the sled, which runs the battery out from under the hopper to the charging station, which is just the guts of an old manual charger attached to a lead screw to adjust the height of the charging terminals for different size batteries. When the battery is charged, the sled pushes it a little further into an outfeed hopper before going back to get another battery from the infeed side.

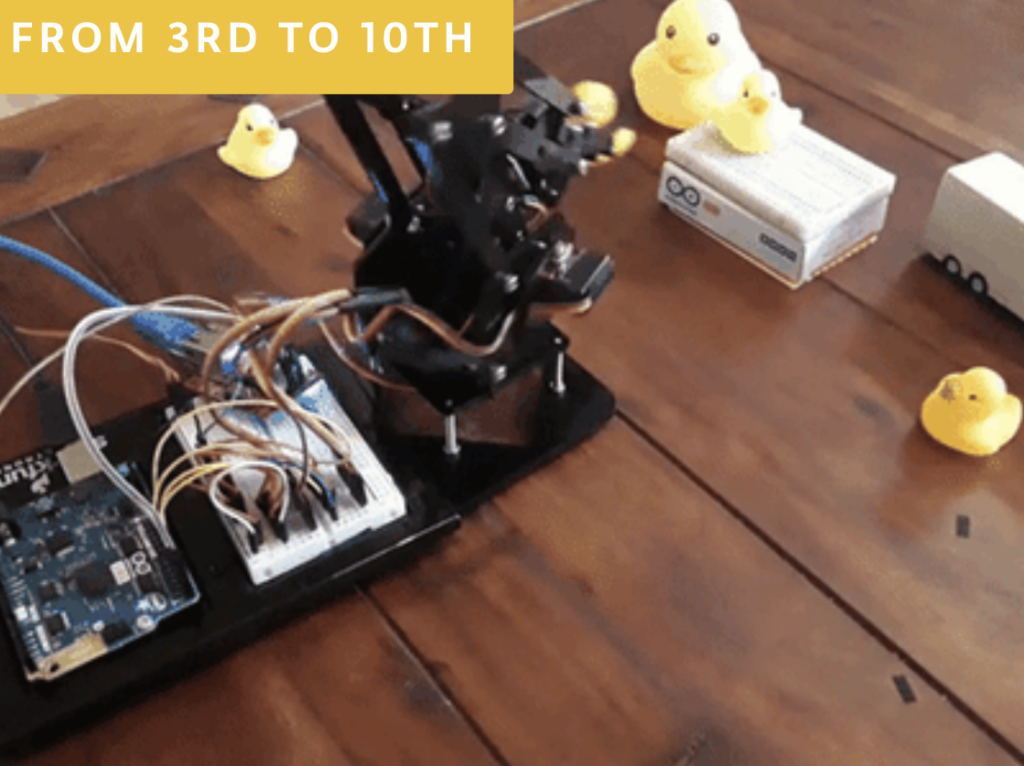
Of course, that all vastly understates the amount of work [Lance] had to put into this. He suffered through a lot of “integration hell” problems, like getting the charger properly connected to the Arduino running the automation. But with a lot of tweaking, he can now just dump in a bunch of depleted packs and let the battery bot handle everything. The video after the break shows all the gory details.

Of course, there’s another completely different and much simpler solution to the dead battery problem.

Gesture Controlled Filming Gear Works Super Intuitively

Shooting good video can be an arduous task if you’re working all by yourself. [Pave Workshop] developed a series of gesture-responsive tools to help out, with a focus on creating a simple intuitive interface.

The system is based around using a Kinect V2 to perceive gestures made by the user, which can then control various objects in the scene. For instance, a beckoning motion can instruct a camera slider to dolly forward or backwards, and a halting gesture will tell it to stop. Bringing the two hands together or apart in special gestures indicate that the camera should zoom in or out. Lights can also be controlled by pulling a fist towards or away from them to change their brightness.

The devil is in the details with a project that works this smoothly. [Pave Workshop] lays out the details on how everything Node.JS was used to knit together everything from the custom camera slider to Philips Hue bulbs and other Arduino components.

The project looks really impressive in the demo video on YouTube. We’ve seen some other impressive automated filming rigs before, too.

The Ease of Wireless Charging, Without the Wait

Historically, there have been a few cases of useful wireless power transmission over great distances, like a team at MIT that was able to light up a 60 W bulb at several meters, and of course Nikola Tesla had grand dreams of drawing energy from the atmosphere. But for most of us wireless power is limited to small, short-range devices like cellphone chargers. While it’s not a lot of work to plug in a phone when it needs a charge, even this small task can be automated.

This build begins with a 3D printed cradle for the smartphone to sit in. When the device detects that the phone has been placed in the cradle, it uses a linear actuator to drive a custom-built charging cable into the phone’s USB port. Similarly, when the phone is lifted from the cradle the cable is automatically removed. It appears that there is some play in the phone’s position that lets the charger be plugged in smoothly, and the project’s creator [Larpushka] points out that the linear actuator is not particularly strong so we don’t imagine the risk of damage is very high.

While wireless charging still may have the edge when it comes to keeping debris out of the port, we still really enjoy a project like this that seems to be done for its own sake. There are some improvements that [Larpushka] plans to make, but for now we’re delighted by this build. For anyone looking to add true wireless charging to any phone that doesn’t have it, though, it’s not too difficult to accomplish either.

Automated plant tending with Arduino

Do you like plants, but not so much the tending to and watering them? If that sounds like you, then you might be interested in your own CNC growing machine. The system—created by 15-year-old maker “daily3dprinting”—is controlled by an Arduino Uno, and uses a single stepper motor to pull a watering head into position based on hygrometer readings.

A relay is used to turn the grow light on at 6am and off at 8pm, and another to activate the unit’s water pump. A third relay is employed to power off the L298N stepper driver when not needed. 

The project took home second place in the math and engineering category at daily3dprinting’s high school science fair, and more info on the build is available in its write-up here.

Winners of the Arduino/Distrelec Automation & Robotics Contest announced!

Earlier this year, Distrelec launched an Automation & Robotics Contest that invited our community to help advance Industry 4.0 leveraging the Arduino ecosystem. Submissions were required to use Arduino hardware—ranging from WiFi (MKR1000 and Yún Rev2) to GSM/narrowband (MKR FOX 1200, MKR WAN 1300, and MKR GSM 1400) to feature-rich boards like the popular Mega and Due—along with Arduino Create to set up, control, and connect their devices.

Fast forward five months and the winning entries have now been selected, with the top project receiving a Keithley DMM6500 Bench Top Multimeter and a trip to Maker Faire Rome to showcase their work. Other prizes included a Weller WT1010 Set (2nd place) and Grove Starter Kits for Arduino (3rd-10th).

So without further ado, let’s take a look at the winners!

1st Place: Arduino Data Glasses for My Multimeter

2nd Place: Industrial Line Follower for Supplying Materials

Runner-Up: Accessibility Controls for Droids

Runner-Up: Skating Robot  

Runner-Up: Autonomous Home Assistant Robot

Runner-Up: Object Avoiding FSM Robot Arm

Runner-Up: Automatic Monorail Control

Runner-Up: Smart Crops: Implementing IoT in Conventional Agriculture

Runner-Up: Building a Sensor Network for an 18th Century Gristmill

Runner-Up: Robot Arm Controlled Through Ethernet

Congratulations to everyone! Be sure to also check out the contest page to browse through several other projects, such as an IoT platform for vehicles, a universal CNC machine, a gesture-controlled robotic arm, and more!

A Remotely Controlled Kindle Page Turner

One of the biggest advantages of e-readers such as the Kindle is the fact that it doesn’t weigh as much as a traditional hardcover book, much less the thousands of books it can hold in digital form. Which is especially nice if you drop the thing on your face while reading in bed. But as light and easy to use as the Kindle is, you still need to hold it in your hands and interact with it like some kind of a baby’s toy.

Looking for a way to operate the Kindle without having to go through the exhaustive effort of raising their hand, [abm513] designed and built a clip-on device that makes using Amazon’s e-reader even easier. At the press of a button, the device knocks on the edge of the screen which advances the book to the next page. Going back a page will still require you to extend your meaty digit, but that’s your own fault for standing in the way of progress.

The 3D printed case holds an Arduino and RF receiver, as well as a small servo to power the karate-chop action. There’s no battery inside, meaning the device needs to stay plugged in via a micro USB connection on the back of the case. But let’s be honest: if you’re the kind of person who has a remote-controlled Kindle, you probably aren’t leaving the house anytime soon.

To fool the Kindle into thinking a human finger is tapping the screen, the page turner’s arm has a stylus tip on the end. A channel is designed into the 3D printed arm for a wire to run from the tip to the Arduino’s ground, which triggers the capacitive screen to register a touch.

All joking aside, the idea holds promise as an assistive technology for individuals who are unable to lift an e-reader or operate its touch screen controls. With the Kindle held up in a mount, and this device clipped onto the side, anyone who can push a button (or trigger the device in whatever method they are physically capable) can read a book on their own. A simple pleasure that can come as a huge comfort to a person who may usually be dependent on others.

In the past we’ve seen physical buttons printed for touch screens, and an Arduino used to control a touch screen device. But this particular combination of physical and electrical interaction is certainly a unique way to tackle the problem without modifying the target device.

Automated Syrup System is Sweet Sweet Madness

Here at Hackaday we are big fans of the TV show, “How It’s Made”. It’s not much of a stretch to assume that, as somebody who is currently reading this site, you’ve probably seen it yourself. While it’s always interesting to see the behind the scenes process to create everyday products, one of the most fascinating aspects of the show is seeing how hard it is to make things. Seriously, it’s enough to make you wonder how companies are turning a profit on some of these products when you see just how much technology and manual work is required to produce them.

That’s precisely the feeling we got when browsing through this absolutely incredible overview of how [HDC3] makes his maple syrup. If that’s not a sentence you ever thought you’d see on Hackaday, you aren’t alone. But this isn’t a rusty old pail hanging off of a tap, this is a high-tech automated system that’s capable of draining 100’s of gallons of sap from whole groves of trees. We’ll never look at a bottle of syrup in the store the same away again.

It all starts with hundreds of tiny taps that are drilled into the trees and connected to a network of flexible hoses. The plumbing arrangement is so complex that, in certain, areas high tension support wires are necessary to hold up the weight of the hoses and their sweet contents. The main hose leads to an Arduino-powered collection station which maintains a 100 kPa (29 inHg) vacuum throughout the entire system.

The sap is temporarily held in a 250 gallon container, but at this point it’s still just that: sap. It needs to be refined into something suitable for putting on your pancakes. The first step of that process utilizes a reverse osmosis filtration system to pull the water out of the sap and increase its sugar concentration. [HDC3] says the filtration system is built from eBay scores and parts from the home improvement store, and it certainly looks the part of something that would be under a kitchen sink. This system is able to increase the sugar concentration of the sap from around 2% as it comes out of the trees to 8%. But it’s still a far way off from being ready to use.

Interestingly enough, the last steps of the process are about as old-school as they come. The semi-concentrated sap is placed in a long low metal pan, and heated over a wood fire to drive off more of the water. This process continues until the sap is roughly 60% sugar, at which point it is filtered and moved into the house to finish boiling on the stove.

All told, the syrup is boiled for eight hours to bring its sugar content up to 66%. Even with the improvements [HDC3] has made to the system, he reveals that all this hard work only results in slightly more than a half-gallon of final syrup. Talk about dedication.

It probably comes as no surprise that this is the first time Hackaday has ever run a story about producing maple syrup. However we’ve seen a number of automated beer brewing systems that seem to have been tackled with similar zeal. There’s probably a conclusion to be drawn there about the average hacker’s diet, but that’s a bit outside our wheelhouse.

[via /r/DIY]

The Internet of Blast Gates

There’s nothing quite like building out a shop filled with tools, but even that enviable task has a lot of boring work that goes into it. You’ve got to run power, you’ve got to build benches, and you need to build a dust collection system. That last one is usually just fitting a bunch of pipe and tubes together and adding in a few blast gates to direct the sucking of your dust collection system to various tools around the shop.

For most shops with a handful of tools and dust collection ports, manually opening and closing each blast gate is an annoying if necessary task. What if all of this was automated, though? That’s what [Bob] over on I Like To Make Stuff did. He automated his dust collection system. When a tool turns on, so does the vacuum, and the right blast gate opens up automatically.

The first part of this build is exactly what you would expect for installing a dust collection system in a shop. The main line is PVC sewer pipe tied to the rafters. Yes, this pipe is grounded, and s otherwise not very interesting at all. The real fun comes with the bits of electronics. [Bob] modified standard blast gates to be servo-actuated. Each individual tool was wired up to a current sensor at the plug, and all of this was connected to an Arduino. With a big ‘ol relay attached to the dust collection system, the only thing standing in the way of complete automation was a bit of code.

This project is a continuation of [Bob]’s earlier Arduinofication of his dust collection system where all the blast gates were controlled by servos, an Arduino, and a numeric keypad. That’s an exceptionally functional system that gets around the whole ‘leaning over a machine to open a gate’ problem, but it’s still not idiot-proof – someone has to press a button to open a gate. This new system is, for the most part, completely automatic and doesn’t really require any thought on the part of the operator. It’s neat stuff, and a great application of cheap Arduinos to make shop life a bit easier.


Filed under: Arduino Hacks, Tool Hacks

Music Box Plays “Still Alive” Thanks to Automated Hole Puncher

Custom hole punch and feed system

Most projects have one or two significant aspects in which custom work or clever execution is showcased, but this Music Box Hole Punching Machine by [Josh Sheldon] and his roommate [Matt] is a delight on many levels. Not only was custom hardware made to automate punching holes in long spools of paper for feeding through a music box, but a software front end to process MIDI files means that in a way, this project is really a MIDI-to-hand-cranked-music-box converter. What a time to be alive.

The hole punch is an entirely custom-made assembly, and as [Josh] observes, making a reliable hole punch turns out to be extremely challenging. Plenty of trial and error was involved, and the project’s documentation as well as an overview video go into plenty of detail. Don’t miss the music box version of “Still Alive”, either. Both are embedded below.

As [Josh] mentioned on his project page, he was inspired by a tutorial video showing how to punch music by hand. It led to this tool to take a MIDI file and cut the music paper out on a laser cutter, whereas [Josh] and [Matt] were inspired to automate the entire process in their own way.

For those of you who don’t think science should stop there, why not automate the creation of the music itself with the output of this Bach-emulating Recurring Neural Network?

Thanks to [Tim Trzepacz] for giving us a heads up on this delightful project!


Filed under: musical hacks

Talking Arduino Tells GoPro What To Do

It’s 2017 and even GoPro cameras now come with voice activation. Budding videographers, rest assured, nothing will look more professional than repeatedly yelling at your camera on a big shoot. Hackaday alumnus [Jeremy Cook] heard about this and instead of seeing an annoying gimmick, saw possibilities. Could they automate their GoPro using Arduino-spoken voice commands?

It’s an original way to do automation, for sure. In many ways, it makes sense – rather than mucking around with trying to make your own version of the GoPro mobile app (software written by surfers; horribly buggy) or official WiFi remote, stick with what you know. [Jeremy] decided to pair an Arduino Nano with the ISD1820 voice playback module. This was then combined with a servo-based panning fixture – [Jeremy] wants the GoPro to pan, take a photo, and repeat. The Arduino sets the servo position, then commands the ISD1820 to playback the voice command to take a picture, before rotating again.

[Jeremy] reports that it’s just a prototype at this stage, and works only inconsistently. This could perhaps be an issue of intelligibility of the recorded speech, or perhaps a volume issue. It’s hard to argue that a voice control system will ever be as robust as remote controlling a camera over WiFi, but it just goes to show – there’s never just one way to get the job done. We’ve seen people go deeper into GoPro hacking though – check out this comprehensive guide on how to pwn your GoPro.


Filed under: Arduino Hacks, digital cameras hacks