Posts with «speaker» label

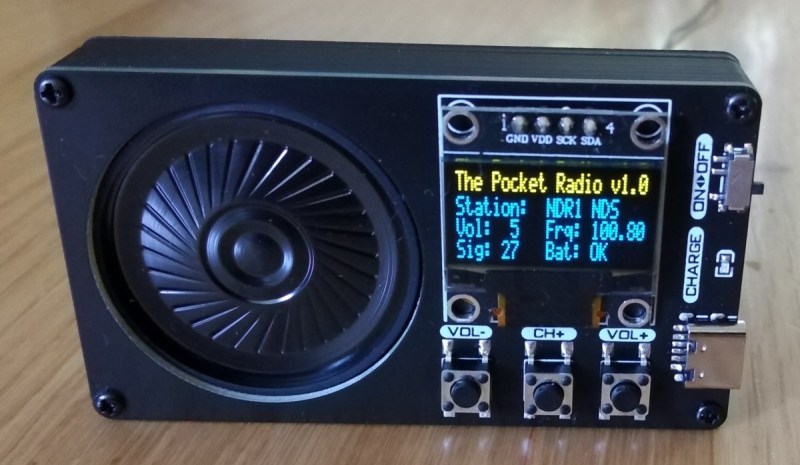
Upgraded Toy Guitar Plays Music

Getting the finishing details on a Halloween costume completed is the key to impressing friends and strangers alike on the trick-or-treat rounds. Especially when it comes to things like props, these details can push a good Halloween costume to great with the right touches. [Jonathan]’s friend’s daughter will be well ahead of the game thanks to these additions to a toy guitar which is part of her costume this year.

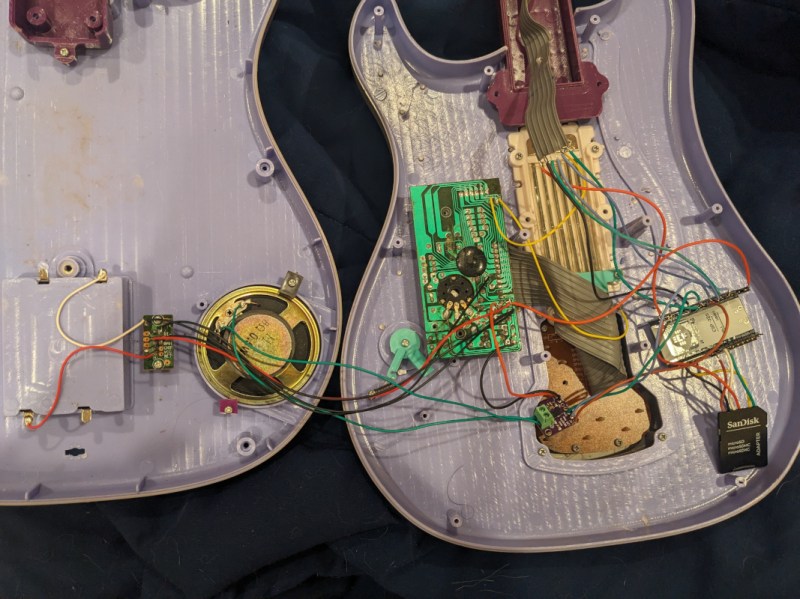
The toy guitar as it was when it arrived had the capability to play a few lackluster sound effects. The goal here was to get it to play a much more impressive set of songs instead, and to make a couple upgrades along the way as well. To that end, [Jonathan] started by dismantling the toy and investigating the PCBs for potential reuse. He decided to keep the buttons in the neck of the guitar despite their non-standard wiring configuration, but toss out the main board in favor of an ESP32. The ESP32 is tasked with reading the buttons, playing a corresponding song loaded on an SD card, and handling the digital to analog conversion when sending it out to be played on the speaker.

The project doesn’t stop there, though. [Jonathan] also did some custom mixing for the songs to account for the lack of stereo sound and a working volume knob, plus he used the ESP32’s wireless capabilities to set the guitar up as a local file server so that songs can be sent to and from the device without any wires. He also released the source code on the project’s GitHub page for anyone looking to use any parts of this project. Don’t forget there’s a Halloween contest going on right now, so be sure to submit the final version of projects like these there!

Hack a Day 26 Oct 00:00

Pocket Radio Powered By Tiny Microcontroller

Before the days of MP3 players and smartphones, and even before portable CD players, those of us of a certain age remember that our cassette players were about the only way to take music on-the-go. If we were lucky, they also had a built-in radio for when the single tape exhausted both of its sides. Compared to then, it’s much easier to build a portable radio even though cassettes are largely forgotten, as [wagiminator] shows us with this radio design based on an ATtiny.

The build is about as compact as possible, with the aforementioned ATtiny 402/412 as its core, it also makes use of an integrated circuit FM tuner,  an integrated audio amplifier with its own single speaker, and a small OLED display. The unit also boasts its own lithium-polymer battery charger and its user interface consists of only three buttons, plenty for browsing radio stations and controlling volume.

The entire build fits easily in the palm of a hand and is quite capable for a mobile radio, plus all of the schematics and code is available on the project page. While it doesn’t include AM capability, just the fact that FM is this accessible nowadays when a few decades ago it was cutting-edge technology is quite remarkable. If you’re looking for an even smaller FM receiver without some of the bells and whistles of this one, take a look at this project too.

Hack a Day 06 Jul 21:00
arduino  attiny  audio  code  fm  oled  radio  radio hacks  schematics  speaker  

Arduino Orchestra Plays The Planets Suite

We’ve seen a great many Arduino synthesizer projects over the years. We love to see a single Arduino bleeping out some monophonic notes. From there, many hackers catch the bug and the sky is truly the limit. [Kevin] is one such hacker who now has an Arduino orchestra capable of playing all seven movements of Gustav Holst’s Planets Suite.

The performers are not human beings with expensive instruments, but simple microcontrollers running code hewn by [Kevin’s] own fingertips. The full orchestra consists of 11 Arduino Nanos, 6 Arduino Unos, 1 Arduino Pro Mini, 1 Adafruit Feather 32u4, and finally, a Raspberry Pi.

Different synths handle different parts of the performance. There are General MIDI synths on harp and bass, an FM synth handling wind and horn sections, and a bunch of relays and servos serving as the percussive section. The whole orchestra comes together to do a remarkable, yet lo-fi, rendition of the whole orchestral work.

While it’s unlikely to win any classical music awards, it’s a charming recreation of a classical piece and it’s all the more interesting coming from so many disparate parts working together. It’s an entirely different experience than simply listening to a MIDI track playing on a set of headphones.

We’d love to see some kind of hacker convention run a contest for the best hardware orchestra. It could become a kind of demoscene contest all its own. In the meantime, scope one of [Kevin’s] earlier projects on the way to this one – 12 Arduinos singing Star Wars tracks all together. Video after the break.

Meet the Marvelous Macro Music Maker

Do you kind of want a macropad, but aren’t sure that you would use it? Hackaday alum [Jeremy Cook] is now making and selling the JC Pro Macro on Tindie, which is exactly what it sounds like — a Pro Micro-based macro keypad with an OLED screen and a rotary encoder. In the video below, [Jeremy] shows how he made it into a music maker by adding a speaker and a small solenoid that does percussion, all while retaining the original macro pad functionality.

[Jeremy]’s original idea for a drum was to have a servo seesawing a chopstick back and forth on the table as one might nervously twiddle a pencil. That didn’t work out so well, so he switched to the solenoid and printed a thing to hold it upright, and we absolutely love it. The drum is controlled with the rotary encoder: push to turn the beat on or off and crank it to change the BPM.

To make it easier to connect up the solenoid and speaker, [Jeremy] had a little I²C helper board fabricated. There’s one SVG connection and another with power and ground swapped in the event it is needed. If you’re interested in the JC Pro Macro, you can pick it up in various forms over on Tindie. Of course, you might want to wait for version 2, which is coming to Kickstarter in October.

There are many ways to make a macro keyboard. Here’s one that also takes gesture input.

Follow the Bouncing Ball of Entropy

When [::vtol::] wants to generate random numbers he doesn’t simply type rand() into his Arduino IDE, no, he builds a piece of art. It all starts with a knob, presumably connected to a potentiometer, which sets a frequency. An Arduino UNO takes the reading and generates a tone for an upward-facing speaker. A tiny ball bounces on that speaker where it occasionally collides with a piezoelectric element. The intervals between collisions become our sufficiently random number.

The generated number travels up the Rube Goldberg-esque machine to an LCD mounted at the top where a word, corresponding to our generated number, is displayed. As long as the button is held, a tone will continue to sound and words will be generated so poetry pours forth.

If this take on beat poetry doesn’t suit you, the construction of the Ball-O-Bol has an aesthetic quality that’s eye-catching, whereas projects like his Tape-Head Robot That Listens to the Floor and 8-Bit Digital Photo Gun showed the electronic guts front and center with their own appeal.


Filed under: Arduino Hacks

Bluetooth Speaker With Neopixel Visual Display!

Finding a product that is everything you want isn’t always possible. Making your own that checks off all those boxes can be. [Peter Clough] took the latter route and built a small Bluetooth speaker with an LED visualization display that he calls Magic Box.

A beefy 20W, 4Ohm speaker was screwed to the lid of a wooden box converted to the purpose. [Clough] cut a clear plastic sheet to the dimensions of the box, notching it 2cm from the edge to glue what would become the sound reactive neopixel strip into place — made possible by an electret microphone amplifier. There ended up being plenty of room inside the speaker box to cram an Arduino Pro Mini 3.3V, the RN-52 Bluetooth receiver, and the rest of the components, with an aux cable running out the base of the speaker. As a neat touch, neodymium magnets hold the lid closed.

We gotta say, a custom speaker with LED visualization makes for a tidy little package — aside from the satisfaction that comes from building it yourself.

Depending on your particular situation, you may even opt to design a speaker that attaches to a magnet implanted in your head.

[via /r/DIY]


Filed under: Arduino Hacks, hardware, led hacks, musical hacks

EspoTek Labrador Review

Have you heard about the EspoTek Labrador ? 

A tiny board which can turn your computer into an
- Oscilloscope
- Waveform generator
- Logic analyser
- Multimeter
- and Power supply.

Great for makers or hobbyists with limited bench space or limited funds. Perfect for students and anyone starting out in the field of electronics

As you will see in the video below, I take a prototype of the EspoTek Labrador for a spin, and try out all of the functions that this board can provide.

I use an Arduino UNO, a couple of 433MHz RF modules, some LEDs and a speaker to see just how useful this board will be for my hobby requirements.

I have been wanting an Oscilloscope for quite some time, and while this board does not necessarily win against a benchtop oscilloscope on a side-by-side comparison of specifications, it does make up for it somewhat in terms of price, space (or footprint), usability, and wide range of functionality. But does it actually function as an oscilliscope? Is it useful ? Will it do what I need it to do?  Or will I still need to buy that expensive oscilloscope that I have been saving up for?

Have a look at my review below, and tell me what you think.


Let me know your thoughts in the comments below:
ScottC 29 Oct 02:58

Speech Recognition and Synthesis with Arduino

In my previous post, I showed how to control a few LEDs using an Arduino board and BitVoicer Server. In this post, I am going to make things a little more complicated.

read more

Manipulate your voice with Mimic Monster and Intel Edison

It’s time to introduce you to another great tutorial made for  Intel Edison.  Mimic Monster is a project allowing you to record soundbites and playing them back manipulated.
In this step-by-step project, everyone who is interested in audio features and mods , can find useful information on how to manipulate audio files and create amazing effects from your voice.

Grawr! It’s a mimic monster! What did you say? Grawr! It’s the mimic monster!

Having landed on Earth, this little alien needs you to teach it how to speak. Speak into its audio antenna and it will repeat your words back. Press a button and change its pitch. In this tutorial, you will learn in more detail, how to work with a USB sound card, a microphone, and a speaker.


Before you begin, make sure you’ve followed through Intel® Edison Getting Started guide, and our previous tutorial, the Intel® Edison mini-breakout Getting Started Guide.

 Check the other tutorials of the series.