While OLED displays and the like are extremely versatile, there’s still something really charming about vintage VFD tubes. Christine Thompson (AKA ChristineNZ) in fact built her latest clock specifically to use eight ILC1-1/8L VFD tubes, which each stand nearly four inches tall.
The device is equipped with an Arduino Mega board, a MAX6921 VFD driver, a DS3231 RTC module, and a BME280 sensor that allows it to also show pressure, humidity and temperature in both Celsius and Fahrenheit.
The retro-themed timepiece packs a speaker and an MP3 module to play chimes every 15 minutes, and in addition to the digits on the front has a secondary display and control panel on the back for setup. The unit is housed in a mahogany frame with shaped copper supports, nicely complementing its glowing green numbers.
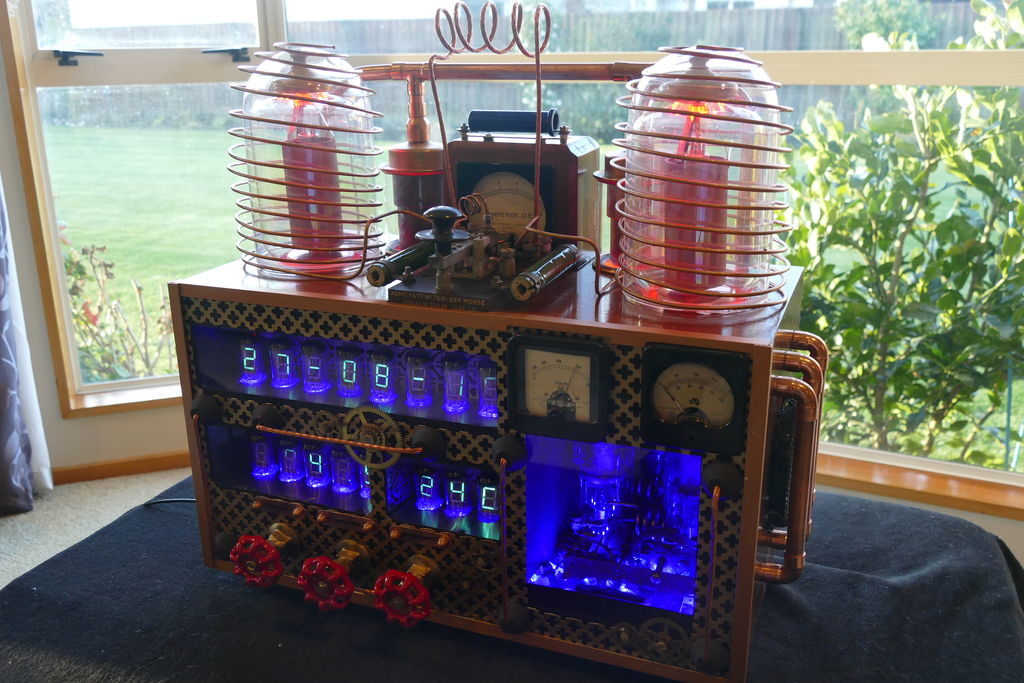
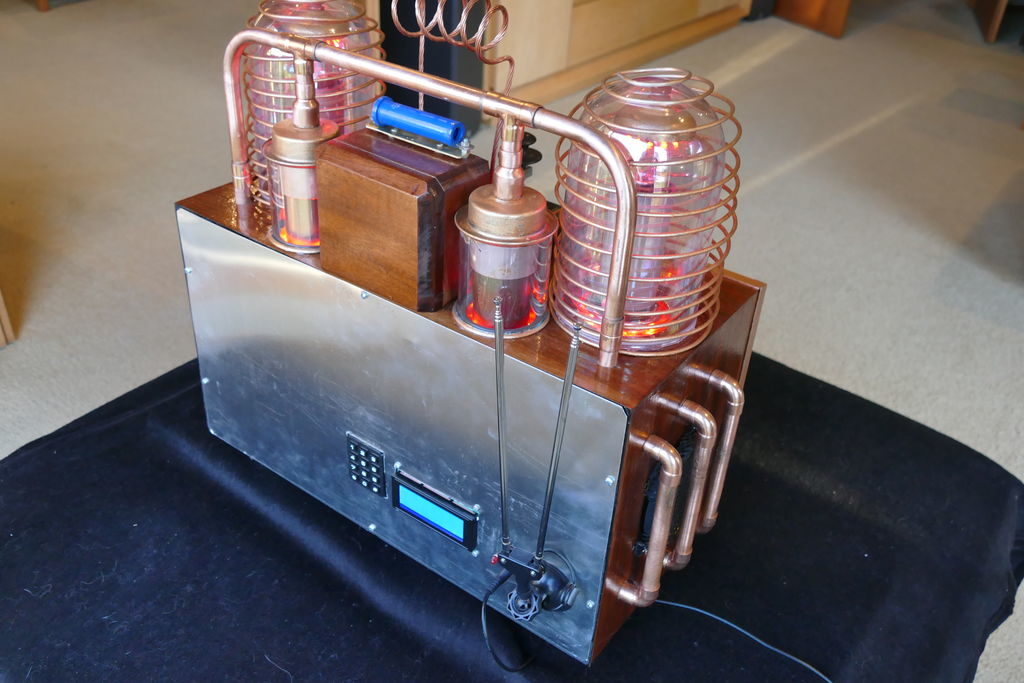
If you want to create your own steampunk/mad scientist entertainment center, it would be hard to top this radio/clock setup by Christine Thompson.
Her device displays the time and date on eight VFD tubes, arranged on top of another eight that show the radio frequency and volume, along with the ambient temperature and pressure read by a BMP280 sensor.
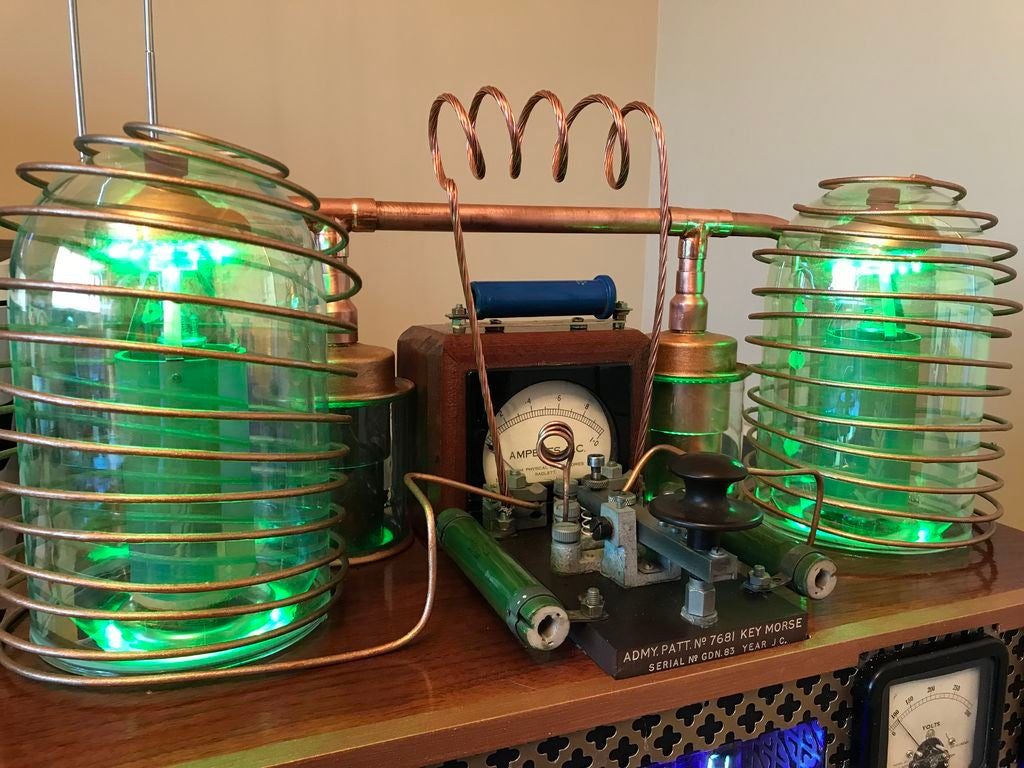
A wide variety of lighting effects, motor-driven clockwork, coils, and even an automated Morse key cement its steampunk theme, and it’s nicely housed in a restored radio cabinet.
The project is controlled by a pair of Arduino Mega boards linked together via I2C, and Thompson’s write-up has all sorts of tidbits for potential retro-display builders.
This project is without doubt the most complex I have undertaken, with sixteen IV-11 VFD tubes, two Arduino Mega cards, ten LED Neon light circuits, a servo, an electromagnet, two MAX6921AWI IC Chips, five DC power supplies, a HV power supply, two DC Volt meters, a DC Amp meter, FM stereo radio, 3W power amplifier, LCD screen, and keyboard. Apart from the above parts list, two software programs had to developed from scratch and finally the construction of the entire radio required about 200 hours of work.
I decided to include this project onto the Instructables site not expecting members to reproduce this project in its entirety but rather to cherry pick the elements that where of interest to them. Two areas of particular interest to the site members may be the control of the 16 IV-11 VDF tubes using two MAX6921AWI chips and its associated wiring, and the communications between two Mega 2650 cards.
The various components included into this project have been sourced locally, except the IV-11 tubes, and the MAX6921AWI chips both obtained on EBay. I wanted to bring back to life various items that would otherwise languish in boxes for years. All of the HF valves where sourced with the understanding that all where failed units.
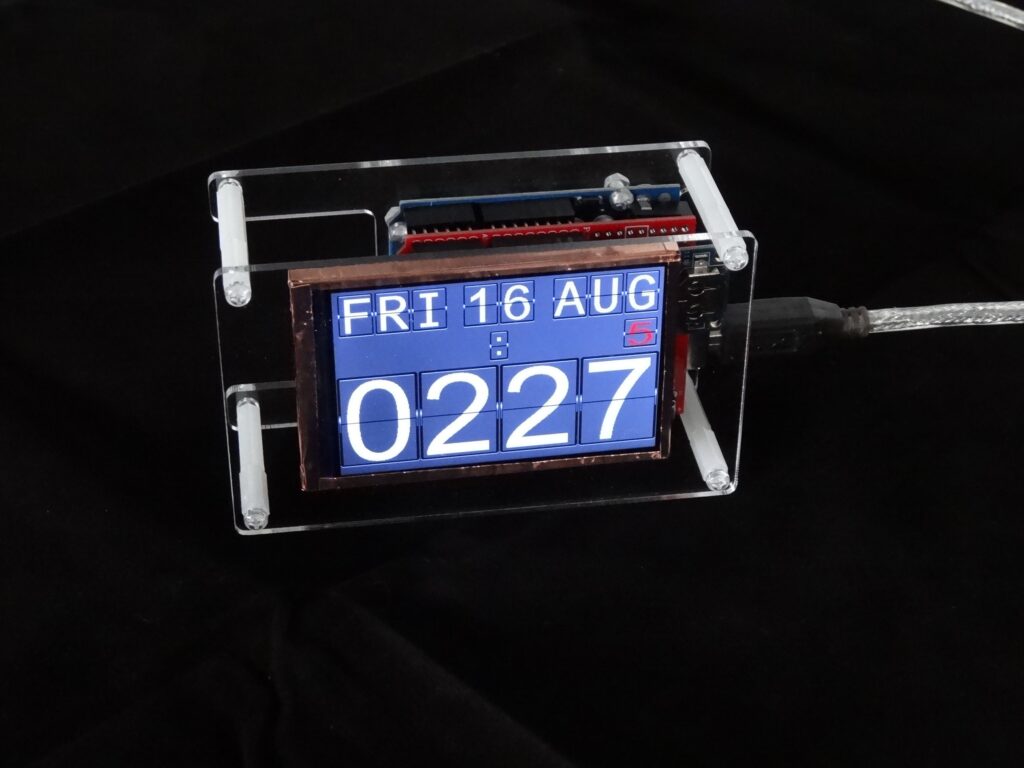
Although flip clocks may be extremely interesting electromechanical devices, with rolling flaps to show what time it is, they’re also fairly complicated if you want to build one yourself. Mark Wilson, however, took a different approach with his project, simulating the output on a 320×240 LCD display.
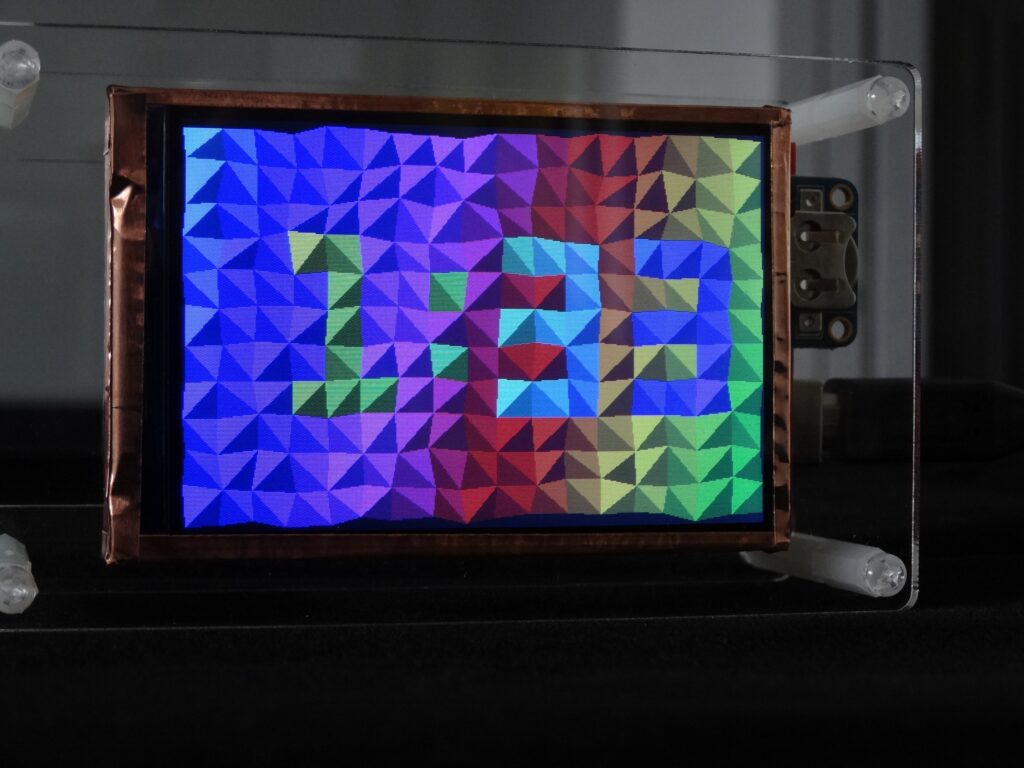
The clock is powered by an Arduino Uno and a DS3231 RTC module, allowing it to show the time, date, a blinking colon, and even the days until the trash/recycling needs to be put out. Alternate screens are available as well, including a Pong clock, triangle clock, and cube clock, which can be individually selected or set to randomly cycle if you so desire.
For its housing, Wilson chose a minimal acrylic/standoff design that seems to suit it well, and you can see it in action in the short demo clip below.
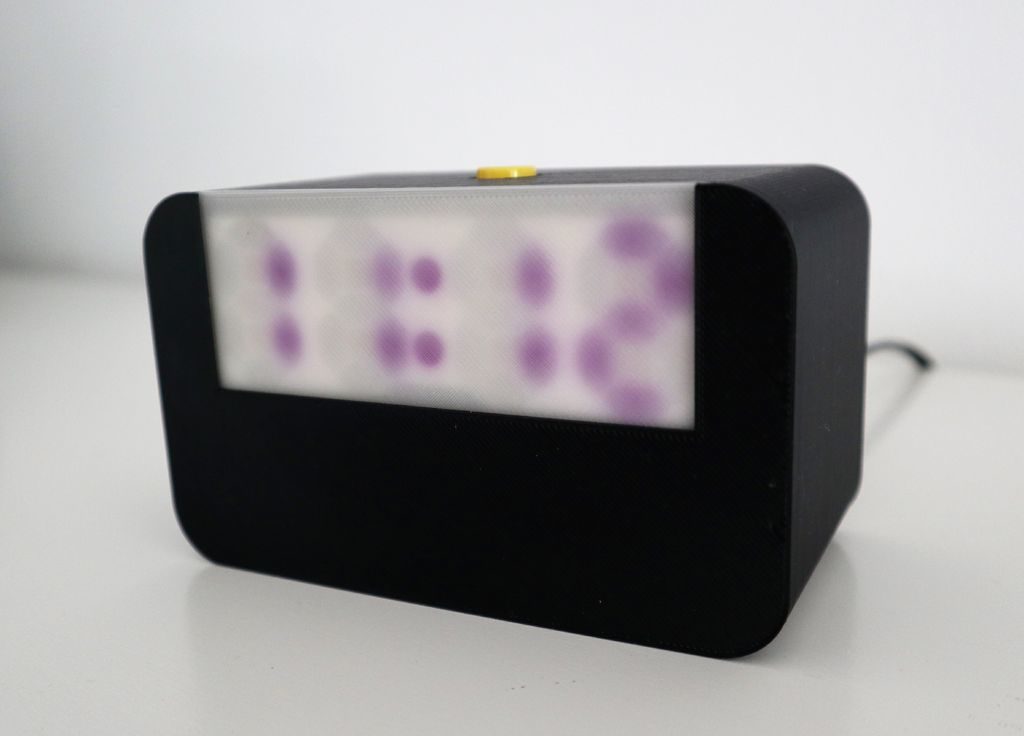
With many LED projects—like clocks—you’ll want to use a diffuser to keep light somewhat even over a wide area. Diffusers, as their name implies, diffuse light, but what if one was to instead use it as the light source itself?
This clever timepiece from Zaphunk does just that, employing an array of UV LEDs to illuminate a photochromic face. In the case of the glowing screen, the material first shines in response to the lit LEDs, then stays ‘on’ after they turn off, showing four numbers and a colon. When the photochromic cover is in use, the filament instead changes color based on the LEDs.
The clock is implemented with an Arduino Nano, an RTC module, and a heavily modified 8-digit 7-segment display, and triggered via the press of a button on top.
This clock uses a custom built 4-digit 7-segment display made from UV LEDs. In front of the display a screen is placed that consists either of phosphorescent (“glow-in-the-dark”) or photochromic material. A push button on the top lights up the UV display which then illuminates the screen for a few seconds so that it starts glowing or changes color which then slowly fades away.
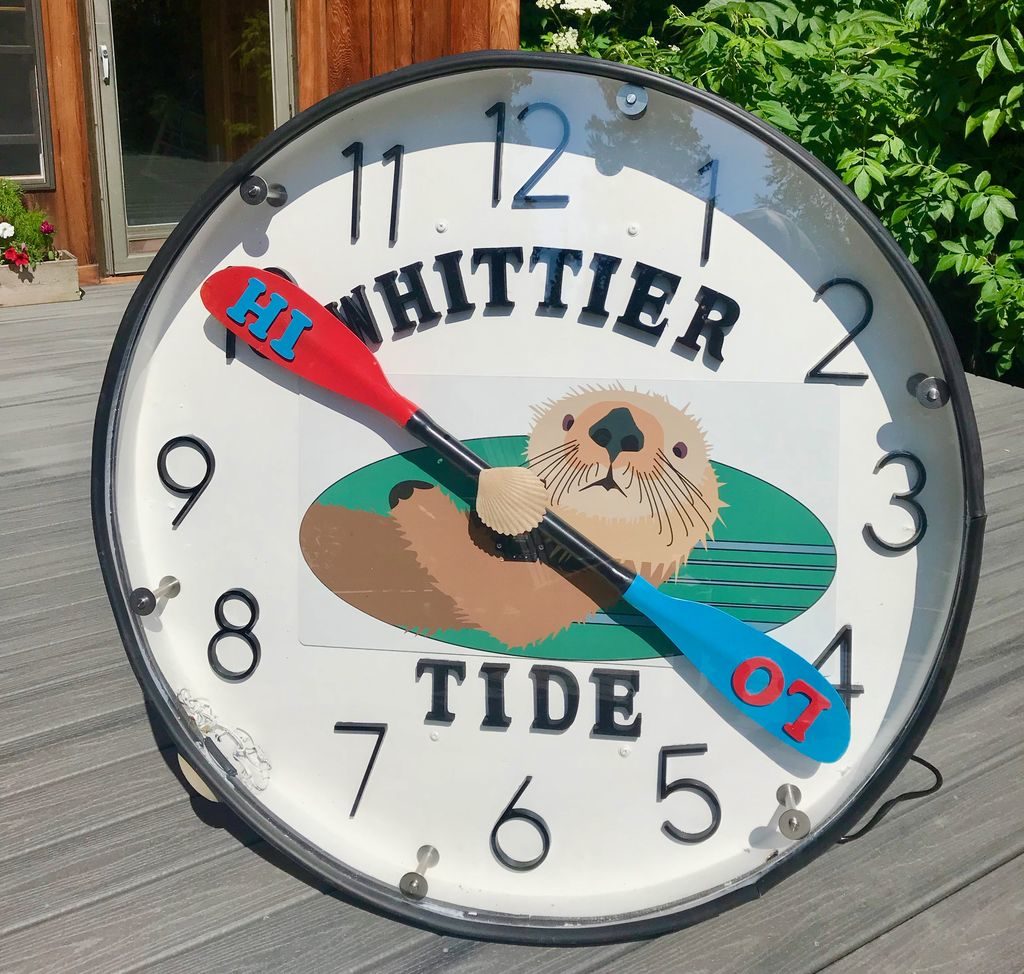
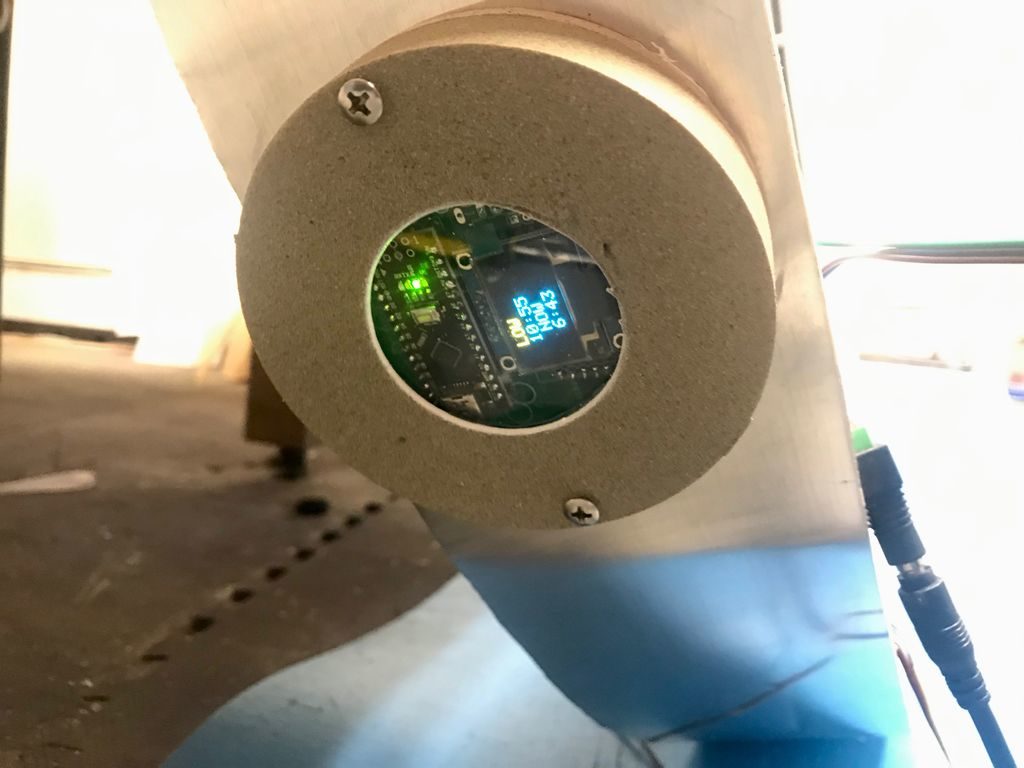
As a gift for friends that operate tours of Prince William Sound in Alaska, maker ‘rabbitcreek’ decided to make a humongous (4’ diameter) tide clock, controlled by dual Arduino Nanos.
One Nano operates the adorable—though very large—otter on the clock’s face via a servo and gear reduction setup that holds a kayak paddle to indicate high and low tides. The other board handles the unit’s RGB LED lighting, which shines the appropriate color to indicate the vast swings in daylight time of that region.
An RTC module for each Nano provides accurate timekeeping—thus proper tide and daylight indications—and a small monitor is used for maintenance tasks. It’s a brilliant build that is certain to delight residents and tourists to the area alike!
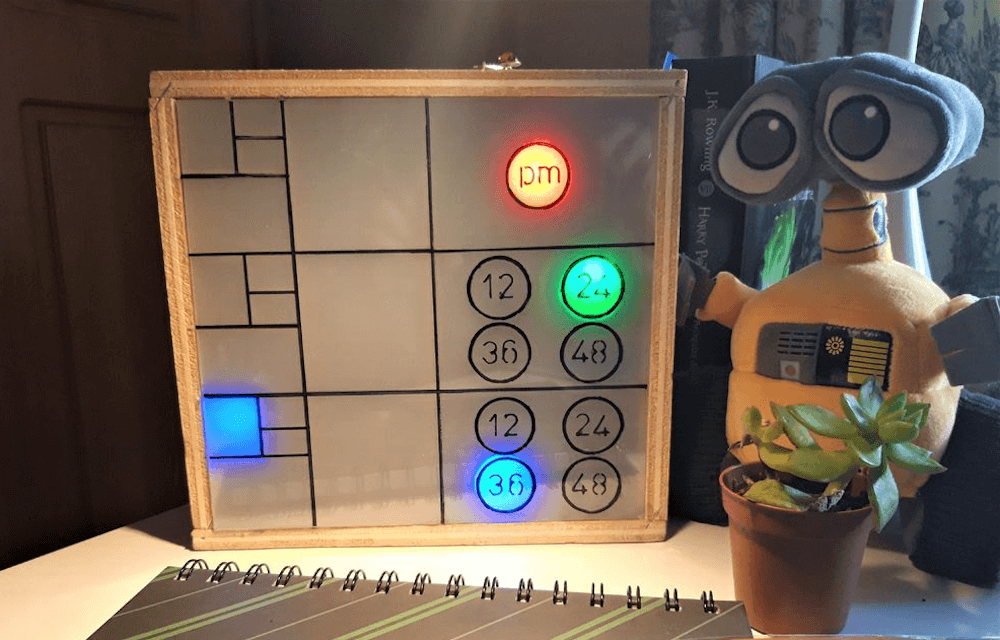
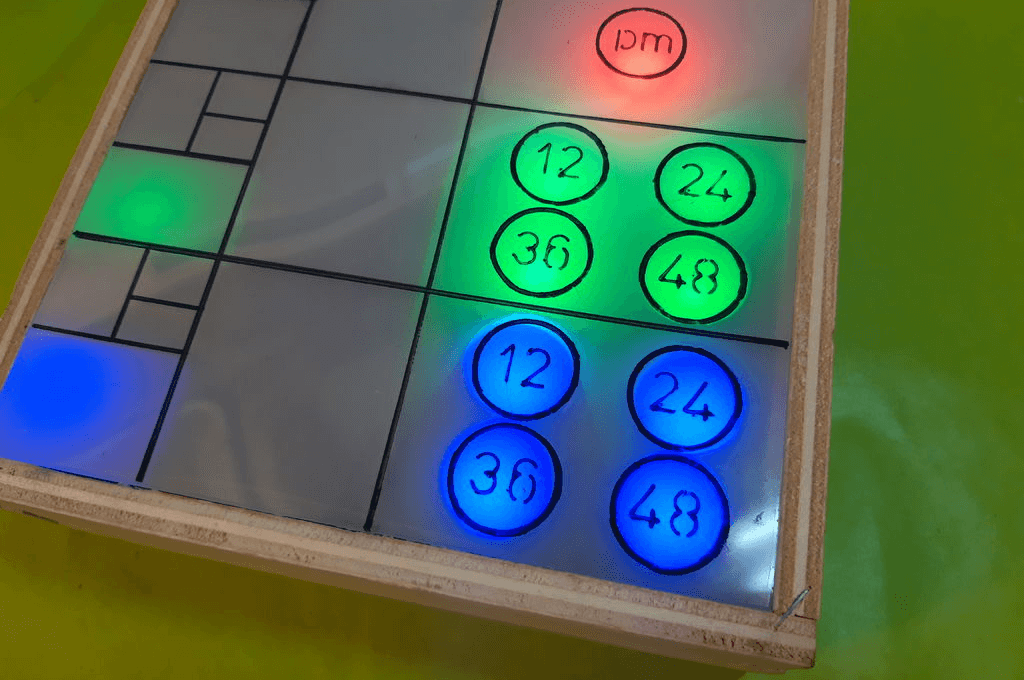
In the early 1200s, Fibonacci introduced a series of numbers that now bear his name, starting with 0, then 1, and continuing on as the sum of the two preceding numbers. This gives values of 0, 1, 1, 2, 3, 5, 8, and so on, and after being prompted by a friend, “TecnoProfesor” decided to turn this numerical pattern into a clock.
The concept here is that instead of using the conventional 1-12 to display the time, this device uses blocks corresponding to Fibonacci numbers 1-5, with circular icons adding increments of 12 for minute and second values.
It’s an interesting concept, somewhat akin to the world of binary or even word clocks. The build consists of an Arduino Mega and a DS3231 RTC module for control, a wood and methacrylate housing, and a number of programmable RGB LEDs to indicate numbers.
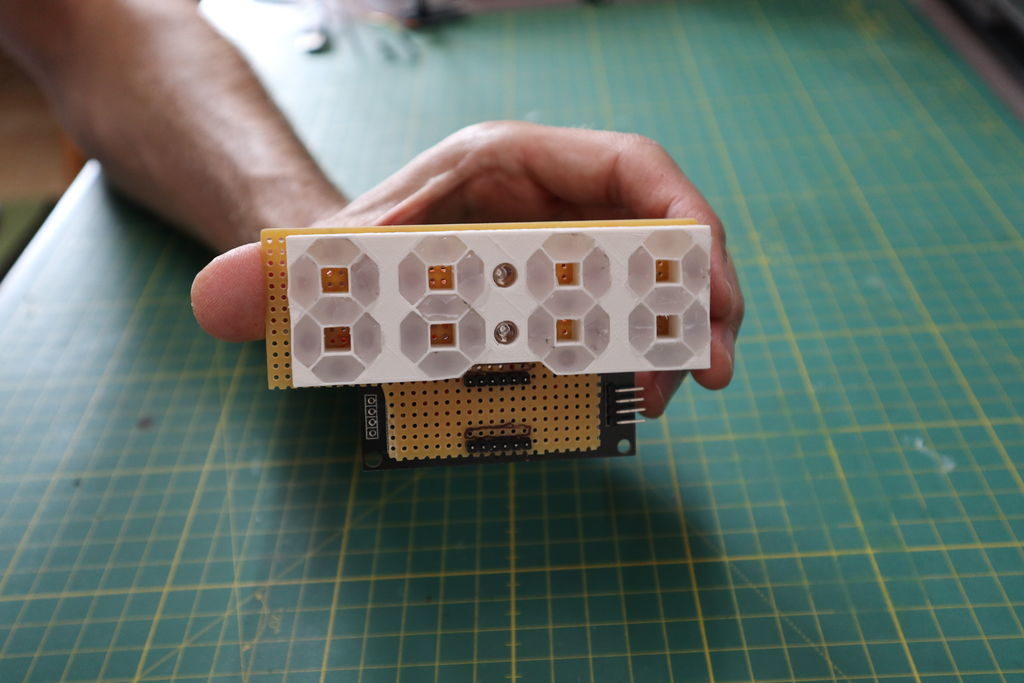
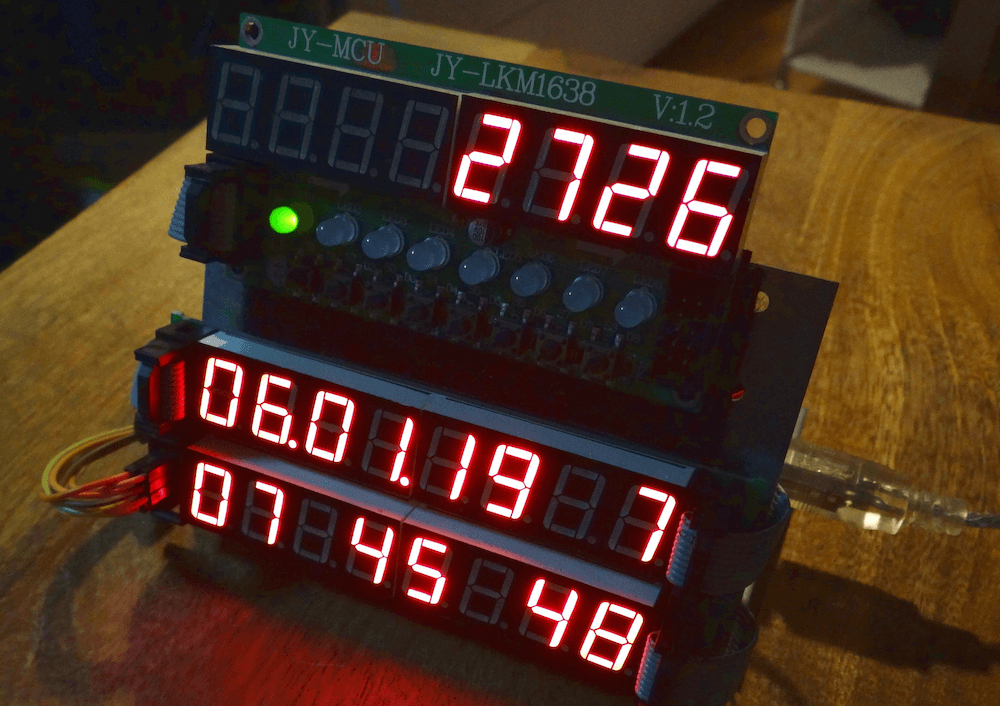
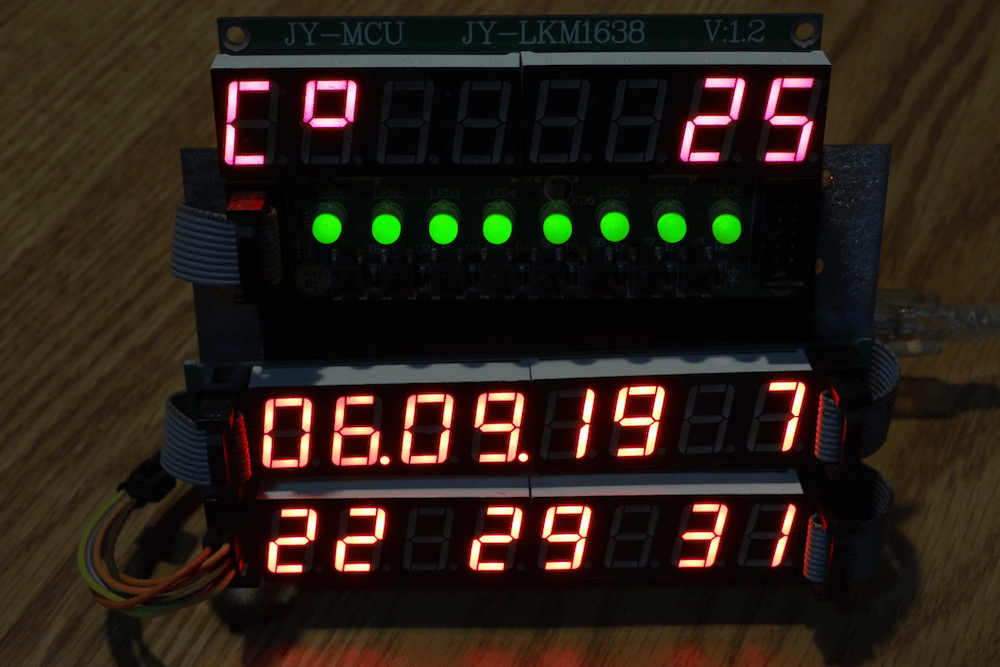
Alarm clocks of old—and certainly many of those today—require several button pushes to set things up properly. Maker Michael Wessel, however, decided to implement his own take on a more intuitive clock, creating a device that features three separate eight-digit seven-segment LED panels. Eight buttons allow for direct manipulation of each of the digits, with their own dedicated LEDs.
The info on display includes time and date, as well as temperature, and it can even show how many days, hours, or minutes have passed since a special pre-programmed day. Up to seven audible alarms are available, which can be silenced by a loud noise (e.g. clapping your hands) via a sound sensor.
The clock is controlled via an Arduino Mega, along with an RTC module to keep things accurate.
I remember I always had to set all digital clocks for my grandparents in the ’80s — these clocks and watches always required some complicated button juggling! So, here it is: a DIY LED alarm clock that my grandparents would have been able to set and use without my help!
An Arduino-based LED clock with 7 individual alarms, highly intuitive user interface, temperature display, and display of days / hours / minutes passed since a special date, e.g., your birthday. An active / ringing alarm can be disabled by making a loud noise, e.g., by clapping your hands. Timer-based PWM sound output for alarm melodies.
The Arduino’s EEPROM is being used to store the alarms of course, and the DS3231 RTC is battery backed up, so it survives a temporary power outage and you won’t be late for work the next morning.
This was put together rather quickly, thanks to off the shelf components, Velcro and existing Arduino libraries for them! The clock can be built for about $30 – 40.
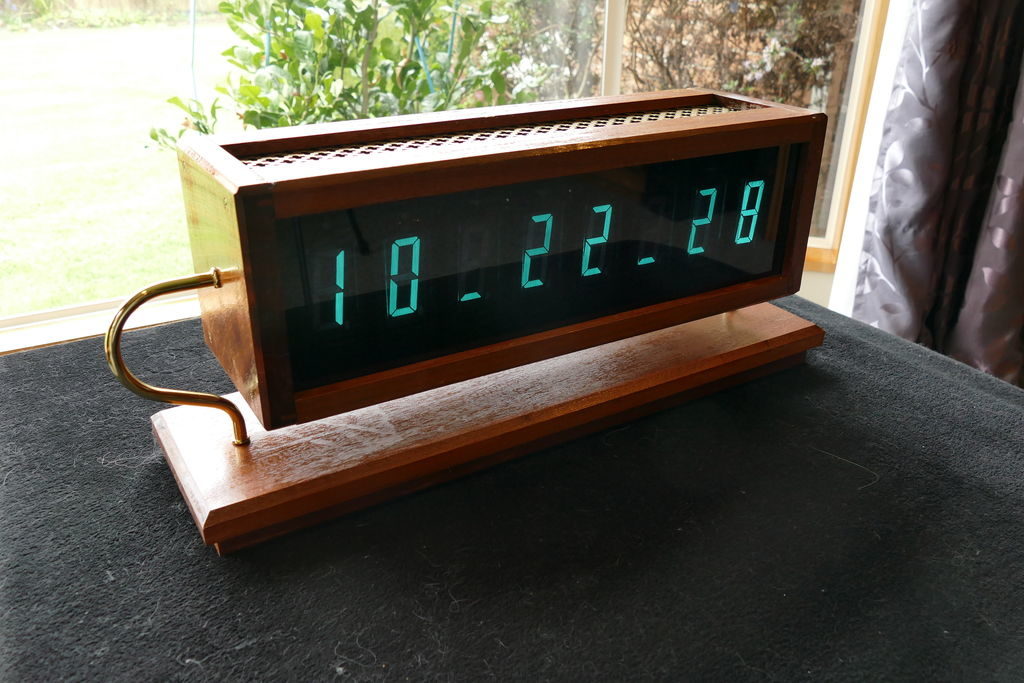
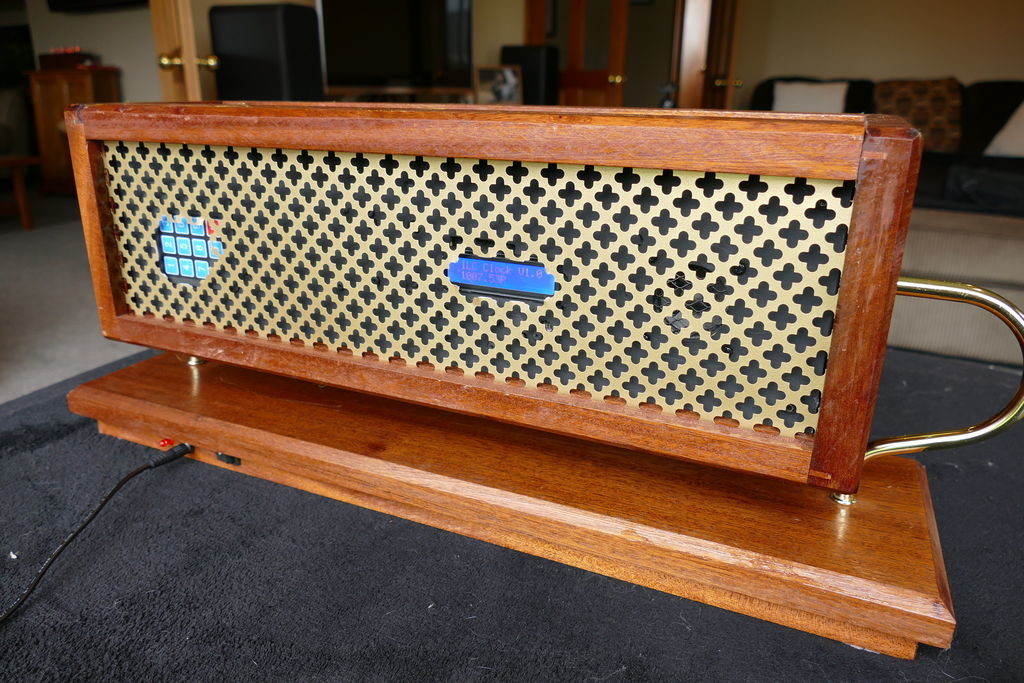
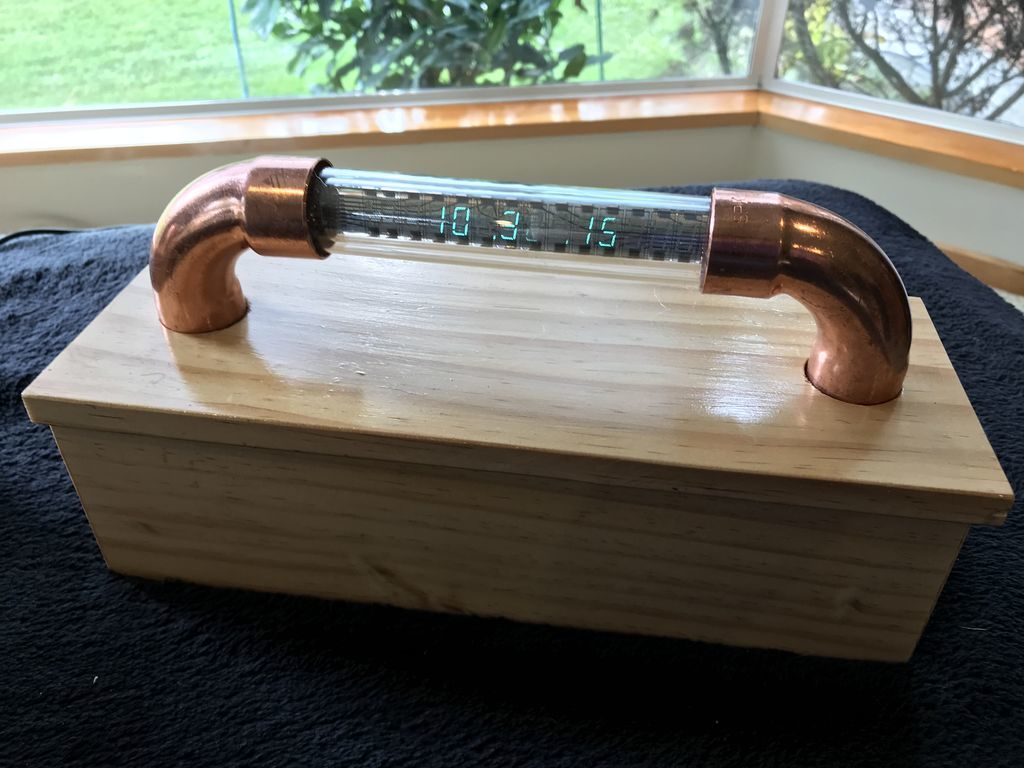
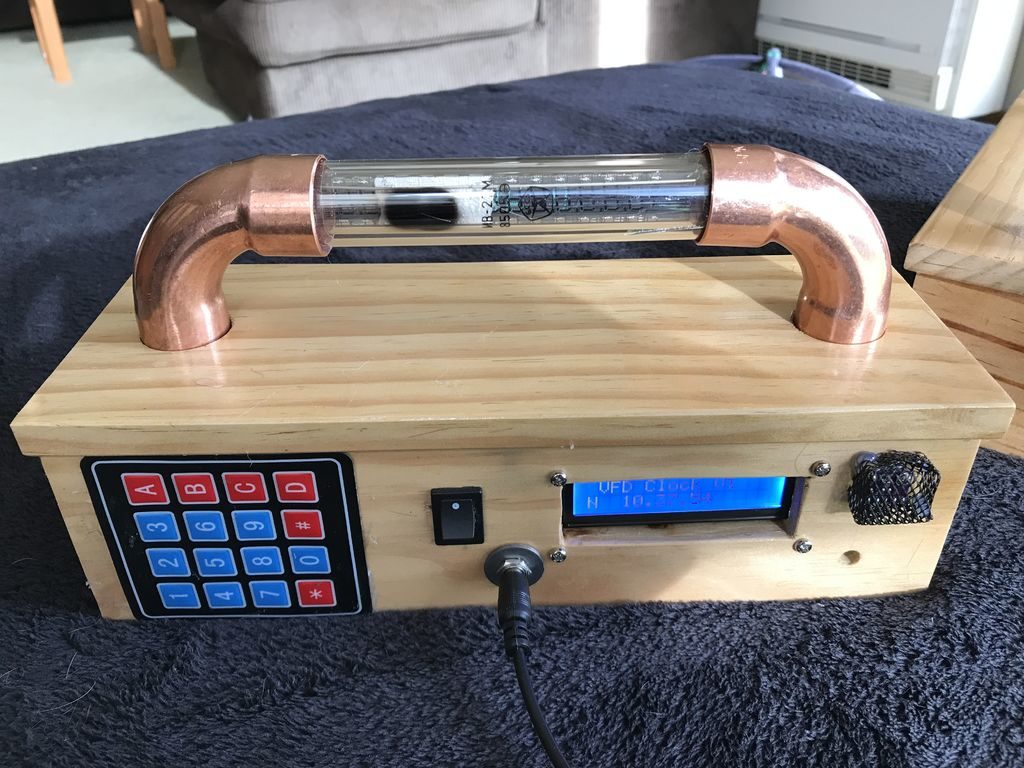
If you’re a fan of novel timepieces, then you’ll want to check out Christine Thompson’s VFD Alarm Clock.
The device features a USSR-manufactured IV-27V 7-segment tube, capable of displaying 13 numbers or letters via a 24V supply, though the MAX6921 chip used here means that only 10 grids are used.
10 characters, however, are plenty to show time, date, humidity, temperature, and pressure, plus the text “WAKE UP!” when an audible alarm sounds.
The clock runs on an Arduino Mega, along with an RTC module, a keypad, and secondary LCD screen on the back to assist with setting it up.
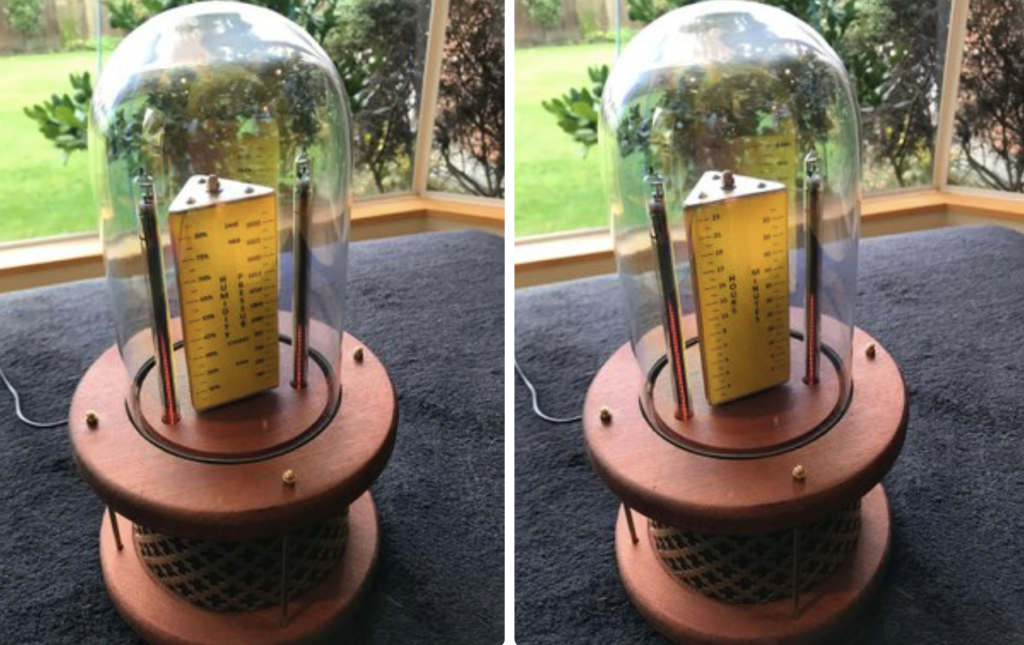
Creators keep coming up with new clock designs, and while you might think that every new possibility has been exhausted, Christine Thompson has proved this assumption wrong once again with her “VFD Trilateral Clock.“
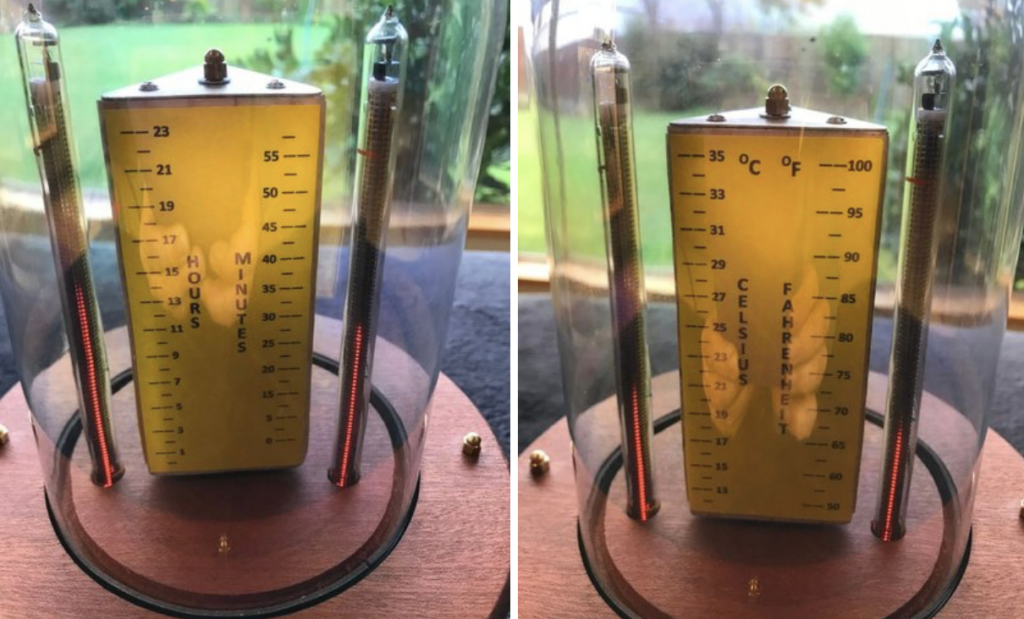
This Arduino Uno-powered device employs a stepper motor to rotate a triangular prism shape with scales for hours and minutes on one side, temperature in Celsius and Fahrenheit on the other, and humidity and pressure on the third surface.
The geometric scale travels in 120-degree steps, causing each face to line up with a pair of IN-13 Nixie tubes on either side. These linear tubes are then used to indicate time and environmental conditions in a beautiful bell jar display, as seen at around 3:30 in the video below.
While waiting for the delivery of parts for another project I decided to push ahead with this project. At its heart is two IN-13M Nixie tubes. These tubes are designed to provide a linear scale between maximum and minimum points using an illuminated column. The project uses two of these IN-13M, three wire Nixie tubes to show, time (Hours and Minutes), temperature (Celsius and Fahrenheit), Humidity (percentage), and Pressure (millibars).
At this point I would like to thank Dr. Scott M. Baker for his great web site, which provided me with all the information I needed to get these Nixie tubes to work. In particular the Current Regulator as displayed and detailed on his web site.
The project uses a BME280 sensor to determine the temperature, pressure and humidity and RTC clock to monitor time. As the system needs to display six different values it was necessary to construct a rotating central display which showed these values against six scales. In order to achieve this an equilateral triangle of wood was fashioned, each side showing two sets of values. A stepper motor was mounted under the top platform and this motor rotates through 120 degrees in time for the next set of values to be displayed on the two Nixie tubes.
If you want to show everyone your computer prowess—or perhaps get a little practice—binary clocks are a great way to do so. These clocks express time in 1s and 0s instead of 0 through 9, and while the concept is pretty simple, actually creating one is less than straightforward… or used to be.
The Binary Clock Shield, now on Crowd Supply, aims to make this type of clock build extremely easy. This board plugs into an Arduino Uno and features 17 RGB LEDs to act as binary digits, along with an RTC module and backup battery socket.
The device also includes a piezo speaker for sound output, plus three user buttons, great for setting the time or whatever other unique application you have in mind!