Posts with «3d printed» label

Pill Dispenser To Keep You On Track

When forgetting to take medication on time can lead to a bad day or night, having a helper to keep you on track can greatly improve your life. [M. Bindhammer] faces this scenario every day, so he built his own robotic pill dispenser.

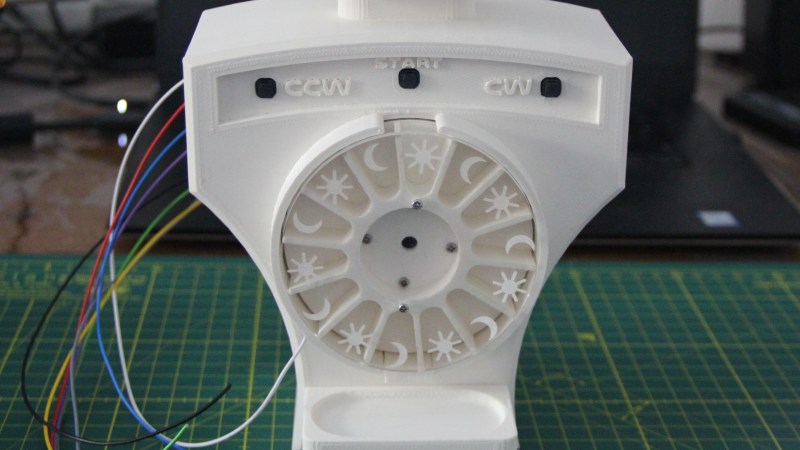
The core of the project is a 3D printed dispensing drum with individual pockets for morning and evening medication. It is mounted directly to a 360° winch servo, normally used for RC sailboats, while a second conventional servo opens a small sliding door to drop the pills onto the dispensing tray. The tray integrates a sensitive touch sensor which can detect when [M] picks up the pills, without being triggered by the pills themselves.

[M. Bindhammer] also included a small but loud speaker, connected to a speech synthesis module for audio reminders. The main controller is a Arduino Due with a custom breakout shield that also integrates a DS3231 real time clock. All the electronics are enclosed in a 80’s style humanoid robot-shaped body, with dispensing drum on its chest, and an OLED screen as it’s face.

The end result is a very polished build, which should make [M. Bindhammer]’s life with bipolar disorder a little bit easier, and he hopes it might help others as well.

For more medication related gadgets, take a peek at another pill dispenser and a 3D printed dosing spoon to replace an essential but discontinued commercial version.

Hackaday Prize 2023: Bolt Bot Micro Servo Droids

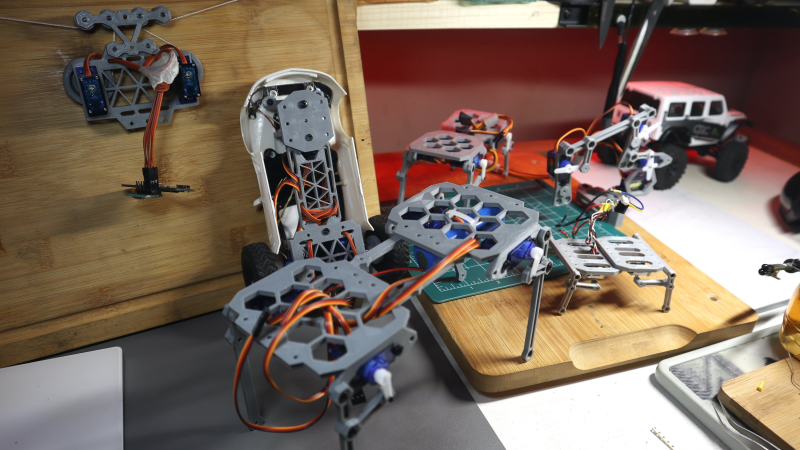
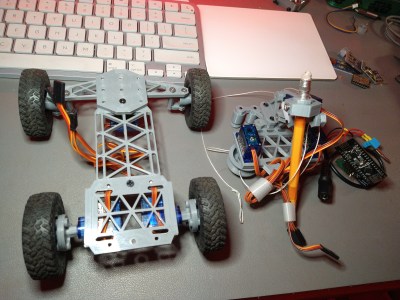
This Hackaday prize entry from [saul] is the beginning of a reconfigurable kit of 3D printed parts and servo motors for robotics learning. With just access to a printer, a few cheap-as-chips servo motors, an Arduino, and some nuts and bolts, you could be hacking together robot walkers within a few hours of starting!

Bolt Bots is very simple to understand, with all the mechanics and wiring out there in the breeze, but strictly for indoor use we reckon. If you want to add remote control to your application, then drop in one of the ubiquitous nRF24L01 boards and build yourself a copy of the remote control [saul] handily provides in this other project.

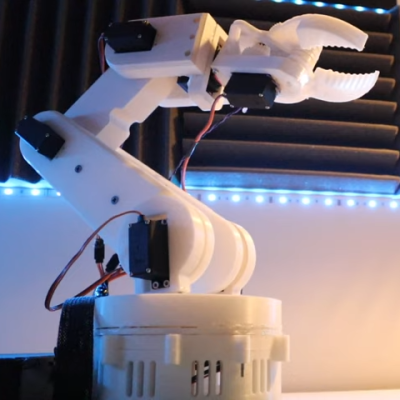
There really isn’t a great deal we can say about this, as it’s essentially a build kit with quite a few configuration options, and you just have to build with it and see what’s possible. We expect the number of parts to proliferate over time giving even more options. So far [saul] demonstrates a few flavors of ‘walkers’, a rudimentary ‘robot arm’, and even a hanging drawbot.

The bolt hardware can be found in this GitHub repo, and the remote control code in this second one.

Servo-based designs are sometimes sneered at due to their dubious accuracy and repeatability, but with a little of effort, this can be vastly improved upon. Also, multi-legged walkers need multiple servos and controllers to drive ’em. Or do they?

The HackadayPrize 2023 is Sponsored by:

Mouse Enjoys Its Freedom

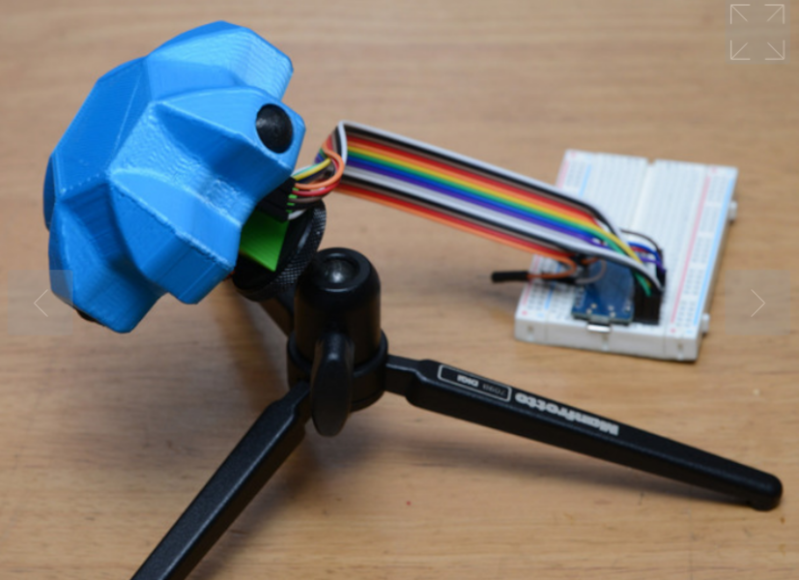
Although it took a little while to standardize on the two-button-with-scroll-wheel setup, most computers have used a mouse or mouse-like device to point at objects on the screen since the 80s. But beyond the standard “point and click” features of the mouse, there have been very few ground-breaking innovations beyond creature comforts. At least, until the “Space Mushroom” mouse from [Shinsaku Hiura] hit our tips line.

This mouse throws away most of the features a typical mouse might have in favor of a joystick-like interface that gives it six degrees of freedom instead of the usual two — while still being about mouse-sized and held in the hand. It doesn’t even have a way of mapping motion directly to movements on the screen. Instead, it maps each degree of freedom to a similar movement of the mouse itself using these three joystick sensors physically linked together, with some underlying programming to translate each movement into the expected movement on the screen.

While this might not replace a standard mouse for every use case anytime soon, it does seem to have tremendous benefit in 3D modeling software, CAD, or anything where orienting a virtual object is the primary goal. Plus, since there’s no limit to the number of mice that can be attached to a computer (beyond USB limitations) this mouse could easily be used in conjunction with a normal mouse much like macro keyboards being used alongside traditional ones.

Thanks to [Rez] for the tip!

A Detonation Engine Prototyped Using Resin Printing

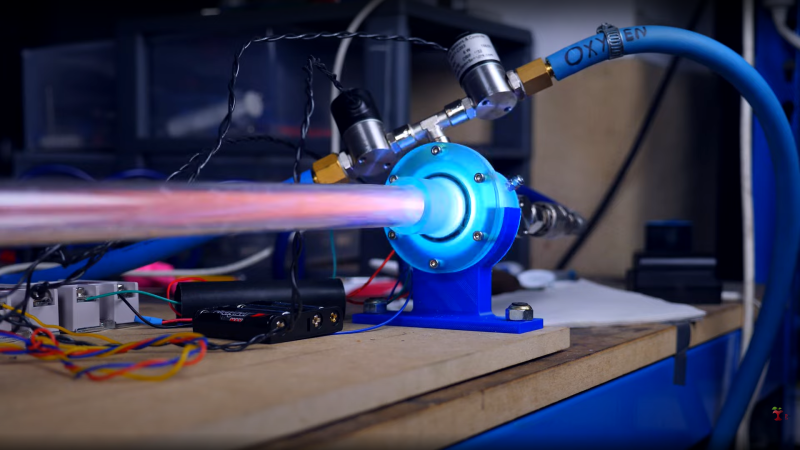
Over the years [Integza] has blown up or melted many types of jet engine, including the humble pulsejet. Earlier improvements revolved around pumping in more fuel, or forced air intakes, but now it’s time for a bit more refinement of the idea, and he takes a sidestep towards the more controllable detonation engine. His latest experiment (video, embedded below) attempts to dial-in the concept a little more. First he built a prototype from a set of resin printed parts, with associated tubing and gas control valves, and a long acrylic tube to send the exhaust down. Control of the butane and air injection, as well as triggering of the spark-ignition, are handled by an Arduino — although he could have just used a 555 timer — driving a few solid state relays. This provided some repeatable control of the pulse rate. This is a journey towards a very interesting engine design, known as the rotating detonation engine. This will be very interesting to see, if he can get it to work.

Supersonic exhaust plume with the characteristic ‘mushroom’ shape

Detonation engines operate due to the pressure part of the general thrust equation, where the action is in the detonative combustion. Detonative combustion takes place at constant pressure, which theoretically should lead to a greater efficiency than boring old deflagration, but the risks are somewhat higher. Apparently this is tricky to achieve with a fuel/air mix, as there just isn’t oomph in the mixture. [Integza] did try adding a Shchelkin spiral (we call them springs around here) which acts to slow down the combustion and shorten the time taken for it to transition from deflagration to detonation.

It sort of worked, but not well enough, so running with butane and pure oxygen was the way forward. This proved the basic idea worked, and the final step was to rebuild the whole thing in metal, with CNC machined end plates and some box section clamped with a few bolts. This appeared to work reasonably well at around 10 pulses/sec with some measurable thrust, but not a lot. More work to be done we think.

We hinted at earlier work on forced-air pulsejets, so here that is. Of course, whilst we’re on the subject of pulsejets, we can’t not mention [Colinfurze] and his pulsejet go kart.

Custom Macro Keyboard With Sweet Backlighting

From the smallest 60% keyboards for those with no desk space to keyboards with number pads for those doing data entry all day, there’s a keyboard size and shape for just about everyone. The only problem, even with the largest keyboards, is that they’re still fairly limited in what they can do. If you find yourself wishing for even more functionality, you might want to build something like this custom macro keyboard with built-in LED backlighting.

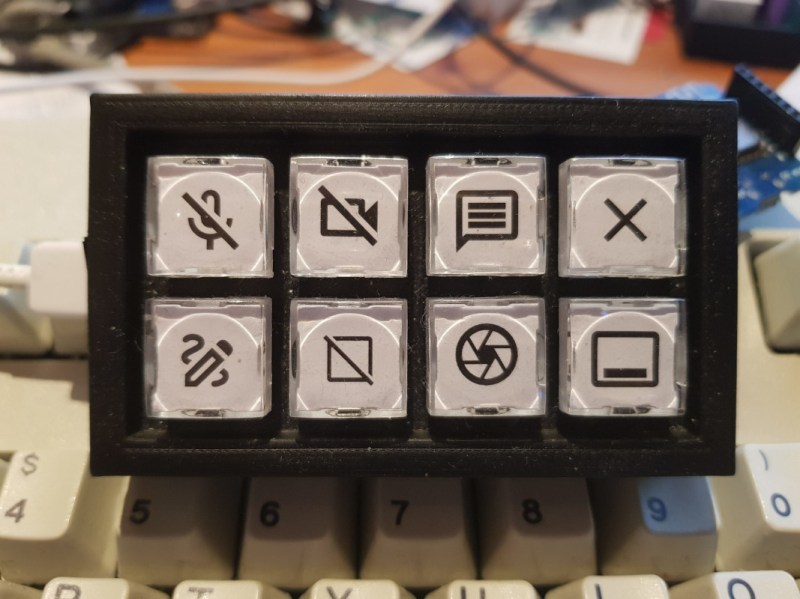
Rather than go with a standard mechanical keyboard switch like a Cherry MX, this build is based around TS26-2 pushbuttons with built-in LED lighting. [atkaper] only really needed one button for managing the mute button on MS Teams, but still built a total of eight switches into this keyboard which can all be individually programmed with different functions. The controller is an Arduino Leonardo and the enclosure was 3D printed.

Paired with the classic IBM Model M keyboard, this new macro keyboard adds plenty of functionality while also having control over LED backlighting. Macro keyboards are incredibly useful, especially with their ability to easily change function with control over the software that runs on them. The key to most builds is the 32U4 chip found in some Atmel microcontrollers which allows it to easily pass keyboard (and mouse) functionality to any computer its plugged in to.

Custom Macro Keyboard With RGB Lighting

From the smallest 60% keyboards for those with no desk space to keyboards with number pads for those doing data entry all day, there’s a keyboard size and shape for just about everyone. The only problem, even with the largest keyboards, is that they’re still fairly limited in what they can do. If you find yourself wishing for even more functionality, you might want to build something like this custom macro keyboard with built-in LED backlighting.

Rather than go with a standard mechanical keyboard switch like a Cherry MX, this build is based around TS26-2 pushbuttons with built-in LED lighting. [atkaper] only really needed one button for managing the mute button on MS Teams, but still built a total of eight switches into this keyboard which can all be individually programmed with different functions. The controller is an Arduino Leonardo and the enclosure was 3D printed.

Paired with the classic IBM Model M keyboard, this new macro keyboard adds plenty of functionality while also having control over LED backlighting. Macro keyboards are incredibly useful, especially with their ability to easily change function with control over the software that runs on them. The key to most builds is the 32U4 chip found in some Atmel microcontrollers which allows it to easily pass keyboard (and mouse) functionality to any computer its plugged in to.

3D Printed Gesture-Controlled Robot Arm is a Ton of Tutorials

Ever wanted your own gesture-controlled robot arm? [EbenKouao]’s DIY Arduino Robot Arm project covers all the bases involved, but even if a robot arm isn’t your jam, his project has plenty to learn from. Every part is carefully explained, complete with source code and a list of required hardware. This approach to documenting a project is great because it not only makes it easy to replicate the results, but it makes it simple to remix, modify, and reuse separate pieces as a reference for other work.

[EbenKouao] uses a 3D-printable robotic gripper, base, and arm design as the foundation of his build. Hobby servos and a single NEMA 17 stepper take care of the moving, and the wiring and motor driving is all carefully explained. Gesture control is done by wearing an articulated glove upon which is mounted flex sensors and MPU6050 accelerometers. These sensors detect the wearer’s movements and turn them into motion commands, which in turn get sent wirelessly from the glove to the robotic arm with HC-05 Bluetooth modules. We really dig [EbenKouao]’s idea of mounting the glove sensors to this slick 3D-printed articulated gauntlet frame, but using a regular glove would work, too. The latest version of the Arduino code can be found on the project’s GitHub repository.

Most of the parts can be 3D printed, how every part works together is carefully explained, and all of the hardware is easily sourced online, making this a very accessible project. Check out the full tutorial video and demonstration, embedded below.

3D printing has been a boon for many projects, especially those involving robotic arms. All kinds of robotic arm projects benefit from the advantages of 3D printing, from designs that focus on utility and function, to clever mechanical designs that reduce part count in unexpected ways.

A Linear Stencil Clock Built for Quiet Operation

We around the Hackaday shop never get tired of seeing new ways to mark the passage of time. Hackers come up with all manner of interesting timekeeping modalities using every imaginable material and method of moving the mechanism once per whatever minimum time unit the hacker chooses to mark.

But honestly, there are only so many ways to make a clock, and while we’re bound to see some repeats, it’s still nice to go over old ground with a fresh approach. Take this linear sliding stencil clock for instance. [Luuk Esselbrugge] has included some cool design elements that bear a closer look. The video below shows that the display is made up of four separate stepper motors, each driving a vertical stencil via a rack-and-pinion mechanism. There a simple microswitch for homing the display, and a Neopixel for lighting things up.

The video below shows that the stencils move very, very slowly; [Luuk] says that this is to keep the steppers as quiet as possible. Still, this means that some time changes take more than a minute to accomplish, which is a minor problem. The Neopixel also doesn’t quite light up just one digit, which should be a pretty easy fix for version 2. Still, even with these issues, we like the stately movements of this clock, and appreciate [Luuk]’s attempts to make it easier to live with.

Don’t let the number of clocks you see on these pages dissuade you from trying something new, or from putting your twist on an old design. Start with fridge magnets, an old oscilloscope, or even a bevy of steel balls, and let your imagination run wild. Just make sure to tell us all about it when you’re done.

[via r/Arduino]

3D Printed SCARA Arm With 3D Printer Components

One of the side effects of the rise of 3D printers has been the increased availability and low cost of 3D printer components, which are use fill for range of applications. [How To Mechatronics] capitalized on this and built a SCARA robot arm using 3D-printed parts and common 3D-printer components.

The basic SCARA mechanism is a two-link arm, similar to a human arm. The end of the second joint can move through the XY-plane by rotating at the base and elbow of the mechanism. [How To Mechatronics] added Z-motion by moving the base of the first arm on four vertical linear rods with a lead screw. A combination of thrust bearings and ball bearings allow for smooth rotation of each of the joints, which are belt-driven with NEMA17 stepper motors. Each joint has a microswitch at a certain position in its rotation to give it a home position. The jaws of the gripper slide on two parallel linear rods, and are actuated with a servo. For controlling the motors, an Arduino Uno and CNC stepper shield was used.

The arm is operated from a computer with a GUI written in Processing, which sends instructions to the Arduino over serial. The GUI allows for both direct forward kinematic control of the joints, and inverse kinematic control,  which will automatically move the gripper to a specified coordinate. The GUI can also save positions, and then string them together to do complete tasks autonomously.

The base joint is a bit wobbly due to the weight of the rest of the arm, but this could be fixed by using a frame to support it at the top as well. We really like the fact that commonly available components were used, and the link in the first paragraph has detailed instructions and source files for building your own. If the remaining backlash can be solved, it could be a decent light duty CNC platform, especially with the small footprint and large travel area. This is very similar to a wooden SCARA robots we’ve seen before, except that one put the Z-axis at the gripper. We’ve also seen a few 3D printers and pen plotters that used this layout.

Concentric Rings Keep this Calendar Perpetually Up to Date

The variety of ways that people find to show the passage of time never ceases to amaze us. Just when you think you’ve seen them all, someone comes up with something new and unusual, like the concentric rings of this automated perpetual calendar.

What we really like about the design that [tomatoskins] came up with is both its simplicity and its mystery. By hiding the mechanism, which is just a 3D-printed internal ring gear attached to the back of each ring, it invites people in to check it out closely and discover more. Doing so reveals that each ring is hanging from a pinion gear on a small stepper motor, which rotates it to the right point once a day or once a month. Most of the clock is made from wood, with the rings themselves made using the same technique that woodturners use to create blanks for turning bowls — or a Death Star. We love the look the method yields, although it could be even cooler with contrasting colors and grains for each segment. And there’s nothing stopping someone from reproducing this with laser-cut parts, or adding rings to display the time too.

Another nice tip in this write up is the trick [tomatoskins] used to label the rings, by transferring laser-printed characters from paper to wood using nothing but water-based polyurethane wood finish. That’s one to file away for another day.