Posts with «arduino leonardo» label

Screech Owl is a Tribute to The Eowave Persephone

The Eowave Persephone was a beautiful thing—a monophonic ribbon synth capable of producing clean, smoothly varying tones. [Ben Glover] used to own a nice example that formerly belonged to Peter Christopherson, but lost it in the shifting sands of time. His solution was to build one of his own from scratch.
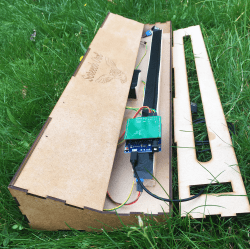
It’s a simple build, but the final result puts out a nice pleasant sound.

Known as the Screech Owl, the build is based around a custom shield designed to suit the Arduino Leonardo. The primary control interface is a Softpot 500 mm membrane potentiometer, layered up with a further thin film pressure sensor which provides aftertouch control. The Leonardo reads these sensors and synthesizes the appropriate frequencies in turn.

All the electronics is wrapped up inside a tidy laser-cut enclosure that roughly approximates the design of the original Eowave device. [Ben] noted the value of services like Fiverr and ChatGPT for helping him with the design, while he also enjoyed getting his first shield design professionally manufactured via JLCPCB.

It’s a tidy build, and in [Ben’s] capable hands, it sounds pretty good, too. We’ve seen some other great ribbon controlled synths before, too. Video after the break.

MIL-SPEC Keyboard Now Salutes USB

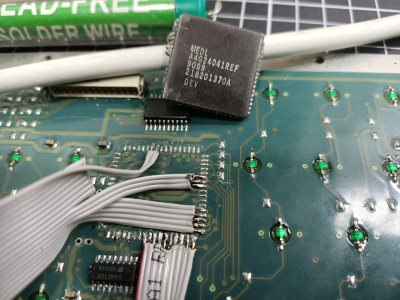
When [easyjo] picked up this late ’80s Marconi mil-spec keyboard for cheap, he knew it wouldn’t be easy to convert it to USB — just that it would be worth it. Spoiler alert: those LEDs aren’t a mod, they’re native. They get their interesting shape from the key traces, which are in the four corners.

Despite having way-cool buttons such as WPNS HOLD, and the fact that Control is on the home row where it belongs, this keyboard does not look fun to type on at all for any length of time. Of course, the point of this keyboard is not comfort, but a reliable input device that keeps out dust, sweat, liquids, and the enemy.

This is probably why the controller is embedded into the underside of the key switch PCB instead of living on its own board.  [easyjo] tried to analyze the signals from the existing 26-pin connector, but it didn’t work out.

So once he was able to decode the matrix, he removed the controller chip and wired the rows and columns directly to an Arduino Leonardo. Fortunately, the LEDs were just a matter of powering their columns from the front side of the board.

The availability of certain kinds of military surplus can make for really interesting modernization projects, like adding POTS to a field telephone.

Via r/duino

Hacking An Arduino NFC Reader With WebUSB

When [gdarchen] wanted to read some NFC tags, he went through several iterations. First, he tried an Electron application, and then a client-server architecture. But his final iteration was to make a standalone reader with an Arduino and use WebUSB to connect to the application on the PC.

This sounds easy, but there were quite a few tricks required to make it work. He had to hack the board to get the NFC reader’s interrupt connected correctly because he was using a Leonardo board. But the biggest problem was enabling WebUSB support. There’s a library, but you have to change over your Arduino to use USB 2.1. It turns out that’s not hard, but there’s a caveat: Once you make this change you will need the WebUSB library in all your programs or Windows will refuse to recognize the Arduino and you won’t be able to easily reprogram it.

Once you fix those things, the rest is pretty easy. The PC side uses node.js. If you back up a level in the GitHub repository, you can see the earlier non-Arduino versions of the code, as well.

If you want to understand all the logic that went into the design, the author also included a slide show that discusses the three versions and their pros and cons. He did mention that he wanted a short-range solution so barcodes and QR codes were out. He also decided against RFID but didn’t really say why.

NFC business cards are a thing. You can also use them to catch some public transportation.

A Macro Keyboard In A Micro Package

Remember back in the early-to-mid 2000s when pretty much every cheap USB keyboard you could find started including an abundance of media keys in its layout? Nowadays, especially if you have a customized or reduced-sized mechanical keyboard, those are nowhere to be seen. Whenever our modern selves need those extra keys, we have to turn to external peripherals, and [Gary’s] Knobo is one that looks like it could’ve come straight out of a fancy retail package.

The Knobo is a small macro keypad with 8 mechanical Cherry-style keys and a clickable rotary encoder knob as its main feature. Each key and knob gesture can be customized to any macro, and with five gestures possible with the knob, that gives you a total of thirteen inputs. On top of that, the build and presentation look so sleek and clean we’d swear this was a product straight off of Teenage Engineering’s money-printing machine.

The actions you can do with those inputs range from simple media controls with a volume knob all the way to shortcuts to make a Photoshop artist’s life easier. Right now you can only reprogram the Knobo’s Arduino-based firmware with an In-Circuit Serial Programmer to change what the inputs do, but [Gary] is currently working on configuration software so that users without any programming knowledge will be able to customize it too.

Knobs are just one of those things that everyone wants to use to control their computers, much like giant red buttons. Alternative input devices can range from accessibility-designed to just downright playful. Whatever the inspiration is for them, it’s always nice to see the creativity of these projects.

The HackadayPrize2019 is Sponsored by:

Arduino Leonardo Gets A Lockable Bootloader

Security is something that’s far too often overlooked in embedded devices. One of the main risks is that if the device doesn’t verify the authenticity of incoming firmware updates. [Walter Schreppers] was working on a USB password storage device, so security was paramount. Thus, it was necessary to develop a secure bootloader.

[Walter]’s device was based upon the Arduino Leonardo. Starting with the Caterina bootloader, modifications were made to enable the device to be locked and unlocked for programming. This can be done in a variety of ways, depending on how things are setup. Unlocking can be by using a secret serial string, an onboard jumper, and [Walter] even suspects a SHA1 challenge/response could be used if you were so inclined.

It’s never too soon to start thinking about security in your projects. After all, we must stave off the cyberpunk future in which leather-clad youths flick all your lights on and off before burning your house down in the night by overclocking the water heater. Naturally, we’ve got a primer to get you going in the right direction. Happy hacking!

Vintage Atari Becomes Modern Keyboard

The modern keyboard enthusiast is blessed with innumerable choices when it comes to typing hardware. There are keyboards designed specifically for gaming, fast typing, ergonomics, and all manner of other criteria. [iot4c] undertook their own build for no other reason than nostalgia – which sounds plenty fun to us.

An Arduino Leonardo is pressed into service for this hack. With its USB HID capabilities, it’s perfectly suited for custom keyboard builds. It’s built into a working Atari 65XE computer, and connected to the keyboard matrix. The Keypad and Keyboard libraries are pressed into service to turn keypresses on the 80s keyboard into easily digseted USB data.

There’s plenty of room inside the computer for the added hardware, with the USB cable neatly sneaked out the rear. [iot4c] notes that everything still works and the added hardware does not cause any problems, as long as it’s not used as a computer and a keyboard at the same time.

It’s possible to do a similar hack on the Commodore 64, too. If you’re doing tricky keyboard builds yourself, you know where to send ’em.

A Keyboard To Stomp On

Macros are useful things. They allow one to execute a series of commands with a single keypress. There exists a wide variety of hardware and software solutions to create and use macros to improve your workflow, and now [Evan] has brought the open-source ManyKey into the fray, along with a build tutorial to boot.

The tutorial acts as a great introduction to ManyKey, as [Evan] walks through the construction of a macro keyboard designed to be operated by the feet. Based around the Arduino Leonardo and using off-the-shelf footswitches commonly used in guitar effects, it’s accessible while still hinting at the flexibility of the system. Macros are programmed into the keyboard through a Python app which communicates over serial, and configurations are saved into the Arduino’s onboard EEPROM. The ManyKey source is naturally available over at GitHub.

[Evan] tells us he uses his setup to run DJ software with his feet while his hands are busy on the turntables. That said, there’s all manner of other applications this could be used for. Efficiency is everything, and we love to see keyboard projects that aim to improve workflow with new ideas and custom builds – this shortcut keyboard makes a great example.


Create a gesture control unit for your PC using Skywriter and Arduino

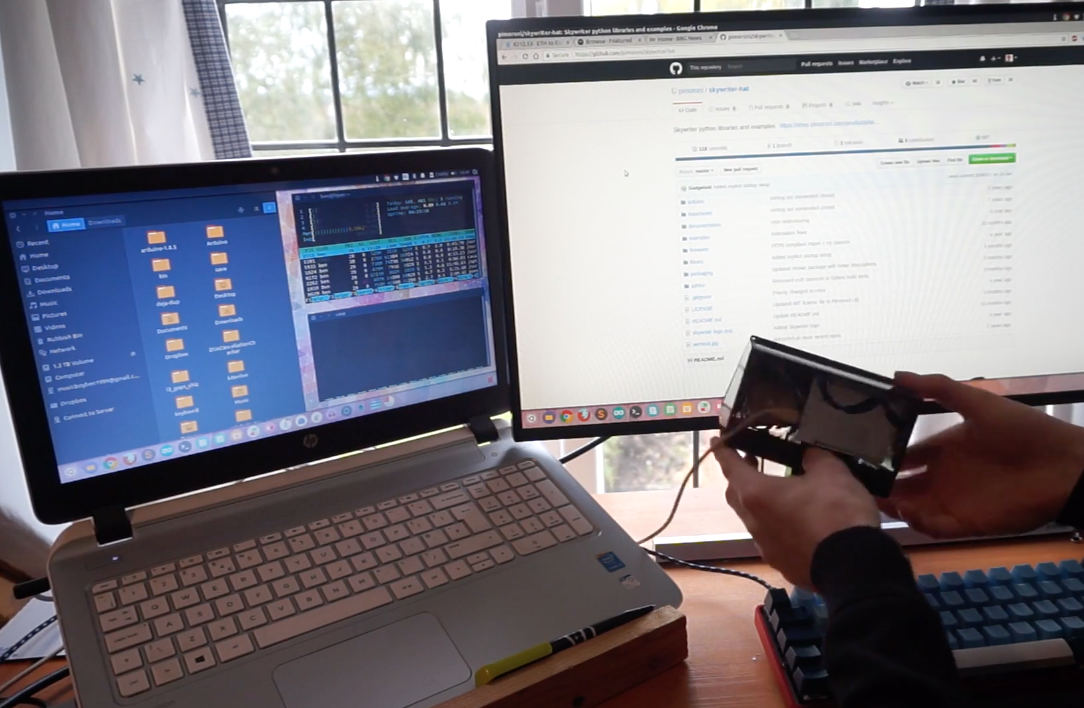
While keyboards are great, and custom shortcuts can make things even better, why not do away with buttons and knobs altogether, controlling your computer instead via simple gestures? Maker Ben James has done just this, creating a unique interface using a Skywriter device to pick up finger movements, along with an Arduino Leonardo to emulate a keyboard on his laptop.

Since the Skywriter can detect a number of gestures, James assigned various swipes, taps and circular motions to keyboard commands. As you can see in the video here, the results are pretty neat. 

More info on this project can be found on his blog post, and its code is available on GitHub.

Over-engineered, Arduino-powered closet lights

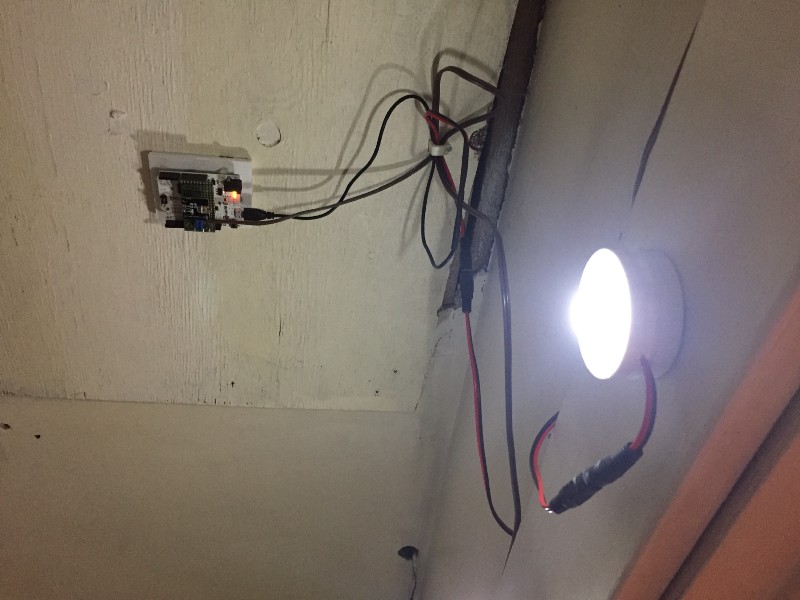
If you’re faced with a closet that doesn’t have any lights inside, you simply could go and find puck lights at most retail stores. But, if you’re Dillon Nichols, you buy a set of lights, and enhance them with a wired power supply and automatic Arduino control.

To accomplish this, Nichols decoded the infrared remote control signal to his puck lights using an Arduino Leonardo, then set up things up to sense the door’s opening via a physical switch and signal the lights accordingly. Now when he opens the closet, lights automatically shine down and fade out when it’s closed.

He also added a timer, so that they turn off after 10 minutes automatically if he forgets to shut the door. Looking for an over-engineered, non-permanent solution for yourself? You can check out his detailed write-up here and find the code for his build on GitHub.

Hack an old typewriter with Arduino for digital input

Mechanical typewriters are, for the most part, a thing of the past. Though the tactile feedback of these machines is interesting, as is the ability to directly mark on a piece of paper, they lack the important ability to input instructions into a modern computer. Konstantin Schauwecker, not satisfied with this analog-only output, decided to retrofit a German Olympia Monica typewriter as a unique digital user input device.

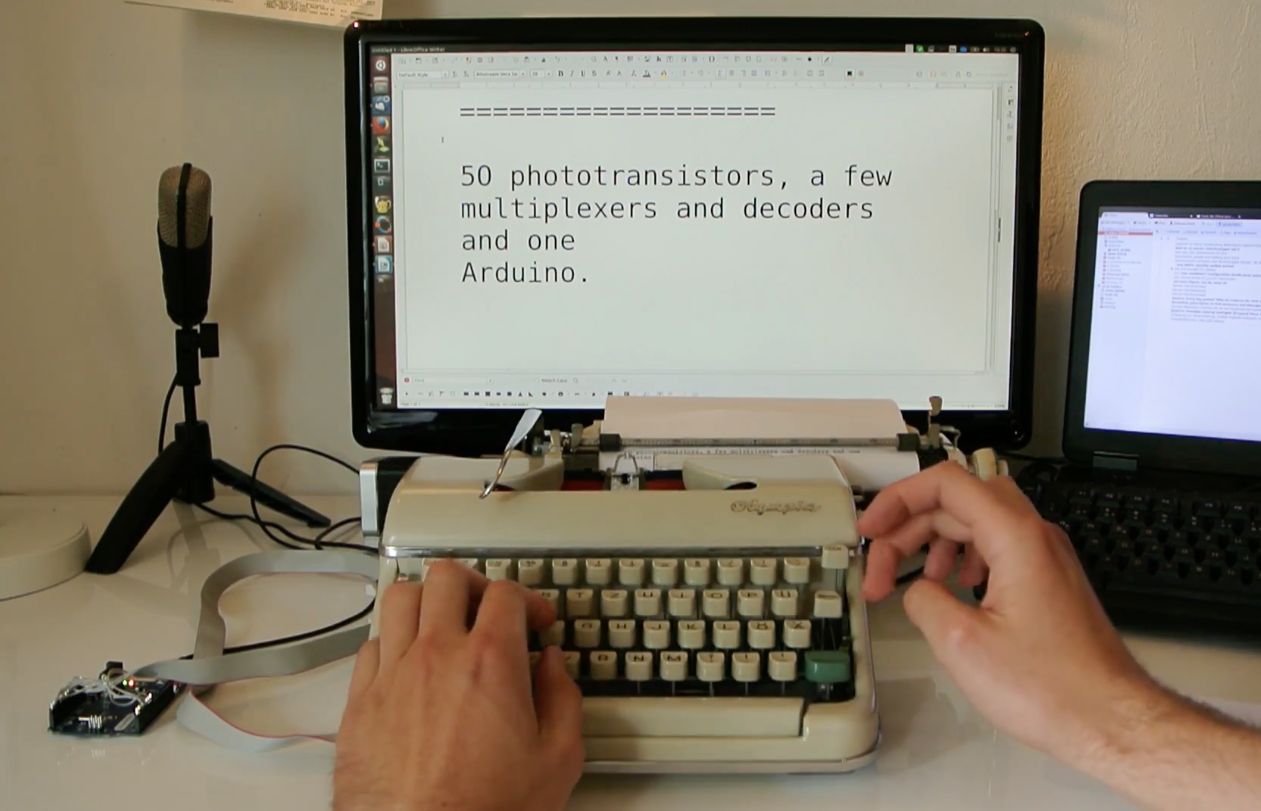
To accomplish this, he created a PCB with phototransistors that sense when the linkages for each key are pushed down. The result is a keyboard that functions perfectly well as a manual typewriter, and pushes this data to a computer using an Arduino Leonardo.

I modified a vintage type writer to function as a USB keyboard using an Arduino and 50 phototransistors. The typewriter is a German Olympia Monica that I bought at a local flea market. For this project I created a simple PCB that carries the phototransistors and several multiplexers and decoders. The PCB is connected to the Arduino through a ribbon cable. I used an Arduino Leonardo, which can function as a USB input device.

Check out Schauwecker’s write-up for more info on this clever build.