Posts with «research» label

One Method For Removing Future Space Junk

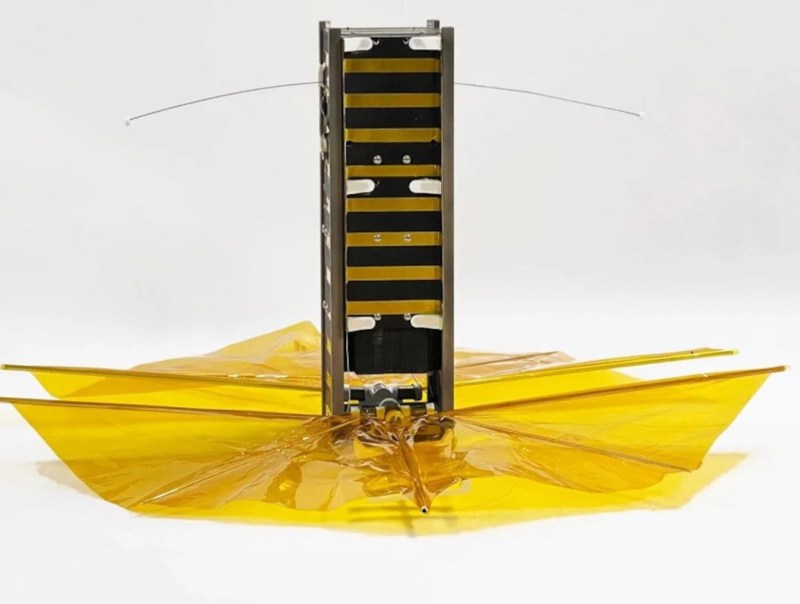
When sending satellites into space, the idea is to place them into as stable an orbit as possible in order to maximize both the time the satellite is useful and the economics of sending it there in the first place. This tends to become rather untenable as the amount of space junk continues to pile up for all but the lowest of orbits, but a team at Brown University recently tested a satellite that might help solve this problem, at least for future satellite deployments.

The main test of this satellite was its drag sail, which increases its atmospheric drag significantly and reduces its spaceflight time to around five years. This might make it seem like a problem from an economics standpoint, as it’s quite expensive to build satellites and launch them into space, but this satellite solves these problems by being both extremely small to minimize launch costs, and also by being built out of off-the-shelf components not typically rated for spaceflight. For example, it gets its power solely from AA batteries and uses an Arduino for its operation and other research.

The satellite is currently in orbit, and has already descended from an altitude of 520 km to 470 km. While it won’t help reduce the existing amount of debris in orbit, the research team hopes to demonstrate that small satellites can be affordable and economically feasible without further contributing to the growing problem of space junk. If you’re looking to launch your own CubeSat one day, take a look at this primer which goes over most of the basics.

Hack a Day 22 Mar 16:30

Arduino goes to space series: A new hope

We recently sponsored one of the labs at Lulea University in Sweden, the INSPIRE (INstrumentation for Space and Planetary Investigation, Resources and Exploration) Lab. It is not just any lab, it is the lab from Prof. Mari Paz Zorzano and Prof. Javier Martín, both known for their work in the possibility of discovering water on Mars’ surface, this extent was published in this Nature magazine article in 2015, among other places.

What I learned rather quickly, thanks to my interactions with both professors over the last couple of years, is that Arduino has been a basic component in the countless projects made in their lab–the Mega and Due are their students’ favorites due to the amount of available pins as well as robustness of the earlier; but also because of the floating comma, analog to digital converter, and general relevance for instrumentation of the latter.

This article is going to be the first of a series where we will highlight the way the Lulea lab is using Arduino for instruments, real life experiences, zero gravity tests, low orbit missions, and general teaching. We hope they will inspire many to follow in their steps and look at the stars with a renewed interest in science and technology.

Meet the players

Mari Paz and Javier were known to me before I actually got to meet up with them in person. As a researcher, I had heard of the article in Nature, who hadn’t? Plus, since both of them come from Spain (as I do), you can imagine that the national press was covering their finding pretty well when it was published. Funny enough, they knew about Arduino because they, as many researchers, needed to figure out methods to better finance their experiments, and Arduino is a tool known for being affordable, as well as technically competent to command many of their tests. I should confess that, by the time we all got in touch, I was already trying to figure out how to talk to them.

In November 2016, Mari Paz and Javier had just opened their lab in Kiruna, their discovery had given them new positions at a new university (Lulea University, owner of the Kiruna campus, closer to the launching station), a new team, and access to a lot more resources. And so they got back to work. I was invited to give a speech as part of their seminar series and later host a short workshop mainly for master and PhD students. The Kiruna campus in November is completely surrounded by snow. You can make it there skiing several months in the year, something I got told people do sometimes. However, the city of Kiruna is going to go through a bunch of transformations (the city center will be moved 30km due to the mine that is literally under it), and the professors decided to move their lab to Lulea’s main campus for the time being. Follow the descriptions of some of the projects developed there.

Project 1: PVT-Gamers

One of the biggest challenges for spacecrafts is how to weigh the remaining propellant (fuel) in the absence of gravity. With contemporary space vehicles in mind, which can be reused, this has become one of the most economically critical limitations to be taken into account. PVT-Gamers is the acronym for ‘Improved Pressure-Volume-Temperature Gauging Method for Electric-Propulsion Systems’ experiment designed at the INSPIRE Lab. It is exploring the use of pressurized propellants, like Xenon, and monitoring how it is used and how much is left to keep the spacecraft moving.

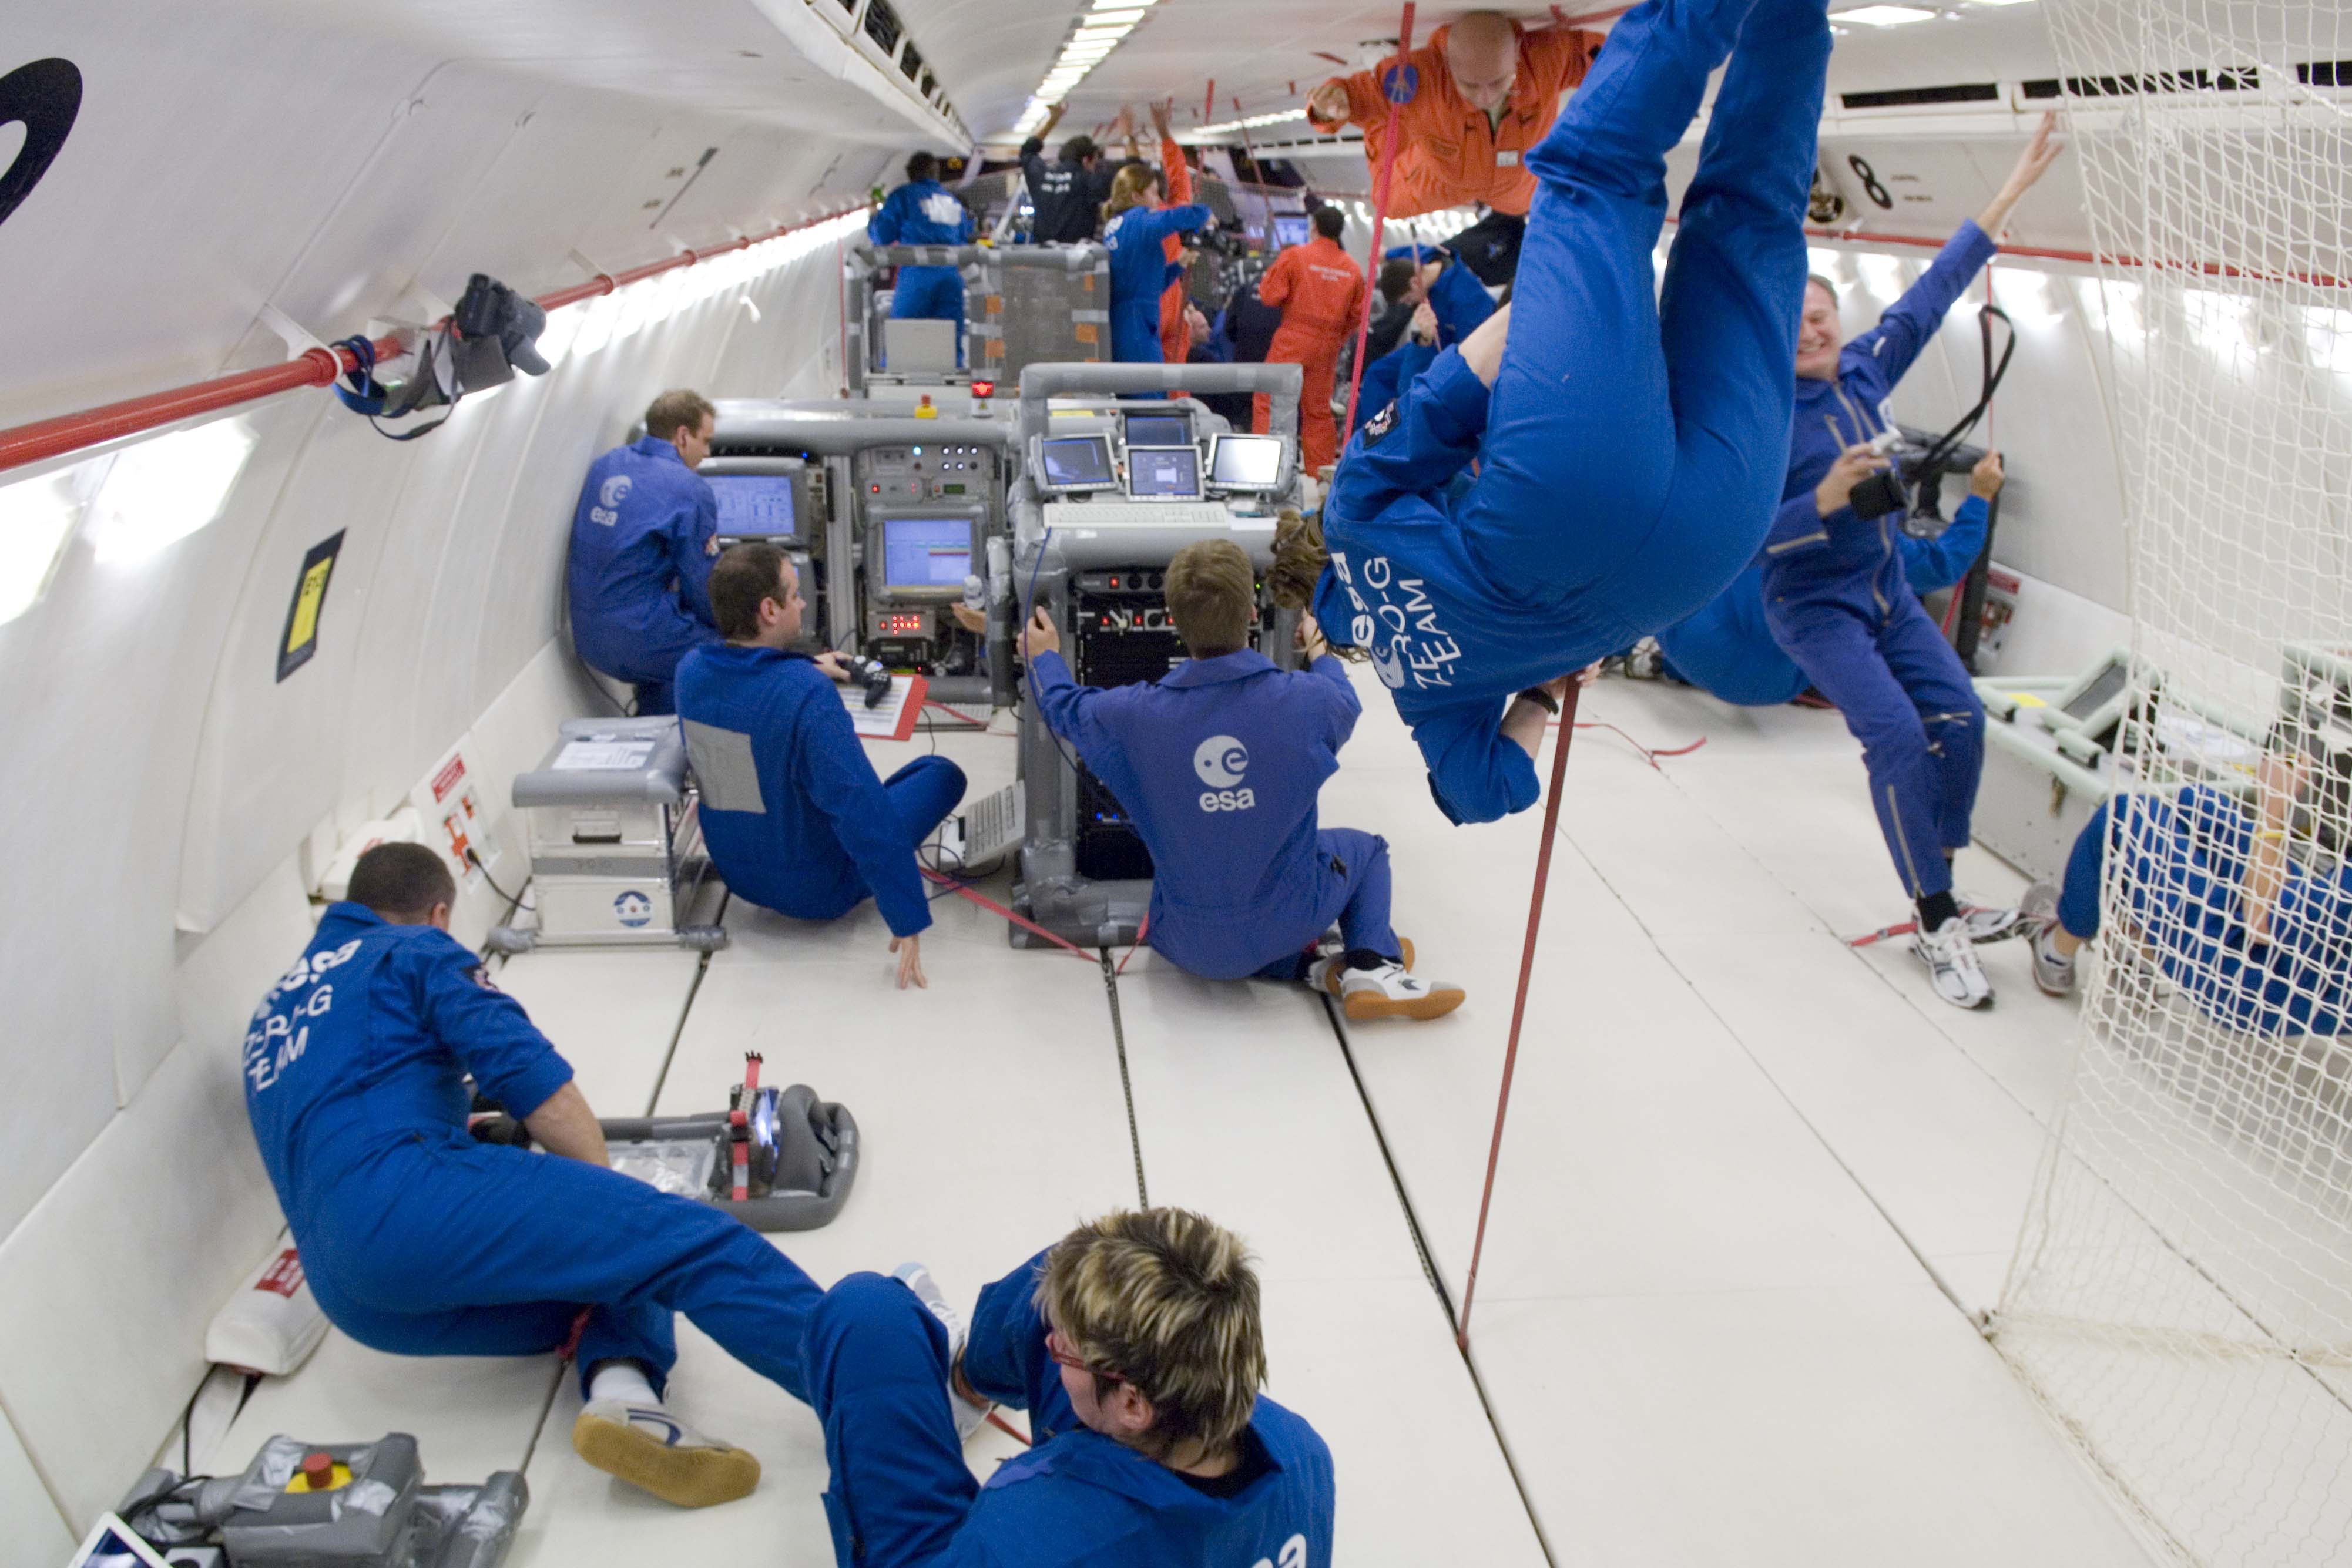
PVT-Gamers has been chosen by the European Space Agency (ESA) to fly on-board the Airbus A310 ZERO-G airplane. For those of you not familiar with it, it is a flying vehicle that reaches a state similar to zero gravity, and therefore is used for simulating space conditions. The PVT-Gamers has been selected within the ESA program “Fly Your Thesis! 2018,” which will give the research team behind it the ability to test their assumptions in a real world scenario. A new method will be applied to small pressurized Xenon gas containers under hyper/micro-gravity cycles at a stationary cooling. Arduino boards, specifically 6 Arduino Mega 2560, are instrumental in recovering all the data, such as temperature, pressure, deformation, or acceleration. Subsequently, it will be possible to reproduce on-orbit, thrust phase, external accelerations, and fuel transfer conditions over a propellant tank at its End Of Life (EOL) stage, where there is almost no propellant left.

The potential applications from this scientific experiment may provide the upcoming spacecraft generation with a fuel measuring and control method that could constitute a turning point for long-term space missions. This can be applied to CubeSats or telecommunication satellites, and also to large future projects using electric propulsion such as the lunar space station “Deep Space Gateway” or the Mercury mission BepiColombo.

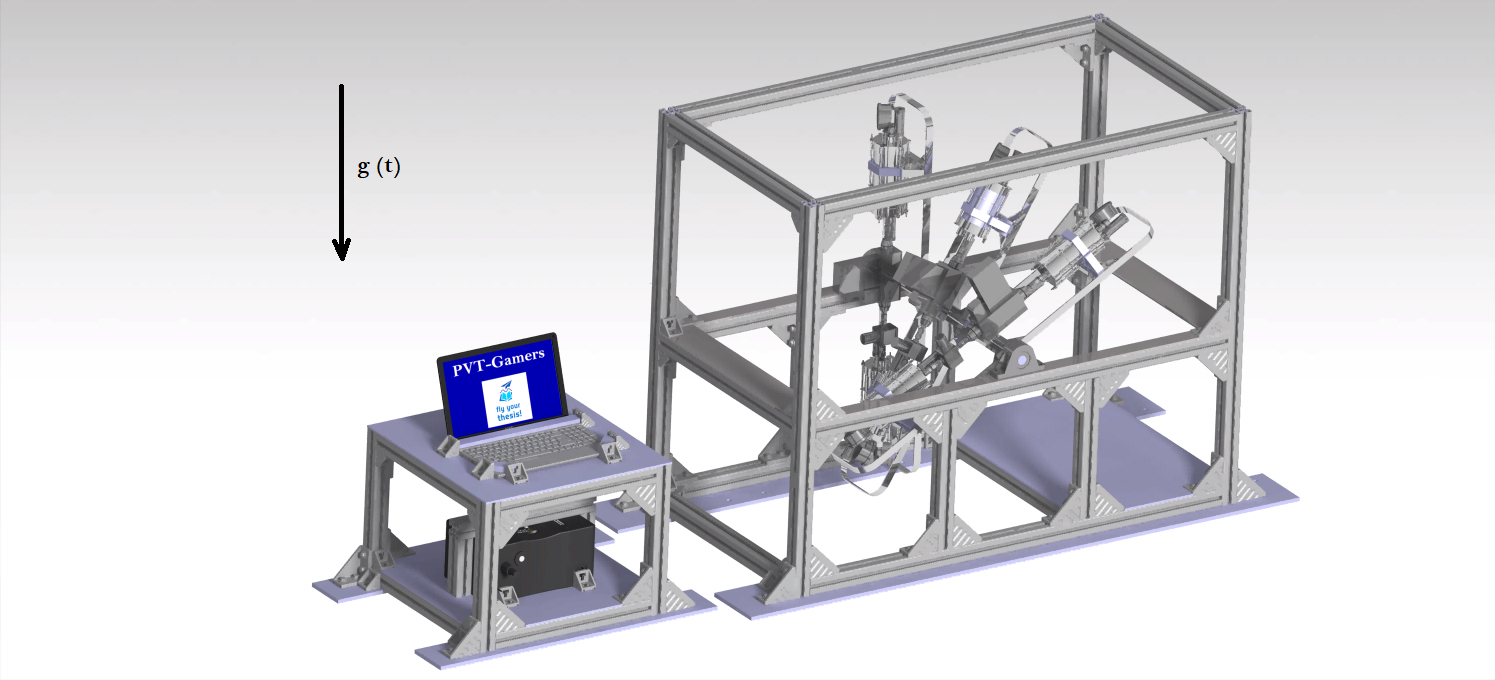
Current design of the PVT-Gamers experiment rack configuration to be attached to the A310 ZERO-G cabin. Photo credit: PVT-Gamers

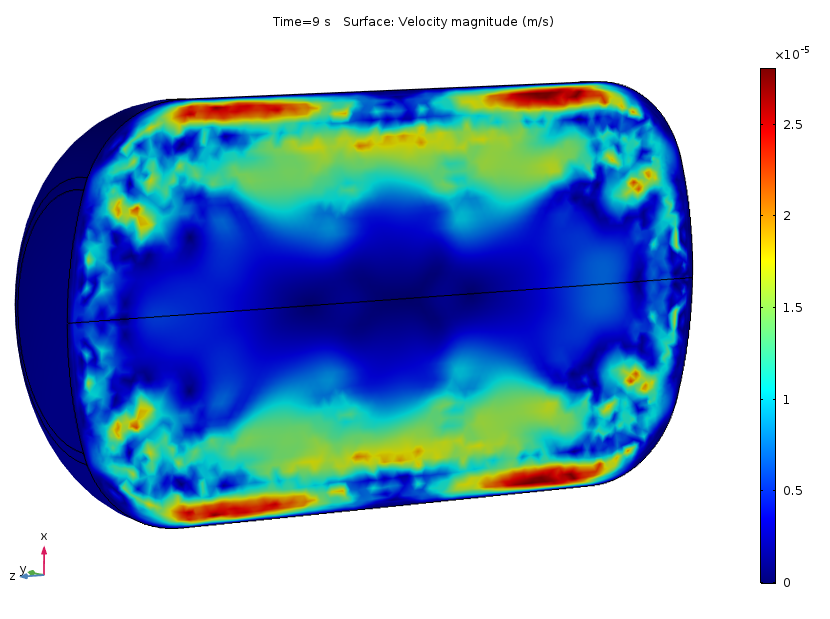
Simulation of the velocity distribution in magnitude within a spacecraft propellant tank as consequence of external heating. Photo credit: PVT-Gamers

A310 ZERO-G cabin during a micro-gravity stage. Photo credit: ESA

Closing with a reflection: Why is this so important?

You might wonder… Why should Arduino be so interested in the creation of machines aimed at the exploration of space? The answer is three-fold. First, space is the ultimate frontier, the conditions are very tough, shipping electronics out of the atmosphere is expensive and forces engineers to become very creative, reusability is key (a part has to be used for more than one thing, even the hardware components). For Arduino, proving that our boards and choice of materials, while still cheap, are good enough to be part of the space career, is of course of vital importance. If it works in space, it works on Earth, also for the industry.

Second, the limitations are such, that many of the designs become very useful in everyday situations. If we made a greenhouse for Mars, it would work for the Arctic, or for poor villagers on the mountains anywhere in the world as well. Isn’t an excuse good enough to make a machine that will help improve people’s lives?

Third, in education we need icons to follow, and we need experiences to replicate. The ones from Mari Paz, Javier, and their team will for sure awaken the scientific vocation in many of our younger ones. Helping science is helping education!
Arduino Blog 16 Mar 19:37
arduino  research  

A low-cost approach to Intrinsic optical signal

Leonardo Lupori and Raffaele Mazziotti are active in the field of neuroscience at Tommaso Pizzorusso’s lab at Neuroscience Institute CNR of Pisa respectively as molecular biologist and experimental psychologist. They created an Arduino-based and MATLAB-controlled tool called IOSIC (Intrinsic Optical Signal Imaging Chamber), powered by an Arduino Micro and focused on intrinsic optical signal (IOS) imaging apparatus to run experiments on the plasticity of the brain.

Intrinsic optical signal (IOS) imaging is a functional imaging technique that has revolutionized our understanding of cortical functional organization and plasticity since it was first implemented, around 30 years ago. IOS is produced by the brain when processing information and is similar to the information recorded with the plethysmograph (the instrument to measure heart rate from a finger) and it is useful to investigate how the brain works. The researchers are especially interested to investigate how the brain is able to adapt to the environment to store information but also acquire new skills and these studies are really useful to understand what happens to the brain when is in good health or during a disease.

Even if their lab has a long-standing expertise in electrophysiological studies, they decided to  developed a fully functional apparatus for IOS with tools already available and low-cost:

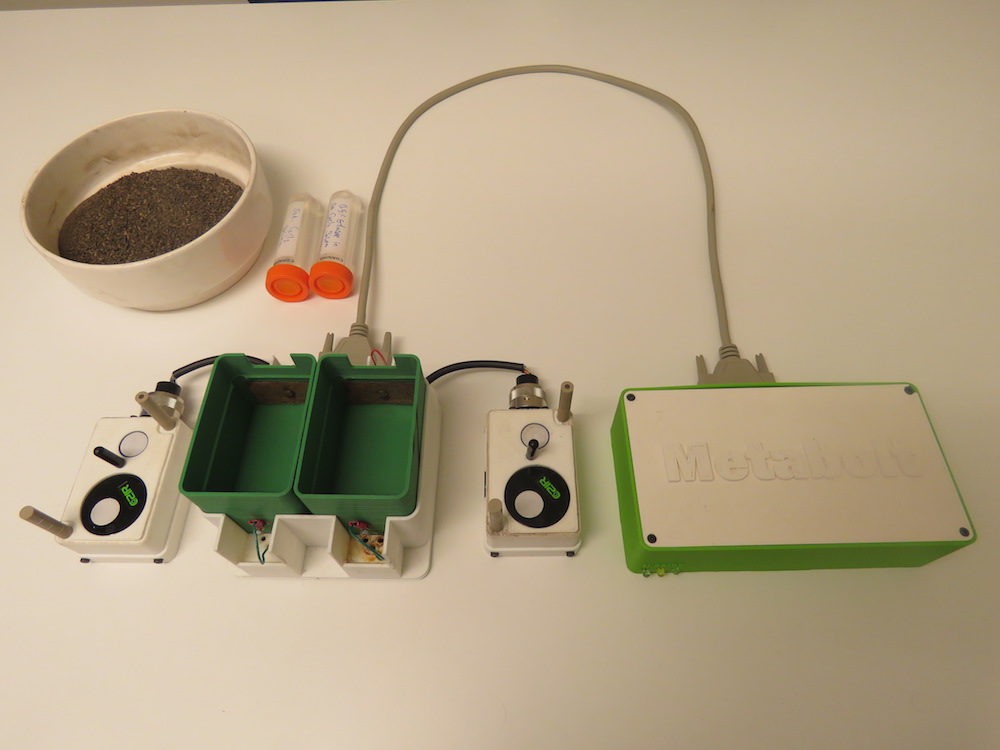
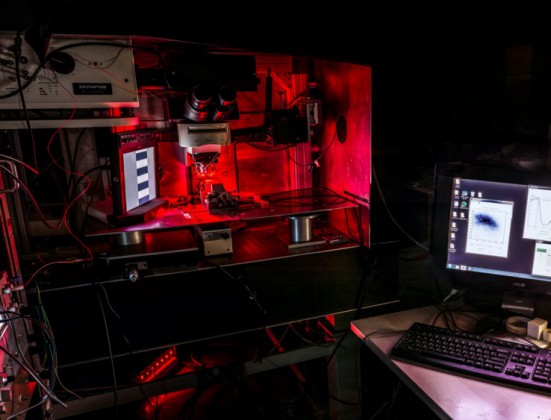
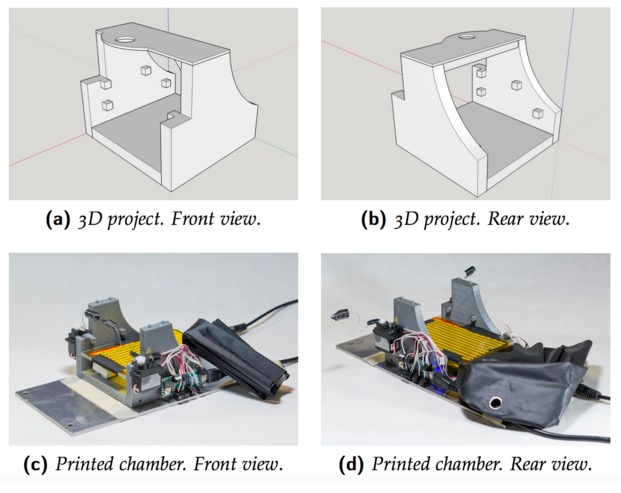
To set up the entire system we used a mix of components commercially available and custom-made. The most expensive tool we used is an imaging camera from Hamamatsu (it is necessary because we need to analyze data quantitatively), but you can also use a cheaper camera (at least with a CCD chip 12-bit depth is recommended). The rest is stuff collected from old tools of the lab. For example, the microscope, that in our case is an old Olympus confocal microscope, but any transmitted light microscope or macroscope should be ok, was already in the lab and is currently used also for other purposes. For light illumination, we used a custom made crown-shaped LED holder that can be attached to the objective and provide a really stable light source. Afterwards, we wrote a MATLAB script to control the camera and then we built an imaging chamber to analyze the animal preparation. The imaging chamber is essential to keep the animal stable during the imaging session (about 7 minutes) and also to maintain its physiological temperature during the time course of anesthesia. An additional feature added to the chamber is the possibility to change the animal’s visual field automatically allowing us to measure rapidly, efficiently and repeatedly a very important parameter of plasticity called ocular dominance. The chamber is composed by a 3D printed structure on which an Arduino MICRO, two servo motors, a heating pad, an IR thermometer and a magnetic ring have been installed. Currently we are using this system with success and we hope to discover something really relevant.

You can download IOSIC code for the Arduino MICRO here. The code uses third-party libraries : TMP006 and Servo. MATLAB code to control shutters is available here.

Are you a developer? Take a 10-minute survey and shape a new dev report

How will IoT play out in your ecosystem? Is HTML vs. Native still relevant? Are you using AWS, Azure or Google Cloud? Which are the hottest IoT verticals? These are some of the questions that researchers at VisionMobile address through their 9th edition of Developer Economics research launched at the beginning of this month. You can make your voice heard taking the 10-minute Developer Skill Census survey and later read key insights given back to the community as a free download in late July.
The Developer Economics research program tracks developer sentiment across platforms, revenues, apps, tools, APIs, segments and regions, tackling some of 2015’s most commonly asked questions. It’s the largest, most global app developer research & engagement program reaching up to 10,000 developers in over 140 countries and we believe open source developers could give an interesting point of view on the topic!
After  taking the survey, you can download immediately a free chapter from one of VisionMobile’s premium paid reports taking a close look at app profits & costs and also enter a draw to win prizes such as an iPhone 6, an Apple Sports Watch, an Oculus Rift Dev Kit, and many more.
  
Arduino Blog 20 May 17:25

Project feature: Accessing YQL from Arduino

The ethernet shield opens up lot of possibilities for Arduino. One of which has been explored by Sudar. He has found a way to make YQL calls and even parse the JSON response using Arduino and Ethernet shield.

So what is YQL?

YQL stands for Yahoo Query Language. It is an expressive SQL-like language that lets you query, filter, and join data across Web services. You can read more about YQL from the Yahoo Developer network page.

Checkout the tutorial and the source code at his blog hardwarefun.com.

He is a Research Engineer at Yahoo Research Labs India, by profession, and a hardware hacker by passion. More of his projects can be found here.

Arduino Blog 08 Jan 14:46
hacks  research  users  yql  

Labview and Arduino: 3Dmicro Toolkit Arduino Expansion (beta)

3D SuperVision Systems is an italian spin-off from “Università Politecnica delle Marche“, whose mission is to design and to develop new solutions for embedded applications.
Few days ago, they published the latest release of 3Dmicro toolkit, a software add-on to NI Labview usable for firmware rapid prototyping on 32-bit PIC microcontrollers, by using Labview’s easy-to-use graphical programming language; along with this, an Arduino-oriented version has been released as well for academic beta testers, which allows users to make use of Arduino’s I/O, ADCs, timers, PWM and serial communication directly from Labview’s interface.


More information can be found here, while interested beta-testers can sign up this application form.

Arduino based Milling Machine

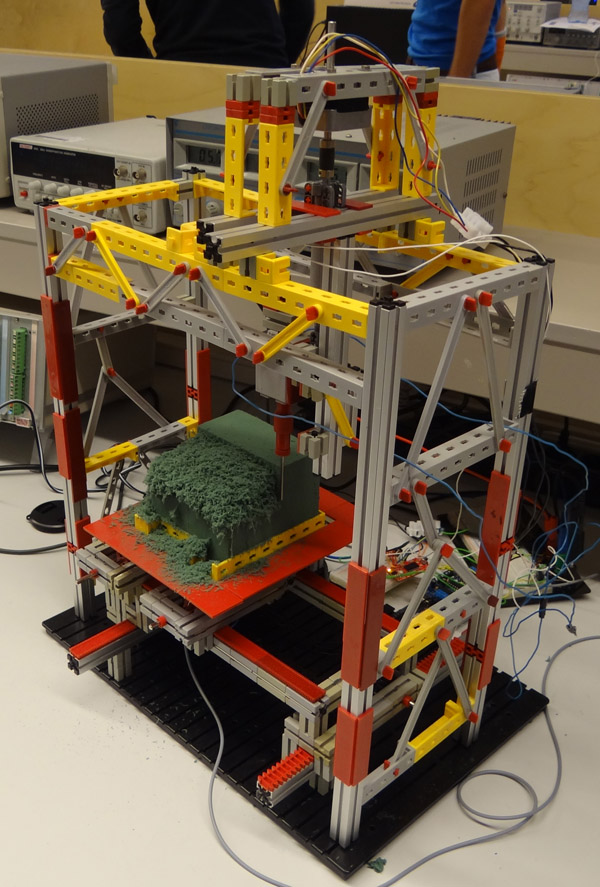
This is a working model of an Arduino based Milling Machine created using FischerTechnik. For those of you who are unaware of FischerTechnik, it is similar to the LEGOTM Building Blocks.

A group of four Mechanical Engineering students at the Delft University of Technology (Netherlands) created this project as part of their Mechatronics class in their Second year of Bachelor of Sciences (B.Sc.) Program.

Laurens Valk, one of the creators, explains the essence of Arduino in the project:

“The system uses the Adafruit motor shield to run two stepper motors, and the Sparkfun EasyDriver for the third stepper motor. The Arduino runs code that listens to Matlab commands over USB. We expanded that code a little to make it possible to add the third stepper motor and some other commands. Most of the actual code was programmed in Matlab, with the Arduino as the interface between computer and motors/sensors.”

We had a little chat with Laurens. Here is the excerpt:


When did you first hear about Arduino, and when did you first start using it?
I’ve seen a lot of Arduino projects over the years, but this was the first time we used it in a project. Personally, I usually build robots with MINDSTORMS NXT, but this felt like a good opportunity to combine mechanical work (the printer hardware) with real electronics (Arduino).
How did you end up making a Milling Machine/ 3D Printer for your project?

We chose to come up with our own design challenge and decided not to do the standard exercise. Initially we thought about making a (2D) plotter or scanner. Then quickly we started thinking about the same things, except in 3D. One of the projects that inspired us was the LEGO Milling Machine by Arthur Sacek. Both a scanner and printer would still be doable in 3D, but the time was limited, so we settled with the printer idea.

All construction had to be done in one workweek for logistical reasons. To make sure we were able to finish in time, we prepared much of the electronics and software outside the lab. We finished just in time, but unfortunately we could do only one complete print before we had to take it apart. Not surprisingly, it was very exciting to wait for the result of the one and only complete test run. We couldn’t see the result until we used the vacuum cleaner to remove the dust.

Here is a video showing the working of this machine. [And the Vacuum Cleaner Laurens is talking about]:

This gives an Insight into the many feats that an Arduino can accomplish.


Space experiments for everyone: the ArduSat project

ArduSat, which stands for “Arduino satellite”, is a recently kickstarted project that aims at developing an open platform usable to emulate space scientists:

Once launched, the ArduSat will be the first open platform allowing the general public to design and run their own space-based applications, games and experiments, steer the onboard cameras to take pictures on-demand, and even broadcast personalized messages back to Earth.

ArduSat will be equipped with several sensors (such as cameras, gyros, accelerometers, GPS and more) packed inside a small cube (the side will be approximately 10 cm long) that can be accessed through a set of Arduinos.

Once in orbit, the ArduSat will be accessible from the ground to flash the required firmware for the experiments and for getting back all the collected information. People interested in performing space experiments will have access to a ground replica of ArduSat explotable to test and debug their code before the actual deployment.

The project is very ambitious, and it is expected that such an open accessible space platform will have a considerable impact on how simple space experiments will be carried out in the forthcoming years, in the case of fundraising success.

You may find the Kickstarter page of the project here.

[Via: Hack A Day and Kickstarter]

XOrduino: an Arduino-compatible board for the OLPC XO laptop

Dr. Scott Ananian, from the One Laptop Per Child (OLPC) project, conceived an Arduino Leonardo-compatible board especially designed for the OLPC XO laptop, with the goal to cut down its price as much as possible, to foster its adoption even in developing countries. From Scott’s blog:

The board uses mostly through-hole parts, with one exception, and there are only 20 required components for the basic Arduino functionality, costing about $5 (from digikey, quantity 100). It is reasonable for local labor or even older kids to assemble by hand.

The board, named XOrduino, is open hardware (schematics and pcb files can be found on github), and can be directly plugged into the XO’s USB ports, which allowed Scott to save the money required for the USB connector. Moreover, its design has been inspired by other open hardware projects, such as SparkFun’s ATmega32U4 breakout board and SparkFun’s Scratch Sensor Board-compatible PicoBoard.

Scott designed also a second board, which is even cheaper than the first one, called XO Stick:

It’s based on the AVR Stick using the ATtiny85 processor and costs only $1/student. It’s not quite as user-friendly as the Arduino-compatible board, but it can also be used to teach simple lessons in embedded electronics.

A longer description can be found here, while detailed release notes can be found on github.

It’s very exciting to see how open technologies, such as open hardware and open source software, contribute to the way education and creativity can take place around the world, especially regarding their promotion in developing countries.

[Via: Ossblog, OLPC blog, Scott Ananian's blog]

Some advances in aerial vehicles: bat-inspired smart wings

Researchers from Centro de Automática y Robótica (Universidad Politécnica de Madrid) and from Brown University carried out a very deep research about the specific behavior of bat flight, whose ultimate goal is to replicate the capabilities of bat’s wings by means of an ad-hoc designed micro aerial vehicle (MAV).

From the home page of the project:

[...] this research is oriented towards the development of a biological inspired bat robot platform, that allows to reproduce the amazing maneuverability of these flying mammals. The highly maneuverability is achieved by reproducing the flapping and morphing capabilities of their wing-skeleton structure. This structure is composed by several joints and a membrane that generates the required lift forces to fly.

To mimmic the muscular system that moves the joints of the wing-bones, Shape Memory Alloys (SMA) NiTi wires are used as artificial-muscles. Several challenges in controlling this SMA-based actuation system are regarded in this research.

A lot of research work has already been carried out (see here for a list of publications) and a bat-like MAV prototype has been designed and implemented to both evaluate and validate the research outcomes. Among the other stuff, the core onboard electronic is made up of an arduino-based board, an IMU, a radio transceiver and a rechargeable LiPo battery.

More details on this project can be found here.

[Via: BaTboT project homepage]

Arduino Blog 06 Jun 13:52