Posts with «imu» label

Behold The Mega-Wheelie, a Huge One-Wheeled Electric Skateboard

DIY electric personal vehicles are a field where even hobbyists can meaningfully innovate, and that’s demonstrated by the Mega-Wheelie, a self-balancing one-wheeled skateboard constructed as an experiment in traversing off-road conditions.

[John Dingley] and [Nick Thatcher] have been building and testing self-balancing electric vehicles since 2008, with a beach being a common testing ground. They suspected that a larger wheel was the key to working better on rough ground and dry sand and tested this idea by creating a skateboard with a single wheel. A very big, very wide wheel, in fact.

The Mega-Wheelie houses a 24V LiFePO4 battery pack, 450 W gearmotor with chain and sprocket drive, SyRen motor controller from Dimension Engineering, Arduino microcontroller, and an inertial measurement unit to enable the self-balancing function. Steering is done by leaning, and the handheld controller is just a dead man’s switch that disables the vehicle if the person piloting it lets go.

Design-wise, a device like this has a few challenging constraints. A big wheel is essential for performance but takes up space that could otherwise be used for things like batteries. Also, the platform upon which the pilot stands needs to be as low to the ground as possible for maximum stability. Otherwise, it’s too easy to fall sideways. On the other hand, one must balance this against the need for sufficient ground clearance.

Beaches are rarely covered in perfectly smooth and firm sand, making them a good test area.

In the end, how well did it work? Well enough to warrant a future version, says [John]. We can’t wait to see what that looks like, considering their past 3000 W unicycle’s only limitation was “personal courage” and featured a slick mechanism that shifted the pilot’s weight subtly to aid steering. A video of the Mega-Wheelie (and a more recent unicycle design) is embedded just below the page break.

And just for reference, here is some of [John]’s previous work on a self-balancing unicycle design.

Arduino Activated Automotive Aerodynamic Apparatus is… (Spoiler Alert!)

Sometimes a great hack is great for no other reason than that it’s fun, and [Michael Rechtin]’s DIY Active Aero Spoiler and Air Brake certainly qualifies as a fun hack. This is a mod designed to live in a world where looks are everything, stickers add horsepower, and a good sound system is more important than good wheel alignment. Why is that? Because like the switch that exists only to activate the mechanism that turns it off, the DIY Active Aero Spoiler and Air Brake seen below is almost completely useless. So to understand its allure, we must understand its inspiration.

For a few decades now, luxury sports car manufacturers have been adding active aerodynamic components to their vehicles. For example, several Porsche models feature adaptive spoilers that adjust to driving conditions. Super cars such as the Bugatti Veyron have spoilers that flip up at high angles during braking to increase drag and reduce braking distance. All of these features are sadly missing from the average two or four door family-car-turned-wannabe-track-fiend. Until now!

[Michael] has created a new active spoiler for every mall-bound muffler-challenged hand me down. The build starts with a CNC cut foam wing which is covered with fiberglass, Bondo (an automotive necessity) and some faux carbon fiber for that go-fast feel. An Arduino, IMU, two servos, and a battery pack detect deceleration and automatically increase the spoiler angle just like the big boys, but without needing any integration into the vehicles systems. Or bolts, for that matter.

It’s unlikely that the braking force is enough to slow down the vehicle though, given that it’s not enough to pop the suction cups holding it to the trunk lid. But does it have the “wow” factor that it was designed to induce? Spoiler Alert: It does!

As it turns out, this isn’t the first adjustable spoiler featured here at Hackaday, and this adjustable spoiler on a car that’s made for actual racing is quite interesting.

Thanks to [Zane] for the tip on this project!

Annoy Yourself into Better Driving with This Turn Signal Monitor

Something like 99% of the people on the road at any given moment will consider themselves an above-average driver, something that’s as statistically impossible as it is easily disproven by casual observation. Drivers make all kinds of mistakes, but perhaps none as annoying and avoidable as failure to use their turn signal. This turn signal monitor aims to fix that, through the judicious use of negative feedback.

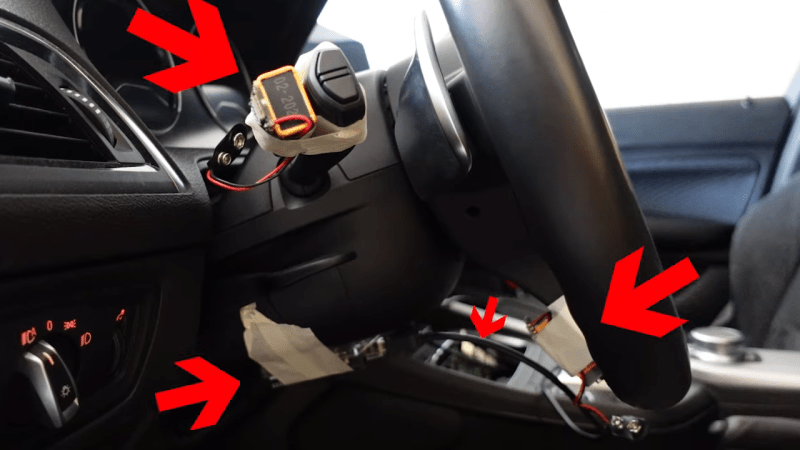
Apparently, [Mark Radinovic] feels that he has a predisposition against using his turn signal due to the fact that he drives a BMW. To break him of that habit, one that cost him his first BMW, he attached Arduino Nano 33 BLEs to the steering wheel and the turn signal stalk. The IMUs sense the position of each and send that over Bluetooth to an Arduino Uno WiFi. That in turn talks over USB to a Raspberry Pi, which connects to the car’s stereo via Bluetooth to blare an alarm when the steering wheel is turned but the turn signal remains untouched. The video below shows it in use; while it clearly works, there are a lot of situations where it triggers even though a turn signal isn’t really called for — going around a roundabout, for example, or navigating a sinuous approach to a drive-through window.

While [Mark] clearly built this tongue firmly planted in cheek, we can’t help but think there’s a better way — sniffing the car’s CANbus to determine steering angle and turn signal status comes to mind. This great workshop on CANbus sniffing from last year’s Remoticon would be a great place to start if you’d like a more streamlined solution than [Mark]’s.

[via Tom’s Hardware]

Hack a Day 07 Nov 15:15

Cheating At Bowling, The Hacker Way

Anyone who has ever gone to a bowling alley will know the preferred (but ineffective) technique to telepathically control a bowling ball. [Mark Rober] and [James Bruton] decided to change that and hacked a bowling ball that can be steered remotely (and discreetly), simply by leaning your body.

They started with a standard bowling ball, that was cut in half and hollowed out on a lathe. A beam sits on the centre line of the ball, mounted on a bearing in each half to allow the ball to spin around it. Steering done by shifting the centre of mass, by moving a steel pendulum that hangs below the beam side to side with heavy-duty servo. The servo is controlled with an Arduino, and an IMU to detects the balls orientation. Power is provided by and RC Lipo battery. The wireless controller is a sneaky little device that is taped to [Mark]’s back and covered with clothing, and steers the ball by detecting how far he leans with an IMU module. The brain is an Arduino Mini and an NRF24L01 provides the RF link.
While it’s not an easy build, it’s a fairly simple system electronically, with off the shelf electronics modules and perfboard. The genius is in the implementation and its entertainment value. The look on the kids faces when [Mark] “telepathically” controls the ball, after showing off the fact that he has zero natural ability, is absolutely priceless. [Mark Rober], a former NASA engineer, has made a name for himself with viral Youtube videos on cool projects like a glitter booby trap for package thieves and a liquid sand hot tub. [James Bruton], a former toy designer is known for his robotics prowess that he has put on display with OpenDog and functional Star Wars robots.

For us this hack is a perfect example of one that entertains and inspires, a powerful combination for young and old alike. Check out the awesome video after the break.

Hack a Day 24 Nov 15:00

Adaptive Spoon Helps Those With Parkinson’s

There are a lot of side effects of living with medical conditions, and not all of them are obvious. For Parkinson’s disease, one of the conditions is a constant hand tremor. This can obviously lead to frustration with anything that involves fine motor skills, but also includes eating, which can be even more troublesome than other day-to-day tasks. There are some products available that help with the tremors, but at such a high price [Rupin] decided to build a tremor-compensating utensil with off the shelf components instead.

The main source of inspiration for this project was the Liftware Steady, but at around $200 this can be out of reach for a lot of people. The core of this assistive spoon has a bill of material that most of us will have lying around already, in order to keep costs down. It’s built around an Arduino and an MPU6050 inertial measurement unit with two generic servo motors. It did take some 3D printing and a lot of math to get the utensil to behave properly, but the code is available on the project site for anyone who wants to take a look.

This project tackles a problem that we see all the time: a cost-effective, open-source solution to a medical issue where the only alternatives are much more expensive. Usually this comes up around prosthetics, but can also help out by making biological compounds like insulin directly for less than a medical company can provide it.

Augment RC vehicle control with an IMU-based transmitter

When piloting a vehicle remotely, it’s only natural to tilt your controller one way or the other to “help” guide it in the right direction. While usually this has no effect whatsoever, YouTuber Electronoobs decided to take this concept and run with it, creating a remote control transmitter that responds to an onboard MPU-6050 inertial measurement unit.

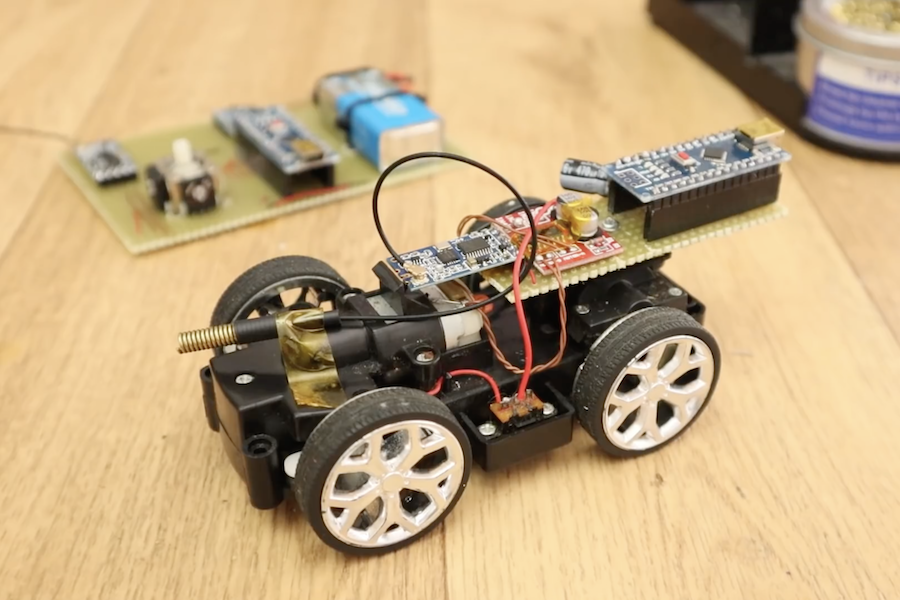
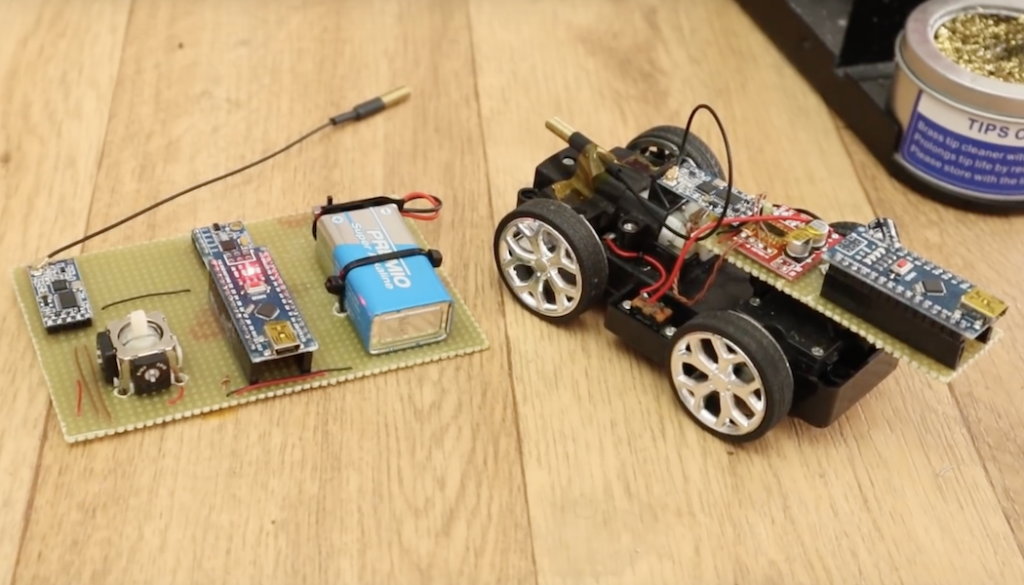
The transmitter’s Arduino Nano takes movement data, and sends the corresponding signals to a custom receiver board on the RC car via a pair of HC-12 wireless modules. A second Arduino mounted in the car then commands the vehicle’s DC motors with the help of an H-bridge. 

This is a radio controller that has 2 analog channels and the data is out from a MPU-6050 gyro module. So, we could control a toy car for example just by rotating the controller. I usually use the nRF24 module, but in this project I also want to show you how to use the HC-12 module. You will learn how to get the IMU data, how to use the HC-12 radio connection and how to control 2 DC motors using PWM signals and an H-bridge.

It’s quite a versatile build, and it can even be set up to output PWM signals if you need to interface with more advanced electronics.

Arduino Blog 02 Oct 13:43

Fire Fighting Robot

Primary image

What does it do?

Navigate a Maze, extinguish a flame, track position

I'm currently a sophomore at Worcester Polytechnic Institute studying Robotics Engineering. The third course in the series, RBE 2002, focusing on sensors. In a group of 4 students, we built a robot that could autonomously navigate a maze, locate a flame, put it out and report its X,Y, and Z position relative to its starting position. The robot was required to use an IMU and a flame sensor provided to us. All other sensors and parts are up to the group to use to complete the challenge.

Cost to build

Embedded video

Finished project

Complete

Number

Time to build

Type

URL to more information

Weight

read more

Revealed: Homebrew Controller Working in Steam VR

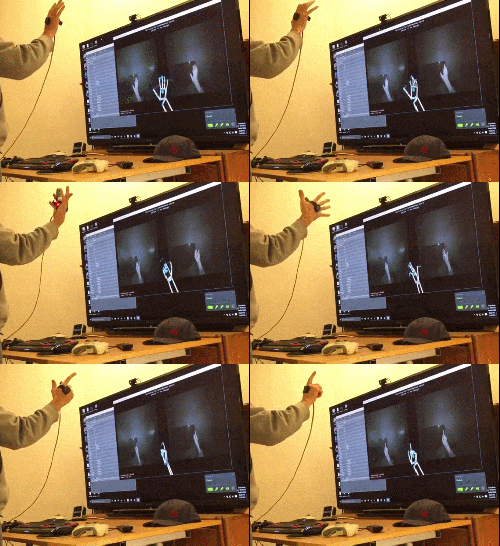
[Florian] has been putting a lot of work into VR controllers that can be used without interfering with a regular mouse + keyboard combination, and his most recent work has opened the door to successfully emulating a Vive VR controller in Steam VR. He uses Arduino-based custom hardware on the hand, a Leap Motion controller, and fuses the data in software.

We’ve seen [Florian]’s work before in successfully combining a Leap Motion with additional hardware sensors. The idea is to compensate for the fact that the Leap Motion sensor is not very good at detecting some types of movement, such as tilting a fist towards or away from yourself — a movement similar to aiming a gun up or down. At the same time, an important goal is for any added hardware to leave fingers and hands free.

[Florian]’s DIY VR hand controls emulate the HTC Vive controllers in Valve’s Steam VR Tracking with a software chain that works with his custom hardware. His DIY controller doesn’t need to be actively held because by design it grips the hand, leaving fingers free to do other tasks like typing or gesturing.

Last time we saw [Florian]’s work, development was still heavy and there wasn’t any source code shared, but there’s now a git repository for the project with everything you’d need to join the fun. He adds that “I see a lot of people with Wii nunchucks looking to do this. With a few edits to my FreePIE script, they should be easily be able to enable whatever buttons/orientation data they want.”

We have DIY hardware emulating Vive controllers in software, and we’ve seen interfacing to the Vive’s Lighthouse hardware with DIY electronics. There’s a lot of hacking around going on in this area, and it’s exciting to see what comes next.


Filed under: Arduino Hacks, Virtual Reality

Teach your drone what is up and down with an Arduino

Gyroscopes and accelerometers are the primary sensors at the heart of an IMU, also known as an internal measurement unit — an electronic sensor device that measures the orientation, gravitational forces and velocity of a multicopter, and help you keep it in the air using Arduino.

Two videos made by Joop Brokking, a Maker with passion for RC model ‘copters, clearly explain how to program your own IMU so that it can be used for self-balancing your drone without Kalman filters,  libraries, or complex calculations.

Auto leveling a multicopter is pretty challenging. It means that when you release the pitch and roll controls on your transmitter the multicopter levels itself. To get this to work the flight controller of the multicopter needs to know exactly which way is down. Like a spirit level that is on top of the multicopter for the pitch and roll axis.

Very often people ask me how to make an auto level feature for their multicopter. The answer to a question like this is pretty involved and cannot be explained in one email. And that is why I made this video series.

You can find the bill of materials and code here.