Posts with «linear actuator» label

Sisyphean Ball Race Robot Toils Gracefully, Magnetically

Aren’t ball races and marble runs fun? Wouldn’t they be so much more enjoyable if you didn’t have to climb back up the ladder each time, as it were, and reset the thing? [Johannes] wrote in to tell us about a wee robot with the Sisyphean task of setting a ball bearing on a simple but fun course, collecting it from the end, and airlifting it back to the start of the track.

[Johannes] built this ‘bot to test small-scale resin printing strength as well as the longevity of some tiny linear actuators from Ali that may or may not be available at a moment’s notice. The point was to see how these little guys fared when connected directly to an Arduino or other microcontroller, rather than going the safer route with a motor driver of some kind.

Some things worked well, like the c-clips that keep the axles together, and using quick pulses to release the magnetically-linked ball from the gripper. Other aspects didn’t work out so well. Tiny resin parts do not respond well to force, for starters. And then there’s the actuators themselves. The connections are fragile and the motors are weak, but they vary wildly in quality from piece to piece, so YMMV. Some lose steps, and others occasionally seize. But you wouldn’t know any of that from the graceful movement capture in the video below. Although it appears to be automated, the bot is under remote control because of the motor issues.

Not into ball runs? There are other Sisyphean tasks available, such as moving sand around in the name of meditation.

1960s Stereo Console Gets an Upgrade

Faced with an old console stereo from the 1960s that was barely functional, [Sherman Banks] aka W4ATL decided to upgrade its guts while keeping its appearance as close to the original as possible. This stereo set is a piece of mahogany furniture containing an AM/FM stereo receiver and an automatic turntable from JCPenny’s Penncrest line. As best [Sherman] can determine, it is most likely a 1965 model. The old electronics were getting more and more difficult to repair and the tuner was drifting off-station every 15 minutes. He didn’t want to throw it away, so he decided to replace all the innards.

The first thing was to tear out the old electronics while retaining the chassis proper. The new heart of the entertainment center is a modern Denon AV stereo receiver. This unit can be controlled over Ethernet, has a radio tuner, inputs for SiriusXM and a turntable, and supports Bluetooth streaming. [Sherman] next replaced the 1965 turntable, and then turned his attention to connecting up the controls and indicators.

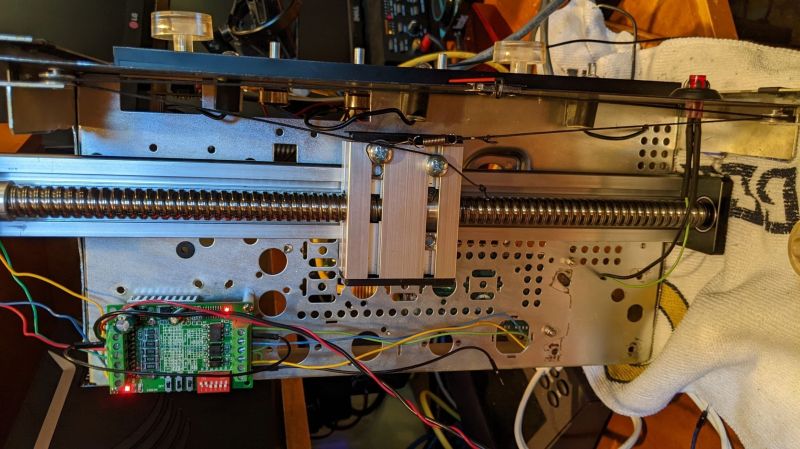
The potentiometers were replaced with equivalent ones of lower resistance, the neon stereo indicator was replaced with an LED, but the linear tuning dial proved to be a nearly two month challenge and resulted in a cool hack. In brief, he connected an optical rotary encoder to the tuning knob and used a stepper motor with a linear actuator to control the dial indicator. All this is controlled from an Arduino Mega 2560 with three shields for I/O and LAN. But there was still one remaining issue — without vacuum tubes to warm up, the radio would play immediately after power-on. [Sherman] fixed that by programming the Arduino to slowly ramp up the volume at the same rate as the original tube receiver. And finally, he installs a small HDMI monitor in the corner to display auxiliary information and metadata from the Denon receiver.

Check out the videos below the break. We wrote about a couple of similar conversions in the past: this one from 2018 was also a Penncrest, and from last year this COVID isolation project that emphasized the addition of a new liquor cabinet.

Plasma Globe Reveals Your Next Clue

If you like solving puzzles out in the real world, you’ve probably been to an escape room before, or are at least familiar with its concept of getting (voluntarily) locked inside a place and searching for clues that will eventually lead to a key or door lock combination that gets you out again. And while there are plenty of analog options available to implement this, the chances are you will come across more and more electronics-infused puzzles nowadays, especially if it fits the escape room’s theme itself. [Alastair Aitchison] likes to create such puzzles and recently discovered how he can utilize a USB powered plasma globe as a momentary switch in one of his installations.

The concept is pretty straightforward, [Alastair] noticed the plasma globe will draw significantly more current when it’s being touched compared to its idle state, which he measures using an INA219 current shunt connected to an Arduino. As a demo setup in his video, he uses two globes that will trigger a linear actuator when touched at the same time, making it an ideal multiplayer installation. Whether the amount of fingers, their position on the globe, or movement make enough of a reliable difference in the current consumption to implement a more-dimensional switch is unfortunately not clear, but definitely something worth experimenting with.

In case you’re planning to build your own escape room and are going for the Mad Scientist Laboratory theme, you’ll obviously need at least one of those plasma globes sparking in a corner anyway, so this will definitely come in handy — maybe even accompanied by something slightly larger? And for all other themes, you can always resort to an RFID-based solution instead.

Linear movement with Arduino and 3D printing

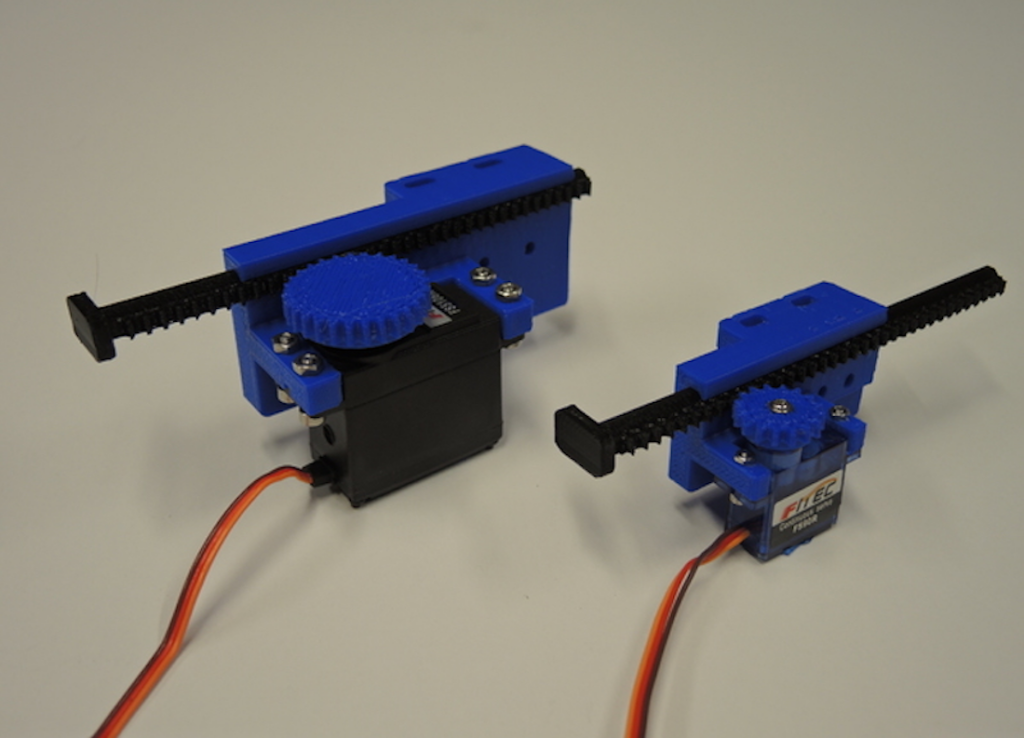
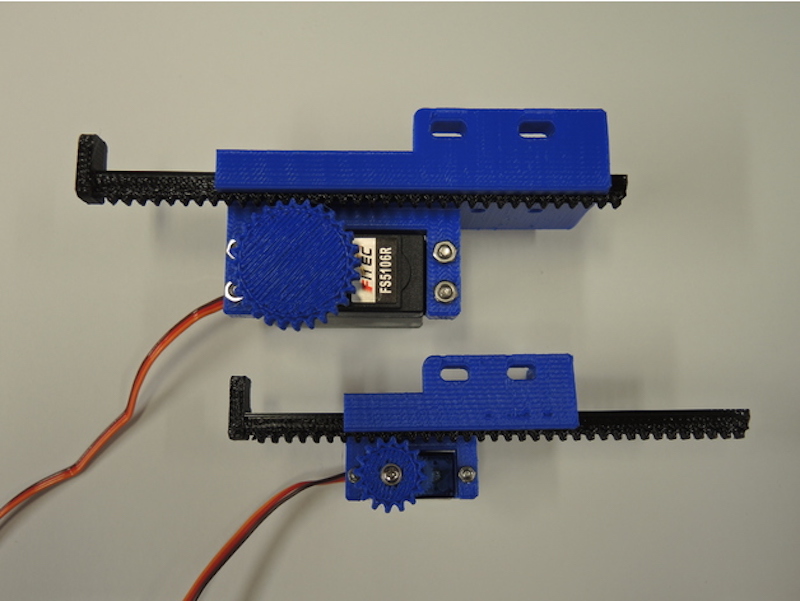
Arduino boards are great for controlling small servo motors, but what if you need something to provide linear travel? As spotted on Reddit, while the answer here is a little less straightforward, YouTuber Potent Printables has a great solution. It uses 3D-printed components, along with a dab of epoxy and fastener hardware to convert either a micro or standard continuous rotation servo into a rack-and-pinion mechanism.

The project can be seen in the video below with an Arduino Uno and motor shield, though any Arduino capable of PWM output should have no problem with this setup. Since the servos used here are meant for continuous rotation, travel distance is based only on timing. Depending on the application, you may want add a simple microswitch or other sensing mechanism for feedback.

This is a general purpose linear servo actuator (pusher style). Two sizes have been designed, for different space constraints and force outputs.

These use continuous rotation servos which helps keep the cost very low. Off the shelf actuators of this type can cost around $70 USD.

The “mini” version will fit in smaller spacers, but has a much lower force output. The “large” version has a higher force output, but is…larger in size than the “mini.”

A linear actuator that won’t break the bank

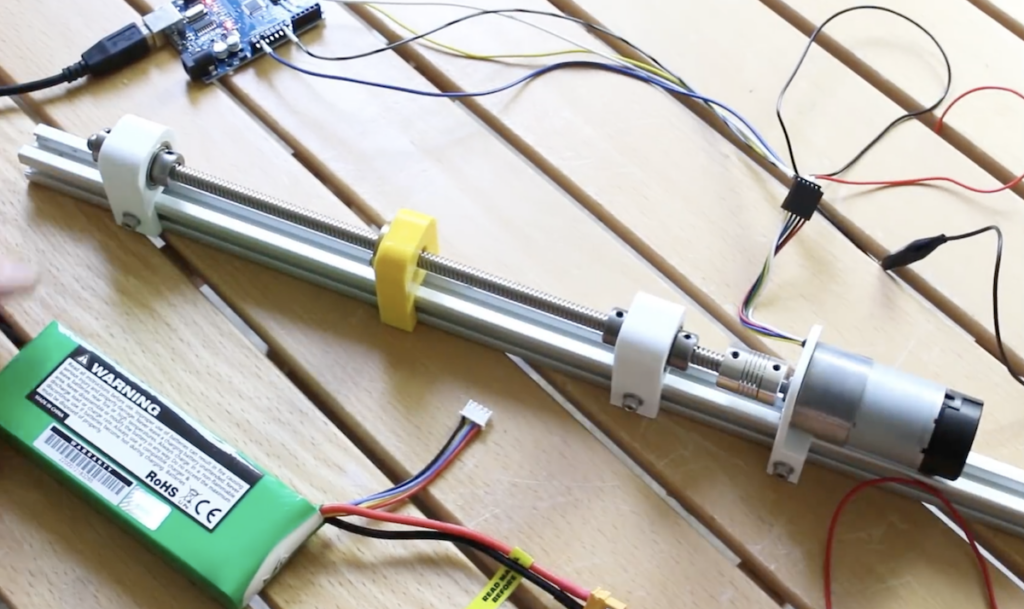
Extremely good linear actuators can be expensive and heavy, but what if you need something for relatively light applications? In the video below, James Bruton explains how you can make one using parts including a DC motor with a quadrature encoder, 3D-printed mounting, and a lead screw assembly.

His device uses an Arduino Uno for control, using pins 2 and 3 as interrupts to ensure correct rotation—and thus linear travel—sensing. Proper movement is facilitated with a pair of PID loops to regulate both the position and velocity, even under differing load and battery conditions. 

Arduino code and CAD information can be found on GitHub, while an explanation of the project is seen in the video below. 

Arduino Blog 19 Oct 15:32

Junkyard RC Conversion Looks Like Mad Max Extra

Over the years we’ve noticed that there is a subset of hackers out there who like to turn real life vehicles into remote controlled cars. These vehicles are generally destroyed in short order, either by taking ridiculous jumps, or just smashing them into stuff until there’s nothing left. In truth that’s probably what most of us would do if we had access to a full size RC car, so no complaints there.

As a rule, the donor vehicles for these conversions are usually older and cheap. That only makes sense, why spend a lot of money on a vehicle you intend on destroying? But even still, the RC conversion [William Foster] has recently completed may take the cake. We don’t know how much of the “antiquing” of his donor vehicle was intentionally done, but on the whole, the thing looks like it got dragged from the bottom of a lake somewhere. Presumably, he got a great deal on it.

The video posted to YouTube is primarily about [William] driving his creation around (sometimes from the back seat, no less), but towards the second half of the video there’s a quick rundown on the hardware used to make this pile of rust move.

A standard RC transmitter and receiver combination are used to control a pair of Arduinos mounted in the center console, which are in turn hooked up to external stepper drivers. The wheel is turned via a chain and sprocket arrangement, and the pedals are pushed with homebrew contraptions that look like they are made from lead screws intended for 3D printers.

All in all, it appears [William] has cooked up a fairly responsive control system with commodity hardware you could get on Amazon or eBay. Not sure we’d be backseat driving this thing personally, but to each their own.

We recently covered a Jeep that got a similar remote control upgrade, but these super-sized remote controlled vehicle builds are not just limited to the ground either.


Filed under: Android Hacks, car hacks

Hidden Bookshelf Door Shows Incredible Motion

Who didn’t dream of a hidden door or secret passage in the house when they were kids? Some of us still do! [SPECTREcat] had already built a secret door in a fully functioning bookcase with a unique opening mechanism. The intriguing mechanism allows the doors to start by sliding slightly away form one another before hinging into the hidden space. Their operation was, however, was manual. The next step was to automate the secret door opening mechanism with electronics.

The project brain is an off-the-shelf Arduino Uno paired with a MultiMoto Arduino shield to drive 4 Progressive Automations PA-14 linear actuators. These linear actuators have 50lb force, allowing the doors to fully open or close within 10 seconds and maintain a speed that wouldn’t throw the books off the bookcases.

Not wanting to drill a hole through the bookshelf for a switch or other opening mechanisms, [SPECTREcat] added a reed switch that is activated on the other side by a DVD cover with a magnet inside. In addition to that, there is a PIR sensor on the inside room to automatically close the doors if no motion is detected for 2 hours. Dont worry, there’s also a manual switch inside just in case.

Using one of the items on the shelf to trigger the secret passage is a classic move. He could also have used a secret knock code, like the Secret Attic Library Door we covered in the past. Check out the video below to see the hinge and slide movement in action.


Filed under: home hacks

PWM on High Current(amp) Actuators

I'm trying to move up into the category I originally got into robotics for in the first place: bigger buddies!

I have a Raspberry Pi I'd like to use to control some linear actuators, which are 12v and lift about 225lbs. I'm unaware of their amp usage: a search for similar rated ones said ~4-5A. They were purchased from an online auto parts place, so it's unlikely they'd know.

read more

Secret Attic Library Door

We have a pretty good guess where [Krizbleen] hides away any seasonal presents for his family: behind his shiny new secret library door. An experienced woodworker, [Krizbleen] was in the process of finishing the attic in his home when he decided to take advantage of the chimney’s otherwise annoying placement in front of his soon-to-be office. He built a false wall in front of the central chimney obstacle and placed a TV in the middle of the wall (directly in front of the chimney) flanked on either side by a bookcase.

If you touch the secret book or knock out the secret sequence, however, the right-side bookcase slides gently out of the way to reveal [Krizbleen’s] home office. Behind the scenes, a heavy duty linear actuator pushes or pulls the door as necessary, onto which [Krizbleen] expertly mounted the bookcase with some 2″ caster wheels. The actuator expects +24V or -24V to send it moving in one of its two directions, so the Arduino Uno needed a couple of relays to handle the voltage difference.

The effort spent here was immense, but the result is seamless. After borrowing a knock-detection script and hooking up a secondary access button concealed in a book, [Krizbleen] had the secret door he’d always wanted: albeit maybe a bit slow to open and close. You can see a video of its operation below.


Filed under: Arduino Hacks, home hacks

Nerf gun progress

The Nerf gun prototype is coming along nicely.  The students have tested the launcher up to 120 psi, built a prototype tilt and pan mechanism in Lego, and today hooked up a small reservoir behind the solenoid valve on the barrel to a bigger reservoir using an air hose.

They hope to be able to keep the bigger reservoir up to pressure by occasionally turning on a 12v compressor.  The compressor takes 10A and can’t be run for very long at a time (it brings the system up to 120psi  from 0psi in about 15 seconds), so they’ll have to run it off a relay.  I couldn’t find cheap relays that looked easy to use with 5v control and 12v 10A contacts, but automotive relays are cheap (I found 5 relays and 5 sockets for $5 on Amazon AGT (5 Pack) 30/40 AMP Relay Harness Spdt 12V Bosch Style (40AMP-HRNS)—even with shipping that is only $2.25 each for relay plus socket).  The relay can be controlled by half an H-bridge of the Hexmotor board.  The other half of the H-bridge controlling the solenoid should be fine, as we never need to run the compressor and fire at the same time—we can stop the compressor for a fraction of a second while firing.

They want to have the running of the compressor be automatic, which would require a pressure sensor.  The Freescale MPX5999D would work and is one of the few sensors I’ve seen with a large enough range, but I’m not sure how to mount it.  Standard tire-pressure monitoring sensors and transmitters are cool, but I don’t know if they go up to high enough pressures and I don’t know how to interface to their transmitters—that is almost certainly a more expensive solution. Honeywell has a differential sensor with ports that will go to ±150psi, which may be easier to connect up, but it costs about twice as much and is uncompensated and unamplified: I suspect it would be a lot fussier to work with than the Freescale part.  I’ve ordered a sample of the Freescale part, and read their AN936 application note on mounting (epoxy is your friend).

It turns out that the relays may be useful for other functions, like a linear actuator for the tilt mechanism. Two relays can be controlled from one H-bridge to get forward-backward-stop action on motors up to 30 amps (but no PWM!). Unfortunately, 12v linear actuators seem to run $100 and up, which is more that I want to spend on a single part.  I may ask the students to redesign—either building their own lead-screw mechanism or coming up with a different tilt mechanism.  I don’t think a simple servo motor will do—the beefiest one I have claims only 69 oz-in (0.49 Nm) of torque, which I don’t think will be enough to tilt the gun, even if they can get the hinge very close to the center of gravity.

Another problem has come up: getting more darts.  We have 5 darts that fit the barrel perfectly (1.45cm diameter).  There are plenty of darts sold like that, but they almost all now have larger heads on the end, and the heads don’t slide down the barrel.  The new Nerf clip-system darts are all mini-darts, that have a 0.5″ (1.25cm) diameter instead.  These do not fire well from the ½” PVC, which I measured as having an ID of 1.485cm (0.585″). A chart of PVC sizes I found on line says that 1/2″ ID Schedule 40 PVC is supposed to have an inside diameter of 0.622″, which is almost 5/8″, but that ID can vary by 10%, even along a single piece of pipe—only OD is held to tight specs.  Thicker-walled Schedule 80 is supposed to have 0.546″ ID, which would still be too loose for clip-system darts.

I see four possible solutions:

  • Find a source of (probably non-Nerf) foam darts that are 1.45cm (9/16″) diameter with heads that are no wider than the body. I think that they came with an NXT generation crossbow, so replacement foam darts for that may be what we need. They’re nowhere near as cheap as clip-system darts, but this is still probably the cheapest solution.
  • Buy Nerf  (or other) darts with the right size bodies but oversize heads, remove the heads, and make new ones (out of what?). This would be cheap, but tedious, and the darts would probably fly poorly, unless we made the new heads have a decent weight.
  • Use clip-system darts for compatibility with the popular Nerf guns, but find a smaller diameter tube than the ½” PVC pipe (where? and how would it be connected to the solenoid valve?) It looks like Schedule 40 3/8″ steel pipe has a inside diameter of 0.49″, which is just right, but steel pipe is rather heavy.
  • Use clip-system darts, but convert to the Nerf-standard tube-inside-the-dart launching system.  This limits the effective barrel length to the inside length of the dart (about 4.5cm) and the barrel diameter to the inside diameter of ¼”, which will limit the top speed of the darts (OK for safety, but probably not as much fun).

Filed under: Pressure gauge, Robotics Tagged: Arduino, foam darts, linear actuator, Nerf darts, Nerf gun, nerf guns, pressure sensor, relay, rocket