Posts with «bootloader» label

Low-Power Challenge: Making an Analog Clock Into a Calendar With a 50-Year Life

You have to be pretty ambitious to modify a clock to run for 50 years on a single battery. You also should probably be pretty young if you think you’re going to verify your power estimates, at least in person. According to [Josh EJ], this modified quartz analog clock, which ticks off the date rather than the time, is one of those “The March of Time” projects that’s intended to terrify incentivize you by showing how much of the year is left.

Making a regular clock movement slow down so that what normally takes an hour takes a month without making any mechanical changes requires some clever hacks. [Josh] decided to use an Arduino to send digital pulses to the quartz movement to advance the minute hand, rather than let it run free. Two pulses a day would be perfect for making a 30-day month fit into a 60-minute hour, but that only works for four months out of the year. [Josh]’s solution was to mark the first 28 even-numbered minutes, cram 29, 30, and 31 into the last four minutes of the hour, and sort the details out in code.

As for the low-power mods, there’s some cool wizardry involved with that, like flashing the Arduino Pro Mini with a new bootloader that reduces the clock speed to 1 MHz. This allows the microcontroller and RTC module to run from the clock movement’s 1.5 V AA battery. [Josh] estimates a current draw of about 6 μA per day, which works out to about 50 years from a single cell. That’s to be taken with a huge grain of salt, of course, but we expect the battery will last a long, long time.

[Josh] built this clock as part of the Low-Power Challenge contest, which wrapped up this week. We’re looking forward to the results of the contest — good luck to all the entrants!

Trojans Can Lurk Inside AVR Bootloaders

If there’s one thing we’ve learned over the years, it’s that if it’s got a silicon chip inside, it could be carrying a virus. Research by one group focused on hiding a trojan inside an AVR Arduino bootloader, proving even our little hobbyist microcontrollers aren’t safe.

The specific aim of the research was to hide a trojan inside the bootloader of an AVR chip itself. This would allow the trojan to remain present on something like a 3D printer even if the main firmware itself was reinstalled. The trojan would still be able to have an effect on the printer’s performance from its dastardly hiding place, but would be more difficult to notice and remove.

The target of the work was the ATmega328P, commonly used in 3D printers, in particular those using the Marlin firmware. For the full technical details, you can dive in and read the research paper for yourself. In basic terms, though, the modified bootloader was able to use the chip’s IVSEL register to allow bootloader execution after boot via interrupt. When an interrupt is called, execution passes to the trojan-infected bootloader’s special code, before then returning to the program’s own interrupt to avoid raising suspicion. The trojan can also execute after the program’s interrupt code too, increasing the flexibility of the attack.

Simply reflashing a program to an affected chip won’t flush out the trojan. The chip instead must have its bootloader specifically rewritten a clean version to remove the offending code.

It’s not a super dangerous hack, overall. Typically, flashing a malicious bootloader would require physical access to the chip. Furthermore, there’s not heaps to be gained by sneaking code onto the average 3D printer out there. However, it’s nonetheless a good example of what bootloaders can really do, and a reminder of what we should all be careful of when operating in security-conscious domains. Stay safe out there!

Hack a Day 22 Sep 03:00

Arduino Leonardo Gets A Lockable Bootloader

Security is something that’s far too often overlooked in embedded devices. One of the main risks is that if the device doesn’t verify the authenticity of incoming firmware updates. [Walter Schreppers] was working on a USB password storage device, so security was paramount. Thus, it was necessary to develop a secure bootloader.

[Walter]’s device was based upon the Arduino Leonardo. Starting with the Caterina bootloader, modifications were made to enable the device to be locked and unlocked for programming. This can be done in a variety of ways, depending on how things are setup. Unlocking can be by using a secret serial string, an onboard jumper, and [Walter] even suspects a SHA1 challenge/response could be used if you were so inclined.

It’s never too soon to start thinking about security in your projects. After all, we must stave off the cyberpunk future in which leather-clad youths flick all your lights on and off before burning your house down in the night by overclocking the water heater. Naturally, we’ve got a primer to get you going in the right direction. Happy hacking!

Want to Learn Ethernet? Write Your Own Darn AVR Bootloader!

There’s a school of thought that says that to fully understand something, you need to build it yourself. OK, we’re not sure it’s really a school of thought, but that describes a heck of a lot of projects around these parts.

[Tim] aka [mitxela] wrote kiloboot partly because he wanted an Ethernet-capable Trivial File Transfer Protocol (TFTP) bootloader for an ATMega-powered project, and partly because he wanted to understand the Internet. See, if you’re writing a bootloader, you’ve got a limited amount of space and no device drivers or libraries of any kind to fall back on, so you’re going to learn your topic of choice the hard way.

[Tim]’s writeup of the odyssey of cramming so much into 1,000 bytes of code is fantastic. While explaining the Internet takes significantly more space than the Ethernet-capable bootloader itself, we’d wager that you’ll enjoy the compressed overview of UDP, IP, TFTP, and AVR bootloader wizardry as much as we did. And yes, at the end of the day, you’ve also got an Internet-flashable Arduino, which is just what the doctor ordered if you’re building a simple wired IoT device and you get tired of running down to the basement to upload new firmware.

Oh, and in case you hadn’t noticed, cramming an Ethernet bootloader into 1 kB is amazing.

Speaking of bootloaders, if you’re building an I2C slave device out of an ATtiny85¸ you’ll want to check out this bootloader that runs on the tiny chip.

SMART Response XE Gets Wireless Bootloader

A few months back we first brought word of the progress being made in unlocking the SMART Response XE, an ATmega128RFA powered handheld computer that allowed teachers to create an interactive curriculum in the days before all the kids got Chromebooks. Featuring 2.4 Ghz wireless communication, a 384×160 LCD, and a full QWERTY keyboard, schools paid around $100 each for them 2010. Now selling for as little as $5 on eBay, these Arduino-compatible devices only need a little coaxing and an external programmer to get your own code running.

The previous post inspired [Larry Bank] to try his hand at hacking the SMART Response XE, and so far he’s made some very impressive progress. Not only has he come up with his own support library, but he’s also created a way to upload Arduino code to the devices through their integrated 802.15.4 radio. With his setup, you no longer need to open the SMART Response XE and attach a programmer, making it much easier to test and deploy software.

[Larry] has written up a very detailed account of his development process, and goes through the trouble of including his ideas that didn’t work. Getting reliable communication between two of these classroom gadgets proved a bit tricky, and it took a bit of circling around until he hit on a protocol that worked.

The trick is that you need to use one SMART Response XE attached to your computer as a “hub” to upload code to other XEs. But given how cheap they are this isn’t that big of a deal, especially considering the boost in productivity it will net you. [Larry] added a 5 x 2 female header to his “hub” XE so he could close the device back up, and also added a physical power switch. In the video after the break, you can see a demonstration of the setup sending a simple program to a nearby XE.

Between this wireless bootloader and the Arduboy compatibility covered previously, we’d suggest you get your SMART Response XE now. We wouldn’t be surprised if the prices of these things start going up like they did with the IM-ME.

Over The Air Updates For Your Arduino

An Arduino and a data radio can make a great remote sensor node. Often in such situations, the hardware ends up installed somewhere hard to get to – be it in a light fitting, behind a wall, or secreted somewhere outdoors. Not places that you’d want to squeeze a cable repeatedly into while debugging.

[2BitOrNot2Bit] decided this simply wouldn’t do, and decided to program the Arduinos over the air instead.

Using the NRF24L01 chip with the Arduino is a popular choice to add wireless communications to a small project. By installing one of these radios on both the remote hardware and a local Arduino connected to the programming computer, it’s possible to remotely flash the Arduino without any physical contact whatsoever using Optiboot.

The writeup is comprehensive and covers both the required hardware setup for both ends of the operation as well as how to install the relevant bootloaders. If you’re already using the NRF24L01 in your projects, this could be the ideal solution to your programming woes. Perhaps you’re using a different platform though – like an Arduino on WiFi? Don’t worry – you can do OTA updates that way, too.

How to burn Arduino bootloader to atmega 328

In this post we will learn, how to burn hex file in avr microcontroller using programmer and burner software.

List of components/software:

1. USBasp programmer
2. Target circuit board having microcontroller (mine have atmega328)
3. Avrdudes (Burner software)

Prerequisites:
USBasp driver installed in your system.
If it is not installed, then read instructions about installation from my previous post.
USBasp driver installation

Default fuse byte for atmega328 is: LFUSE = 0X62 and HFUSE = 0XD9. It might vary
This corresponds to internal rc oscillator

LFUSE = 0XFF and HFUSE = 0XDE
This corresponds to external oscillator having frequency 16 MHz

We can use internal as well as external oscillator. For the time being, we are using external crystal having 16 MHz frequency.


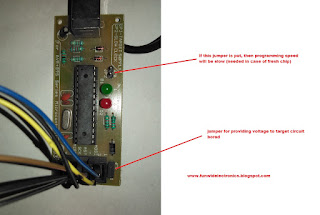
Connecting atmega328 to usbasp

USBasp programmer


Using Usbasp programmer
Change the fuse bytes:


Check out the video:


The connections from USBasp programmer to target circuit board (atmega 8a is as follows):

USBASP                                    ATMEGA328
VCC                                           PIN NO. 7, 20, 21 (VCC, AREF, AVCC)
GND                                          PIN NO. 8, 22 (GND)
RST                                            PIN NO. 1 (RESET)
MOSI                                         PIN NO. 17 (MOSI)
MISO                                         PIN NO. 18 (MISO)
SCK                                           PIN NO. 19 (SCK)

The connection is same for any other microcontroller e.g. atmega 328, atmega 328P, atmega 168, etc.

Download avrdudes from the below link:

Thanks for visiting this blog.

Stay tuned for more tutorials

Dual-boot Your Arduino

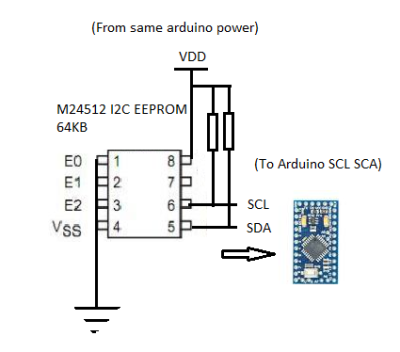
There was a time, not so long ago, when all the cool kids were dual-booting their computers: one side running Linux for hacking and another running Windows for gaming. We know, we were there. But why the heck would you ever want to dual-boot an Arduino? We’re still scratching our heads about the application, but we know a cool hack when we see one; [Vinod] soldered the tiny surface-mount EEPROM on top of the already small AVR chip! (Check the video below.)

Aside from tiny-soldering skills, [Vinod] wrote his own custom bootloader for the AVR-based Arduino. With just enough memory to back up the AVR’s flash, the bootloader can shuffle the existing program out to the EEPROM while flashing the new program in. For more details, read the source.

While you might think that writing a bootloader is deep juju (it can be), [Vinod]’s simple bootloader application is written in C, using a style that should be familiar to anyone who has done work with an Arduino. It could certainly be optimized for size, but probably not for readability (and tweakability).

Why would you ever want to dual boot an Arduino? Maybe to be able to run testing and stable code on the same device? You could do the same thing over WiFi with an ESP8266. But maybe you don’t have WiFi available? Whatever, we like the hack and ‘because you can’ is a good enough excuse for us. If you do have a use in mind, post up in the comments!


Filed under: Arduino Hacks, Microcontrollers

Arduinos (and other AVRs) Write To Own Flash

In this post on the Arduino.cc forums and this blog post, [Majek] announced that he had fooled the AVR microcontroller inside and Arduino into writing user data into its own flash memory during runtime. Wow!

[Majek] has pulled off a very neat hack here. Normally, an AVR microcontroller can’t write to its own flash memory except when it’s in bootloader mode, and you’re stuck using EEPROM when you want to save non-volatile data. But EEPROM is scarce, relative to flash.

Now, under normal circumstances, writing into the flash program memory can get you into trouble. Indeed, the AVR has protections to prevent code that’s not hosted in the bootloader memory block from writing to flash. But of course, the bootloader has to be able to program the chip, so there’s got to be a way in.

The trick is that [Majek] has carefully modified the Arduino’s Optiboot bootloader so that it exposes a flash-write (SPM) command at a known location, so that he can then use this function from outside the bootloader. The AVR doesn’t prevent the SPM from proceeding, because it’s being called from within the bootloader memory, and all is well.

The modified version of the Optiboot bootloader is available on [Majek]’s Github.  If you want to see how he did it, here are the diffs. A particularly nice touch is that this is all wrapped up in easy-to-write code with a working demo. So next time you’ve filled up the EEPROM, you can reach for this hack and log your data into flash program memory.

Thanks [Koepel] for the tip!


Filed under: Arduino Hacks

Sparkfun Ships 2000 MicroViews Without Bootloaders

Everyone has a bad day right? Monday was a particularly bad day for the folks at Sparkfun. Customer support tickets started piling up, leading to the discovery that they had shipped out as many as 1,934 MicroViews without bootloaders.

MicroView is the tiny OLED enabled, Arduino based, microcontroller system which had a wildly successful Kickstarter campaign earlier this year. [Marcus Schappi], the project creator, partnered up with SparkFun to get the MicroViews manufactured and shipped out to backers. This wasn’t a decision made on a whim, Sparkfun had proven themselves by fulfilling over 11,000 Makey Makey boards to backers of that campaign.

Rather than downplay the issue, Sparkfun CEO [Nathan Seidle] has taken to the company blog to explain what happened, how it happened, and what they’re going to do to make it right for their customers. This positions them as the subject of our Fail of the Week column where we commiserate instead of criticize.

First things first, anyone who receives an effected MicroView is getting a second working unit shipped out by the beginning of November. Furthermore, the bootloaderless units can be brought to life relatively easily. [Nate] provided a hex file with the correct bootloader. Anyone with an Atmel AVR In-System Programming (ISP) programmer and a steady hand can bring their MicroView to life. Several users have already done just that. The bootloader only has to be flashed via ISP once. After that, the MicroView will communicate via USB to a host PC. Sparkfun will publish a full tutorial in a few weeks.

Click past the break to read the rest of the story.

So what went wrong? The crux of the problem is a common one to manufacturing: An incomplete production test. For many of their products, Sparkfun loads a single hex file containing the production test and the optiboot bootloader. The test code proves out the functionality of the device, and the bootloader allows the customer to flash the device with their own sketches. The problem is the bootloader normally connects to a PC host via USB. Enumerating a USB connection can take up to 30 seconds. That’s way too slow for volume production.

Sparkfun opted to skip the bootloader test, since all the pins used to load firmware were electrically tested by their production test code. This has all worked fine for years – until now. The production team made a change to the test code on July 18th. The new hex file was released without the bootloader. The production test ran fine, and since no one was testing the bootloader, the problem wasn’t caught until it was out in the wild.

The Sparkfun crew are taking several steps to make sure this never happens again.They’re using a second ATmega chip on their test fixture to verify the bootloader without the slow PC enumeration step. Sparkfun will also avoid changing firmware during a production run. If firmware has to change, they’re planning to beta test before going live on the production line. Finally, Sparkfun is changing the way they approach large scale production. In [Nathan's] own words:

Moving from low volume to mid-volume production requires a very different approach. SparkFun has made this type of mistake before (faulty firmware on a device) but it was on a smaller scale and we were agile enough to fix the problem before it became too large. As we started producing very large production runs we did not realize quality control and testing would need very different thinking. This was a painful lesson to learn but these checks and balances are needed. If it didn’t happen on Microview it would have happened on a larger production run someday in the future.

Everyone has bad days, this isn’t the first time Sparkfun has lost money due to a mistake. However, they’re doing the right thing by attacking it head on and fixing not only the immediate issue but the underlying thought process which allowed the problem to arise.


Filed under: Hackaday Columns, news