Posts with «laser» label

Laser Engraver Uses All of the DVD Drive

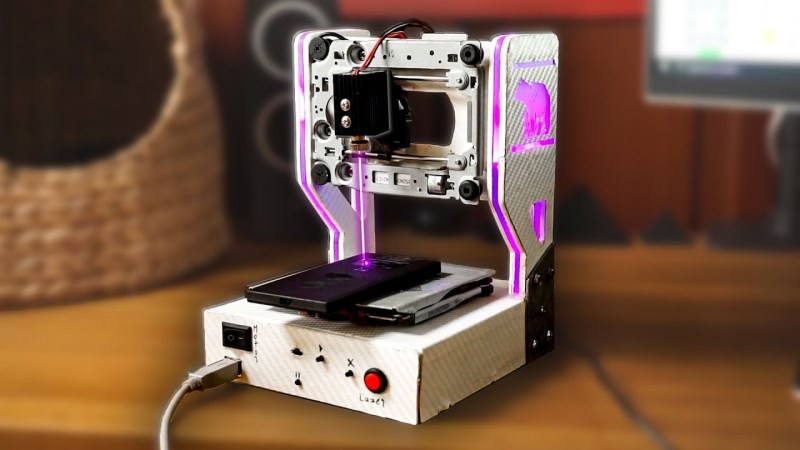
For the last ten to fifteen years, optical drives have been fading out of existence. There’s little reason to have them around anymore unless you are serious about archiving data or unconvinced that streaming platforms will always be around. While there are some niche uses for them still, we’re seeing more and more get repurposed for parts and other projects like this laser engraver which uses not only the laser from a DVD drive, but plenty of other parts as well.

The build starts with a couple optical drives, both of which are dismantled. One of the shells is saved to use as a base for the engraver, and two support structures are made out of particle board and acrylic to hold the laser and the Y axis mechanism. Both axes are made from the carriages of the disassembled hard drives, with the X axis set into the base to move the work piece. One of the lasers from the scavenged DVD drives is fitted to the Y axis with a new heat sink, and with an Arduino set up to interpret gcode the device is on its way to engraving any material that will fit into its diminutive frame.

While the build repurposes almost all of the parts from the optical drives, it does stop short of using the drive motors in favor of A4988 stepper motors. It’s also not quite powerful enough to engrave wood, but other materials like leather are right in this machine’s sweet spot. If you have plenty of drives on hand with nothing else for them to do, there’s plenty more they can be used for. This scanning laser microscope is among the more interesting builds we’ve seen.

DVD Optics Power This Scanning Laser Microscope

We’ve all likely seen the amazing images possible with a scanning electron microscope. An SEM can yield remarkably detailed 3D images of the tiniest structures, and they can be invaluable tools for research. But blasting high-energy cathode rays onto metal-coated samples in the vacuum chamber of a bulky and expensive instrument isn’t the only way to make useful images, as this home-brew laser scanning microscope demonstrates.

This one comes to us by way of [GaudiLabs], a Swiss outfit devoted to open-source lab equipment that enables citizen science; we saw their pocket-sized thermal cycler for PCR a while back. The basic scheme here is known as confocal laser scanning fluorescence microscopy, where a laser at one wavelength excites fluorescent tags bound to structures in a sample. Light emitted by the tags is collected, and a 3D image is built up from multiple scans of the sample at different focal planes.

Like many DIY projects, this microscope is built from old DVD parts, specifically the pickup heads. The precision optics in these commonly available assemblies, which are good enough to read pits as small as 150 nm on a Blu-Ray DVD, are well-suited for resolving similarly sized microstructures. One DVD pickup is used to scan the laser in the X-axis, while the other head is modified to carry the sample and move it in the Y-axis. The pickup head coils and laser are driven by an Arduino carried on a custom PCB along with the DVD heads. Complete build files are posted on GitHub for anyone interested in recreating this work.

We love tips like this that dig back a bit and find things we missed the first go-around. And the equipment [GaudiLabs] lists really has potential for the budding biohacker, which we also like.

Thanks for the tip on this one, [Bill].

Open Laser Blaster Shells Out More Bang for the Buck

[a-RN-au-D] was looking for something fun to do with his son and dreamed up a laser blaster game that ought to put him in the running for father of the year. It was originally just going to be made of cardboard, but you know how these things go. We’re happy the design went this far, because that blaster looks fantastic.

Both the blaster and the target run on Arduino Nanos. There’s a 5mW laser module in the blaster, and a speaker for playing the pew pew-related sounds of your choice. Fire away on the blaster button, and the laser hits a light-dependent resistor mounted in the middle of the target. When the target registers a hit, it swings backward on a 9g servo and then returns quickly to vertical for the next shot.

There are some less obvious features that really make this game a hit. The blaster can run in 10-shooter mode (or 6, or whatever you change it to in the code) with a built-in reload delay, or it can be set to fully automatic. If you’re short on space or just get sick of moving the target to different flat surfaces, it can be mounted on the wall instead — the target moves forward when hit and then resets back to flat. Check out the demo video we loaded up after the break.

No printer? No problem — here’s a Node-RED shooting gallery that uses simple wooden targets.

Laser Light Show Turned Into Graphical Equalizer

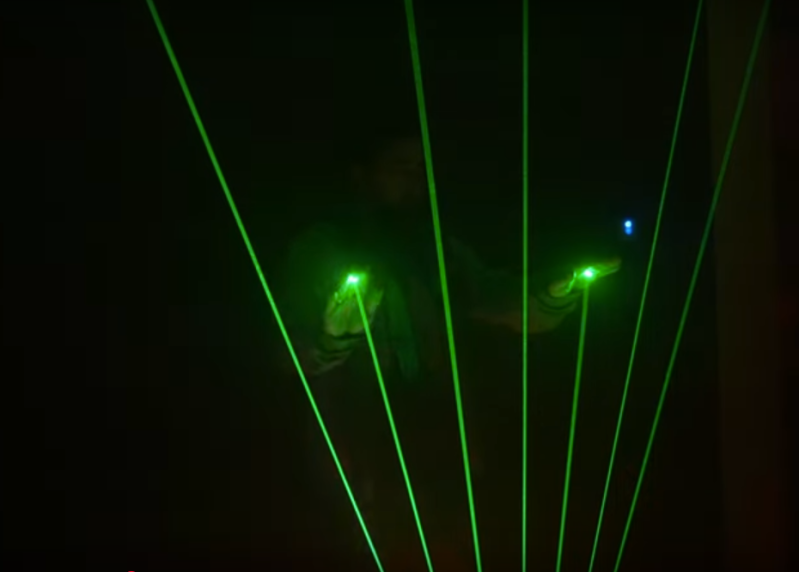
The gold standard for laser light shows during rock concerts is Pink Floyd, with shows famous for visual effects as well as excellent music. Not all of us have the funding necessary to produce such epic tapestries of light and sound, but with a little bit of hardware we can get something close. [James]’s latest project is along these lines: he recently built a laser light graphical equalizer that can be used when his band is playing gigs.

To create the laser lines for the equalizer bands, [James] used a series of mirrors mounted on a spinning shaft. When a laser is projected on the spinning mirrors it creates a line. From there, he needed a way to manage the height of each of the seven lines. He used a series of shrouds with servo motors which can shutter the laser lines to their appropriate height.

The final part of the project came in getting the programming done. The brain of this project is an MSGEQ7 which  takes an audio input signal and splits it into seven frequencies for the equalizer. Each one of the seven frequencies is fed to one of the seven servo-controlled shutters which controls the height of each laser line using an Arduino. This is a great project, and [James] is perhaps well on his way to using lasers for other interesting musical purposes.

Hack a Day 14 Feb 03:00

Laser projector ditches galvanometer for spinning drum

Laser projectors like those popular in clubs or laser shows often use mirror galvanometers to reflect the laser and draw in 2D. Without galvos, and on a tight budget, [Vitaliy Mosesov] decided that instead of downgrading the quality, he would seek an entirely different solution: a spinning mirror drum.

He fires a laser at a rotating drum with twelve mirror faces, each at a different adjustable vertical angle. The laser will hit a higher or lower point on the projection surface depending on which mirror it’s reflecting off – this creates resolution in the Y direction.

Timing the pulsing of the laser so that it reflects off the mirror at a certain horizontal angle provides the X resolution.

As you can already tell, speed and timing is critical for this to work. So much so that [Vitaliy] decided he wanted to overclock his Arduino – from 16 MHz to 24.576 MHz. Since this changes the baud rate, an AVR ISP II was used for programming after the modification, and the ‘duino’s hardware serial initialization had to be hacked too.

For the laser itself, [Vitaliy] designed some nifty driver circuitry, which can respond quickly to the required >50 kHz modulation, supply high current, and filter out voltage transients on the power supply (semiconductor lasers have no protection from current spikes).

On the motor side of things, closed loop control is essential. A photo-interrupter was added to the drum for exact speed detection, as well as a differentiator to clean up the signal. Oh, and did we mention the motor is from a floppy disk drive?

We’ve actually seen builds like this before, including a dot-matrix version with multiple lasers and one made apparently out of Meccano and hot-glue that can project a Jolly Wrencher. But this build, with its multiple, adjustable mirrors, is a beauty.  Check it out in action below.

Hack a Day 20 Apr 16:30

Afroman Teaches Intro to Servos, Builds Laser Turret

After a longish hiatus, we were pleased to see a new video from [Afroman], one of the most accessible and well-spoken teachers the internet has to offer. If you’re new to electronics, see the previous sentence and resolve to check out his excellent videos. The new one is all about servos, and it culminates in a simple build that provides a foundation for exploring robotics.

[Afroman] leaves no gear unturned in his tour de servo, which is embedded after the break. He explains the differences between open vs. closed loop motor systems, discusses the different sizes and types of servos available, and walks through the horns and pigtails of using them in projects. Finally, he puts this knowledge to use by building a laser turret based on a pan-tilt platform.

The Arduino-driven turret uses two micro servos controlled with pots to move by degrees in X/Y space. Interestingly, [Afroman] doesn’t program the board in the Arduino IDE using wiring. Instead, he uses an open-source microcontroller language/IDE called XOD that lets you code by building a smart sort of schematic from drag-and-drop components and logic nodes. Draw the connections, assign your I/O pin numbers, and XOD will compile the code and upload it directly to the board.

XOD seems like a good tool for beginners to do rapid prototyping. On the other hand, a look into the generated code reveals a whole lot of wrappers that obfuscate the bits of code that actually do stuff. There doesn’t seem to be a way to shed them, either, so once you design something in XOD, you’re kind of stuck using it to iterate. That said, the generated code is well documented, and someone who knows what they’re looking at could find, for instance, the I/O pin assigned to the blink sketch LED.

Once the novelty of the double laser cat tormentor has subsided, use the other servos in that 5-pack you bought to flip a light switch, control a knob, or play the glockenspiel.


Filed under: how-to, Laser Hacks

Speakers Make a LASER Scanning Microscope

We’ve seen a lot of interest in LSM (LASER Scanning Microscopes) lately. [Stoppi71] uses an Arduino, a CD drive, and–of all things–two speakers in his build. The speakers are used to move the sample by very small amounts.

The speakers create motion in the X and Y axis depending on the voltage fed to them via a digital analog converter. [Stoppi71] claims this technique can produce motion in the micron range. His results seem to prove that out. You can see a video about the device, below.

Oddly enough, [Stoppi71] found that older CD drives were easier to work with because they were not as miniaturized as more modern versions. The device uses the Arduino to drive the scanning table (the speakers), and read the photodetector. The results of the scan appear on an LCD screen.

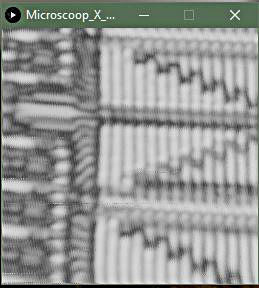
Using a calibration slide from eBay, [Stoppi71] calibrated the device for different magnifications. You can see the test slide at medium magnification. For the record, a human hair is about 40 or 50 microns thick. So the 10 micron mark in the photo would be like splitting a hair in quarters or fifths.

The real goal was to view pits on CDs, and the instrument is more than capable of doing that. The image doesn’t show up all at once (it is scanning, after all) and it isn’t the kind of view you’d expect from an optical microscope, but a typical optical scope can’t resolve below about 200 microns. Special techniques can push that lower, but being able to resolve things at the one or two micron level with something this simple is a great accomplishment.

We recently saw a different-looking LSM built on a conventional microscope stage and a DVD drive. If LSM isn’t enough for you, maybe you should pitch in on the open source electron microscope project.


Filed under: laser hacks

Laser Scanning Microscope

Remember that feeling when you first looked down on a microscope? Now you can re-live it but in slightly different way. [Venkes] came up with a way to make a Laser Scanning Microscope (LSM) with mostly off the shelf components that you probably have sitting around, collecting dust in your garage. He did it using some modified DVD pick-ups, an Arduino Uno, a laser and a LDR.

EPROM die shot

To be honest, there’s some more stuff involved in the making of the LSM but [Venkes] did a detailed Instructable explaining how everything fits together. You will need a fair dose of patience, it’s not very easy to get the focus right and it’s quite slow, an image takes about half an hour to complete, but it can do 1300x amplification at 65k pixels (256×256). From reading the instructions it seems that you will need a steady hand to assemble it together, some steps look kind of tricky. On the software side, the LSM uses Arduino and Processing. The Arduino part is responsible for the steering of the lens and taking the LDR readings. This information is then sent to Processing which takes care of interpreting the data and translate it to an image.

The build difficulty level should be between the DIY Smartphone Microscope and the Laser Sequencer Super Microscope. In the end, if everything goes right, you will end up with some cool images:


Filed under: hardware
Hack a Day 09 Feb 00:00
arduino  hardware  laser  lsm  microscope  

Real-Time Planet Tracker With Laser-Point Accuracy

Space. The final frontier. Unfortunately, the vast majority of us are planet-locked until further notice. If you are dedicated hobbyist astronomer, you probably already have the rough positions of the planets memorized. But what if you want to know them exactly from the comfort of your room and educate yourself at the same time? [Shubham Paul] has gone the extra parsec to build a Real-Time Planet Tracker that calculates their locations using Kepler’s Laws with exacting precision.

An Arduino Mega provides the brains, while 3.5-turn-pan and 180-degree-tilt servos are the brawn. A potentiometer and switch allow for for planet and mode selection, while a GPS module and an optional MPU9250 gyroscope/magnetometer let it know where you are. Finally a laser pointer shows the planet’s location in a closed room. And then there’s code: a lot of code.

The hardware side of things — as [Shubham Paul] clarifies — looks a little unfinished because the focus of the project is the software with the intent to instruct. They have included all the code they wrote for the RTPT, providing a breakdown in each section for those who are looking to build their own.

There is an extra step to auto-align the RTPT to north, otherwise you’ll have to do so manually. But [Shubham Paul] has designed it so that even if you move the tracker about, the RTPT will readjust its calculations in real time. Each part of the project includes a wealth of related information beyond simple instructions to adequately equip any prospective builders.

This hack gets the job done. If it’s looks you’re after, an artistic expression of maker skills and astronomy can be seen in this planetary map that relies on persistence of vision.


Filed under: Arduino Hacks, software hacks

Cheap Dual Mirror Laser Projector

[Stanley] wanted to make a laser projector but all he could find online were one’s using expensive galvanometer scanners. So instead he came up with his own solution that is to be admired for its simplicity and its adaptation of what he could find.

At its heart is an Arduino Uno and an Adafruit Motor Shield v2. The green laser is turned on and off by the Arduino through a transistor. But the part that makes this really a fun machine to watch at work are the two stepper motors and two mirrors that reflect the laser in the X and Y directions. The mirrors are rectangles cut from a hard disk platter, which if you’ve ever seen one, is very reflective. The servos tilt the mirrors at high speed, fast enough to make the resulting projection on the wall appear almost a solid shape, depending on the image.

He’s even written a Windows application (in C#) for remotely controlling the projector through bluetooth. From its interface you can select from around sixteen predefined shapes, including a what looks like a cat head, a heart, a person and various geometric objects and line configurations.

There is a sort of curving of the lines wherever the image consists of two lines forming an angle, as if the steppers are having trouble with momentum, but that’s probably to be expected given that they’re steppers controlling relatively large mirrors. Or maybe it’s due to twist in the connection between motor shaft and mirror? Check out the video after the break and let us know what you think.

The video’s in three parts: looking at the laser beams in action as you’d see them on a dance floor, then watching the projected images while looking at an insert of the Windows application, and then watching the steppers and mirror doing their rapid movements.

As for the expensive galvanometer scanners we mentioned above, check out this impressive laser projector that uses them. Another method is to use a spinning wheel with mirrors set to different angles, like this one that draws a marquee using a pill box as the wheel. And how about one with no mirrors at all, instead attaching the laser directly to servo motors, though that one does take longer to draw.


Filed under: laser hacks