Posts with «arduino due» label

Arduino Plays NES Games

Watching the advancement of technology is interesting enough by looking at improved specifications for various components as the years go by. But clock speeds, memory size, and power consumption are all fairly intangible compared to actual implementation of modern technology when compared to days of yore. For example, this $40 microcontroller can do what a video game console was able to do in the 80s for a tenth of the (inflation adjusted) price.

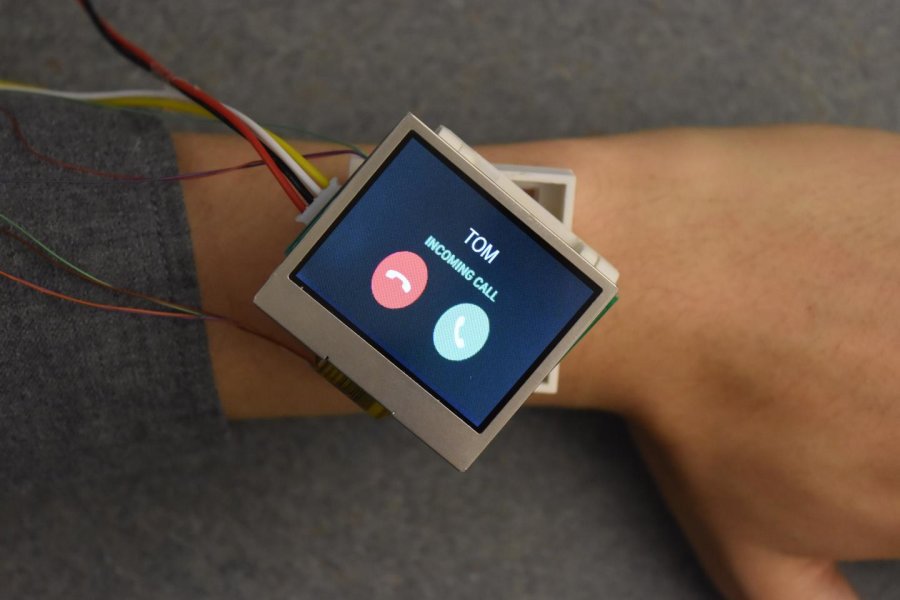
The NESDUE is an emulator for NES games which runs completely on an Arduino Due. The Arduino does have some limitations that have to be worked around to get the Nintendo to work, though. For one, it needs to be overclocked to be playable and it also needs a workaround to get past the memory limit of 96 kB of RAM. From there, a small screen is wired up along with a controller (from a Super Nintendo) and the gaming can begin.

This is an impressive feat for an Arduino platform to accomplish, especially with the amount of memory tweaking that has to happen. This might be the most advanced gaming system available that runs everything on an Arduino, right up there with the Arduinocade which can provide an arcade-like experience straight from the Arduino as well.

Vintage vacuum fluorescent display controlled with Arduino Due

Vacuum fluorescent displays (VFDs) have a distinct cool blue-greenish glow, and were once used in a wide range of devices, from VCRs to microwave ovens and even car dashboards. Although extremely popular way back when, they can be more difficult to source today. In the video below, Scotty Allen of the Strange Parts YouTube channel takes on the challenge of getting a $600 ISE (now Noritake) display up and running with an Arduino Due.

The process starts with examining the datasheet to find that the Due’s 3.3V logic can indeed drive the 20×2 character display, then he constructs a custom adapter board to do just that. After more datasheet lurking, head scratching and hacking, he finally got it to show “Hello world!” toward the end of the clip, along with some simple animations. 

The VFD control is part of a larger build that will be revealed in the future, and a good reminder of just how much trial and error is needed to succeed in making something awesome.

Single-handed smartwatch text entry with WrisText

Smartwatches can keep us informed of incoming information at a glance, but responding still takes the use of another hand, potentially occupied by other tasks. Researchers at Dartmouth College are trying to change that with their new WrisText system.

The device divides the outside of a Ticwatch 2 into six sections of letters, selected by the movement of one’s wrist. As letters are chosen, possible words are displayed on the screen, which are then selected automatically, or by rubbing and tapping gestures between one’s finger and thumb. 

The prototype employs an Arduino DUE to pass information to a computer, along with proximity and piezo sensors to detect hand and finger movements. 

We present WrisText – a one-handed text entry technique for smartwatches using the joystick-like motion of the wrist. A user enters text by whirling the wrist of the watch hand, towards six directions which each represent a key in a circular keyboard, and where the letters are distributed in an alphabetical order. The design of WrisText was an iterative process, where we first conducted a study to investigate optimal key size, and found that keys needed to be 55o or wider to achieve over 90% striking accuracy. We then computed an optimal keyboard layout, considering a joint optimization problem of striking accuracy, striking comfort, word disambiguation. We evaluated the performance of WrisText through a five-day study with 10 participants in two text entry scenarios: hand-up and hand- down. On average, participants achieved a text entry speed of 9.9 WPM across all sessions, and were able to type as fast as 15.2 WPM by the end of the last day.

More information can be found in the project’s research paper, or you can see it demonstrated in the video below.

Integrating a Nintendo Power Glove with today’s VR technology

When the Power Glove was released in the early 1990s, the idea that you could control games with hand motions was incredible, but like the Virtual Boy that followed years later, the hardware of the day just couldn’t keep up. Today, hardware has finally gotten to the point where this type of interface could be very useful, so Teague Labs decided to integrate a Power Glove with an HTC Vive VR headset.

While still under development, the glove’s finger sensors have shown great promise for interactions with virtual touchscreen devices, and they’ve even come up with a game where you have to counter rocks, paper, and scissors with the correct gesture.

Making this all possible is the Arduino Due, which supports the library for communicating with the Vive tracker.

We took a Power Glove apart, 3D scanned the interfacing plastic parts and built modified parts that hold the Vive Tracker and an Arduino Due on the glove. After some prototyping on a breadboard, we designed a shield for the Due and etched it using the laser-cutter transfer technique. We then soldered all components and spray-painted the whole shield to protect the bare copper. After mounting the tracker and tweaking the code by matzmann666, we had the glove work.

If you’d like to see the details of what has been accomplished so far, check out the Teague Labs team’s design files and code on GitHub.

Ball-on-plate machine uses touchscreen position sensing

Redditor “xmajor9x” has spent several weeks building a three-legged machine to balance a metal ball on top of a plate. The device uses three servos attached to a rectangular surface with linkages that translate servo position into linear displacement of the table. This allows it to keep the ball centered, or rotate around the perimeter in a circle or square pattern.

An Arduino Due controls the ball using a PID loop, and the ball’s position is sensed not by an external camera, but by the top “plate,” which is actually made out of a resistive touchscreen. Although this adds a very unique element, it means that the ball on top must be quite heavy to be reliably tracked, and its creator is considering switching to a computer vision system in the future.

Be sure to check out the project’s GitHub page for code and more info on the build! <!–more–>

Arduino Blog 14 Jul 19:48

Building an Arduino-controlled single-pixel scanner

If you’ve seen color sensors such as the TCS34725,  you may have considered them for projects that can pick out one colored object over another. On the other hand, if you were to take one of these sensors, mount them to an Arduino-driven plotter, and then take readings in an X/Y plane, you’d have all the elements needed for a simple single-pixel scanner.

In the video seen below, Kerry D. Wong does just this using his hacked HP 7044A plotter to scan a picture, recording RGB color values in a 128 x 128 grid. As the device scans, the Arduino Due used for control passes these values to a computer, which assembles them together into a low-resolution image.

You can find more details on the project, including its code, in Wong’s blog post here.

Smartwatch convenience ‘moves’ to the next level

To address the limitations of today’s fixed-face watches, researchers have come up with an actuated smartphone concept that physically moves itself using an Arduino Due, Bluetooth and several motors.

Receiving Internet notifications has gone from using a computer, to checking them on your smartphone, to now simply seeing them come in on your wearable device. On the other hand, you still have to rotate your wrist into the right position to see the screen. Worse yet, if you want to show others what is on your wrist, you may even have to twist your arm awkwardly.

Fortunately, there is a possible solution to this scourge in the form of Cito, which bills itself as “An Actuated Smartwatch for Extended Interactions.” This design can move in five different directions–rotates, hinges, translates, orbits and rises–potentially making viewing more convenient, or even providing haptic feedback. Prototype electronics are housed inside a control box on the upper arm, but presumably would become much smaller in a production version.

You can see the team’s entire paper here, or read this write-up for a more involved summary.

Photo: Jun Gong

M2 by Macchina joins At Heart!

We’re excited to announce the latest member of Arduino’s AtHeart program. M2 by Macchinanow live on Kickstarter–is an open-source, versatile development platform for hacking and customizing cars.

M2’s design is compact, modular, wirelessly connectable, and built on the popular Arduino Due. The device can be wired under the hood for a more permanent installation or plugged into the OBD2 port, enabling you to do virtually anything with your vehicle’s software. 

Macchina, a Minnesota-based company, has partnered with Arduino, Digi and Digi-Key to develop M2, and believes that its highly-adaptable hardware will most benefit hot rodders, mechanics, students, security researchers, and entrepreneurs by providing them access to the inner workings of their rides.

M2 accommodates a wide variety of wireless options thanks to its Digi XBee form-factor socket, allowing you to easily connect your car to the Internet, smartphone, satellites, or the cloud using BLE, WiFi, GSM, LTE, and other modules.

The platform can be programmed using the latest Arduino IDE, and is compatible with a number of software packages. Moreover, given its open-source nature, potential applications are bounded only by the collective imagination of the coding community.

Interested? Check out Macchina’s Kickstarter page to learn more or pre-order your M2 today!

Arduino Altair 8800 Simulator

Browse around eBay for an original Altair 8800 and you quickly find that the price range is in the thousands of dollars. If you are a collector and have some money in your pocket maybe that’s okay. But if you want the Altair 8800 experience on a budget, you can build yourself a clone with an Arduino. [David] kindly shared the build details on his Arduino Project Hub post. Using an Arduino Due (or a Mega for 25% of original speed), the clone can accurately reproduce the behavior of the Altair’s front panel elements. We covered a similar project in the past, using the Arduino Uno.

While not overly complicated to build one, you will need a 
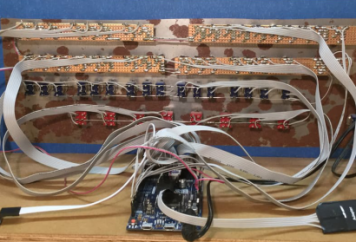
fair amount of patience so you can solder all the 36 LEDs, switches, transistors, and resistors but in the end, you’ll end up with a brand new computer to play with.  In 1975, an assembled Altair 8800 Computer was selling for $621 and $439 for an unassembled version. Sourced right, your clone would be under 50 bucks. Not bad.

The simulator comes with a bunch of software for you to try out and even games like Kill-the-Bit and Pong. BASIC and Assembler example programs are included in the emulator software and can easily be loaded.

In addition, the simulator includes some extra functions and built-in software for the Altair which are accessible via the AUX1/AUX2 switches on the front panel (those were included but not used on the original Altair). From starting different games to mount disks in an emulated disk drive, there are just too many functions to describe here. You can take a look at the simulator documentation for more information.

In case you don’t know already, here’s how to play Kill-the-Bit:


Filed under: Arduino Hacks

Roast coffee to perfection with an Arduino and Android app

After winning the South African National Barista Championship in 2009, Neil Maree decided to actually start a company to make coffee roasting equipment. Genio was the result, and after some work, his machines can now roast coffee to perfection using recipe input via an Android app.

Once instructions are transferred, a heavily modified Arduino Due controls the roaster depending on user preferences. Maree first tried an analog solution, then used a PLC before deciding that the Arduino was what he needed.

All of Genio’s roasters have a control panel with a variety of traditional switches and knobs, and then a not-so-traditional tablet mount. The app sends a “roast profile” to the roaster over a Bluetooth connection.

Perk your interest? You can take an inside look at the roasting machine factory on htxt.africa here.

Arduino Blog 14 Nov 18:24