Posts with «nes» label

Arduino Plays NES Games

Watching the advancement of technology is interesting enough by looking at improved specifications for various components as the years go by. But clock speeds, memory size, and power consumption are all fairly intangible compared to actual implementation of modern technology when compared to days of yore. For example, this $40 microcontroller can do what a video game console was able to do in the 80s for a tenth of the (inflation adjusted) price.

The NESDUE is an emulator for NES games which runs completely on an Arduino Due. The Arduino does have some limitations that have to be worked around to get the Nintendo to work, though. For one, it needs to be overclocked to be playable and it also needs a workaround to get past the memory limit of 96 kB of RAM. From there, a small screen is wired up along with a controller (from a Super Nintendo) and the gaming can begin.

This is an impressive feat for an Arduino platform to accomplish, especially with the amount of memory tweaking that has to happen. This might be the most advanced gaming system available that runs everything on an Arduino, right up there with the Arduinocade which can provide an arcade-like experience straight from the Arduino as well.

The King of All Game Genies In An Arduino

While Nintendo is making a killing on nostalgic old consoles, there is a small but dedicated group of hackers still working with the original equipment. Since the original NES was rolled out in the 80s, though, there are a few shortcomings with the technology. Now, though, we have Arduinos, cheap memory, and interesting toolchains. What can we do with this? Absolutely anything we want, like playing modern video games on this antiquated system. [uXe] added dual-port memory to his ancient NES console, opening up the door to using the NES as a sort of video terminal for an Arduino. Of course, this is now also the King of All Game Genies and an interesting weekend project to boot.

Most NES cartridges have two bits of memory, the PRG and CHR ROMs. [uXe] is breaking out the cartridge connector onto an exceptionally wide rainbow ribbon cable, and bringing it into a custom Arduino Mega shield loaded up with two 16K dual-port RAM chips. These RAM chips effectively replace the PRG and CHR ROMs Since these are dual-port RAM chips, they can be written to by the Arduino and read by the NES simultaneously.

The NES sees one port of the RAM and can read and write from it while the Arduino still has access to make changes to the other post while that’s happening. A trick like this opens up a whole world of possibilities, most obviously with tiling and other graphics tricks that can push beyond the console’s original capabilities. [uXe] is currently playing Arduboy games on the NES — a really neat trick to pull off. Well done [uXe]!

Be sure to check out the video below of the NES running some games from the Arduboy system. It seems to integrate seamlessly into the hardware, so if you’ve always had a burning desire to fix crappy graphics on some of your favorite games, or run some special piece of software on an NES, now might just be your time to shine.


Filed under: nintendo hacks
Hack a Day 20 Nov 16:31

Tricking Duck Hunt to See A Modern LCD TV as CRT

A must-have peripheral for games consoles of the 1980s and 1990s was the light gun. A lens and photo cell mounted in a gun-like plastic case, the console could calculate where on the screen it was pointing when its trigger was pressed by flashing the screen white and sensing the timing at which the on-screen flying spot triggered the photo cell.

Unfortunately light gun games hail from the era of CRT TVs, they do not work with modern LCDs as my colleague [Will Sweatman] eloquently illustrated late last year. Whereas a CRT displayed the dot on its screen in perfect synchronization with the console output, an LCD captures a whole frame, processes it and displays it in one go. All timing is lost, and the console can no longer sense position.

[Charlie] has attacked this problem with some more recent technology and a bit of lateral thinking, and has successfully brought light gun games back to life. He senses where the gun is pointing using a Wiimote with its sensor bar on top of the TV through a Raspberry Pi, and feeds the positional information to an Arduino. He then takes the video signal from the console and strips out its sync pulses which also go to the Arduino. Knowing both position and timing, the Arduino can then flash a white LED stuck to the end of the light gun barrel at the exact moment that part of the CRT would have been lit up, and as far as the game is concerned it has received the input it is expecting.

He explains the timing problem and his solution in the video below the break. He then shows us gameplay on a wide variety of consoles from the era using the device. More information and his code can be found on his GitHub repository.

We’ve featured [Charlie]’s work in the retro gaming field before, with his HDMI mod for a Neo Geo MVS. Console light guns have made a lot of appearances on these pages, a recent one was this video synthesiser but it’s this burning laser mod that most children of the 1980s would have given anything to own.


Filed under: nintendo hacks, nintendo wii hacks

Honey, I shrunk the NES… with Raspberry Pi and Arduino!

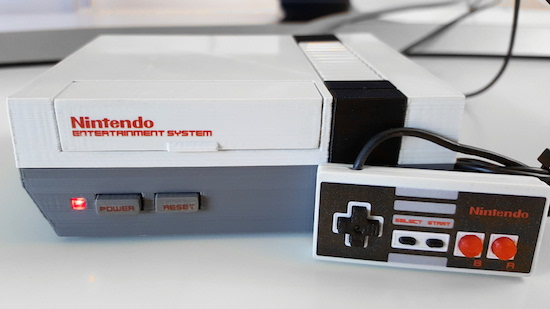
The NES was one of, if not, the first gaming consoles most of us ever played. That’s why we were all pretty excited to hear Nintendo’s recent plans of releasing the NES Classic Mini. As great as it sounds, though, turns out it’ll only support its 30 pre-loaded games–no Internet downloads, nor any cartridge slots. But leave it to a Maker to come up with a solution! Enter DaftMike, who has built his own shrunken-down, 3D-printed version of the retro system complete with some of the features we all would’ve loved to see with Nintendo’s re-creation.

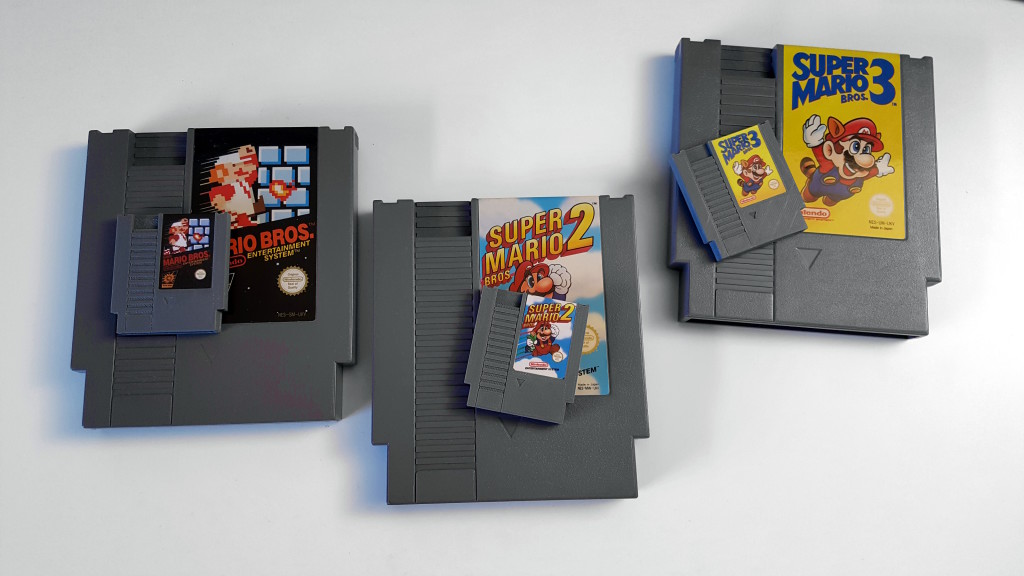
The DIY system–which is 40% the size of the original–is powered by a Raspberry Pi and an Arduino. It runs on RetroPie emulation software and uses itsy-bitsy NFC tagged cartridges, ranging from Super Mario Bros. to Zelda. When a cartridge is inserted into the machine’s fully-functional slot, an NFC reader scans it, selects that specific game from the Pi’s internal memory, and boots it up onto the screen.

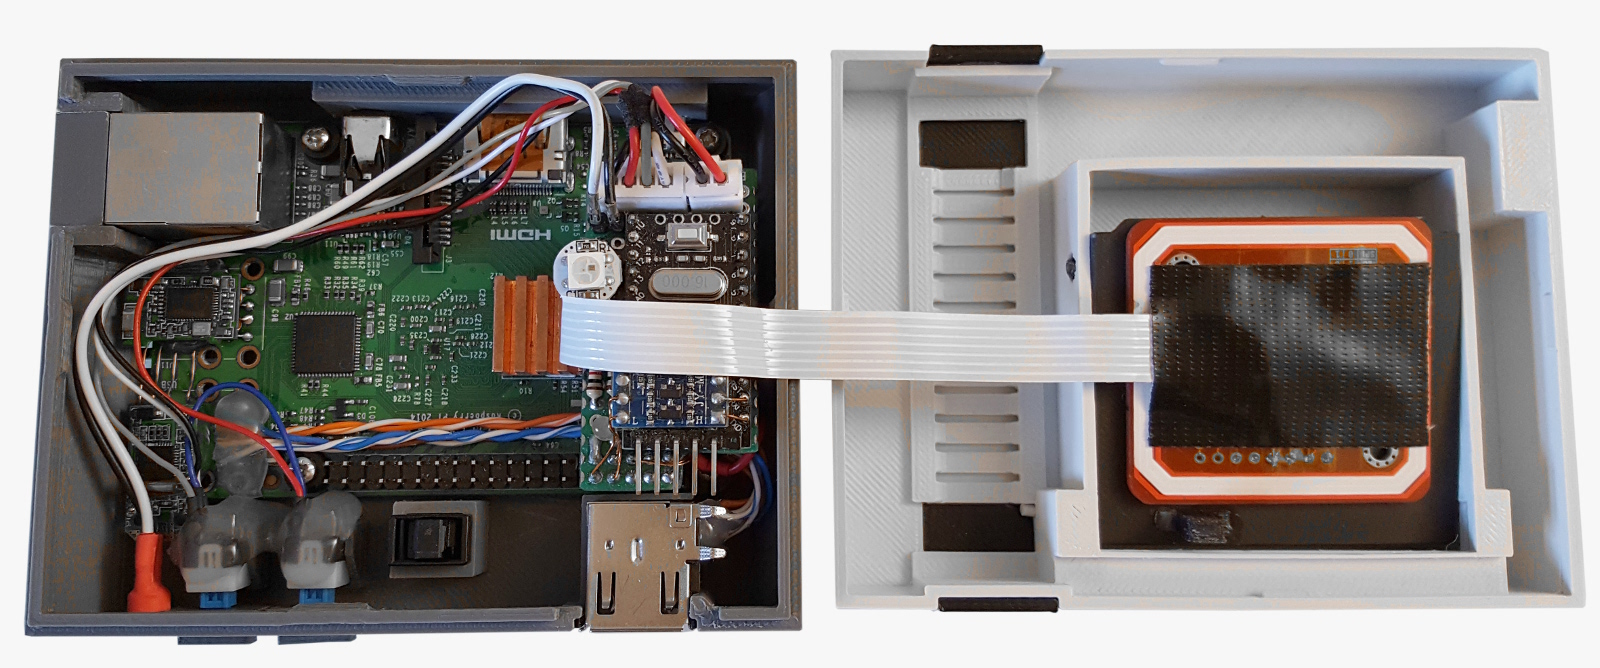
I designed the connections between the Arduino and Pi to use the top 10 GPIO pins so I could mount the Arduino directly to the Raspberry Pi using a 2×5 header. All the electronics would then sit in the case behind the USB ports.

The NFC reader mounts underneath the cartridge tray connected to the Arduino with a piece of flat cable. There’s enough length on it for the case halves to be splayed apart if I need to dismantle the unit and the Arduino ‘lump’ unplugs from the Pi so I can update the ‘firmware.’

DaftMike even rounded out his incredibly-realistic design with a mini, Arduino Pro Micro-based controller–although probably a bit too small for adult hands. (Cool nevertheless!)

In terms of software, an Arduino sketch is used to read the NFC tags and manage the power switching, while a Python script running on the Raspberry Pi is tasked with launching the games. The two communicate over serial.

Those wishing to spark some childhood gaming nostalgia should check out Daftmike’s entire blog post, which provides a full rundown of the build and its inner workings.


NES Reborn as Nexus Player and NES

Anyone who has a Raspberry Pi and an old Nintendo has had the same thought. “Maybe I could shove the Pi in here?” This ran through [Adam’s] head, but instead of doing the same old Raspberry Pi build he decided to put a Nexus Player inside of this old video game console, with great success. Not only does it bring the power of a modern media player, it still works as an NES.

If you haven’t seen the Nexus Player yet, it’s Google’s venture into the low-cost home media center craze. It has some of the same features of the original Chromecast, but runs Android and is generally much more powerful. Knowing this, [Adam] realized it would surpass the capabilities of the Pi and would even be able to run NES emulators.

[Adam] went a little beyond a simple case mod. He used a custom PCB and an Arduino Pro Micro to interface the original controllers to the Nexus Player. 3D printed brackets make sure everything fits inside the NES case perfectly, rather than using zip ties and hot glue. He then details how to install all of the peripherals and how to set up the Player to run your favorite game ROMs. The end result is exceptionally professional, and brings to mind some other classic case mods we’ve seen before.


Filed under: Android Hacks

NES annoyance timer makes no friends at your work

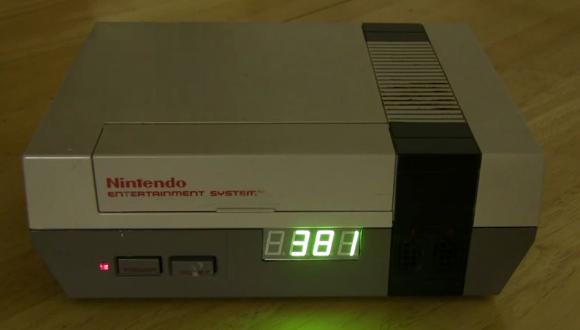
Still trying to solidify that reputation as the office Grinch? This project will let everyone know you’re a complete jerk in no time. It’s called the 8-bit Annoying Person Remover. It detects when someone enters your office at which point it starts to play the Super Mario Bros. theme song while the display counts down 400 seconds. Just like in the game the music gets faster at the end and when it stops they know it’s time to get the heck out.

The hardware inside isn’t too complicated. An Arduino and a Wave shield do most of the work. The song played is stored on an SD card and can easily be changed. There’s a speaker mounted under the top heat vent of the enclosure. The device defaults to displaying the time of day, but monitors a motion sensor on one side to detect when someone comes through the door. This also works when someone leaves, cutting off the music and resetting the display. Don’t miss a video of it in action after the break.

It’s as if this was made specifically for the Comic Book Guy

[via Technabob]


Filed under: lifehacks
Hack a Day 05 Mar 21:01
alarm  arduino  clock  lifehacks  nes  timer  wave shield  

Mechanical Donkey Kong game tests your barrel-jumping skills, patience

We've seen quite a few NES mods in our day, but we can't say we've ever seen one hooked up to anything quite like this. Built by DIY-er Martin Raynsford, this contraption / work-of-art makes use of an Arduino (naturally) to relay signals from the NES controller to the Donkey Kong screen brought to life above, which was constructed with near pixel-perfect accuracy out of laser-cut parts. As Raynsford points out, though, things are still a bit limited in the game's V1 state. There isn't much of an actual "game," for starters -- just Mario stuck in the middle with a never-ending loop of barrels / ball bearings that you can jump over. A second version is planned with a greater degree of control, but we're guessing the video for it won't be quite as hypnotic as the one after the break.

Continue reading Mechanical Donkey Kong game tests your barrel-jumping skills, patience

Filed under: Misc, Gaming, Alt

Mechanical Donkey Kong game tests your barrel-jumping skills, patience originally appeared on Engadget on Mon, 24 Sep 2012 19:11:00 EST. Please see our terms for use of feeds.

Permalink | Email this | Comments

NES controllers for any Bluetooth application

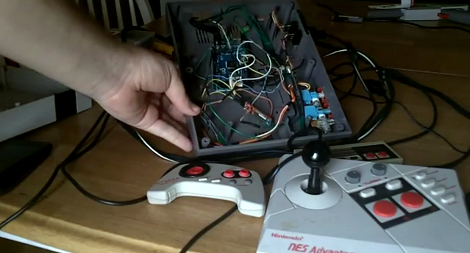
[Dustin Evans] wanted to used his original NES controllers to play emulated games. The problem is he didn’t want to alter the classic hardware. His solution was to use the connectors and enclosure from a dead NES to build a Bluetooth translator that works with any NES controller.

Here he’s showing the gutted half of an original NES. Although the motherboard is missing, the connectors for the controllers are still there. They’ve been rewired to an Arduino board which has a BlueSMiRF modem. The controller commands are harvested by the Arduino and sent to whatever is listening on the other end of the Bluetooth connection. He also has plans to add a couple of SNES ports to the enclosure so that those unaltered controllers may also be used.

In the video after the break [Dustin] walks us through the hardware setup. He then demonstrates pairing the device with an Android phone and playing some emulators with the pictured controllers.


Filed under: nintendo hacks, peripherals hacks

Arduino hacker conjures NES and Etch-a-sketch wonderment (video)

You never know when that creative spark will ignite in your brain and compel you to sketch out some ideas. But when that genius moment finally arrives, you might consider grabbing your original Nintendo controller, quickly wiring it up to an Arduino board, connecting that to some motors and then using those to drive the dials on an Etch-a-Sketch. Modder Alpinedelta32 tries it in the video after the break and it turns out to be a breeze -- and so much more tactile than other idea-capturing devices.

Continue reading Arduino hacker conjures NES and Etch-a-sketch wonderment (video)

Arduino hacker conjures NES and Etch-a-sketch wonderment (video) originally appeared on Engadget on Fri, 25 Nov 2011 22:01:00 EST. Please see our terms for use of feeds.

Permalink | Email this | Comments