Posts with «nintendo hacks» label

Understanding Custom Signal Protocols with Old Nintendos
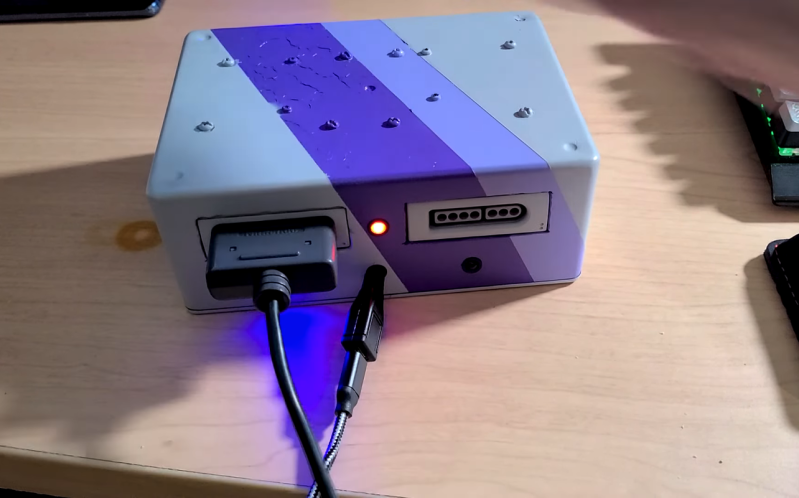
For retro gaming, there’s really no substitute for original hardware. As it ages, though, a lot of us need to find something passable since antique hardware won’t last forever. If a console isn’t working properly an emulator can get us some of the way there, but using an original controller is still preferred even when using emulators. To that end, [All Parts Combined] shows us how to build custom interfaces between original Nintendo controllers and a PC.

The build starts by mapping out the controller behavior. Buttons on a SNES controller don’t correspond directly to pins, rather a clock latches all of the button presses at a particular moment all at once during each timing event and sends that information to the console. To implement this protocol an Adafruit Trinket is used, and a thorough explanation of the code is given in the video linked below. From there it was a simple matter of building the device itself, for which [All Parts Combined] scavenged controller ports from broken Super Nintendos and housed everything into a tidy box where it can be attached via USB to his PC.

While it might seem like a lot of work to get a custom Nintendo controller interface running just because he had lost his Mega Man cartridge, this build goes a long way to understanding a custom controller protocol. Plus, there’s a lot more utility here than just playing Mega Man; a method like this could easily be used to interface other controllers as well. We’ve even seen the reverse process where USB devices were made to work on a Nintendo 64.

Turning GameCube & N64 Pads Into MIDI Controllers

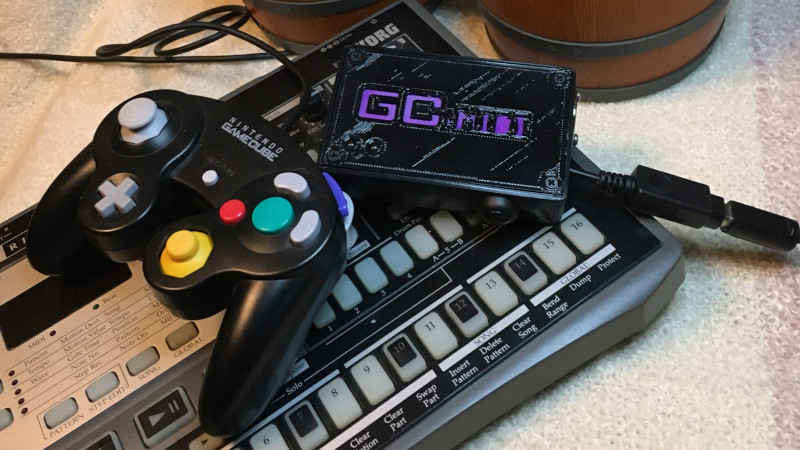
It’s fair to say that the Nintendo 64 and GameCube both had the most unique controllers of their respective console generations. The latter’s gamepads are still in high demand today as the Smash Bros. community continues to favor its traditional control scheme. However, both controllers can easily be repurposed for musical means, thanks to work by [po8aster].

The project comes in two forms – the GC MIDI Controller and the N64 MIDI Controller, respectively. Each uses an Arduino Pro Micro to run the show, a logic level converter, and [NicoHood’s] Nintendo library to communicate with the controllers. From there, controller inputs are mapped to MIDI signals, and pumped out over traditional or USB MIDI.

Both versions come complete with a synth mode and drum mode, in order to allow the user to effectively play melodies or percussion. There’s also a special mapping for playing drums using the Donkey Konga Bongo controller with the GameCube version. For those eager to buy a working unit rather than building their own, they’re available for purchase on [po8aster’s] website.

It’s a fun repurposing of video game hardware to musical ends, and we’re sure there’s a few chiptune bands out there that would love to perform with such a setup. We’ve seen other great MIDI hacks on Nintendo hardware before, from the circuit-bent SNES visualizer to the MIDI synthesizer Game Boy Advance. Video after the break.

If you wanna be a cool nerd who uses video game controllers to play music, I’m doing a birthday sale, 20% off all the things!

Code/Link RTs appreciated pic.twitter.com/GqBpGUFWLe

— Po8aster (@Po8aster) April 30, 2021

[Thanks to Chris D for the tip!]

Controlling a Broken Super Nintendo With MIDI

A Super Nintendo that has trouble showing sprites doesn’t make for a very good game system. As it turns out, Super Mario World is a lot less fun when the titular hero is invisible. So it’s no surprise that [jwotto] ended up tossing this partially functional SNES into the parts bin a few years back.

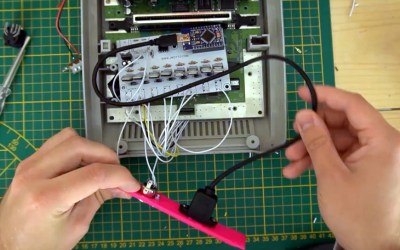
But he recently came up with a project that may actually benefit from its unusual graphical issues; turning the glitched console into a circuit bent video synthesizer. The system was already displaying corrupted visuals, so [jwotto] figured he’d just help things along by poking around inside and identifying pins that created interesting visual effects when shorted out.

Installing the new electronics into the SNES.

Once he mapped out the pins, he wired them all up to a transistor switching board that he’d come up with for a previous project. That would let an Arduino short out the pins on command while still keeping the microcontroller relatively isolated from the SNES. Then it was just a matter of writing some code that would fire off the transistors based on MIDI input.

The end result is a SNES that creates visual glitches along with the music, which [jwotto] can hook up to a projector when he does live shows. A particularly neat feature is that each game responds in its own way, so he can swap out the cartridge to show completely different visuals without having to change any of the MIDI sequencing.

A project like this serves as a nice introduction to both circuit bending and MIDI hacking for anyone looking to get their digital feet wet, and should pair nicely with the MIDI Game Boy Advance.

[Thanks to Irregular Shed for the tip.]

Star Fox Comes To Arduboy

The original Star Fox for the SNES was a landmark game. With the Super FX chip built into the cartridge, it presented the first 3D accelerated home console experience. The series has spanned several consoles and over two decades. Now, it’s getting an (albeit unofficial) port to the Arduboy, thanks to [Stephane Hockenhull].

Impressively, the game fits in under 28KB, and [Stephane] hasn’t skimped on the development details. The process begun with setting up a basic 3D engine on the Arduboy, followed by some tests of various gameplay ideas. The final implementation bears a strong similarity to the original SNES gameplay. At this point, work moved out of the Arduino IDE into [Stephane]’s custom development environment to speed things along. A PC port was used to save time programming the flash every iteration.

The tricks used to pull this off are many and varied. There are neat hacks used to optimise the storage of the 3D model data, implement lightweight collision detection, and generate random levels. Everything was done in order to make the game fit into the smallest space possible.

Running smooth 3D graphics on a 16MHz 8-bit microcontroller is an impressive feat, and a testament to [Stephane]’s coding abilities. We can’t wait to see more 3D development on the platform. Meanwhile, if the Arduboy doesn’t quite have the look you want, there’s a solution for that too. Video after the break.

The King of All Game Genies In An Arduino

While Nintendo is making a killing on nostalgic old consoles, there is a small but dedicated group of hackers still working with the original equipment. Since the original NES was rolled out in the 80s, though, there are a few shortcomings with the technology. Now, though, we have Arduinos, cheap memory, and interesting toolchains. What can we do with this? Absolutely anything we want, like playing modern video games on this antiquated system. [uXe] added dual-port memory to his ancient NES console, opening up the door to using the NES as a sort of video terminal for an Arduino. Of course, this is now also the King of All Game Genies and an interesting weekend project to boot.

Most NES cartridges have two bits of memory, the PRG and CHR ROMs. [uXe] is breaking out the cartridge connector onto an exceptionally wide rainbow ribbon cable, and bringing it into a custom Arduino Mega shield loaded up with two 16K dual-port RAM chips. These RAM chips effectively replace the PRG and CHR ROMs Since these are dual-port RAM chips, they can be written to by the Arduino and read by the NES simultaneously.

The NES sees one port of the RAM and can read and write from it while the Arduino still has access to make changes to the other post while that’s happening. A trick like this opens up a whole world of possibilities, most obviously with tiling and other graphics tricks that can push beyond the console’s original capabilities. [uXe] is currently playing Arduboy games on the NES — a really neat trick to pull off. Well done [uXe]!

Be sure to check out the video below of the NES running some games from the Arduboy system. It seems to integrate seamlessly into the hardware, so if you’ve always had a burning desire to fix crappy graphics on some of your favorite games, or run some special piece of software on an NES, now might just be your time to shine.


Filed under: nintendo hacks
Hack a Day 20 Nov 16:31

Tricking Duck Hunt to See A Modern LCD TV as CRT

A must-have peripheral for games consoles of the 1980s and 1990s was the light gun. A lens and photo cell mounted in a gun-like plastic case, the console could calculate where on the screen it was pointing when its trigger was pressed by flashing the screen white and sensing the timing at which the on-screen flying spot triggered the photo cell.

Unfortunately light gun games hail from the era of CRT TVs, they do not work with modern LCDs as my colleague [Will Sweatman] eloquently illustrated late last year. Whereas a CRT displayed the dot on its screen in perfect synchronization with the console output, an LCD captures a whole frame, processes it and displays it in one go. All timing is lost, and the console can no longer sense position.

[Charlie] has attacked this problem with some more recent technology and a bit of lateral thinking, and has successfully brought light gun games back to life. He senses where the gun is pointing using a Wiimote with its sensor bar on top of the TV through a Raspberry Pi, and feeds the positional information to an Arduino. He then takes the video signal from the console and strips out its sync pulses which also go to the Arduino. Knowing both position and timing, the Arduino can then flash a white LED stuck to the end of the light gun barrel at the exact moment that part of the CRT would have been lit up, and as far as the game is concerned it has received the input it is expecting.

He explains the timing problem and his solution in the video below the break. He then shows us gameplay on a wide variety of consoles from the era using the device. More information and his code can be found on his GitHub repository.

We’ve featured [Charlie]’s work in the retro gaming field before, with his HDMI mod for a Neo Geo MVS. Console light guns have made a lot of appearances on these pages, a recent one was this video synthesiser but it’s this burning laser mod that most children of the 1980s would have given anything to own.


Filed under: nintendo hacks, nintendo wii hacks

NES controllers for any Bluetooth application

[Dustin Evans] wanted to used his original NES controllers to play emulated games. The problem is he didn’t want to alter the classic hardware. His solution was to use the connectors and enclosure from a dead NES to build a Bluetooth translator that works with any NES controller.

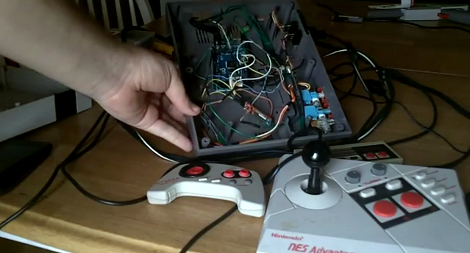
Here he’s showing the gutted half of an original NES. Although the motherboard is missing, the connectors for the controllers are still there. They’ve been rewired to an Arduino board which has a BlueSMiRF modem. The controller commands are harvested by the Arduino and sent to whatever is listening on the other end of the Bluetooth connection. He also has plans to add a couple of SNES ports to the enclosure so that those unaltered controllers may also be used.

In the video after the break [Dustin] walks us through the hardware setup. He then demonstrates pairing the device with an Android phone and playing some emulators with the pictured controllers.


Filed under: nintendo hacks, peripherals hacks