Posts with «design» label

Arduino Gear Shift Indicator Finds ‘Em So You Won’t Grind ‘Em
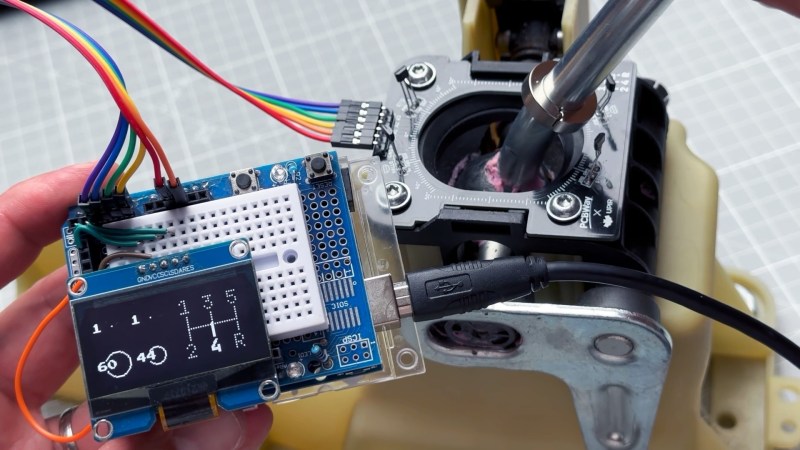
Now, it’s been a shamefully long time since we’ve driven a car with a manual transmission, but as we recall it was pretty straightforward. It certainly didn’t require a lot of help with the shifting pattern, at least not enough to require a technical solution to know what gear you’re in. But then again, we suspect that’s not really the point of [upir]’s latest build.

Oh sure, it’s pretty cool to display your current gear selection on a little LCD screen using an Arduino. And [upir] promises a follow-up project where the display goes inside the shifter knob, which will be really cool. But if you take a look at the video below, you’ll see that the real value of this project is the stepwise approach he takes to create this project. [upir] spends most of the time in the video below simulating the hardware and the code of the project in Wokwi, which lets him make changes and tune the design up before committing anything to actual hardware.
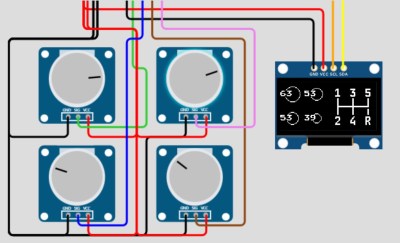
That turned out to be particularly useful with this build since he chose to use analog Hall sensors to detect the shift lever position and didn’t know exactly how that would work. Wokwi let him quickly build a virtual prototype for one sensor (using a potentiometer as a stand-in, since the simulator lacked a Hall sensor model), then quickly expand to the four sensors needed to detect all six gear positions.

By the time his simulation was complete, the code was almost entirely written. [upir] also walks us through his toolchains for both designing the graphics and laying out the PCB, a non-trivial task given the odd layout. We particularly enjoyed the tip on making smooth curved traces around the oval cutout for the shift lever in the board.

The video below is on the longish side, but it’s chock full of great little tips. Check out some more of [upir]’s work, like his pimped-out potentiometer or his custom animations on 16×2 LCDs.

Mechanical Keyboard Is Also a Mouse

The mechanical keyboard community is a vibrant, if not fanatical, group of enthusiasts determined to find as many possible ways of assembling, building, and using as many high-quality keyboards as possible. With so many dedicated participants, most things that can be done with a keyboard already have been done. So when something as unique as this split keyboard that also doubles as a mouse pops up, we take notice.

The keyboard is a custom build from [Taliyah Huang] which uses a pair of Arduinos, one in each half of the keyboard, to communicate key and mouse information to a third Arduino which is plugged in to her laptop. The right-hand half of the keyboard also includes the circuitry from an optical mouse, which gets powered up when the caps lock button is held down. When activated, this allows the keyboard to be used as a mouse directly. It also includes support for most Mac gestures as well, making it just as useful as a trackpad.

While there were some problems with the design, including being slightly too tall to be ergonomic and taking nearly 24 hours of soldering to complete, the prototype device is an interesting one especially since it allows for full control of a computer without needing a dedicated mouse. For other unique mechanical keyboard concepts, we recently featured this build which takes design and functionality cues from the Commodore 64.

Make:cast – To Maker Faire Rome with Love

Italians have a love of innovation and design and it shows at Maker Faire Rome. In this episode of Make:Cast, I look back at Maker Faire Rome in October 2019 during a pre-Covid time when live events could happen. I was guided through Maker Faire Rome by Alessandro Ranellucci, the curator of Maker Faire Rome, along with Massimo Banzi, co-founder of Arduino. Maker Faire Rome 2020 is happening as a virtual event this weekend.

Read more on MAKE

The post Make:cast – To Maker Faire Rome with Love appeared first on Make: DIY Projects and Ideas for Makers.

Daisy is a tiny $29 computer for building custom musical instruments

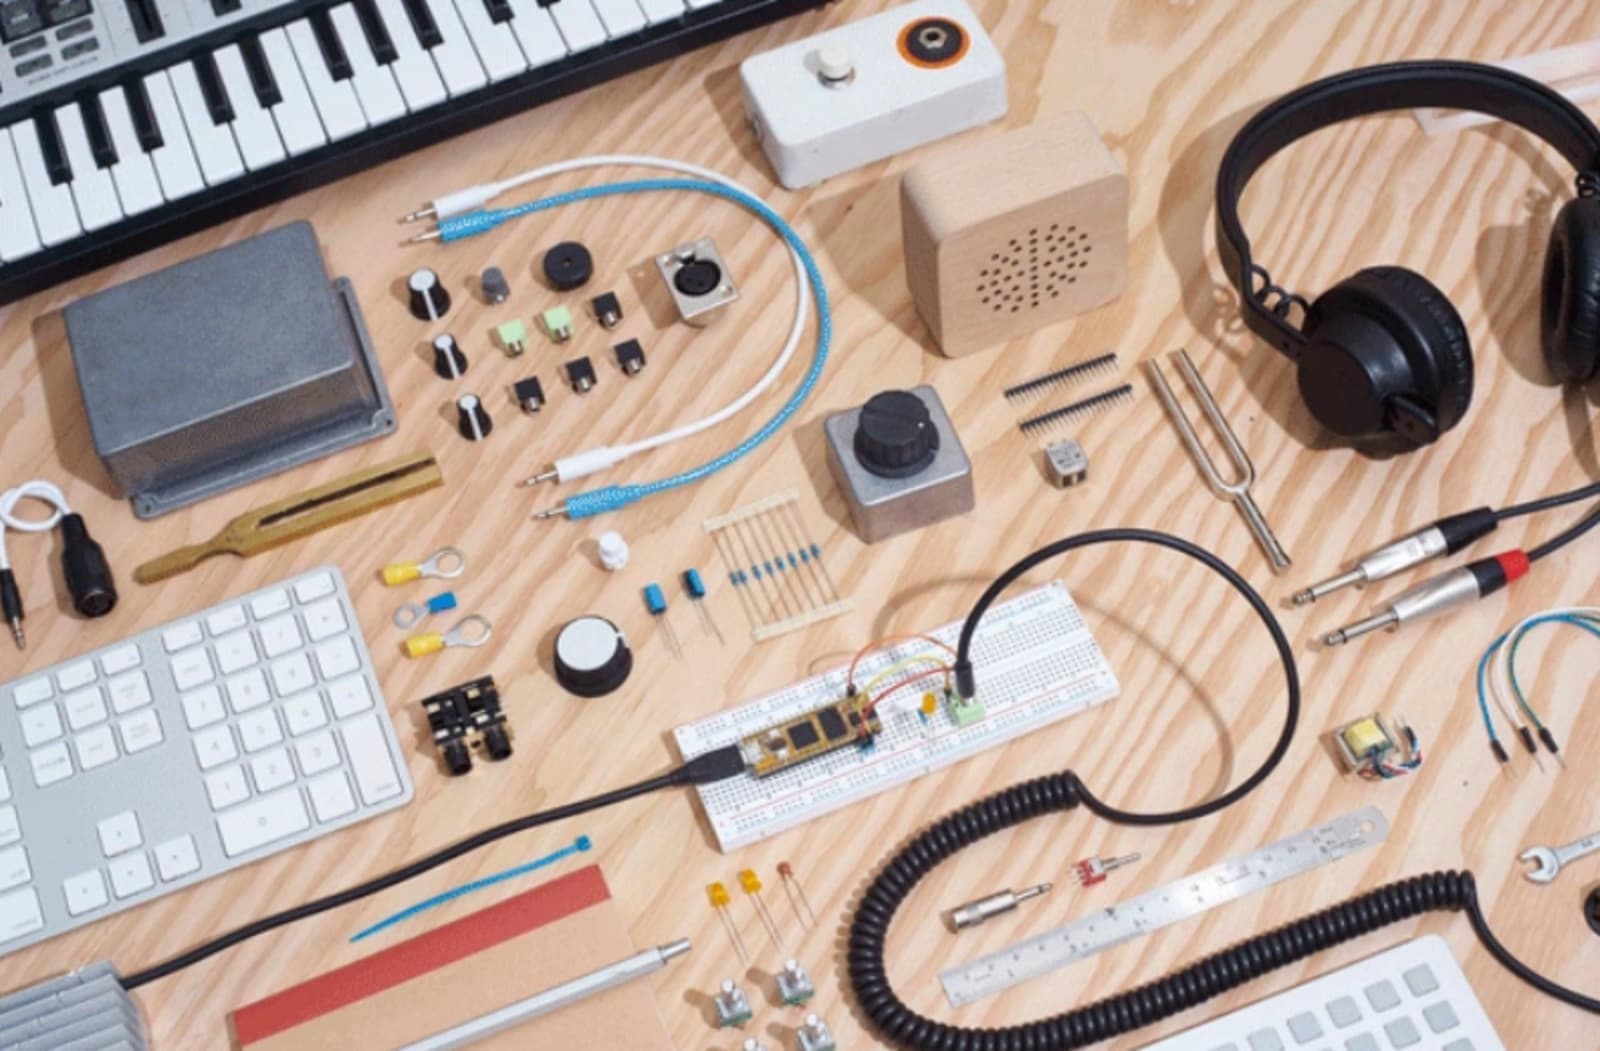
Coding your own musical instruments just got a lot more convenient. Music tech company Electrosmith has launched the Daisy, an open source microcomputer packed with everything you need to code your own pedals, synth, modules and instruments -- and it's the size of a stick of gum.

Source: Kickstarter

Daisy is a tiny $29 computer for building custom musical instruments

Coding your own musical instruments just got a lot more convenient. Music tech company Electrosmith has launched the Daisy, an open source microcomputer packed with everything you need to code your own pedals, synth, modules and instruments -- and it's the size of a stick of gum.

The Open Source Smart Home

[Tijmen Schep] sends in his project, Candle Smart Home, which is an exhibit of 12 smart home devices which are designed around the concepts of ownership, open source, and privacy.

The central controller runs on a Raspberry Pi which is running Mozilla’s new smart home operating system. Each individual device is Arduino based, and when you click through on the site you get a well designed graphic explaining how to build each device. The devices them

It’s also fun to see how many people worked together on this project and added their own touch. Whether it’s a unique covering for the devices or a toggle switch that can toggle itself there’s quite a few personal touches.

As anyone who’s had the sneaking suspicion that Jeff Bezos was listening in to their conversations, we get the need for this. We also love how approachable it makes hacking your own hardware. What are your thoughts?

Hack a Day 07 Nov 03:00

Design and 3D Print Robots with Interactive Robogami

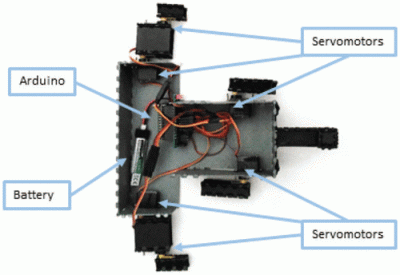
Internals of 3D printed “print and fold” robot. [Image source: MIT CSAIL]
Robot design traditionally separates the body geometry from the mechanics of the gait, but they both have a profound effect upon one another. What if you could play with both at once, and crank out useful prototypes cheaply using just about any old 3D printer? That’s where Interactive Robogami comes in. It’s a tool from MIT’s Computer Science and Artificial Intelligence Laboratory (CSAIL) that aims to let people design, simulate, and then build simple robots with a “3D print, then fold” approach. The idea behind the system is partly to take advantage of the rapid prototyping afforded by 3D printers, but mainly it’s to change how the design work is done.

To make a robot, the body geometry and limb design are all done and simulated in the Robogami tool, where different combinations can have a wild effect on locomotion. Once a design is chosen, the end result is a 3D printable flat pack which is then assembled into the final form with a power supply, Arduino, and servo motors.

A white paper is available online and a demonstration video is embedded below. It’s debatable whether these devices on their own qualify as “robots” since they have no sensors, but as a tool to quickly prototype robot body geometries and gaits it’s an excitingly clever idea.

Perhaps there’s an opportunity to enhance the “3D print, then fold” approach Robogami uses with this concept for making flexible prints out of non-flexible material, or incorporating simple 3D printed circuitry.

Thanks to [Adam] for the tip!


Filed under: robots hacks

Smart ping pong paddles remix music to the speed of play

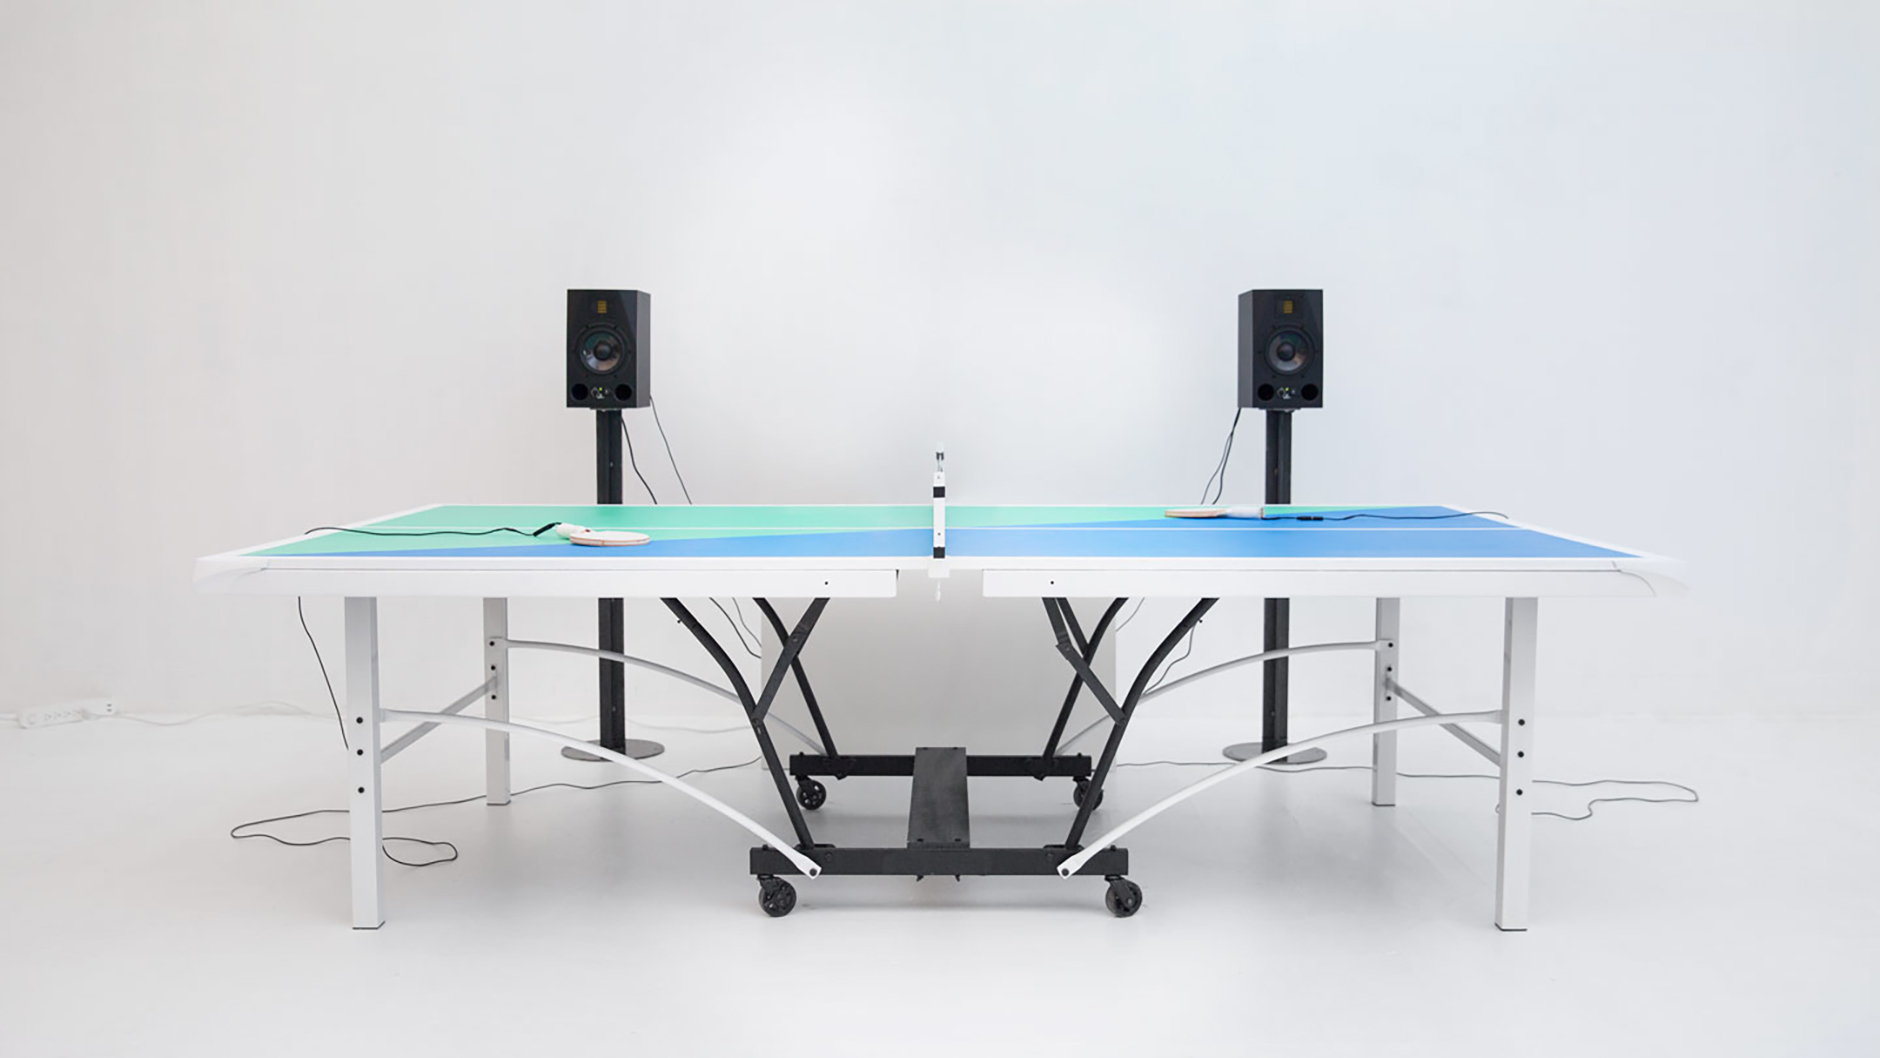
I love playing table tennis, but my backhand topspin is average at best. I'll play for an hour and grow tired of chasing wayward balls, knowing that I'll never have a smash quite like Peco from Ping Pong. Never mind -- now I can cut loose with a game of "Ping Pong FM" instead. The modified bats, which have contact microphones inside, log when you've hit the ball and remix music accordingly. Exchange slices too slowly and the song will drop to a lower tempo; likewise, driving the ball with some vicious top spin will cause it to speed up. You can try to match the beat or purposefully remix the music in weird and wonderful ways -- it's entirely up to you.

Engadget 17 Oct 15:21

Smart ping pong paddles remix music to the speed of play

I love playing table tennis, but my backhand topspin is average at best. I'll play for an hour and grow tired of chasing wayward balls, knowing that I'll never have a smash quite like Peco from Ping Pong. Never mind -- now I can cut loose with a game of "Ping Pong FM" instead. The modified bats, which have contact microphones inside, log when you've hit the ball and remix music accordingly. Exchange slices too slowly and the song will drop to a lower tempo; likewise, driving the ball with some vicious top spin will cause it to speed up. You can try to match the beat or purposefully remix the music in weird and wonderful ways -- it's entirely up to you.

Via: designboom, The Verge

Source: Ping Pong FM

Engadget 17 Oct 15:21