Posts with «arduinocertified» label

Keep your candies safe with Candy Locker and Intel Edison


Candy Locker is a mouth-watering tutorial based on  Intel® Edison and image recognition of objects.
You can keep your candies safe from greedy hands with this color recognition lock and a dispenser using a set of 5 distinct color images and setting up a pattern that will activate and dispense candies.

Follow the link and open the magic door of the video and picture recognition,  invent cool systems learning how to manage object recognition and OpenCv foundations.


Manipulate your voice with Mimic Monster and Intel Edison

It’s time to introduce you to another great tutorial made for  Intel Edison.  Mimic Monster is a project allowing you to record soundbites and playing them back manipulated.
In this step-by-step project, everyone who is interested in audio features and mods , can find useful information on how to manipulate audio files and create amazing effects from your voice.

Grawr! It’s a mimic monster! What did you say? Grawr! It’s the mimic monster!

Having landed on Earth, this little alien needs you to teach it how to speak. Speak into its audio antenna and it will repeat your words back. Press a button and change its pitch. In this tutorial, you will learn in more detail, how to work with a USB sound card, a microphone, and a speaker.


Before you begin, make sure you’ve followed through Intel® Edison Getting Started guide, and our previous tutorial, the Intel® Edison mini-breakout Getting Started Guide.

 Check the other tutorials of the series.

Samsung Joins Arduino Certified Program with ARTIK family

We are happy to announce that Samsung has joined the Arduino Certified Program with the launch of its new ARTIK platform. The collaboration was announced today, during the Internet of Things World in San Francisco, on stage by Young Sohn – President and Chief Strategy Officer, Samsung Electronics – and Massimo Banzi, Co-founder of Arduino.

The ARTIK family is among the elite group of Arduino Certified processors that are compatible with the Arduino ecosystem. The ARTIK platform can be programmed utilizing the Arduino Software Development Environment (IDE), allowing developers the benefit of tapping into the Arduino community for ideas, insights and best practices. Arduino integration brings the open ARTIK platform into the hands and minds of makers, hobbyists and first-time programmers, who will join developers in discovering new possibilities for the Internet of Things.

Curtis Sasaki, Vice President of Ecosystem, Samsung Electronics said:

“Our approach is to provide open platforms to help accelerate the development of IoT for our customers, developers and end users. Being part of Arduino’s Certified Program helps millions of developers familiar with Arduino IDE to take advantage and focus all of their energy to building new and innovative products.”

Massimo Banzi, Co-Founder of Arduino said:

“Arduino Certified ARTIK gives the Arduino passionate community the right tools to create something revolutionary in IoT, in a faster and easier way”

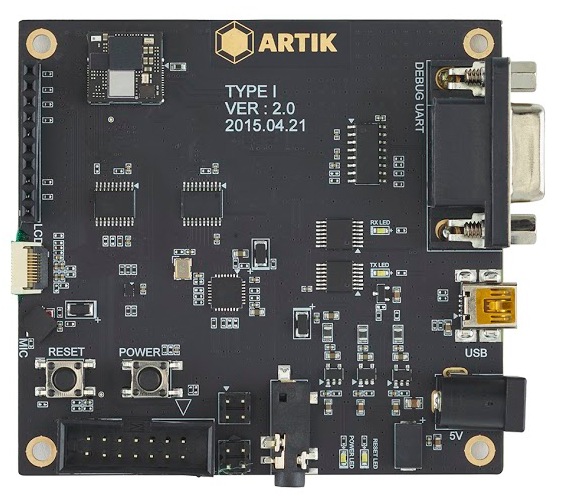
Selected conference attendees were given the ARTIK development boards to begin immediate development and all those in attendance were asked to join the ARTIK platform alpha program. More information about the ARTIK platform and development tools may be found at www.artik.io.

Knock knock! Who’s near your door? Learn how to sense it

Smart Doorbell is the name of the project for a new tutorial created for Intel Edison. It’s a motion detecting doorbell, that senses when someone is near the door(bell) and via a webcam sends a picture of the person approaching the door to a web address while playing a sound.

Motion detecting video streaming doorbell“, a medium-advanced level tutorial, is intended to be a good starting point for building basic IoT devices. You’ll learn how to use a webcam to detect motion: when activated, the device will play a greeting, take a photo and email it to someone to let them know who is at the door.
Take a look at the video to see how it works and follow these steps to make yours:

Install Intel Galileo & Edison with the IDE Boards Manager

We are very pleased to announce the availability of Intel® Galileo and Edison boards support with the Arduino IDE Boards Manager.

If you’ve already installed the Arduino IDE 1.6.3 (or newer), you are already set!

Just click on menu Tools > Board > Boards Manager to find both Galileo and Edison listed and available for download. Click on one of the list, then click Install. Wait a couple of minutes for the IDE to download and unpack all the needed tools and voilà: Board menu will list the Intel board of your choice.


Play with the Basketball Robot running on Intel Edison

After you had an introduction to Intel Edison  following the Getting Started guide, and our previous tutorial, the Intel Edison mini-breakout Getting Started Guide, it’s now time to work on something a bit more complex. You’ll be also able to play a bit with Node.js,  a programming platform that runs on javascript and a good choice for building a web-based application. It is supported by the Intel® Edison standard system image so you can run node.js scripts directly on it.

He shoots! He scores! The crowd goes wild! Let’s build a robot that plays basketball with you. This tutorial is a step-by-step guide for a simple and small differential-drive robot that uses the Intel Edison. You’ll get to know a few more tricks on how to use Mini Breakout Kit and set up a node.js server for the communication.

Go and follow the steps to build it

Getting Started with Intel Edison Mini Breakout Board

Let’s start exploring a bit more about Intel Edison. As you may already know, Intel provides 2 different hardware platforms to work with Edison development board: the core module is called Intel Edison Compute Module, while the 2 extension boards are called Intel Edison Arduino Board and Intel Edison Breakout Board respectively. We refer to them as the Arduino module and mini-breakout board, respectively. The tutorial of this week is called Getting Started with Intel Edison Mini Breakout Board:

It is probably more common to use the Arduino module, since it’s easy to use and has many useful features, most notably the pin headers. However, the mini-breakout’s main advantage comes from its size and possible use as a wearable.

In this tutorial, you’ll get more familiar the mini-breakout board, learn how to use it for basic tasks, and then build a small “blink” example based on this knowledge.

Follow the link and explore

What time is it? Explore Galileo board’s real time clock tutorial

In the past weeks we explored how to make a gsm-controlled star light, a touch-screen controlled marionette, and how to learn more about Linux on Intel Galileo Gen 2.

In today’s tutorial  you’ll learn how to create a “Wake up clock” which will turn on and illuminate the room slowly, simulating a morning sunrise. And hopefully, it will make waking up on Mondays a bit easier!

This is the bill of materials:

Intel® Galileo Gen 2 power supply
Arduino Protoshield
LED power supply
1 High power white LED(3v 700mA)
1 1000 ?F Capacitor
1 2.1 mm DC jack-to-screw terminal adaptor
1 10k potentiometer

1 1.8Ohm 2w resistor
1 LM317t voltage regulator
2 10kOhm resistor
1 2n7000 transistor
1 Coin battery holder
Jumper wires
Colored wire
Pin header
1 8 mm magnet
Stiff wire (that is attracted to magnets)
Wood glue
Hot glue sticks
4 mm MDF components – lasercut according to drawing
Plexiglas components – lasercut according to drawing
Nuts and bolts
Rubberband

Download the files and learn how to assemble electronics at this link

Build a Touchscreen Controlled Marionette with Intel Galileo

Making gets really interesting and fun especially when mixing laser cut shapes, servo motor, tft screen, MDF, plexiglass and Intel Galileo Gen 2. After you assemble the parts and follow the steps of this tutorial, you’ll be able to control the puppet through an interface on the screen. Enjoy the tutorial!

We are going to have a little fun with the Intel® Galileo development board. This time around, we’ll make a simple puppet control system. We’ve put together a “running robot” marionette with a simple mechanism that uses a continuous servo. We’ll be use a touchscreen interface to control various outputs using sliders and switches.

As always, you can modify the designs to suit your needs. We will teach you how to incorporate touchscreens, and make the interface necessary for controlling the Intel® Galileo Gen 2 board.

Just so you know, the instructions this time around are quite long. That’s due to the assembly of the marionette. I would review the assembly instructions fully before attempting to put it together. While it looks long and complicated, if you group the parts, it much simpler.

So, let’s start the puppet show!

Follow the link and start making!

Time to explore Linux on Intel® Galileo Gen 2 – Tutorial

The new tutorial we want to present you today is more like a guide giving you some basic information about the benefit of accessing Linux shell in Intel® Galileo Gen 2. It also shows you in which way the Intel® Galileo Gen 2 is not only an advanced, more powerful version of Arduino Uno that happens to be layered on top of a Linux system. There is definitely much more that can be done with it and the Linux shell: this tutorial is an entry point to explore it and learn how to:

– preparing a system image;
– accessing the shell in 4 different ways;
– examining the workflow of copying a python script into Intel® Galileo Gen 2 through scp (or pscp);
– running an Arduino sketch;
-retrieving files from Intel® Galileo Gen 2.


The Intel® Galileo Gen 2 includes much of the Arduino Uno’s functionality. Similar to an Uno, it can create a wide variety interactive objects that use input sensors and various outputs. After exploring the many possibilities of using the “Arduino part” of the  Intel® Galileo Gen 2 this way, one might start to wonder: what is the next step?

Perhaps you want to write more complex programs using your favorite scripting language like python or javascript. Maybe you’re interested in computer vision or want to have full control over the board and find out more about the inner workings. By accessing to the Linux core, all these will be possible to achieve.

This tutorial will cover the basics of working with Linux by making a simple program that logs button presses. While the example is not very useful, it will help familiarize you with Linux as applied to the Intel® Galileo Gen 2.

Follow the link and explore all the steps