Posts with «lasercut» label

Visualizing air quality with interactive origami flowers

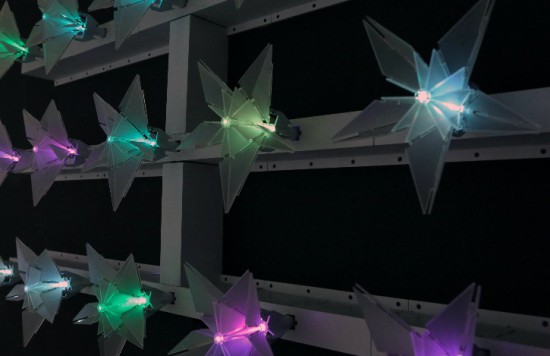
“Under the Dome – PMgami” is an installation created by designer Jiayu  Lui using Arduino Nano. Inspired by paper origami techniques, the digitally fabricated flowers move and change color according to the quality of air measured locally. The main aim of the installation is to obtain a more intuitive way to communicate pollution data and  the relationship between technology and nature.

In the gallery you can explore some other pictures and the schematic. Check the video below to see the installation in action!


Build an IoT Gauge with Arduino Yún and IFTTT

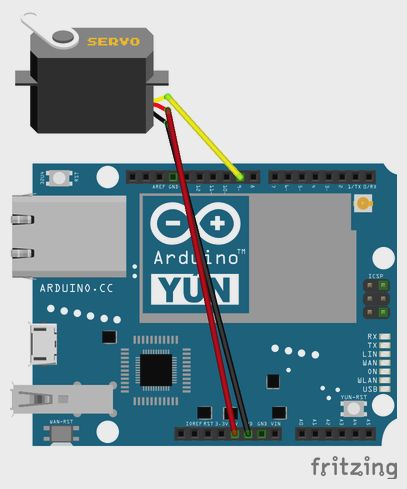
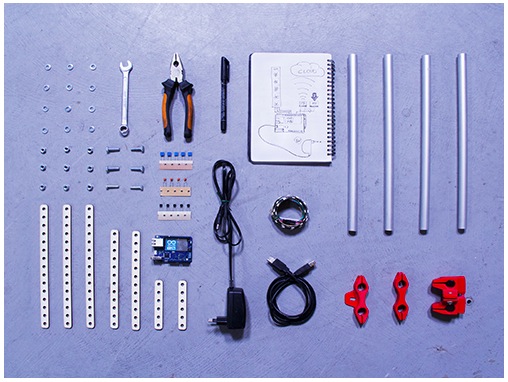
Tomas Amberg shared with us the link to an Instructable he published on how to build a Web-enabled, Arduino-based IoT Gauge with a REST API, and connect it to the IFTTT mash-up platform, via the Yaler.net relay service he founded.

The cool thing about this project is the connection with the Maker Channel  of IFTTT which supports custom Webhooks, to integrate DIY IoT projects: 

Inspired by WhereDial, a DIY Internet of Things classic, the IoT Gauge shows the current location of its owner. A bit like the Weasley Clock in Harry Potter. The design and code of the IoT Gauge is generic and could be used as well to display e.g. weather conditions. The logic resides in the Cloud, the gauge is just a servo with an API.

Check out the five-step tutorial and the ingredients you need at this link.

Arduino Blog 05 Aug 18:00
arduino  featured  fritzing  gauge  ifttt  iot  lasercut  tutorial  uno  yún  

“I am a maker in the making”

Moushira Elamrawy is an Egyptian multidisciplinary designer and technologist based in the city of Cairo and founder of Rishalaser, a new concept for laser cutters that is opensource, portable, DIY, and easy to use. She wrote a piece on iAfrikan about becoming a maker and discovering Arduino. It’s an inspiring text and we want to share it on this blog.

——–

Confession: I used to be an architect (possibly still am!), and then I started tinkering with things.
The architecture engineering school I graduated from did not have a workshop space. The first time I met a CNC router in real life was three years after i graduated.

It is hard to discover what you don’t know even exists. Which is somehow, why I had zero imagination of how those awesome Theo Watson installations could possibly work.

I had no business fiddling with electronics whatsoever. My coding and programming skills were limited to some knowledge of ActionScript, some C, and that was about it.

I read about Openframeworks, installed it, went through examples, tutorials and thought “Nice, I can change parameters that in return would change behavior, fantastic..but ..then..what?!”

By that time, I was an architect working in Morocco, between an office that was based in Fez and a construction site based in a beautiful small southern village close to the Algerian borders, called Mhamid ElGhizlane. It normally took me a little over a day and a half to travel from Fez to the construction site.

I had a radio, which I considered my companion in those interesting border areas. Before Morocco, I was living in Sinai mountains, working on a similar desert development project, where the radio would normally catch signals of Saudi Arabia, Israel, and Jordan. The Moroccan Sahara, on the other hand, got me signals from Algeria, with lots of different dialects. Radio feels like travelling within time within places. It makes you really feel the distance you crossed.

[...]

In May 2012, I attended a beginners workshop for Arduino, lead by Bilal, who was visiting Egypt. During the workshop, I controlled an LED via Arduino.

It was magical.

I never used the board before, I barely understood any syntax, yet in 15 min, I did something cool . . that actually works. Arduino: I am in Love, I thought.

It is easy. It is just that starting alone isn’t easy. Going back home, I went through some examples and I felt oh..I can do stuff. I can do all these stuff actually. Oh, wait, there is also: Processing!

By September 2012, I moved to Barcelona for my masters, which started by a fabrication course in Fablab. I was Alice in wonderland. Then physical computing course started, and Alice’s wonderland was getting more vast.

Everything was awesome. The exact skill set that I wanted to learn. But I needed more, a lot more, time to absorb this whole new world. I thought of taking a gap year, but then, week after week, it turned out that once the ball gets rolling everything is accelerated.

Thanks actually to my sister for pushing me to trust that the ball will get rolling. She herself was moving from translation to graphics design one year before me. It is a family thing.

Arduino was THE treasure.

At the end of the day, all those fantastic surreal systems that I was fascinated by could be done with some components and an Arduino. The amount of associated open source resources is tremendous. The forum is awesome and people actually respond.

Through Arduino, I learned more about microcontrollers, I could program standalone circuits. Then the ball kept rolling, I learned eagle, I can mill some boards, I can solder (err, that was troublesome!), I can interface stuff, I can build sensors, I can work with data, I can build RF sensors, then I became obsessed with antennas, signal processing, and RFID.

I am still learning and learning, but it is much easier now.

Coming from this background, I always go back with time 4 or 5 years ago and recall how I used to react to a “closed box” new technology?

How life would have changed if machine interaction have been made easier, or basically how my life would have changed if machines had the opportunity to step out of their labs and talk to more people.

Making technology more portable and more accessible, is one reason why I started the mobile operated laser cutter project last year, of course, the project would have never been realized without the team that continued with enthusiasm.

Another wonderful project that I just co-started is Jebaleya Talks, with the hope of giving voice to women of Saint Katherine village in Sinai, by introducing them to smart textiles! Well, lets see how this will evolve..

While working in the desert in Sinai, the project foreman was my mentor, his words of wisdom still echo in my ears

“Everything comes along..with patience. If you could just wait”.

Apparently, he had a point!

E-mails are a distraction.

Meetings are boring.

Regular jobs suck your inner clock.

Take a sabbatical and learn what you want to learn and start anew.

At least try.

Oh, and during your sabbatical, give Arduino a try, it might change your life as well.

Let’s just hope that Arduino founders will keep embracing the same energy they started the project with, and that the big whales leave Arduino alone, so that it stays, open and libre just as how it helped liberate many creative energies and minds.
Keep reading on iAfrikan

Making a lasercut Movie Recommender with Intel Edison

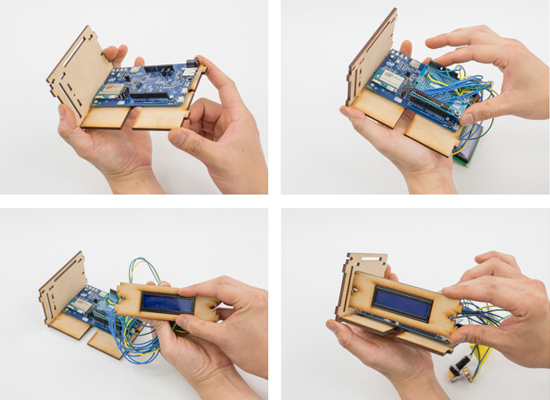
Some days ago we posted on Intel Makers Community an educational tutorial focused on Intel Edison. Our team explored Internet Queries to build a lasercut Movie Recommender and help you find a good movie title  extracted from The Open Movie Database starting from the 50s to the 10s and according to your favourite genre:

Pressing the button will activate the Movie Recommender and the search begins. After the magic is done, the curtain will open to reveal the movie that fits the criteria.

So get this project done, make some popcorn, dim the lights, and get ready to watch a sci-fi movie from 1988… “My Stepmother is an Alien”?!

Follow the link and create your DIY Movie Recommender!

Take a look at the video below to see how it works!

Arduino Blog 02 Mar 20:55

What time is it? Explore Galileo board’s real time clock tutorial

In the past weeks we explored how to make a gsm-controlled star light, a touch-screen controlled marionette, and how to learn more about Linux on Intel Galileo Gen 2.

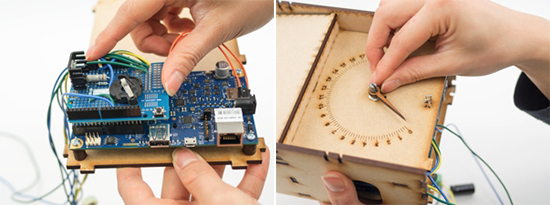
In today’s tutorial  you’ll learn how to create a “Wake up clock” which will turn on and illuminate the room slowly, simulating a morning sunrise. And hopefully, it will make waking up on Mondays a bit easier!

This is the bill of materials:

Intel® Galileo Gen 2 power supply
Arduino Protoshield
LED power supply
1 High power white LED(3v 700mA)
1 1000 ?F Capacitor
1 2.1 mm DC jack-to-screw terminal adaptor
1 10k potentiometer

1 1.8Ohm 2w resistor
1 LM317t voltage regulator
2 10kOhm resistor
1 2n7000 transistor
1 Coin battery holder
Jumper wires
Colored wire
Pin header
1 8 mm magnet
Stiff wire (that is attracted to magnets)
Wood glue
Hot glue sticks
4 mm MDF components – lasercut according to drawing
Plexiglas components – lasercut according to drawing
Nuts and bolts
Rubberband

Download the files and learn how to assemble electronics at this link

Build a Touchscreen Controlled Marionette with Intel Galileo

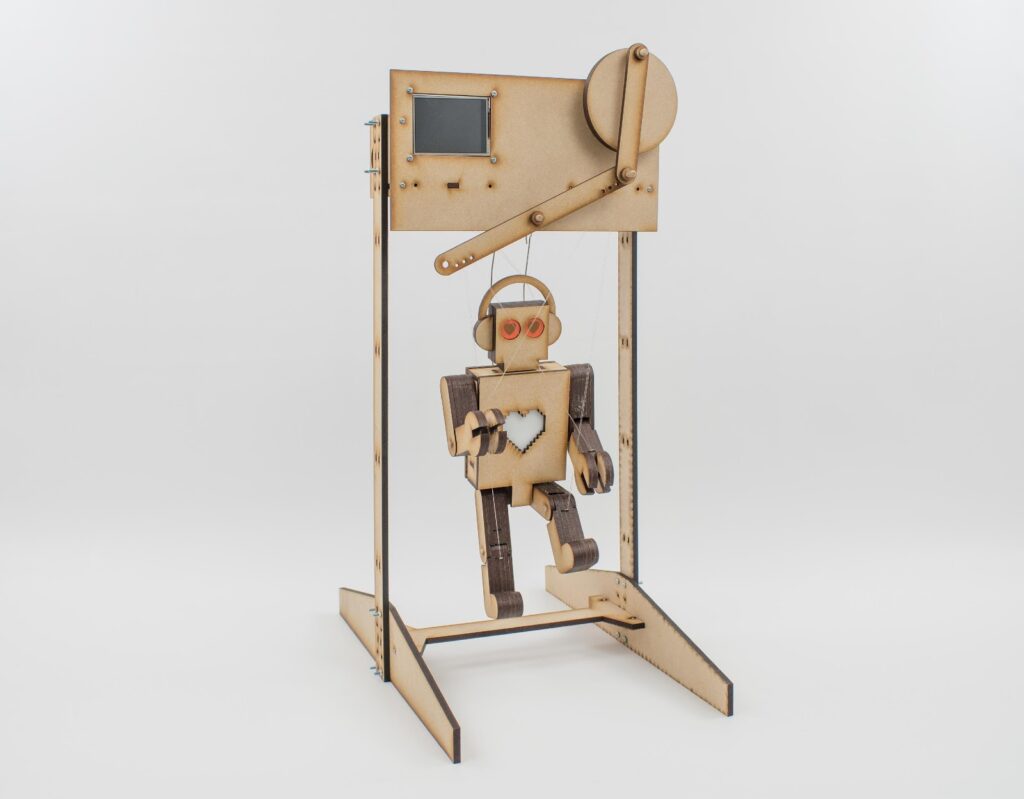
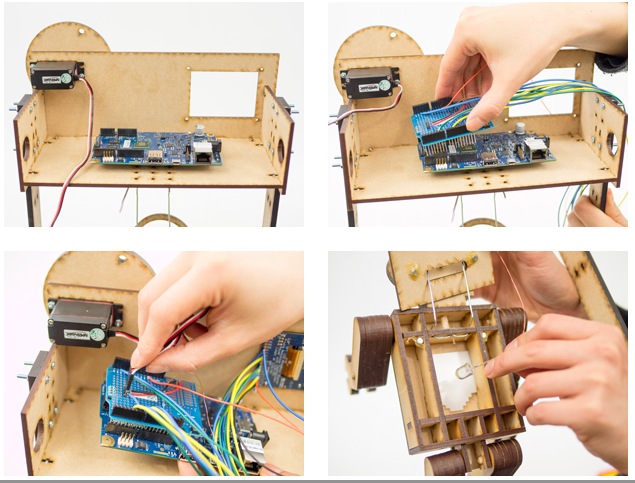
Making gets really interesting and fun especially when mixing laser cut shapes, servo motor, tft screen, MDF, plexiglass and Intel Galileo Gen 2. After you assemble the parts and follow the steps of this tutorial, you’ll be able to control the puppet through an interface on the screen. Enjoy the tutorial!

We are going to have a little fun with the Intel® Galileo development board. This time around, we’ll make a simple puppet control system. We’ve put together a “running robot” marionette with a simple mechanism that uses a continuous servo. We’ll be use a touchscreen interface to control various outputs using sliders and switches.

As always, you can modify the designs to suit your needs. We will teach you how to incorporate touchscreens, and make the interface necessary for controlling the Intel® Galileo Gen 2 board.

Just so you know, the instructions this time around are quite long. That’s due to the assembly of the marionette. I would review the assembly instructions fully before attempting to put it together. While it looks long and complicated, if you group the parts, it much simpler.

So, let’s start the puppet show!

Follow the link and start making!

Casa Jasmina Project is about to roll, with style

The location of the Casa Jasmina apartment will officially be inaugurated here in Torino (Italy) on the 20th of February, together with the celebration of  the 3rd birthday of local Officine Arduino and Fablab Torino.

The two following days (21-22 of February) we’re going to start producing the first connected things for the apartment in a workshop with the support of Jesse Howard, a designer focusing on new systems of making.

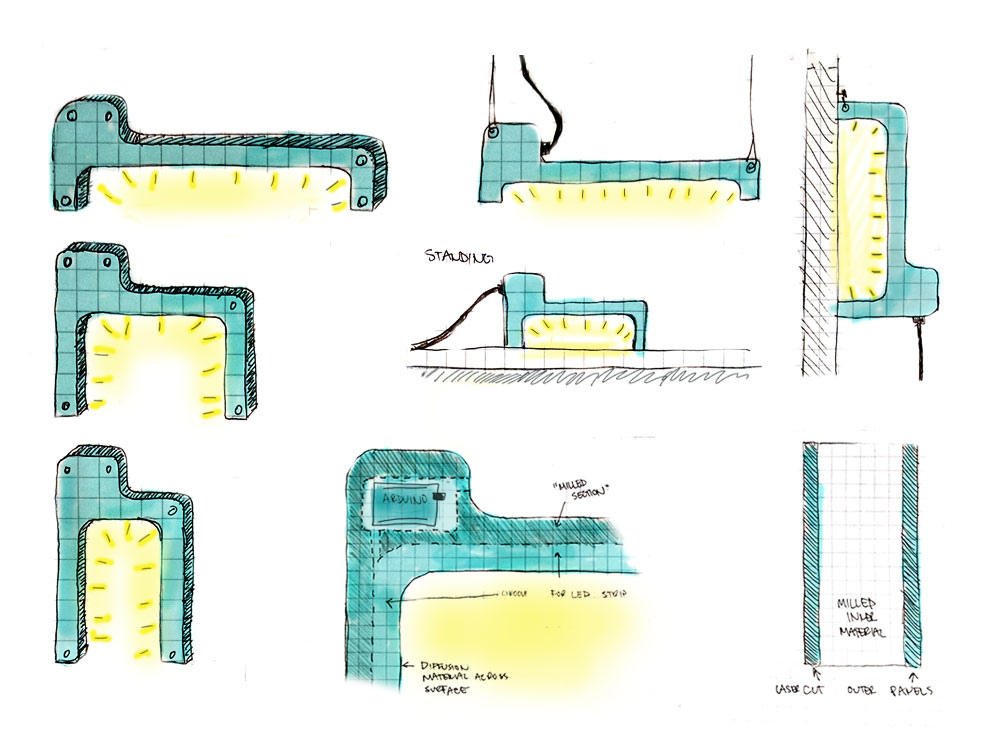
He’ll fly in from Amsterdam and run a 2-day session together with Lorenzo Romagnoli (Casa Jasmina Project Manager) and Stefano Paradiso (Fablab Torino Coordinator) with the goal of designing and manufacturing an Open Source Connected Lamp (OSCOLA).

The workshop is suitable for designers, artists, hackers, and everyone interested in Arduino and open source design and in order to stress the idea of open design, participants will be asked to reinterpret, modify and redesign an open source lamp proposed by Jesse Howard.
A minimum familiarity with of CAD drawings, digital fabrication techniques and Arduino are recommended but not strictly necessary.

By changing materials, shape, use cases, mechanics, and interaction, we are going to create a family of open source lamps.
Arduino Yún will be used to make the lamp interactive, enabling the user to turn it on or off remotely; change the light color; use the light to visualize data etc, or connect one lamp to an other.

The OSCOLA workshop (book your participation!)  consists of 16 hours of class taking place at Fablab Torino and a ticket is valid for two people.  At the end of the workshop, each couple of participants will bring home their IoT open-source lamp and a copy will be reproduced to stay at Casa Jasmina!

Wood and electronics in a kinetic steampunk-flavored sculpture

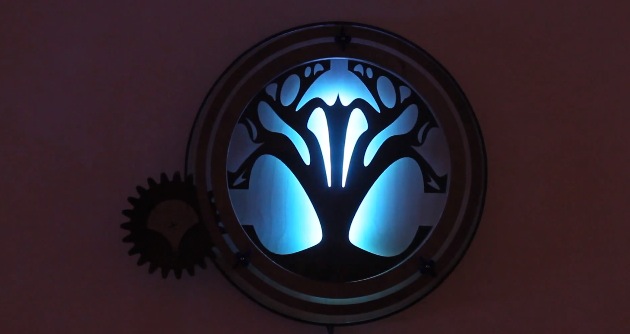
Orbis is a kinetic & lighting  lasercut sculpture controlled by Arduino Mega and created by an engineering design service located in Long Island NY which submitted it to our blog:

Orbis has several unique features and modes of operation not usually seen in Kinetic Art work. There are six specialized lighting modes and two motion modes which are all controlled via two independent Arduino Atmega 2560 control boards.
Orbis was created for a client’s new home who wanted something truly unique. The client specifically requested something which blends the classic look of wood with electronics and mechanics in a simple artistic manner.

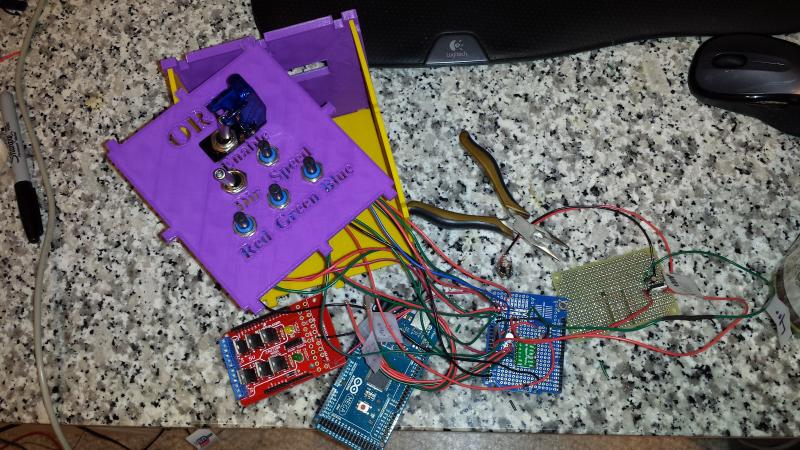
It also had to be large enough to highlight a central wall in the home while combining elements of old and new technologies. The client also wanted a separate control box which would allow guests to his home the ability to interact with the Kinetic Sculpture.
In order to create such a unique Kinetic Sculpture and control box, custom 3D models were developed. Once the client approved, these same files were sent out to a laser wood cutting service. Each piece was then hand stained and carefully assembled.


In the picture below you can see the inside of the control box:


More pictures and videos on the project’s website.

Arduino Blog 04 Jun 22:25