Posts with «digital cameras hacks» label

Motorized Camera Slider Rides on Carbon

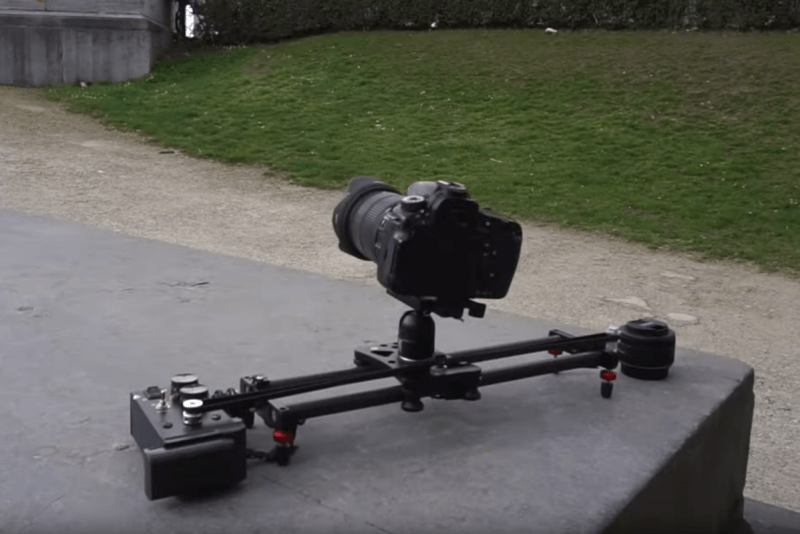
While not every camera mount needs to have six degrees of freedom, one or two can be extremely helpful in the photographic world. In order to make time-lapse shots with some motion or shots that incorporate some parallax, a moving camera mount or dolly is needed, and this small one builds upon a pre-existing, although non-motorized, camera slider.

The slider is an inexpensive model from everyone’s favorite online warehouse, with rails that are at least coated in carbon, if not made out of it entirely, to ensure smooth camera motion. To add the motorization to automatically move the camera, a stepper motor with a belt drive is used which is controlled by an Arduino. A few limit switches are added, letting the dolly perform different movement patterns automatically, and a pair of potentiometers for fine and coarse speed control are included as well, letting the camera take both time-lapse and video while using this mount at various controllable speeds.

With everything tucked into a relatively small box at one end of the dolly, the build is both accessible and functional. The code for the microcontroller is also available on the project’s GitHub page for anyone looking to replicate or build upon the project. And, for those looking to add more degrees of freedom to their camera setups, take a look at this DIY pan and tilt mount.

Low Res Arduino Thermal Camera

Do you know how you see those cheap telescopes at the department store? The box has beautiful pictures that probably came from the Hubble. What you will see is somewhat different. You have to carefully look at [upir’s] Arduino thermal camera project because it intersperses pictures of what you expect an 8×8 sensor will produce with images produced by a much better camera.

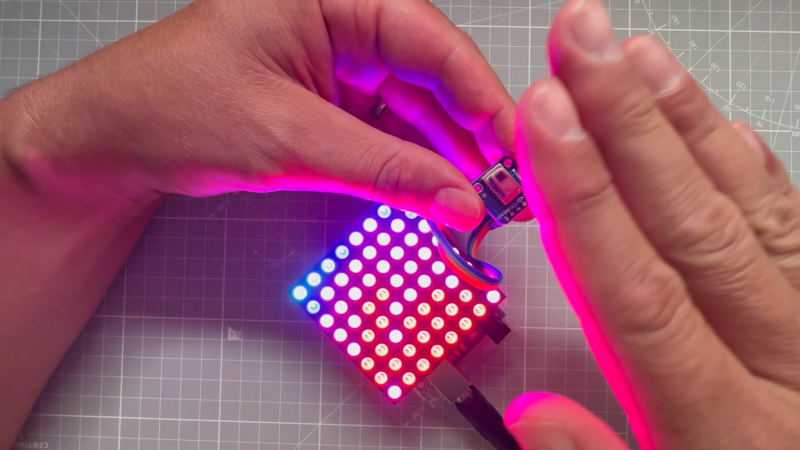
The actual project — watch the video below — is undoubtedly neat. An inexpensive 8×8 IR sensor and an 8X8 LED panel join to form a crude but usable thermal camera.

He leverages several ready-made libraries and walks through how and why he chose them and how he had to modify them. We enjoyed the demo of plotting HSV values to the LED array instead of the usual RGB values.

Given canned code to read the sensor and drive the LEDs, the rest is easy. Of course, like the dime-store telescope, you aren’t going to get amazing results. On the other hand, you probably have everything you need except the $20 sensor sitting around doing nothing anyway.

At around the ten-minute mark, he shows the same sensor in a commercial module that interpolates a higher resolution to an LCD. Still crude, so he also gives a quick review of a commercial camera that plugs into your phone. (You can ignore the video from here on if the stealth advertising bugs you.) We’ve actually looked at that camera before. We’ve also looked at some of the competition. While any of those will beat the 8×8 Arduino camera, they’ll cost more and won’t give you the satisfaction of building it, either.

Voice Controlled Camera for Journalist in Need

Before going into the journalism program at Centennial College in Toronto, [Carolyn Pioro] was a trapeze performer. Unfortunately a mishap in 2005 ended her career as an aerialist when she severed her spinal cord,  leaving her paralyzed from the shoulders down. There’s plenty of options in the realm of speech-to-text technology which enables her to write on the computer, but when she tried to find a commercial offering which would let her point and shoot a DSLR camera with her voice, she came up empty.

[Taras Slawnych] heard about [Carolyn’s] need for special camera equipment and figured he had the experience to do something about it. With an Arduino and a couple of servos to drive the pan-tilt mechanism, he came up with a small device which Carolyn can now use to control a Canon camera mounted to an arm on her wheelchair. There’s still some room for improvement (notably, the focus can’t be controlled via voice currently), but even in this early form the gadget has caught the attention of Canon’s Canadian division.

With a lavalier microphone on the operator’s shirt, simple voice commands like “right” and “left” are picked up and interpreted by the Arduino inside the device’s 3D printed case. The Arduino then moves the appropriate servo motor a set number of degrees. This doesn’t allow for particularly fine-tuned positioning, but when combined with movements of the wheelchair itself, gives the user an acceptable level of control. [Taras] says the whole setup is powered off of the electric wheelchair’s 24 VDC batteries, with a step-down converter to get it to a safe voltage for the Arduino and servos.

As we’ve seen over the years, assistive technology is one of those areas where hackers seem to have a knack for making serious contribution’s to the lives of others (and occasionally even themselves). The highly personalized nature of many physical disabilities, with specific issues and needs often unique to the individual, can make it difficult to develop devices like this commercially. But as long as hackers are willing to donate their time and knowledge to creating bespoke assistive hardware, there’s still hope.

[Thanks to Philippe for the tip.]

Light Painting Animations Directly From Blender

Light painting: there’s something that never gets old about waving lights around in a long exposure photo. Whilst most light paintings are single shots, some artists painstakingly create frame-by-frame animations. This is pretty hard to do when moving a light around by hand: it’s mostly guesswork, as it’s difficult to see the results of your efforts until after the photo has been taken. But what if you could make the patterns really precise? What if you could model them in 3D?

[Josh Sheldon] has done just that, by creating a process which allows animations formed in Blender to be traced out in 3D as light paintings. An animation is created in Blender then each frame is automatically exported and traced out by an RGB LED on a 3D gantry. This project is the culmination of a lot of software, electronic and mechanical work, all coming together under tight tolerances, and [Josh]’s skill really shines.

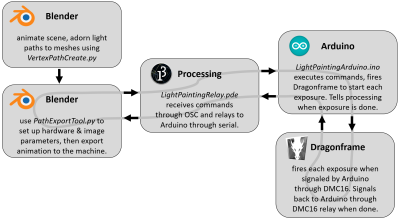
The first step was to export the animations out of Blender. Thanks to its open source nature, Python Blender add-ons were written to create light paths and convert them into an efficient sequence that could be executed by the hardware. To accommodate smooth sliding camera movements during the animation, a motion controller add-on was also written.

The gantry which carried the main LED was hand-made. We’d have been tempted to buy a 3D printer and hack it for this purpose, but [Josh] did a fantastic job on the mechanical build, gaining a solidly constructed gantry with a large range. The driver electronics were also slickly executed, with custom rack-mount units created to integrate with the DragonFrame controller used for the animation.

The video ends on a call to action: due to moving out, [Josh] was unable to continue the project but has done much of the necessary legwork. We’d love to see this project continued, and it has been documented for anyone who wishes to do so. If you want to check out more of [Josh]’s work, we’ve previously written about that time he made an automatic hole puncher for music box spools.

Thanks for the tip, [Nick].

Simple Camera Slider Adds a Dimension or Two to Your Shots

Camera sliders are a popular build, and properly executed they can make for impressive shots for both time-lapse sequences or real-time action. But they seem best suited for long shots, as dollying a camera in a straight line just moves subjects close to the camera through the frame.

This slider with both pan and tilt axes can make moving close-ups a lot easier. With his extremely detailed build log, [Dejan Nedalkovski] shows how he went about building his with only the simplest of materials and tools. The linear rail is simply a couple of pieces of copper pipe supported by an MDF frame. The camera trolley rides the rails on common skateboard bearings and is driven by a NEMA-17 stepper, as are the pan and tilt axes. [Dejan] also provided a barn-door style pivot to tilt the camera relative to the rails, allowing the camera to slide up and down an inclined plane for really interesting shots. The controller uses an Arduino and a joystick to drive the camera manually, or the rig can be programmed to move smoothly between preset points.

This is a step beyond a simple slider and feels a little more like full-blown motion control. We’ve got a feeling some pretty dramatic shots would be possible with such a rig, and the fact that it’s a simple build is just icing on the cake.

Talking Arduino Tells GoPro What To Do

It’s 2017 and even GoPro cameras now come with voice activation. Budding videographers, rest assured, nothing will look more professional than repeatedly yelling at your camera on a big shoot. Hackaday alumnus [Jeremy Cook] heard about this and instead of seeing an annoying gimmick, saw possibilities. Could they automate their GoPro using Arduino-spoken voice commands?

It’s an original way to do automation, for sure. In many ways, it makes sense – rather than mucking around with trying to make your own version of the GoPro mobile app (software written by surfers; horribly buggy) or official WiFi remote, stick with what you know. [Jeremy] decided to pair an Arduino Nano with the ISD1820 voice playback module. This was then combined with a servo-based panning fixture – [Jeremy] wants the GoPro to pan, take a photo, and repeat. The Arduino sets the servo position, then commands the ISD1820 to playback the voice command to take a picture, before rotating again.

[Jeremy] reports that it’s just a prototype at this stage, and works only inconsistently. This could perhaps be an issue of intelligibility of the recorded speech, or perhaps a volume issue. It’s hard to argue that a voice control system will ever be as robust as remote controlling a camera over WiFi, but it just goes to show – there’s never just one way to get the job done. We’ve seen people go deeper into GoPro hacking though – check out this comprehensive guide on how to pwn your GoPro.


Filed under: Arduino Hacks, digital cameras hacks

DIY Motion Control Camera Rig Produces Money-Shots On A Budget

Motion control photography allows for stunning imagery, although commercial robotic MoCo rigs are hardly affordable. But what is money? Scratch-built from what used to be mechatronic junk and a hacked Canon EF-S lens, [Howard’s] DIY motion control camera rig produces cinematic footage that just blows us away.

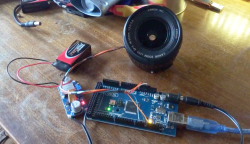
[Howard] started this project about a year ago by carrying out some targeted experiments. These would not only assess the suitability of components he gathered together from all directions, but also his own capacity in picking up enough knowledge on mechatronics to make the whole thing work. After making  himself accustomed to stepper motors, Teensies and Arduinos, he converted an old moving-head disco light into a pan and tilt mount for the camera. A linear axis was added, and with more degrees of freedom, more sophisticated means of control became necessary.

Using the Swift programming language, [Howard] wrote a host program automatically detects the numerous stepper and servo motor based axis and streams the position data to their individual Teensy LC based controllers. To the professional motion graphics artist , these shots aren’t just nice and steady footage: The real magic happens when he starts adding perfectly matched layers of CGI. Therefore, he also wrote some Python scripts that allow him to manually control his MoCo rig from a virtual rig in Blender, and also export camera trajectories directly from his 3D scenes.

On top of the 4-axis camera mount and a rotary stage, [Howard] also needed to find an electronic follow-focus mechanism to keep the now moving objects in focus. Since the Canon EF-S protocol had already been reverse engineered, he decided to tap into the SPI control bus between the camera and the lens to make use of its internal ring motor. Although the piezo motors in autofocus lenses aren’t actually built for absolute positioning, a series of tests revealed that a Canon EF-S 17-55mm IS USM lens can be refocused a few hundred times and still return to its starting position close enough. The caveat: [Howard] had to hack open the £600 lens and drill holes in it. In retrospect, he tells us, it’s a miracle that his wife didn’t leave him during the project.

After several iterations of mechanical improvements, the motion control rig is now finished, and the first clips have already been recorded and edited. They’re stunning. Only the 6-axis robot arm hiding in [Howard’s] basement tells us that he just warming up for the real game. Enjoy the video below, but don’t miss out on the full 3-part video documentary on how this project came to be.


Filed under: digital cameras hacks, video hacks

Arduino Based Remote Shutter For Beme

The well-dressed hacker [Sean Hodgins] has put together a neat little project: a battery powered remote shutter. He built it for use with Beme, the latest Snapchat clone that all of the cool kids are now using.

This service is designed to get away from the selfie culture by starting to record when you hold your phone against your chest, so you are looking at the thing being recorded, not your phone. [Sean] wanted a bit more control than that, so he built a remote control that starts the recording by moving the servo arm over the proximity sensor.

He built this neat little device from an Arduino Pro Mini, a battery, a small servo, a couple of power control boards and a cheap RF link from SeedStudio, all glued onto an iPhone case. It’s a bit rough around the edges (the servo makes some noise that is picked up on the recording, for one thing), but it is a great example of how to lash together a quick prototype to test a project out.


Filed under: Arduino Hacks, digital cameras hacks

Adding a Digital Back to a Sweet Old Camera

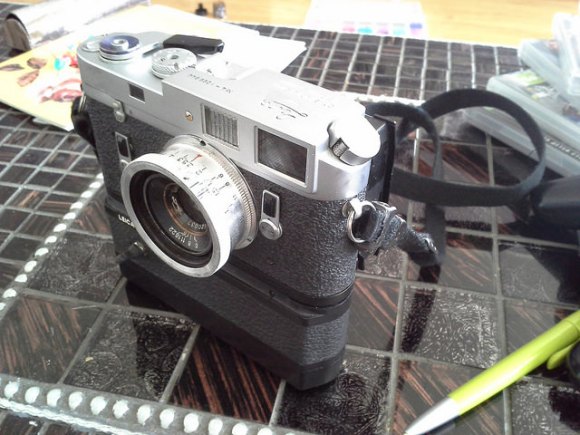
[Eugene] wanted to use his vintage Leica M4 as a digital camera, and he had a Canon EOS 350D digital camera sitting around unused. So he Frankensteined them together and added a digital back to the Leica’s optical frontend.

It sounds simple, right? All you’d need to do is chop off the back from the EOS 350D, grind the digital sensor unit down to fit into exactly the right spot on the film plane, glue it onto an extra Leica M4 back door, and you’re set. Just a little bit of extremely precise hackery. But it’s not even that simple.

Along the way [Eugene] reverse-engineered the EOS 350D’s shutter and mirror box signals (using a Salae Logic probe), and then replicated these signals when the Leica shutter was tripped by wedging an Arduino MiniPro into an old Leica motor-winder case. The Arduino listens for the Leica’s bulb-flash signal to tell when the camera fires, and then sends along the right codes to the EOS back. Sweet.

There are still a few outstanding details. The shutter speed is limited by the latency in getting the signal from the Leica to the 350D back, so he’s stuck at shutter speeds longer than 1/8th of a second. Additionally, the Canon’s anti-IR filter didn’t fit, but he has a new one ordered. These quibbles aside, it’s a beautiful hack so far.

What makes a beautiful piece of work even more beautiful? Sharing the source code and schematics. They’re both available at his Github.

Of course, if you don’t mind completely gutting the camera, you could always convert your old Leica into a point and shoot.


Filed under: digital cameras hacks

Rotating Plants for Time-Lapse Purposes

Automating the growing process of plants and vegetables is an increasing trend among gardening enthusiasts and hobbyists. It’s no surprise, either, with microcontrollers, moisture sensors, Co2 detectors, and even time-lapse cameras with rotating wooden rigs that are in the hands of millions of amateur gardeners around the world.

This project by [Liz] helps to document the sprouting process of her tiny grapefruit bonsai tree that started to flourish at her apartment in Chicago.

Similar rigs can be used for practically any type of indoor plant. They can also be modified to move the plants and vegetables depending on how much light they are getting. Even further, just add some code to splice the photographs together and you’ve got yourself a custom setup that can produce animated GIF files to be uploaded easily to the internet. Pages and pages of happy and healthy growing plants unearthing themselves from the ground up would be pasted all over the web showing the entire sprouting process. An example video of this by [Liz] is embedded below.


Filed under: digital cameras hacks