Posts with «lifehacks» label

RoboTray is a Secret Tea Butler

How far would you go for your cup of tea? [samsungite]’s missus doesn’t like clutter on her countertops, so away the one-cup kettle would go back into the cupboard for next time while the tea steeped. As long as there’s room for it in there, why not install it there permanently? That’s the idea behind RoboTray, which would only be cooler if it could be plumbed somehow.

RoboTray went through a few iterations, most importantly the switch from 6mm MDF to 4 mm aluminum plate. A transformer acts as a current sensor, and when the kettle is powered on, the tray first advances forward 7 cm using a 12 VDC motor and an Arduino. Then it pivots 90° on a lazy Susan driven by another 12 VDC motor. The kettle is smart enough to turn itself off when finished, and the Arduino senses this and reverses all the steps after a ten-second warning period. Check it out in action after the break.

If [samsungite] has any more Arduinos lying around, he might appreciate this tea inventory tracker.

Why Make Coffee When You’re Tired? Let a Robot Do It for You

Like us, [Alberto] doesn’t compromise when it comes to a good cup of coffee. We figure that if he went to an office in the Before Times, he was the type of coworker to bring in their own coffee equipment so as not to suffer the office brew. Or perhaps he volunteered to order the office supplies and therefore got to decide for everyone else. Yep, that’s definitely one way to do it.

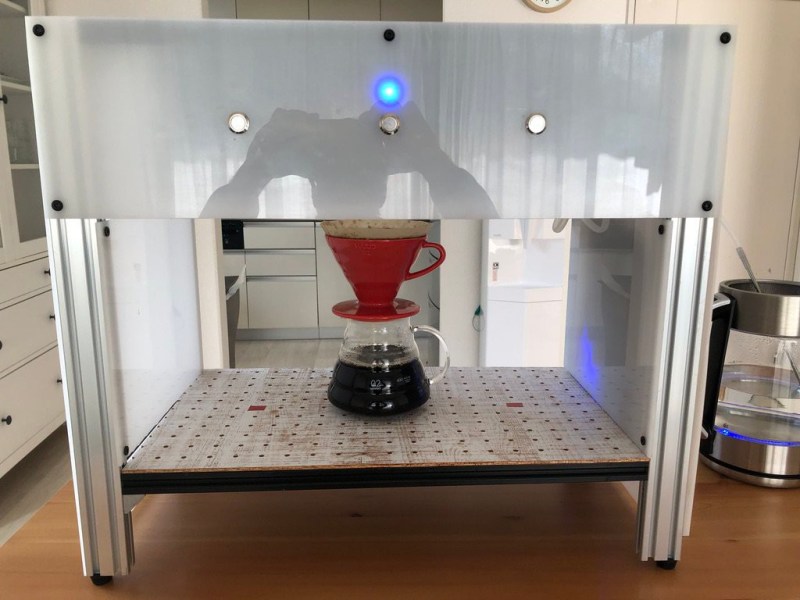
But like many of us, he is now operating out of a home office. Even so, he’s got better things to do than stand around pouring the perfect cup of coffee every morning. See, that’s where we differ, [Alberto]. But we do love Cafeino, your automated pour-over machine. It’s so sleek and lovely, and we’re sure it does a much better job than we do by hand — although we enjoy doing the pouring ourselves.

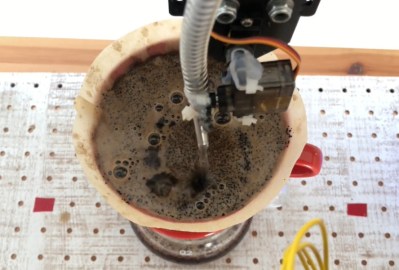
Cafeino is designed to mimic the movements of a trained barista’s hand, because evidently you’re supposed to pour the water in slow, deliberate swirls to evenly cover the grounds. (Our kettle has a chunky spout, so we just sort of wing it.) Cafeino does this by pumping water from an electric kettle and pouring a thin stream of it in circles with the help of two servos.

The three buttons each represent a different recipe setting, which specifies the amount of water, the hand pouring pattern, and the resting times between blooming the grounds and actually pouring the bulk of the water. These recipes are set using the accompanying web app via an ESP32, although the main brain barista is an Arduino Nano. Grab a cup and check out the demo after the break.

Got an old but modern coffee robot lying around? You could turn it into a planter with automated watering.

The HackadayPrize2021 is Sponsored by:

Hamster Trades Crypto Better than You

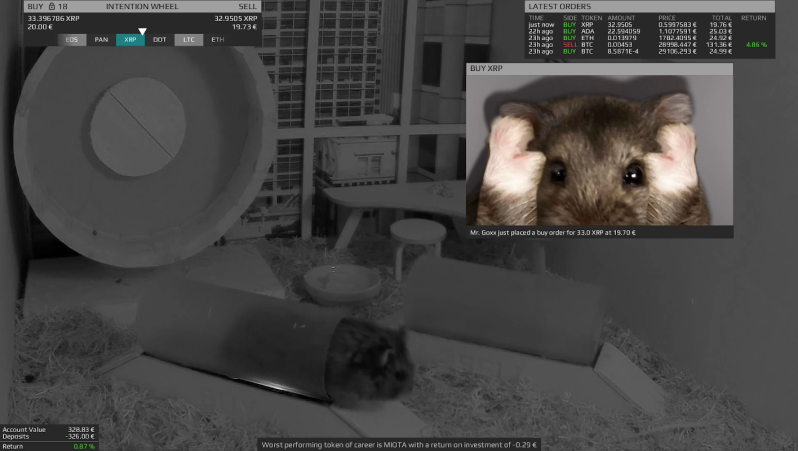
The inner machinations of the mind of cryptocurrency markets are an enigma. Even traditional stock markets often seem to behave at random, to the point that several economists seriously suggest that various non-human animals might outperform one market or another just by random chance alone. The classic example is a monkey picking stocks at random, but in the modern world the hamster [Mr Goxx] actively trades crypto from inside his hamster cage.

[Mr Goxx]’s home comprises a normal apartment and a separate office where he can make his trades. The office contains an “intention wheel” where he can run in order to select a currency to trade, and two tunnels that [Mr Goxx] can use to declare his intention to buy or sell the currency he selected with the wheel. The wheel is connected to an Arduino Nano with an optical encoder, and the Nano also detects the hamster’s presence in the “buy” or “sell” tunnel and lights up status LEDs when he wants to execute a trade. The Nano also communicates with an intricate Java program which overlays information on the live video feed and also executes the trades in real life with real money.

Live updates are sent directly both on Twitter and Reddit, besides the live Twitch stream of [Mr Goxx] we linked above. The stream only shows his office and not his apartment, and he’s mostly active at night (Berlin time). But we can’t wait for his random walks to yield long-term results which can be analyzed for years to come. In the meantime we’ll see if others have been able to make any profits in crypto with any less-random methods.

Wood and Brass Drink Temperature Monitor Looks Good, Has Class

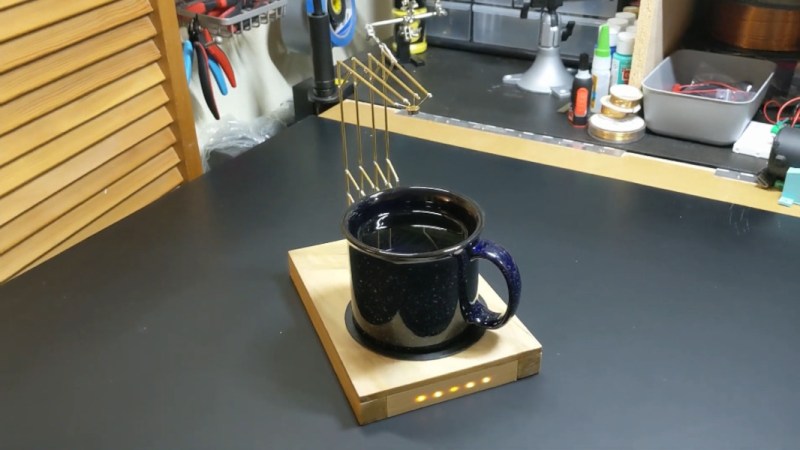
We’ve all been there. Your current project has hit a wall, or the next step will take days to complete, and you need something to do in the meantime. So you start a project that you envision will fit nicely in the gap, and then, inevitably, it doesn’t. Maybe it even takes so long that the original project gets finished first. So what? There’s nothing wrong with that, especially when the filler project turns out as well as this drink temperature monitor disguised as a circuit sculpture (video, embedded below). Just put your mug on the coaster, and the weight of it activates a hidden switch, which causes the sculpture to display its secret LEDs.

[MakeFunStuff] wanted to make something that looked less like a circuit and more like art, while building a tool that could determine the relative hotness of a beverage. Such a a useful circuit sculpture sounds like a tall order to us, but [MakeFunStuff] pulled it off with finesse and style.

The circuit is based around this Sputnik-looking standalone IR temperature sensor which, as [MakeFunStuff] aptly describes, is “a single-pixel infrared camera that picks up everything in a 90° cone starting at the sensor.”

[MakeFunStuff] paired this easy-to-use sensor with an Arduino Nano and five LEDs that show how hot a beverage is on a scale from 1 to 5. The sensor is hidden in plain sight, suspended from the top of the brass rod sculpture and blending in perfectly. We love that the LEDs are hidden behind a thin layer of carefully-drilled wood and agree that a drill press would have been much easier.

The code is set up for just about every temperature scale from Celsius to Rømer, so that solves that argument. [MakeFunStuff] went with the Kelvin scale because science. Our favorite thing about this video is that [MakeFunStuff] shared their failures and fixes as they built their way toward answering the questions of how to suspend the sensor over the drink, and how best to display the heat level while hiding the electronics. Go grab a hot cup of something and check it out after the break while you let it cool off the normie way.

We admit that we would likely zone out while waiting for the LEDs to disappear. Here’s a smart coaster that uses an ESP8266 to send a message to Discord when your beverage has reached the perfect drinking temperature.

Thanks for the hot tip, [Perry]!

Automated Watering Machine Has What Plants Crave: Fertilizer

We’ve seen countless automated plant care systems over the years, but for some reason they almost never involve the secret sauce of gardening — fertilizer. But [xythobuz] knows what’s up. When they moved into their new flat by themselves, it was time to spread out and start growing some plants on the balcony. Before long, the garden was big enough to warrant an automated system for watering and fertilizing.

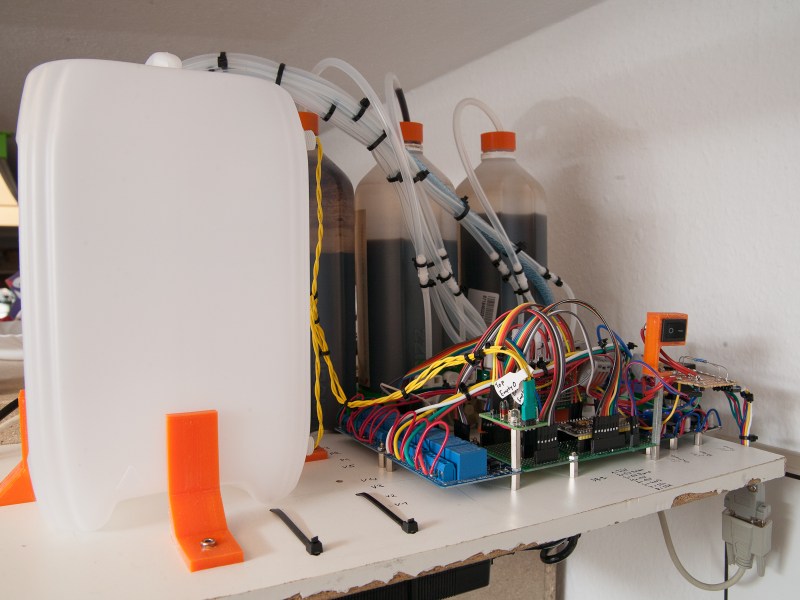
This clever DIY system is based around a 5L gravity-fed water tank with solenoid control and three [jugs] of liquid fertilizer that is added to the water via peristaltic pump. Don’t worry, the water tank has float switches, and [xythobuz] is there to switch it off manually every time so it doesn’t flood the flat.

On the UI side, an Arduino Nano clone is running the show, providing the LCD output and handling the keypad input. The machine itself is controlled with an ESP32 and a pair of four-channel relay boards that control the inlet valve, the four outlet valves, and the three peristaltic pumps that squirt out the fertilizer. The ESP also serves up a web interface that mimics the control panel and adds in the debug logs. These two boards communicate using I²C over DB-9, because that’s probably what [xythobuz] had lying around. Check out the demo video after the break, and then go check on your own plants. They miss you!

Don’t want to buy just any old peristaltic pumps? Maybe you could print your own.

Negative Reinforcement: Drill Bits Edition

In theory, it’s fun to have a lot of toys tools around, but the sad reality is that it’s only as fun as the organization level applied. Take it from someone who finds organization itself thrilling: it really doesn’t matter how many bits and bobs you have, as long as there’s a place for everything and you put away your toys at the end of the day.

[Cranktown City] is always leaving drill bits lying around instead of putting them back in their bit set boxes. Since he responds well to yelling, he decided to build an intelligent drill bit storage system that berates him if he takes one out and doesn’t put it back within ten minutes.

But [Cranktown City] did much more than that. The system is housed in a really nice DIY stand that supports his new milling and drilling machine and has space to hold a certain type of ubiquitous red tool box beneath the drill bits drawer.

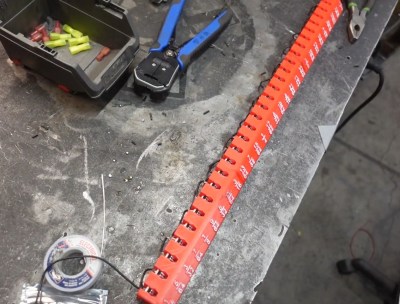
All the bits now sit in a 3D-printed index that fits the width of the drawer. [Cranktown City] tried to use daisy-chained pairs of screws as contacts behind each bit that could tell whether the bit was home or not, but too much resistance interfered with the signal. He ended up using a tiny limit switch behind each bit instead. If any bit is removed, the input signal from the index goes low, and this triggers the Arduino Nano to do two things: it lights up a strip of red LEDs behind the beautiful cut out letters on the drawer’s lip, and it starts counting upward. Every ten minutes that one or more bits are missing, the drawer complains and issues ad hominem attacks. Check out the demo and build video after the break, but not until you put your tools away. (Have you learned nothing?)

Okay, so how do you deal with thousands of jumbled drill bits? Calipers and a Python script oughta do it.

Eyesight Guardian Polices Your Poor Pupils

Don’t know about you, but over the last year or so, we have gone from spending ten or twelve hours a day at this computer to upwards of sixteen or eighteen. Fortunately there’s a window behind the monitor for taking those 20/20/20 breaks that are supposed to prevent eye strain, but it’s so hard to remember (and boring) to do it. And nobody needs yet another thing to remember in the name of self-care.

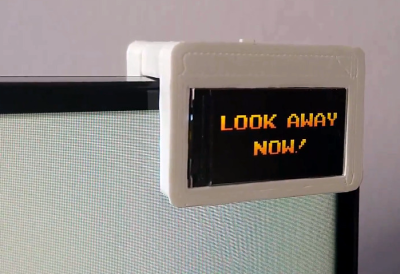
[Daniel Hingston] certainly agrees. As you’ll see in the delightful video after the break, [Daniel] has made a game out of the whole process of stopping every twenty minutes to spend twenty seconds looking at a point that’s at least twenty feet away. Once the break is over, [Daniel] uses the dual-purpose start button to acknowledge having looked away for 20 seconds. The device is meant to clip onto the corner of any monitor, and [Daniel] has provided several sizes of the bridge piece so that everyone can find their fit.

The Guardian’s guts are pretty simple — an Arduino Pro Mini runs the stop watch and a TFT display to show the graphics that live on an SD card. This is a great way to preserve your eyesight by gamifying something we all know we should be doing. It might be nice to add a break timer that counts up to 25 or thereabouts so you have time to stand up and come back. If you press the button too soon, it scolds you and you have to start your eye break over.

Need some more self-care lately? Our own [Jenny List] has your back in these interesting times.

Zoom Out of the Classroom with a Mushroom Button

Considering the state of well, everything, we can’t tell you how glad we are to be out of school. That goes double for not being a teacher these days. [Elena] had some awesome light-up tactile buttons set aside for a killer Kerbal Space Program controller, but it’s funny how a pandemic will change your priorities. Instead, those buttons found a good home in this colorful and enticing Zoom control panel.

[Elena]’s ready pile of Arduinos yielded no Leonardos or Pro Micros, but that’s okay because there’s a handy bootloader out there that allows you to reprogram the USB interface chip of an Uno or a Mega and use it as a keyboard. After setting that up, it was mostly a matter of wiring all those latching and momentary buttons and LEDs to the Mega and making them look fantastic with a set of icons. (We all know the big red mushroom button is for aborting the call; so does it really need an icon?)

[Elena] was inspired by the Zoom call-terminating pull chain we saw a month or so ago as well as the pink control box that launched a thousand or so macro keyboards. Have you made your own sanity-saving solution for our times? Let us know!

On-Air Sign Helps Keep Your Broadcasts G-Rated

Like many of us, [Michael] needed a way to let the family know whether pants are required to enter the room — in other words, whenever a videoconference is in progress. Sure he could hang a do not disturb sign, but those are easy to forget. There’s no need to worry about forgetting to change status because this beautiful wall-mounted sign can be controlled with Alexa.

Inside the gorgeous box made from walnut, curly maple, and oak is an ESP32, some RGB LEDs, and three MOSFETs. [Michael] is using the fauxmoESP library to interface the ESP32 with Alexa, which emulates a Phillips Hue bulb for the sake of using a protocol she already knows. [Michael] can change the color and brightness percentage with voice commands.

The sign is set up as four different devices — one default, and one for each color. Since talking to Alexa isn’t always appropriate, [Michael] can also change the color of the LEDs using sliders on a website that’s served up by the ESP. Check out the full build video after the break.

Need something quick and dirty that works just as well? Our own [Bob Baddeley] made a status indicator that’s simple and effective.

Parking Assistant Helps Back Up the Car Without Going Too Far

Sure, [Ty Palowski] could have just hung a tennis ball from the ceiling, but that would mean getting on a ladder, testing the studfinder on himself before locating a ceiling joist, and so on. Bo-ring. Now that he finally has a garage, he’s not going to fill it with junk, no! He’s going to park a big ol’ Jeep in it. Backwards.

The previous owner was kind enough to leave a workbench in the rear of the garage, which [Ty] has already made his own. To make sure that he never hits the workbench while backing into the garage, [Ty] made an adorable stoplight to help gauge the distance to it. Green mean’s he’s good, yellow means he should be braking, and red of course means stop in the name of power tools.

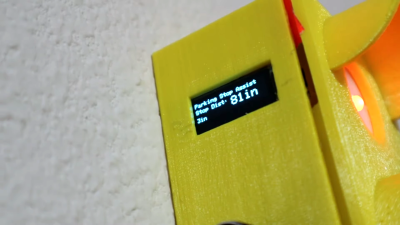
Inside the light is an Arduino Nano, which reads from the ultrasonic sensor mounted underneath the enclosure and lights up the appropriate LED depending on the car’s distance. All [Ty] has to do is set the distance that makes the red light come on, which he can do with the rotary encoder on the side and confirm on the OLED. The distance for yellow and green are automatically set from red — the yellow range begins 24″ past red, and green is another 48″ past yellow. Floor it past the break to watch the build video.

The humble North American traffic signal is widely recognized, so it’s a good approach for all kinds of applications. Teach your children well: start them young with a visual indicator of when it’s okay to get out of bed in the morning.