Posts with «ultrasonic» label

Mini Ultrasonic Levitation Kit is an Exercise in Sound Minimalist Design
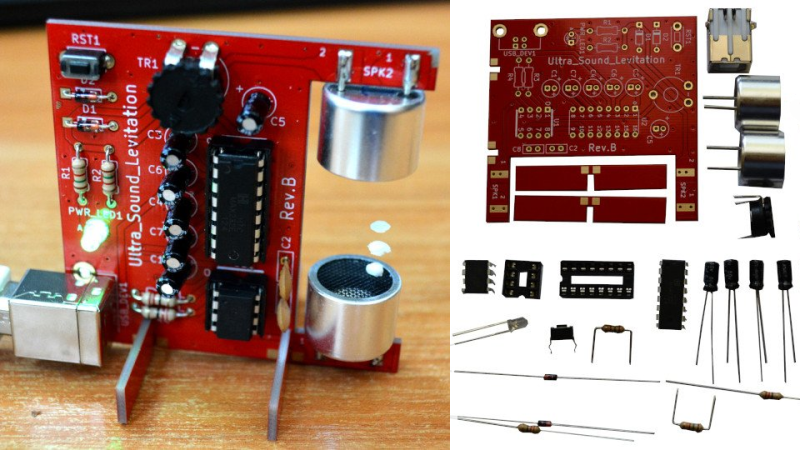
For those that haven’t heard, ultrasonic levitation is a process by which two or more ultrasonic transducers are set opposite to each other and excited in such a way as to create a standing wave between them. The sound is, as the name implies, ultrasonic — so outside the range of human hearing — but strong enough so that the small, light objects can be positioned and held fixed in mid-air where there’s a pressure minimum in the standing wave. [Olimex] has created a small ultrasonic levitation kit that exemplifies this phenomena.

The kit itself is made using through-hole components, with an ATTiny85 as the core microcontroller to drive two TCT40-16T ultrasonic speakers, and a MAX232 to provide a USB interface. Two slotted rectangular PCB pieces that solder connect to the main board, provide a base so that the device stands upright when assembled. The whole device is powered through the USB connection, and the ultrasonic speakers output in the 40KHz range providing enough power to levitate small Styrofoam balls.

The project is, by design, an exercise in minimalism, providing a kit that can be easily assembled, and providing code that can be easily flashed onto the device, examined and modified. All the design files, including the bill of materials, KiCAD schematics, and source code are provided under an open source hardware license to allow for anyone wanting to know how such a project works, or to extend it themselves, ample opportunity. [Olimex] also has the kit for sale for those not wanting to source boards and parts themselves.

We’ve featured ultrasonic levitation devices before, from bare bones system driven by a NE555 to massive phased arrays.

2022 Sci-Fi Contest: A Hand-Following Robot, Powered by Arduino

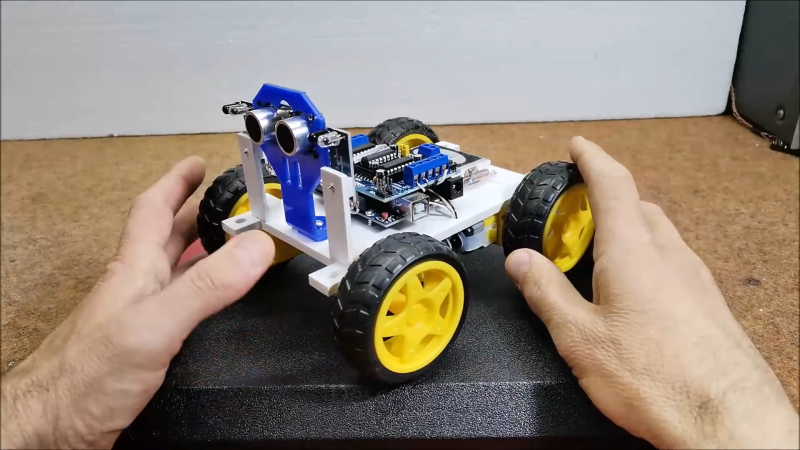
If there’s one thing audiences love in sci-fi, it’s a cute robot companion that follows the heroes around. If you want one of your own, starting with this build from [mircemk] could be just the ticket.

The build relies on the classic Arduino Uno microcontroller, which talks to a HC-SR04 ultrasonic sensor module and two infrared sensors in order to track a human target and follow it around. Drive is thanks to four DC gear motors, driven by a L293D motor driver, with a two-cell lithium battery providing power for everything onboard.

The robot works in a simple manner, following a hand placed in front of the robot’s sensors. First, the robot checks for the presence of an object in front using the ultrasonic sensor. If something is detected, the twin infrared sensors mounted left and right are used to guide the robot, following the hand.

It’s not a sophisticated algorithm, and it won’t really let your robot follow you down a crowded street. However, it’s a great project to learn on for beginners and could serve as a great entry into more advanced projects using face tracking or other techniques. Video after the break.


Hack a Day 13 Apr 21:00

Ultrasonic Sonar Detects Hidden Objects

While early scientists and inventors famously underestimated the value of radar, through the lens of history we can see how useful it became. Even though radar uses electromagnetic waves to detect objects, the same principle has been used with other propagating waves, most often sound waves. While a well-known use of this is sonar, ultrasonic sensors can also be put to use to make a radar-like system.

This ultrasonic radar project is from [mircemk] who uses a small ultrasonic distance sensor attached to a rotating platform. A motor rotates it around a 180-degree field-of-view and an Arduino takes and records measurements during its trip. It interfaces with an application running on a computer which shows the data in real-time and maps out the location of all of the objects around the sensor. With some upgrades to the code, [mircemk] is also able to extrapolate objects hidden behind other objects as well.

While the ultrasonic sensor used in this project has a range of about a meter, there’s no reason that this principle couldn’t be used for other range-finding devices to extend its working distance. The project is similar to others we’ve seen occasionally before, but the upgrade to the software to allow it to “see” around solid objects is an equally solid upgrade.

Slippy Slapper Uselessly Uses All the Arduinos

Want to take that annoyingly productive coworker down a notch? Yeah, us too. How dare they get so much done and be so happy about it? How is it possible that they can bang on that keyboard all day when you struggle to string together an email?

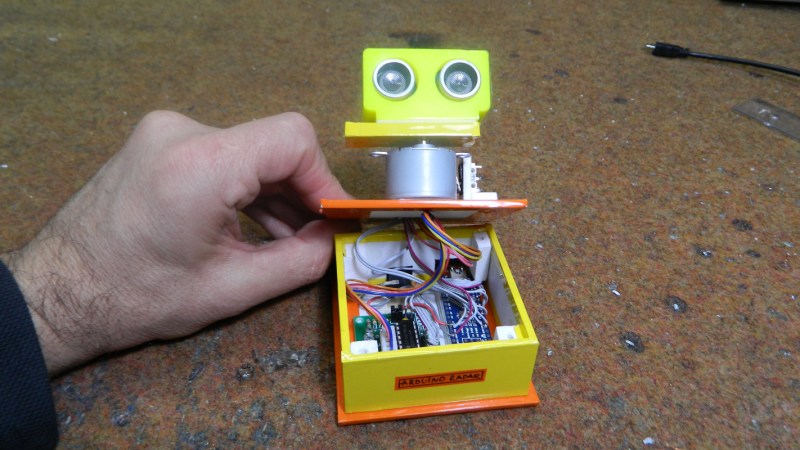
The Slippy Slapper is a useless machine that turns people into useless machines using tactics like endless distraction and mild physical violence. It presses your buttons by asking them to press buttons for no reason other than killing their productivity. When they try to walk away, guess what? That’s another slappin’. Slippy Slapper would enrage us by proxy if he weren’t so dang cute.

You’re right, you don’t need an Arduino for this. For peak inefficiency and power consumption, you actually need four of them. One acts as the master, and bases its commands to the other three on the feedback it gets from Slippy’s ultrasonic nostrils. The other three control the slappin’ servos, the speakers, and reading WAV files off of the SD card. Slap your way past the break to see Slippy Slapper’s slapstick demo.

Need to annoy a group of coworkers all at once? Slip a big bank of useless machines into the conference room while it’s being set up.

Lessons Learned From An Art Installation Build

Art installations are an interesting business, which more and more often tend to include electronic or mechanical aspects to their creation. Compared to more mainstream engineering, things in this space are often done quite a bit differently. [Jan Enning-Kleinejan] worked on an installation called Prendre la parole, and shared the lessons learned from the experience.

The installation consisted of a series of individual statues, each with an LED light fitted. Additionally, each statue was fitted with a module that was to play a sound when it detected visitors in proximity. Initial designs used mains power, however for this particular install battery power would be required.

Arduinos, USB power banks and ultrasonic rangefinders were all thrown into the mix to get the job done. DFplayer modules were used to run sound, and Grove System parts were used to enable everything to be hooked up quickly and easily. While this would be a strange choice for a production design, it is common for art projects to lean heavily on rapid prototyping tools. They enable inexperienced users to quickly and effectively whip up a project that works well and at low cost.

[Jan] does a great job of explaining some of the pitfalls faced in the project, as well as reporting that the installation functioned near-flawlessly for 6 months, running 8 hours a day. We love to see a good art piece around these parts, and we’ve likely got something to your tastes – whether you’re into harmonicas, fungus, or Markov chains.

Dead Simple Ultrasonic Data Communication

Some of the best hacks are the ones which seem perfectly obvious in hindsight; a solution to the problem that’s so elegant, you wonder how it never occurred to you before. Of course we also love the hacks that are so complex your eyes start to water, but it’s nice to have a balance. This one, sent in by [Eduardo Zola] is definitely in the former group.

In the video after the break, [Eduardo] demonstrates his extremely simple setup for using ultrasonic transducers for one-way data communication. Powered by a pair of Arduinos and using transducers salvaged from the extremely popular HC-SR04 module, there’s a good chance a lot of readers can recreate this one on their own bench with what they’ve got lying around. In this example he’s sending strings of text from one computer to another, but with a little imagination this can be used for all sorts of projects.

For the transmitter, the ultrasonic transducer is simply tied to one of the digital pins on the Arduino. The receiver is a bit more complex, requiring a LM386 amplifier and LM393 comparator to create a clean signal for the second Arduino to read.

But how does it work? Looking through the source code for the transmitter and receiver, we can see it’s about as basic as it gets. The transmitter Arduino breaks down a given string into individual characters, and then further converts the ASCII to eight binary bits. These bits are sent out as tones, and are picked up on the receiving end. Once the receiver has collected a decent chunk of tones, it works through them and turns the binary values back into ASCII characters which get dumped over serial. It’s slow, but it’s simple.

If you’re looking for something a bit more robust, check out this guide on using GNU Radio with ultrasonics.

Listening for Hand Gestures

[B. Aswinth Raj] wanted to control a VLC player with hand gestures. He turned to two common ultrasonic sensors and Python to do the job. There is also, of course, an Arduino. You can see a video of the results, below.

The Arduino code reads the distance from both sensors — one for the left hand and the other for the right. This allows the device to react to single hand gestures that get closer or further away from one sensor as well as gestures involving both hands. For example, raising your left hand and moving it closer or further away will adjust the volume. The right hand controls rewind and fast forward. Raising both hands will start or stop playback.

Of course, since the Arduino is reading the gestures you could change them to suit you. We might have mounted the sensors further back (or, perhaps, added more sensors) so you could use trigonometry to triangulate the hand’s exact position. Well, perhaps not exact, but you could get an idea of the hand’s motion from right to left as well as forward and backward.

On the host computer side, Python receives serial data from the Arduino and then simulates keystrokes to get the desired result. Of course, this is also highly customizable.

By coincidence, we did a similar project a few years ago using one sensor and the Arduino’s ability to appear like a USB keyboard. We’ve also seen 8 sensors making piano music.


Filed under: Arduino Hacks
Hack a Day 02 Nov 03:00

Fire Fighting Robot

Primary image

What does it do?

Navigate a Maze, extinguish a flame, track position

I'm currently a sophomore at Worcester Polytechnic Institute studying Robotics Engineering. The third course in the series, RBE 2002, focusing on sensors. In a group of 4 students, we built a robot that could autonomously navigate a maze, locate a flame, put it out and report its X,Y, and Z position relative to its starting position. The robot was required to use an IMU and a flame sensor provided to us. All other sensors and parts are up to the group to use to complete the challenge.

Cost to build

Embedded video

Finished project

Complete

Number

Time to build

Type

URL to more information

Weight

read more

WALTER - The Arduino Photovore Insect Robot

Primary image

What does it do?

Navigate around and seeking light

[Please excuse my English]

Cost to build

Embedded video

Finished project

Complete

Number

Time to build

Type

URL to more information

Weight

read more