Posts with «atmega328p» label

Festive PCB Gives the Gift of Hacking

‘Tis the season for gift giving, and what better to give than a newfound love for hacking, soldering, and blinkenlights? In order to spread cheer and education at the local hackerspace, [Tom Goff] created this festive tree circuit board that can either sit in a stand to be admired, or worn as jewelry. The resistors are even designed to look like candy canes hanging from the boughs.

The brains of this festive little tree is an ATmega328P, which you probably recognize as the microcontroller that powers the Arduino Uno. Although this circuit has none of the extra bits you’d find on an Uno, not even a crystal oscillator, it can still be programmed with Arduino and use the 8 MHz internal clock.

[Tom] has provided good, thorough instructions, especially for the sticky bit of setting up the IDE to program using the 8 MHz internal clock. So even if you’re nowhere near Norwich Hackerspace, you can join in the fun. Be sure to check out the video after the break, wherein [Tom] walks through designing the PCB using Inkscape and Fritzing.

Want to whip up a little something for the hackerspace wall? Check out this Sierpinski Christmas tree.

Off-Grid Radio Also Repairable Off-Grid

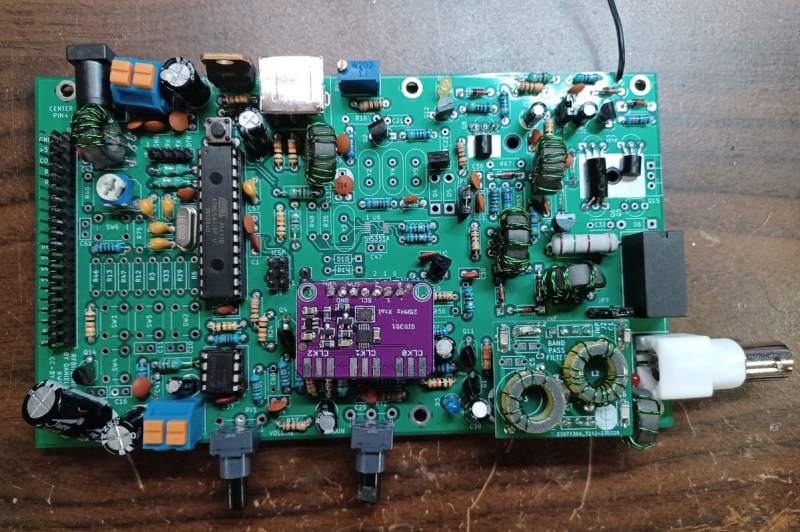
Low-power radios, often referred to in the amateur radio community as QRP radios, have experienced a resurgence in popularity lately. Blame it on certain parts of the hobby become more popular, like Parks on the Air (POTA) or Summits on the Air (SOTA). These are events where a radio operator operates off-grid at remote parks or mountaintops. These QRP rigs are a practical and portable way to make contacts. You would think that a five- or ten-watt rig running on batteries would be simple. Surprisingly, they can be enormously complex and expensive. That’s why [Stephen] built the RFBitBanger, a QRP radio designed to not only be usable off-grid but to be built and maintained off-grid as well.

The radio accomplishes this goal by being built out of as many standard off-the-shelf components as possible. It eschews modern surface-mount components in favor of the much more accessible through-hole parts, including the ATMEGA328P at the center of the build. A PCB design is also available, but it can be built on perf board nearly as easily. The radio supports any mode a QRP operator might use, including CW, SSB, RTTY, and a new mode designed explicitly for this radio called SCAMP which is a low bandwidth, low SNR digital mode built into the Arduino-based firmware. It’s a single-band radio, but any band between 20 and 80 meters can be selected with pluggable filters.

As far as bomb-proof radios go, we can’t imagine a better way to live out an apocalypse than with a radio like this. As long as there’s a well-stocked parts drawer around, this radio could theoretically reach around the world without worrying about warranty claims, expensive parts, or even a company going out of business or not stocking parts for old radios anymore. There’s also more information about this build at the Open Research Institute for those interested. And, if you’re wondering how useful any radio could be using only five watts of transmitter power, take a look at this in-depth look at QRP radio operation.

Get Pumped for This Miniature Gym

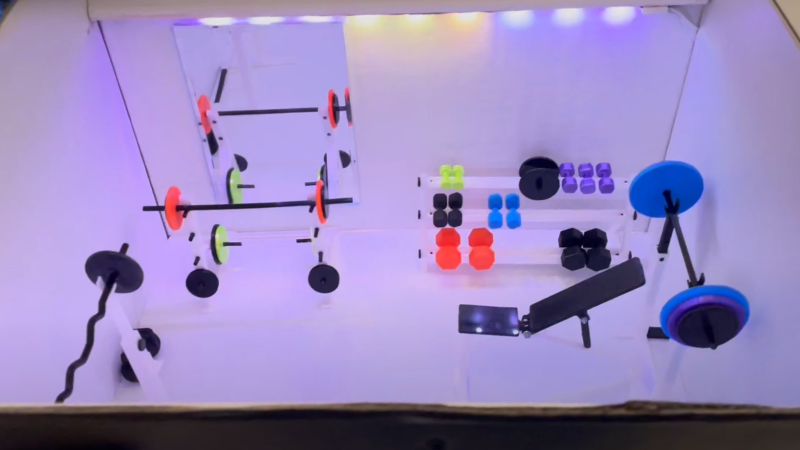
[Duncan McIntyre] lives in the UK but participated in a secret Santa gift exchange for his Dutch friends’ Sinterklaas celebration. In traditional maker fashion, [Duncan] went overboard and created a miniature gym gift box, complete with flashing lights, music and a motorized lid.

[Duncan] used [TanyaAkinora]’s 3D printed tiny gym to outfit the box with tiny equipment, with a tiny mirror added to round out the tiny room. An ATmega328P was used as the main microcontroller to drive the MP3 player module and A4988 stepper motor controller. The stepper motor was attached to a drawer slide via a GT2 timing belt and pulley to actuate the lid. Power is provided through an 18V, 2A power supply with an LM7805 providing power to the ATmega328P and supporting logical elements. As an extra flourish, [Duncan] added some hardware audio signal peak detection, fed from the speaker output, which was then sampled by the ATmega328P to be able to flash the lights in time with the playing music. A micro switch detects when the front miniature door is opened to begin the sequence of lights, song and lid opening.

[Duncan] provides source on GitHub for those curious about the Arduino code and schematics. We’re fans of miniature pieces of ephemera and we’ve featured projects ranging from tiny 3D printed tiny escalators to tiny arcade cabinets.

Video after the break!

A Colorful Way To Play Chess On An ATmega328

We’ve all seen those chess computers that consist out of a physical playing field, and a built-in computer that would indicate where you should put its pieces while inputting the position of your pieces in some way. These systems are usually found in a dusty cardboard box in a back room’s closet, as playing like this is fairly cumbersome, and a lot depends on the built-in chess computer.

This take by [andrei.erdei] on this decades-old concept involves an ATmega328p-based Arduino Pro Mini board, a nice wooden frame, and 4 WS2812-based 65×65 mm RGB 8×8 LED matrices, as well as some TTP223 touch sensors that allow one to control the on-board cursor. This is the sole form of input: using the UP and RIGHT buttons to select the piece to move, confirm with OK, then move to the new position. The chess program will then calculate its next position and indicate it on the LED matrix.

Using physical chess pieces isn’t required either: each 4×4 grid uses a special pattern that indicates the piece that occupies it.  This makes it highly portable, but perhaps not as fun as using physical pieces. It also kills the sheer joy of building up that collection of enemy pieces when you’ve hit that winning streak. You can look at the embedded gameplay video after the break and judge for yourself.

At the core of the chess program is [H.G. Muller]’s micro-Max project. Originally ported to the Arduino Uno, this program outputs the game to the serial port. After tweaking it to use the LED matrix instead, [andrei.erdei] was then faced with the lack of memory on the board for the most common LED libraries. In the end, the FAB_LED library managed to perform the task with less memory, allowing it and the rest of the program to fit comfortably into the glorious 2 kB of SRAM that the ATmega328p provides.

Classic 8-bit chess engines are marvels of software engineering. Ever wonder how they stack up against modern chess software? Check out this article!

Build Your Own Portable Arduino Soldering Iron

At this point you’ve almost certainly seen one of these low-cost portable soldering irons, perhaps best exemplified by the TS100, a pocket-sized temperature controlled iron that can be had for as little as $50 USD from the usual overseas suppliers. Whether or not you’re personally a fan of the portable irons compared to a soldering station, the fact remains that these small irons are becoming increasingly popular with hackers and makers that are operating on a budget or in a small workspace.

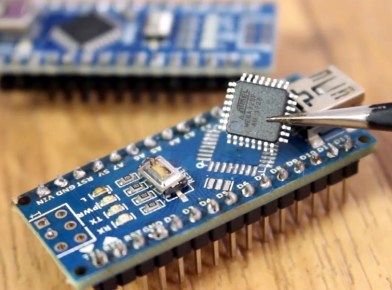
Believing that imitation is the most sincere form of flattery, [Electronoobs] has come up with a DIY portable soldering iron that the adventurous hacker can build themselves. Powered by an ATMega328p pulled out of an Arduino Nano, if offers the same software customization options of the TS100 but at a considerably lower price. Depending on where you source your components, you should be able to build one of these irons for as little as $15.

The iron features a custom PCB and MAX6675 thermocouple amplifier to measure tip temperature. A basic user interface is provided by two tactile buttons on the PCB as well as an 128×32 I2C OLED display. In a future version, [Electronoobs] says he will look into adding some kind of sensor to detect when the iron is actually being used and put it to sleep when inactive.

The tip is sourced from a cheap soldering station replacement iron, and according to [Electronoobs], is probably the weakest element of the entire build. He’s looking into using replacement TS100 tips, but says he’ll need to redesign his electronics to make it compatible. The case is a simple 3D printed affair, which looks solid enough, but seems likely to be streamlined in later versions.

We’ve seen a number of attempts at DIY soldering irons over the years, but we have to say, this one is probably the most professional we’ve ever seen. It will be interesting to see how future revisions improve on this already strong initial showing.

ATMega328 3D!

Small OLED displays are inexpensive these days–cheap enough that pairing them with an 8-bit micro is economically feasible. But what can you do with a tiny display and not-entirely-powerful processor? If you are [ttsiodras] you can do a real time 3D rendering. You can see the results in the video below. Not bad for an 8-bit, 8 MHz processor.

The code is a “points-only” renderer. The design drives the OLED over the SPI pins and also outputs frame per second information via the serial port.

As you might expect, 3D output takes a good bit of math, and the chip in question isn’t very good at handling real numbers. [Ttsiodras] handles this using an old technique: fixed point arithmetic. The idea is simple. Normally, we think of a 16-bit word as holding unsigned values of 0 – 65535. However, if you choose, you can also use it to represent numbers from 0-50.999, for example. Mentally, you scale everything by 1,000 and then reverse the operation when you want to output. Addition and subtraction are straightforward, but multiplication and division require some extra work.

If you want to read more about fixed point math, you are in the right place. We’ve also covered a great external tutorial, too. But if you think this is the first time we’ve covered a 3D graphics engine for the ATmega parts, you’re wrong.


Filed under: Arduino Hacks

GPS Tracker Gets SMS Upgrade

In May of 2000, then-President Bill Clinton signed a directive that would improve the accuracy of GPS for anyone. Before this switch was flipped, this ability was only available to the military. What followed was an onslaught of GPS devices most noticeable in everyday navigation systems. The large amount of new devices on the market also drove the price down to the point where almost anyone can build their own GPS tracking device from scratch.

The GPS tracker that [Vadim] created makes use not just of GPS, but of the GSM network as well. He uses a Neoway M590 GSM module for access to the cellular network and a NEO-6 GPS module. The cell network is used to send SMS messages that detail the location of the unit itself. Everything is controlled with an ATmega328P, and a lithium-ion battery and some capacitors round out the fully integrated build.

[Vadim] goes into great detail about how all of the modules operate, and has step-by-step instructions on their use that go beyond what one would typically find in a mundane datasheet. The pairing of the GSM and GPS modules seems to go match up well together, much like we have seen GPS and APRS pair for a similar purpose: tracking weather balloons.


Filed under: gps hacks
Hack a Day 07 Jul 06:00
arduino  atmega328  atmega328p  cell  gps  gps hacks  gsm  sms  tracker  

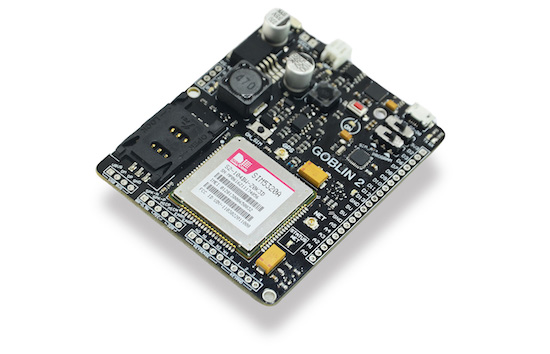
GOBLIN 2 IoT development board joins AtHeart!

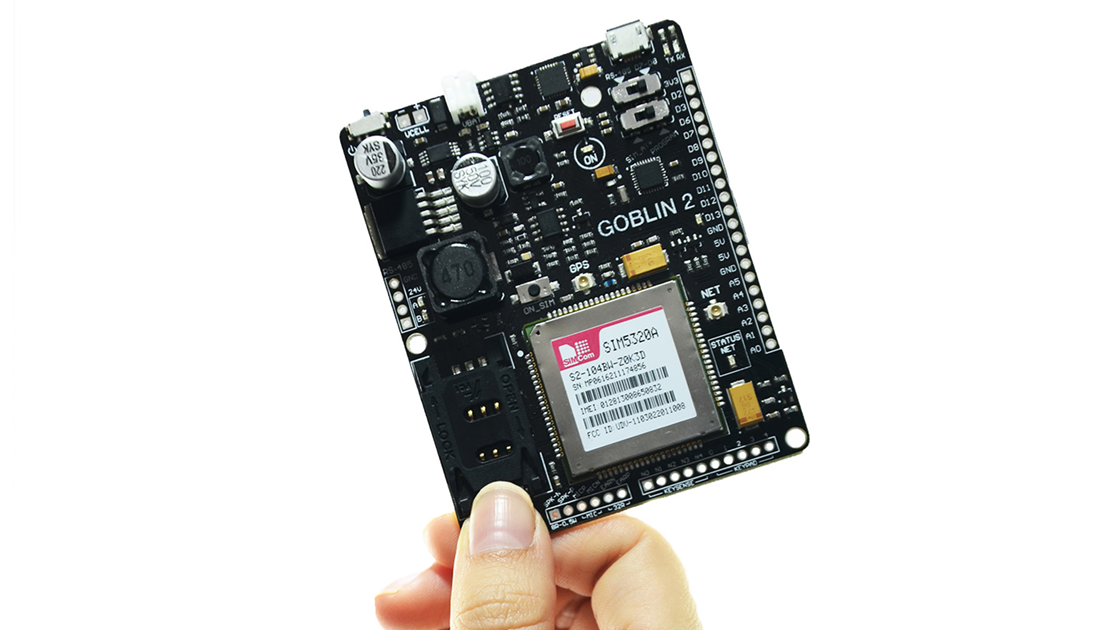
We are happy to announce another new member in the Arduino AtHeart Program! GOBLIN 2 from Mexican startup VERSE Technology is an Arduino-friendly development board with powerful wireless capabilities and broad compatibility with industrial protocols like RS-485.

Designed for both IoT professionals and Makers alike, GOBLIN 2 features an ATmega328P MCU and SIM5320A module at its core, providing dual-band HSDPA and quad-band GSM/GPRS/EDGE connectivity, along with high accuracy 16-channel GPS. The SIM5320A enables GOBLIN 2 to connect with web servers through any cellular network, and includes a header for keyboards, microphones, and speakers. 

GOBLIN 2 is equipped with six analog and 10 digital ports (half of them work as PWM), and offers 24V, 5V and 3.3V voltage outputs. The board is powered by a LiPo battery, which can be charged through micro-USB or solar cell thanks to its built-in battery management system. 

According to VERSE Technology CEO Aaron Benitex:

“We are developing technology to monitor and control the billions of present and future Internet of Things-ready devices. GOBLIN 2 is a board that allows our users to measure parameters like temperature, humidity, position, and others in remote locations. We have designed it in a way that it can easily work with industrial sensors and other applications such as telemetry, weather, GPS systems, and more.”

GOBLIN 2 can be programmed using the Arduino IDE as well as Atmel Studio. Simply upload your code to the board via micro USB, and begin exploring the IoT. Want to learn more? Check out VERSE Technology website

Punch Through's new Arduino board can stay wireless forever (video)

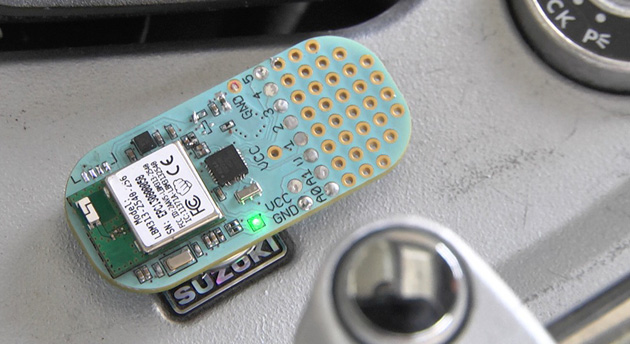
You'll have to plug in a typical Arduino-compatible board at some point in its life, whether it's to add code or just to supply power. Not Punch Through Design's upcoming Cortado, however. The tiny device centers on a custom Bluetooth 4.0 LE module that both enables wireless programming (including through mobile apps) and helps the board last for more than a year on a replaceable watch battery. In fact, the Cortado will already be powered up when you get it -- you can start coding before you've opened the shipping box. It should also be relatively flexible for its size with a built-in accelerometer and the ability to serve as an Apple iBeacon transmitter. Punch Through is crowdfunding the board with hopes of shipping its first units in May. If you're interested, you can pledge $18 to pre-order a Cortado; there's also a helpful promo video after the break.

Filed under: Peripherals

Comments

Via: Make

Source: Punch Through Design

Homebrew 8-bit computer packs in 16 cores, multitasks like a champ

It looks like Jack Eisenmann has done it again. A couple of years after the hobbyist hacker built his first 8-bit computer, he's cobbled together yet another one, but this time with a whopping 16 cores. Appropriately dubbed the DUO Mega, the multicore wonder is made with 16 ATMega328p microcontrollers, each connected to an 8-bit data bus and designed to interpret a custom bytecode that runs the software. Compiled inside a nondescript plastic bin, the machine is also comprised of 16MHz crystal oscillators attached to each of the aforementioned cores, three Arduino UNO boards, 32kb of SRAM, 512kb of flash memory, eight breadboards, an Ethernet shield, a VGA out port and a multitude of components that combine to look like that mess of wires seen above. Because of all that processing power, this relatively primitive machine multitasks beautifully and can perform complicated calculations at an impressive clip. To get a demo of what this marvelous feat of DIY computing can do, have a peek at Eisenmann's video, complete with an 8-bit soundtrack, after the break.

Filed under: Desktops

Comments

Via: Hackaday

Source: DUO Mega