Posts with «arduino hacks» label

Tune In to “Higher Lower”, the Minimal Handheld Electronic Game

[Tommy] has a great write-up about designing and building a minimalistic handheld electronic game called
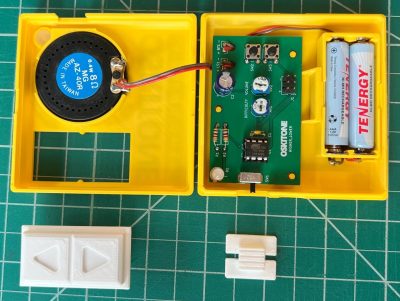
“Higher Lower”. It’s an audio-driven game in which the unit plays two tones and asks the player to choose whether the second tone was higher in pitch, or lower. The game relies on 3D printed components and minimal electronics, limiting player input to two buttons and output to whatever a speaker stuck to an output pin from an ATtiny85 can generate.

Fastener-free enclosure means fewer parts, and on the inside are pots for volume and difficulty. We love the thoughtful little tabs that hold the rocker switch in place during assembly.

Gameplay may be straightforward, but working with so little raises a number of design challenges. How does one best communicate game state (and things like scoring) with audio tones only? What’s the optimal way to generate a random seed when the best source of meaningful, zero-extra-components entropy (timing of player input) happens after the game has already started? What’s the most efficient way to turn a clear glue stick into a bunch of identical little light pipes? [Tommy] goes into great detail for each of these, and more.

In addition to the hardware and enclosure design, [Tommy] has tried new things on the software end of things. He found that using tools intended to develop for the Arduboy DIY handheld console along with a hardware emulator made for a very tight feedback loop during development. Being able to work on the software side without actually needing the hardware and chip programmer at hand was also flexible and convenient.

We’ve seen [Tommy]’s work before about his synth kits, and as usual his observations and shared insights about bringing an idea from concept to kit-worthy product are absolutely worth a read.

You can find all the design files on the GitHub repository, but Higher Lower is also available as a reasonably-priced kit with great documentation suitable for anyone with an interest. Watch it in action in the video below.

Hack a Day 04 Jun 12:00

Look to the Sky With This Simple Plane Tracker

Do you ever get tired of stressing your neck looking for planes in the sky? Worry not! Here is a neat and cheap Arduino/Ras Pi project to keep your neck sore free! [BANK ANGLE] presents a wonderfully simple plane tracking system using an affordable camera and basic microcontrollers.

The bulk of the system relies on a cheap rotating security camera that gets dissected to reveal its internals. Here stepper control wires can be found and connected to the control boards required to allow an Arduino nano to tell the motors when and where to spin. Of course, the camera system doesn’t just look everywhere until it finds a plane, a Raspberry Pi takes in data from local ADS-B data to know where a nearby plane is.

After that, all that’s left is a nifty overlay to make the professional look. Combining all these creates a surprisingly capable system that gives information on the aircraft’s azimuth, elevation, and distance.

If you want to try your hand at making your own version of [BLANK ANGLE]’s tracker, check out his GitHub page. Of course, tracking planes gets boring after a while so why not try tracking something higher with this open-source star tracker?

Thank you Israel Brunini for the tip.

Speed Up Arduino with Clever Coding

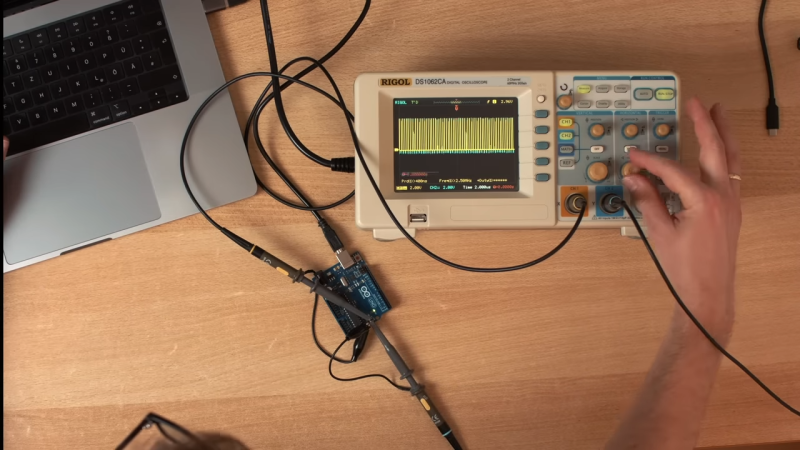
We love Arduino here at Hackaday; they’ve probably done more to make embedded programming accessible to more people than anything else in the history of the field. One thing the Arduino ecosystem is rarely praised for is its speed. That’s where [Playduino]  comes in, with his video (embedded below) that promises to make everyone’s favourite microcontroller run 50x faster.

You might be expecting an unstable overclocking setup, with swapped crystals, tweaked voltages and a hefty heat sink, but no! This is stock hardware. The 50x speedup comes from one simple hack: don’t use digitalWrite();

If you aren’t familiar, the digitalWrite() function is one of the key functions Arduino gives you to operate its boards– specify the pin and the value (high or low) to drive it. It’s very easy, but it’s also very slow. [Playduino] takes a moment to show just how much is going on under the hood when you call digitalWrite(), and shows you what you can do instead if you have a need for speed. (Hint: there’s no Arduino-provided code involved; hardware registers and the __asm keyword show up.)

If you learned embedded programming in an earlier era, this will probably seem glaringly obvious. If you, like so many of us, got started inside of the Arduino ecosystem, these closer-to-the-metal programming techniques could prove useful tools in your quiver. Big thanks to [Stephan Walters] for the tip.

Of course if you prefer to speed things up by hardware rather than software, you can overclock an Arduino– with liquid nitrogen, even.


Taming the Wobble: An Arduino Self-Balancing Bot

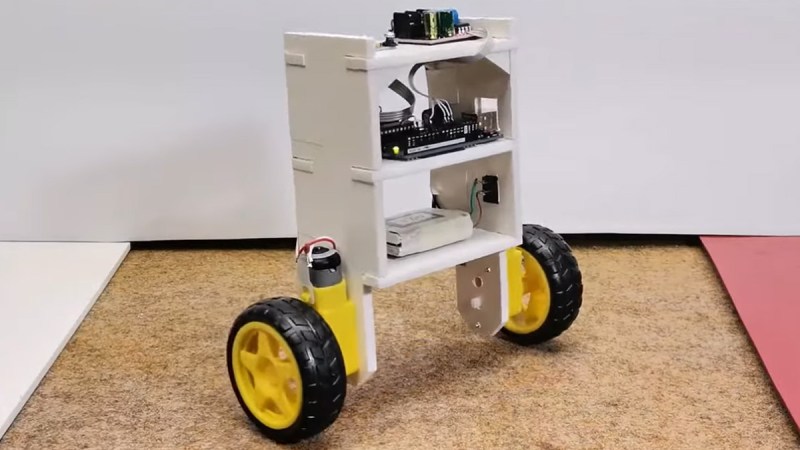
Getting a robot to stand on two wheels without tipping over involves a challenging dance with the laws of physics. Self-balancing robots are a great way to get into control systems, sensor fusion, and embedded programming. This build by [mircemk] shows how to make one with just a few common components, an Arduino, and a bit of patience fine-tuning the PID controller.

At the heart of the bot is the MPU6050 – a combo accelerometer/gyroscope sensor that keeps track of tilt and movement. An Arduino Uno takes this data, runs it through a PID loop, and commands an L298N motor driver to adjust the speed and direction of two DC motors. The power comes from two Li-ion batteries feeding everything with enough juice to keep it upright. The rest of the magic lies in the tuning.

PID (Proportional-Integral-Derivative) control is what makes the robot stay balanced. Kp (proportional gain) determines how aggressively the motors respond to tilting. Kd (derivative gain) dampens oscillations, and Ki (integral gain) helps correct slow drifts. Set them wrong, and your bot either wobbles like a confused penguin or falls flat on its face. A good trick is to start with only Kp, then slowly add Kd and Ki until it stabilizes. Then don’t forget to calibrate your MPU6050; each sensor has unique offsets that need to be compensated in the code.

Once dialed in, the result is a robot that looks like it defies gravity. Whether you’re hacking it for fun, turning it into a segway-like ride, or using it as a learning tool, a balancing bot is a great way to sharpen your control system skills. For more inspiration, check out this earlier attempt from 2022, or these self-balancing robots (one with a little work) from a year before that. You can read up on [mircemk]’s project details here.

2024 Business Card Contest: A Game for Two

If you want to make a good first impression on someone, it seems like the longer you can keep them talking, the better. After all, if they want to keep talking, that’s a pretty good sign that even if you don’t become business partners, you might end up friends. What better way to make an acquaintance than over a friendly game of tic-tac-toe?

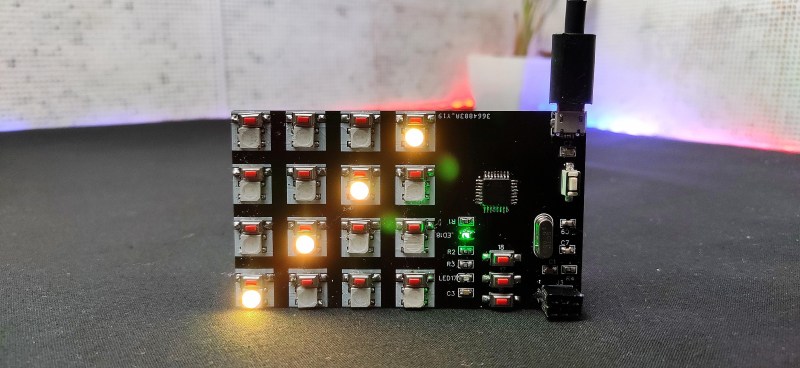
This one will probably take them by surprise, being a 4×4 matrix rather than the usual 3×3, but that just makes it more interesting. The front of the card has all the usual details, and the back is a field of LEDs and micro switches. Instead of using X and O, [Edison Science Corner] is using colors — green for player one, and red for player two. Since playing requires the taking of turns, the microcontroller lights up green and red with alternating single-button presses.

Speaking of, the brains of this operation is an ATMega328P-AU programmed with Arduino. If you’d like to make your own tic-tac-toe business card, the schematic, BOM, and code are all available. Be sure to check out the build and demo video after the break.

Custom Dog Door Prevents Culinary Atrocities

Riley, an 8 lb pug, has more beauty than brains, and a palate as unrefined as crude oil. While we hate criticizing others’ interests and tastes, his penchant for eating cat poop needed to stop. After a thorough exploration of a variety of options, including cat food additives that make its excrement taste worse (HOW? WHY? Clearly taste wasn’t the issue!), automatic litter boxes that stow the secretions, and pet doors that authenticate access to the room with the litter box, [Science Buddies] eventually settled on a solution that was amenable to all members of the family.

The trick was in creating a door mechanism with a blacklist of sorts rather than a whitelist. As the cat didn’t like to push the door open itself, the solution needed to have the pet door open by default. A magnet on Riley’s collar would trip a sensor attached to an Arduino that would control servos to swing the door shut immediately if he attempted to access the defecated delights. Of course safety was a consideration with the door swinging in Riley’s face.

We’ve covered a few pet screeners, including one for the same purpose that used IR sensors (but a much bigger dog also named Riley), and a flock of solutions for chickens. We’ve also seen [Science Buddies] in previous posts, so they’re not on the tips line blacklist.

Arduino Turned Into Something Kinda Like A Pager

Video may have killed the radio star, but cell phones and smart phones all but killed the pager. They still exist, of course, but only in very niche applications. [João Santos] wanted a pager-like experience for himself, though, so he enlisted an Arduino and got to work. Watch a video of the system working below.

The build uses an Arduino Uno to drive a simple HD44780 LCD display with 16 characters each across two lines of text. It’s hooked up to a Wemos D1, which uses its WiFi connection to get online. To this end, it’s capable of talking to a web application which allows users to enter text messages. It receives these messages, passes them to the Arduino Uno over I2C, and then the Uno shuttles the message to the display. It’s overkill, but [João] just found it quicker to get everything up and running via this route.

Those who want to message [João] via the system can head to a website that runs on the OutSystems platform. There, they can enter their name and message, and it will be sent to the pager-like device for display.

It’s a fun little thing, and it makes us wonder if pagers could make a comeback. Maybe simple devices could work in a similar way to Sidewalk or Apple AirTags, communicating via a low-power network made up of smartphones in the local area. We’ve seen something similar done with LoRa. If you happen to whip up something along those lines, don’t hesitate to let us know!

Hack a Day 17 Mar 06:00

Don’t Panic: a Cooperative Bomb Defusing Game

[Heath Paddock] wanted to confound his friends with a game that mimics an escape room in a box. About six months after starting, he had this glorious thing completed. It’s a hardware version of a game called Keep Talking and Nobody Explodes where players have five minutes to defuse a suitcase bomb. This implementation requires at least two players, one with the box-bomb itself, and one who holds all the knowledge but can’t see the box-bomb to defuse it.

The wiring of the Mastermind module.

[Heath]’s version has twice as many modules as the original game, each hand-wired one driven by an Arduino. One of the modules is an LED maze. There are two green anchor LEDs in one of six configurations, and and blue and a red LED.

The object is to move the blue LED next to the red one without touching any walls. Of course, the box-holder can’t see the walls and must describe the configuration of the anchor LEDs to their partner in order to get started.

All of the modules are quite different, which likely makes for an extremely fun and challenging five minutes. [Heath] reports that getting inter-module communication down was a long road. Eventually, [Heath] settled on a mesh network configuration and connected everything in a big loop. Be sure to check out the walk-through video after the break.

This isn’t the first time we’ve seen a hardware implementation of this game. Here’s one that uses a Raspberry Pi.

Arduino, Virtually

While simulating an Arduino isn’t a new idea, a recent project by [LRusso] provides an open source JavaScript simulator that runs in your browser. You can try it out live or host it yourself if you prefer.

The simulator looks much like the standard IDE, so there isn’t much to learn. You can select from several targets, including a UNO R3, a MEGA 1280, a MEGA 2560, or a NANO V3. At the bottom of the screen, you’ll see the correct number of digital pins, analog pins, and the serial monitor. The code is relatively new, and we noticed that the digital and output pins seem to work only for outputs. There is no way to modify any of the values from the user interface. You can, however, enter things into the serial monitor.

You can run a canned demo that uses digital and analog output. There is also another sample that uses the serial port. Unlike some other simulators, you can’t really add much external circuitry but, for some purposes, that isn’t a problem.

If you are looking for more, there is Simulide, which is also free. Falstad can do mixed signal simulations with Arduino code. There’s also Wokwi, which we’ve covered a few times before.

Hack a Day 17 Jan 19:30

Remote-Control Kinetic Sand Table Uses a Single Arduino

There’s nothing fun about a Sisyphean task unless you’re watching one being carried out by someone or something else. In that case, it can be mesmerizing like this Arduino-driven kinetic sand table.

What you can’t see. Image via [thang010146] on YouTube
Like many of these builds, it all started with an ordinary coffee table from the hacker’s favorite furnitüre store. [NewsonsElectronics] opened it up and added a 3mm-thick board to hold the sand and another to hold the rails and magnets.

After designing some pieces to connect the rails and pulleys together, [NewsonsElectronics] let the laser cutter loose on some more 3mm stock. A pair of stepper motors connected to a CNC shield do all of the work, driving around a stack of magnets that causes the ball bearing to trudge beautifully through the sand.

Be sure to check out the videos after the break. The first is a nice demonstration, and the second is the actual build video. In the third video, [NewsonsElectronics] explains how they could write the world’s smallest GRBL code to swing this with a single Arduino. Hint: it involves removing unnecessary data from the g-code generated by Sandify.

Don’t have a laser cutter? Here’s a sand table built from 3D printer parts.