Posts with «arduino pro micro» label

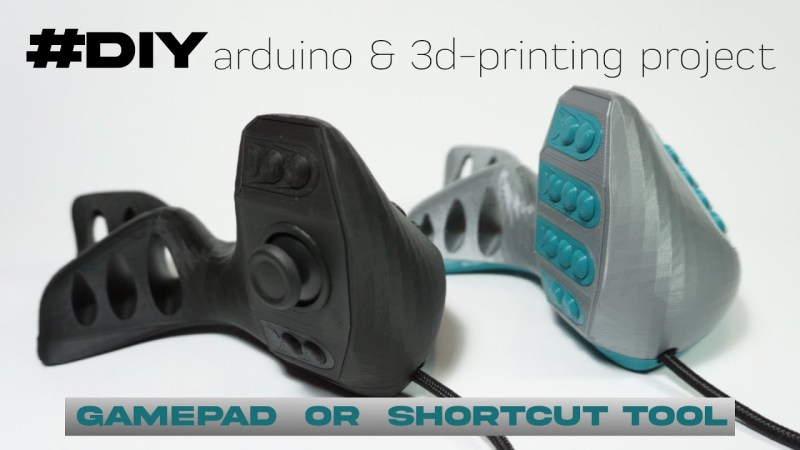
Custom Mouse-Making: Clay Is the Way

For something that many of us handle all day long, it sure would be nice if mice came in more sizes and shapes, wouldn’t it? Until that day, we’ll just have to find something passable or else design and build a custom-shaped mouse from scratch like [Ben Makes Everything] did.

First, [Ben] played around with some modelling clay until he had a shape he was happy with, then took a bunch of pictures of it mounted on a piece of wood for easy manipulation and used photogrammetry to scan it in for printing after cleaning it up in Blender. About six versions later, he had the final one and was ready to move on to electronics.

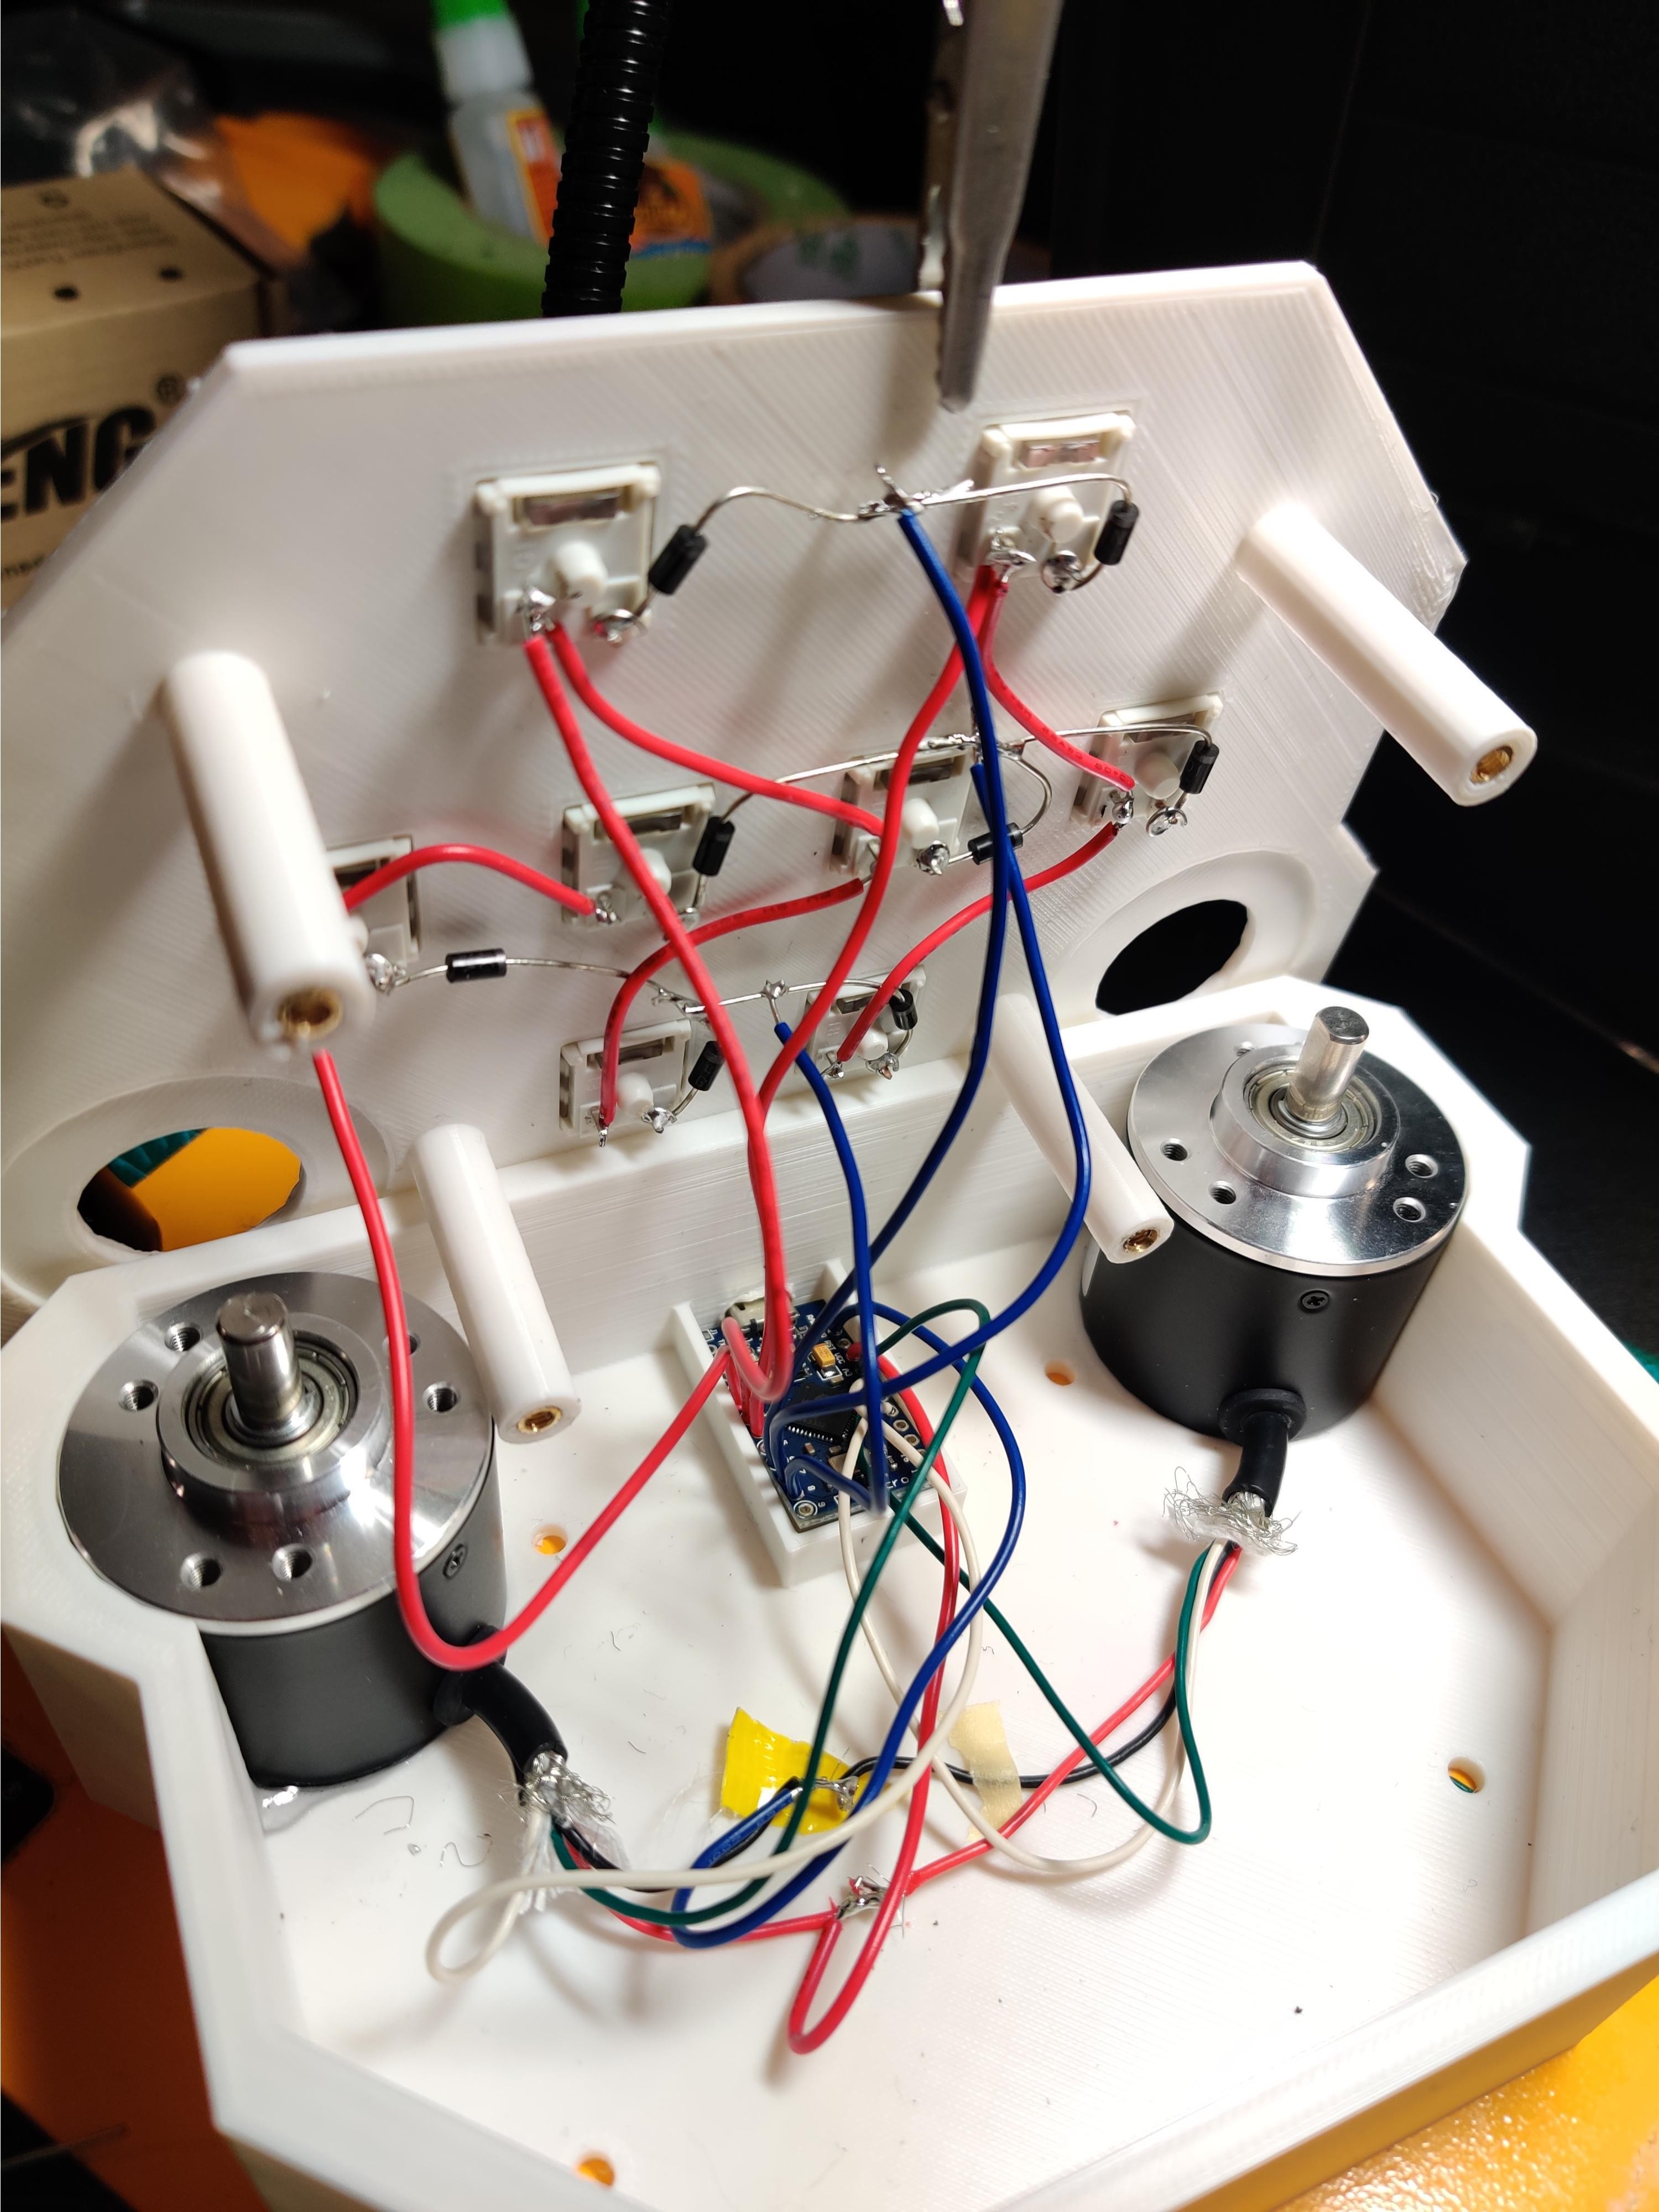
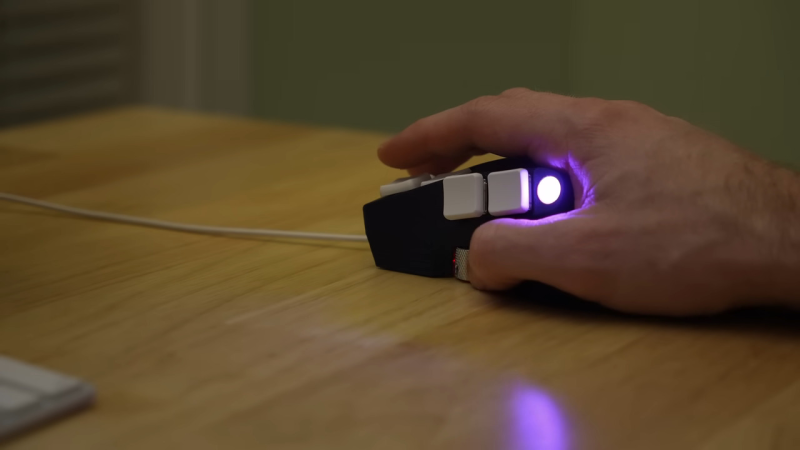
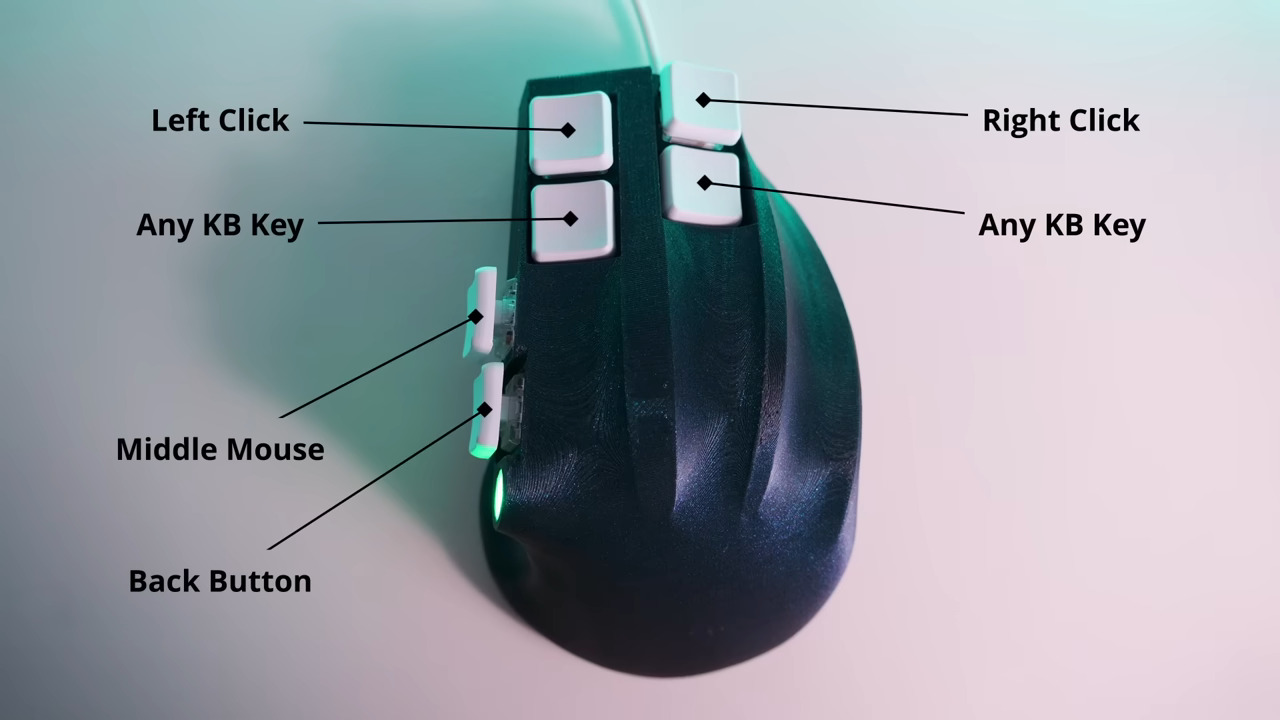
That’s right, this isn’t just mouse guts in an ergonomic package. Inside is Arduino Pro Micro and a PMW 3389 optical sensor on a breakout board. [Ben] was going to use flexible 3D printed panels as mouse buttons, but then had an epiphany — why not use keyboard switches and keycaps instead? He also figured he could have two buttons per finger if he wanted, so he went with Kailh reds for the fingers and and whites in the thumb.

Speaking of the thumb, there was no room for a mouse wheel in between those comparatively huge switches, so he moved it to the the side to be thumb-operated. [Ben] got everything working, and after all this, decided to make it wireless. So he switched to an Adafruit Feather S3 and designed his first PCB for both versions. Ultimately, he found that the wireless version is kind of unreliable, so he is sticking with the wired one for now.

Via Hackster

CAT Is Not Your Average Meow-cropad

Are you completely over the idea of the keyboard in any flattish form and looking for something completely different for inputting your data? Or do you want a mega macropad for 3D design, GIMP or Inkscape work, or to use while relaxing with a nice first-person shooter? Then this ergonomic, double-fistable keyboard/controller mashup named CAT may be what you’re looking for.

Inside each of these slinky felines is pretty much what you’d expect to find — 25 or so switches and an Arduino Pro Micro. Interestingly enough, the switches are all lever-action and not push buttons. There are two breeds of CAT available to build or buy: one has 25 buttons, and the other has a joystick or trackball on the thumb between two upper and two lower buttons. You could have one type for each hand!

More information is available on the Lynx Workshop site, which is where you’ll also find tutorials and instructions for everything from the 3D printing to the electronics to the assembly and coding. There is even a bonus 3D modeling tutorial. Don’t want to invest the time to make your own CAT? These kitties are also available for pre-order. Claw past the break to check them out in action.

Looking for something with regular keyswitches? Oh, we have plenty of those.

Meet the Marvelous Macro Music Maker

Do you kind of want a macropad, but aren’t sure that you would use it? Hackaday alum [Jeremy Cook] is now making and selling the JC Pro Macro on Tindie, which is exactly what it sounds like — a Pro Micro-based macro keypad with an OLED screen and a rotary encoder. In the video below, [Jeremy] shows how he made it into a music maker by adding a speaker and a small solenoid that does percussion, all while retaining the original macro pad functionality.

[Jeremy]’s original idea for a drum was to have a servo seesawing a chopstick back and forth on the table as one might nervously twiddle a pencil. That didn’t work out so well, so he switched to the solenoid and printed a thing to hold it upright, and we absolutely love it. The drum is controlled with the rotary encoder: push to turn the beat on or off and crank it to change the BPM.

To make it easier to connect up the solenoid and speaker, [Jeremy] had a little I²C helper board fabricated. There’s one SVG connection and another with power and ground swapped in the event it is needed. If you’re interested in the JC Pro Macro, you can pick it up in various forms over on Tindie. Of course, you might want to wait for version 2, which is coming to Kickstarter in October.

There are many ways to make a macro keyboard. Here’s one that also takes gesture input.

Sparkpad Sparks Joy for Streamers

The best streamers keep their audience constantly engaged. They might be making quips and doing the funny voices that everyone expects them to do, but they’re also busy reading chat messages aloud and responding, managing different scenes and transitions, and so on. Many streamers use a type of macro keyboard called a stream deck to greatly improve the experience of juggling all those broadcasting balls.

Sure, there are dedicated commercial versions, but they’re kind of expensive. And what’s the fun in that, anyway? A stream deck is a great candidate for DIY because you can highly personalize the one you make yourself. Give it clicky switches, if that’s what your ears and fingers want. Or don’t. It’s your macro keyboard, after all.

[Patrick Thomas] and [James Wood] teamed up to build the perfect stream deck for [James]’ Twitch channel. We like the way they went about it, which was to start by assessing a macro pad kit and use what they learned from building and testing it to design their ideal stream deck. The current version supports both the Arduino Pro Micro and the ESP32. It has twelve key switches, a rotary encoder, an LED bar graph, and an OLED screen for choosing between the eight different color schemes.

If you’d rather have dynamic screens instead of cool keycaps, you can do it cheaper by making non-touch screens actuate momentaries.

The HackadayPrize2021 is Sponsored by:

Turning GameCube & N64 Pads Into MIDI Controllers

It’s fair to say that the Nintendo 64 and GameCube both had the most unique controllers of their respective console generations. The latter’s gamepads are still in high demand today as the Smash Bros. community continues to favor its traditional control scheme. However, both controllers can easily be repurposed for musical means, thanks to work by [po8aster].

The project comes in two forms – the GC MIDI Controller and the N64 MIDI Controller, respectively. Each uses an Arduino Pro Micro to run the show, a logic level converter, and [NicoHood’s] Nintendo library to communicate with the controllers. From there, controller inputs are mapped to MIDI signals, and pumped out over traditional or USB MIDI.

Both versions come complete with a synth mode and drum mode, in order to allow the user to effectively play melodies or percussion. There’s also a special mapping for playing drums using the Donkey Konga Bongo controller with the GameCube version. For those eager to buy a working unit rather than building their own, they’re available for purchase on [po8aster’s] website.

It’s a fun repurposing of video game hardware to musical ends, and we’re sure there’s a few chiptune bands out there that would love to perform with such a setup. We’ve seen other great MIDI hacks on Nintendo hardware before, from the circuit-bent SNES visualizer to the MIDI synthesizer Game Boy Advance. Video after the break.

If you wanna be a cool nerd who uses video game controllers to play music, I’m doing a birthday sale, 20% off all the things!

Code/Link RTs appreciated pic.twitter.com/GqBpGUFWLe

— Po8aster (@Po8aster) April 30, 2021

[Thanks to Chris D for the tip!]

Redox Redux: Split Keeb Gets a Num Pad

What’s the worst thing about split keyboards? If they have one general fault, it’s that almost none of them have a number pad. If you can fly on that thing, but struggle with using the top row numbers, you will miss the num pad terribly, trust us. So what’s the answer? Design your own keyboard, of course. [ToasterFuel] had enough bread lying around to cook up a little experiment for his first keyboard build, and we think the result is well done, which is kind of rare for first keebs.

This design is based on the Redox, itself a remix of the ErgoDox that aims to address the common complaints about the latter — it’s just too darn big, and the thumb clusters are almost unusable. We love how customized this layout is, with its sprinkling of F keys and Escape in the Caps Lock position. Under those keycaps you’ll find 100% Cherry MX greens, so [ToasterFuel] must have pretty strong fingers to pound those super clackers.

Everything else under the hood is pretty standard, with a pair of Arduino Pro Micros running the show. [ToasterFuel] had to wire up the whole thing by hand because of the num pad, and we’re impressed that he built this entire project in just three weeks. And that includes writing his own firmware!

Already found or built a split you love, but still miss the num pad? Why not build one to match your keyboard?

Go Ape with a Banana Macropad

The super fun thing about macro pads is that they’re inherently ultra-personalized, so why not have fun with them? This appealing little keeb may have been a joke originally, but [dapperrogue] makes a valid point among a bunch of banana-related puns on the project page — the shape makes it quite the ergonomic little input device.

Inside this open-source banana is that perennial favorite for macro pads, the Arduino Pro Micro, and eight switches that are wired up directly to input pins. We’re not sure what flavor of Cherry those switches are, hopefully brown or green, but we suddenly wish Cherry made yellow switches. If you want to build your own, the STLs and code are available, and we know for a fact that other switch purveyors do in fact make yellow-stemmed switches.

Contrary to what the BOM says, we believe the sticker is mandatory because it just makes the build — we imagine there would be fewer double takes without it. Hopefully this fosters future fun keyboard builds from the community, and we can’t wait to sink our teeth into the split version!

There are a bunch of ways to make a macropad, including printing everything but the microcontroller.

Via r/mk and KBD

Dynamic Macro Keyboard Controls All the Things

Keyboard shortcuts are great. Even so, a person can only be expected to remember so many shortcuts and hit them accurately while giving a presentation over Zoom. [Sebastian] needed a good set of of shortcuts for OBS and decided to make a macro keyboard to help out. By the time he was finished, [Sebastian] had macro’d all the things and built a beautiful and smart peripheral that anyone with a pulse would likely love to have gracing their desk.

The design started with OBS, but this slick little keyboard turned into a system-wide assistant. It assigns the eight keys dynamically based on the program that has focus, and even updates the icon to show changes like the microphone status.

This is done with a Python script on the PC that monitors the running programs and updates the macro keeb accordingly using a serial protocol that [Sebastian] wrote. Thanks to the flexibility of this design, [Sebastian] can even use it to control the office light over MQTT and make the CO2 monitor send a color-coded warning to the jog wheel when there’s trouble in the air.

This project is wide open with fabulous documentation, and [Sebastian] is eager to see what improvements and alternative enclosure materials people come up with. Be sure to check out the walk-through/build video after the break.

Inspired to make your own, but want to start smaller? There are plenty to admire around here.

Rhythm Game Controller Can’t Be Beat

There’s this whole class of vertically scrolling rhythm games that take both hands and look really fun to play, albeit hard on the joints. You can buy specialized controllers for them, but they’re ridiculously expensive for what they are — just a handful of switches and two knobs. It’s exactly the kind of thing you should build to your taste for far less money.

Inspired by a pocket version of the Voltex controller that is also pretty darned expensive, [OmniSaiRen] set out to make their own on the cheap by building an awesome little macro keyboard that’s smaller and easier to use than the specialized controller. Inside there’s an Arduino Pro Micro taking input from eight Cherry MX switches and two optical encoders. The game treats the encoders as vertical and horizontal mouse movements, so [OmniSaiRen]’s code scans the encoders for their positions.

[OmniSaiRen] wrote their own matrix code and says it’s ugly, but it works well enough to play the game. What more can you ask for? A cool sticker to go on the top? Done. It’s too cold outside to paint, anyway. If it’s a one-handed game pad you need, check out this sweet little thing.

Via r/duino

DIY Ergonomic Game Pad Lends a Hand

Does it seem like everyone you game against can do everything faster than you? Chances are good that they have some kind of dedicated game pad or macro pad with a bunch of custom shortcuts. If you can’t beat ’em, join ’em, but why buy one when you can build your own? [lordofthedum] did the smart thing when they built their own version of the Azeron game pad, which is an outrageously expensive but ergonomic and cool-looking macro pad that reminds us of the DataHand ergonomic keyboard.

Each finger hovers over a C-shaped group of three switches — one actuates by moving the finger forward, another by moving backward, and the third by pushing down like a regular button. The thumb gets a 4-way joystick. All of these inputs are wired up to an Arduino Pro Micro, which has sort of become the standard for DIY macro pads and keyboards. We think this looks fantastic, and really raises the bar for DIY macro pads.

Need a few more keys, but still want a thumb joystick? Check out the smooth and sweet Sherbet game pad.