Posts with «arduino pro micro» label

Cybercube Makes a Great Computing Companion

Oh, sure, there have been a few cube-shaped PCs over the years, like the G4 and the NeXT cube. But can they really be called cubes when the display and the inputs were all external? We think not.
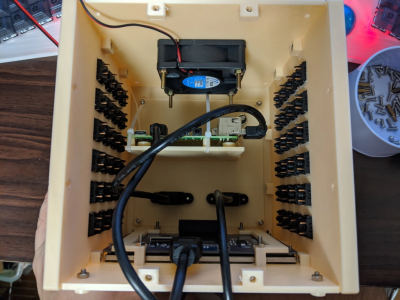
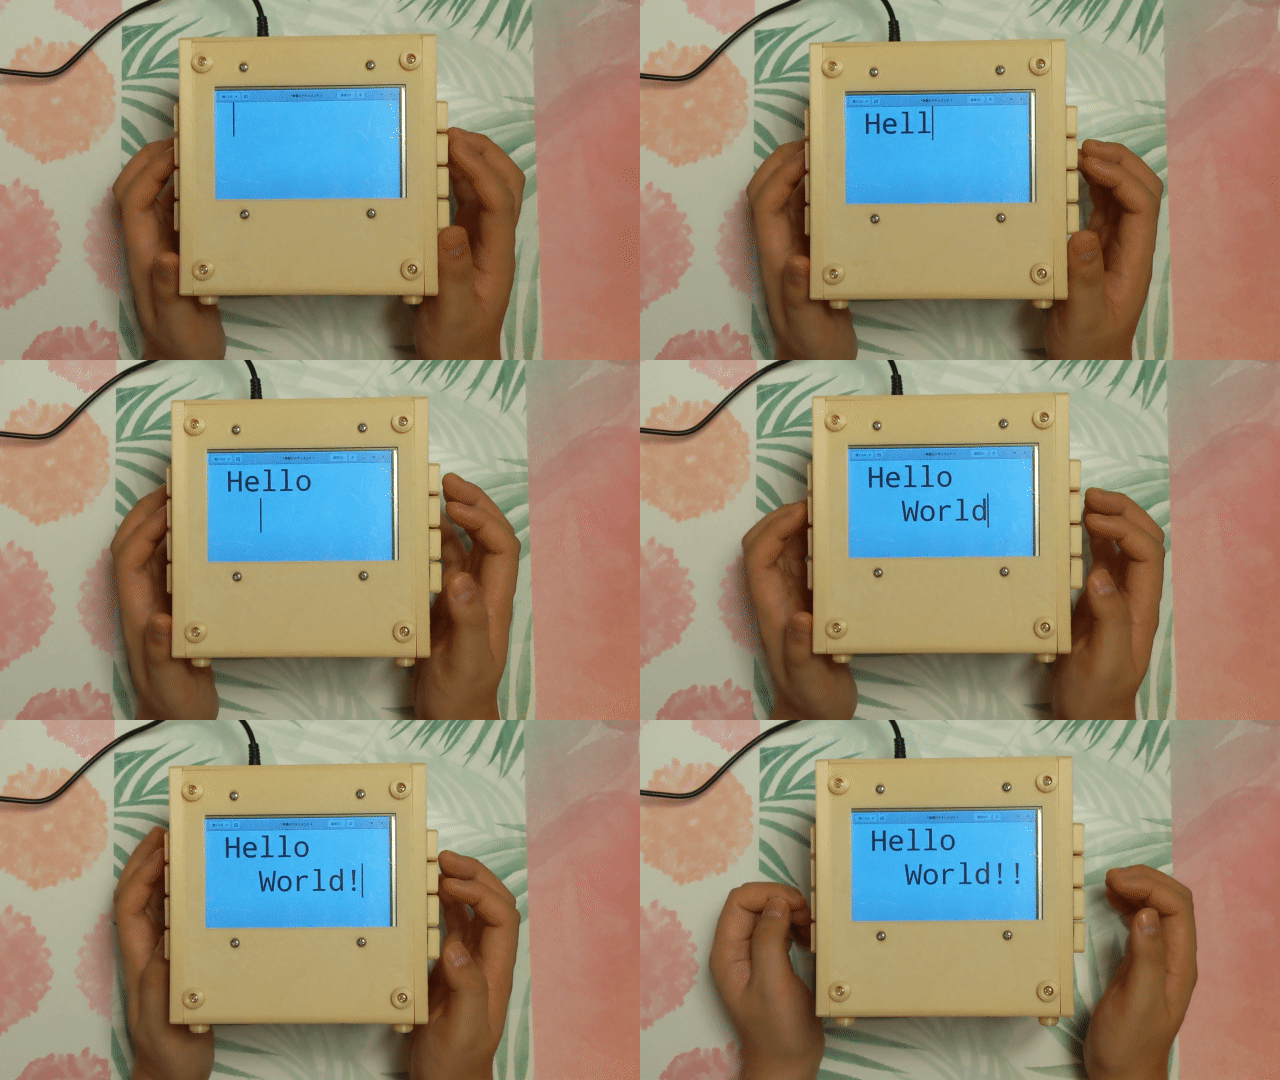
[ikeji] doesn’t think so either, and has created a cube PC that puts them all to shame. Every input and output is within the cube, including our favorite part — the 48-key ortholinear keyboard, which covers two sides of the cube and must be typed on vertically. (If you’ve ever had wrist pain from typing, you’ll understand why anyone would want to do that.) You can see a gif of [ikeji] typing on it after the break.

Inside the 3D printed cube is a Raspberry Pi 4 and a 5″ LCD. There’s also an Arduino Pro Micro for the keyboard matrix, which is really two 4×6 matrices — one for each half. There’s a 6cm fan to keep things cool, and one panel is devoted to a grille for heat output. Another panel is devoted to vertically mounting the microcontrollers and extending the USB ports.
Don’t type on me or my son ever again.

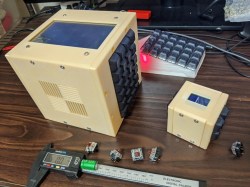
When we first looked at this project, we thought the tiny cube was a companion macro pad that could be stored inside the main cube. It’s really a test cube for trying everything out, which we think is a great idea and does not preclude its use as a macro pad one of these days. [ikeji] already has plenty of plans for the future, like cassette support, an internal printer, and a battery, among other things. We can’t wait to see the next iteration.

We love a good cyberdeck around here, and it’s interesting to see all the things people are using them for. Here’s a cyberduck that quacks in Python and CircuitPython.
Hacker Driven to Build R/C Forza Controller

Generic video game console controllers have certainly gotten better and more ergonomic since the hard corners of the Atari joystick. As beautiful and engrossing as games have become, the controller is still the least engaging aspect. Why race your sweet fleet of whips with an ordinary controller when you could pretend they’re all R/C cars?

[Dave] found an affordable 4-channel R/C controller in the Bezos Barn and did just that. It took some modifications to make it work, like making a daughter board to turn the thumb grip input from a toggle button to a momentary and figuring out what to do with the three-way slider switch, but it looks like a blast to use.

The controller comes in a 6-channel version with two pots on the top. Both versions have the same enclosure and PCB, so [Dave] already had the placement molded out for him when he decided to install a pair of momentary buttons up there. These change roles based on the three-way slider position, which switches between race mode, menu mode, and extras mode.

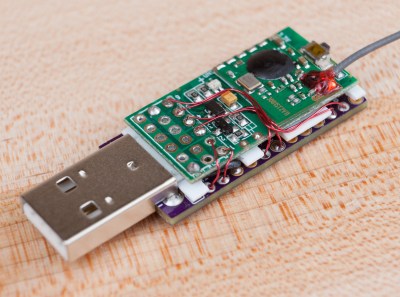
We love the way [Dave] turned the original receiver into a USB dongle that emulates an Xbox 360 controller — he made a DIY Arduino Pro Micro with a male USB-A, stripped down the receiver board, and wired them together. There’s an entire separate blog post about that, and everything else you’d need to make your own R/C controller is on GitHub. Check out the demo and overview of the controls after the break.

[Dave] is no stranger to making game controllers — we featured his DJ Hero controller modified to play Spin Rhythm XD a few months ago.

Via r/duino

Open Source Stream Deck Does it Without Touch Screens

[Adam Welch] has built macro pads in the past out of pre-fab key matrices and handfuls of Cherry MX clones. But all the stickers and custom keycaps in the world wouldn’t make those macro pads as versatile as a stream deck — those visual shortcut panels with tiny touchscreens for each button that some streamers use to change A/V settings or switch between applications.

Let’s face it, stream decks are expensive. But 0.96″ OLED displays are not, and neither are SMD tactile buttons. Why not imitate a screen deck on the cheap by making it so the screens actuate buttons behind them? [Adam] based this baby on the clever design of [Kilian Gosewisch]’s FreeDeck, and they ended up working together to improve it with a dedicated PCB.

The brains of the operation is an Arduino Pro Micro, which addresses each screen individually via two 74HC4051 mux ICs. Thanks to an SD card module, there’s no need to flash the ‘duino every time you want to change a shortcut or its picture. Even if this deck doesn’t hold up forever, it won’t break the bank to build another one. Poke past the break for the build video, which has all the links you’d need to make your own, including a handy configurator.

There’s more than one way to do a visual macro pad. Here’s one that uses a single screen and splits it Brady Bunch style to match the matrix.

Thanks for the tip, [arturo182]!

Switch Tester Servo-Slaps Them ’til they Fail

[James] is designing an open-source 3D printed keyboard switch, with the end goal of building a keyboard with as many printed parts as possible. Since keyswitches are meant to be pressed quite often, the DIY switches ought to be tested just as rigorously as their commercial counterparts are at the factory. Maybe even more so.

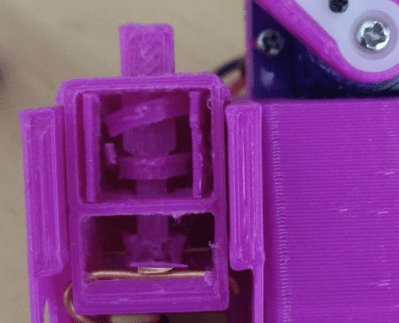
The broken spring after 13,000+ automated boings.

Rather than wear out his fingers with millions of actuations, [James] built a robot to test switches until they fail. All he has to do is plug a switch in, and the servo-driven finger slowly presses the slider down until the contacts close, which lights the LED.

The system waits 100ms for the contacts to stop any tiny vibrations before releasing the slider. That Arduino on the side tracks the contact and release points and sends them to the PC to be graphed. If the switch fails to actuate or release, the tester stops altogether.

We love that this auto-tester works just fine for commercial switches, too — the bit that holds the switch is separate and attaches with screws, so you could have one for every footprint variant. [James] recently did his first test of a printed switch and it survived an astonishing 13,907 presses before the printed coil spring snapped.

One could argue that this doubles as a servo tester. If you want a dedicated device for that, this one can test up to sixteen at a time.

Via @Microchip_Makes

Software Shortcut Keyboard Registers Many Macros

[FabroLabs Technologies] is an industrial designer who uses several creative-type software programs in a given day. Unfortunately, they all have slightly different shortcut schemes, and trying to remember all the different modifiers is a waste of time better spent elsewhere.

This lovely little macro keyboard is every bit as useful as it is cool looking. Spinning the rotary encoder cycles through a menu of programs on the 16×2 LCD, and the key map just updates automatically for the chosen program. At the heart of this build is an Arduino Pro Micro and 20 of the loudest key switches ever made — Cherry MX blues. We like that it manages to look like toy cash register and a serious peripheral all at once — it probably has something to do with those way-cool circular keycaps that were made on a resin printer.

We’re glad that [FabroLabs] laid down such a comprehensive and open build guide during the process of making this macro keyboard. The average hacker can learn a lot from industrial designers who show their work. Remember the time [Eric Strebel] showed us all how to improve our foam board design game?

Custom Tibia Keyboard For a Leg Up In the Game

[Elite Worm] wrote in to tell us about a cool little keyboard designed to make playing a certain game a whole lot easier. One of the ways you can move your character is with the numpad in directional mode plus Control and Shift, but those are too far apart to drive blindly with one hand. This is all the motivation [Elite Worm] needed to build a custom keyboard with only the essentials.

The keyboard is controlled by an Arduino Pro Micro, which is fairly standard for this type of build — it’s usually that or a Teensy. [Elite Worm] used Cherry MX browns for a nice tactile feel, and added LEDs for a purple-white under-glow. We love the way the printed keycaps turned out, and are impressed because tolerances are notoriously tight for those fruity switch stems.

Starting to think of a few uses for a small custom keypad? This thing is wide open, and [Elite Worm] will even send you the PCB files if you ask nicely. See if you can get past the break without your mouse, and check out the build video while you wait.

Want more flexibility? Just use more switches!

An Arduino Pro Micro With USB-C

USB-C versus USB Micro connectors are turning into one of the holy wars of our time. Rather than be left on the wrong side of the divide [Stefan S] has come up with his own USB-C version of of an Arduino Pro Micro to avoid having to always find a different cable.

Home made Arduinos come in all shapes and sizes from the conventional to the adventurous, and from the pictures it seems that this one is firmly in the former camp. The USB-C is present in connector form alone as the device is only capable of talking at the much slower speed of the ATMEGA32U4 processor, but having the newer connector should at least make cabling more accessible.

This is one of the most practical Arduino clones we’ve ever seen, but one of our other favourites is also a bit impractical.

Arduino Keyboard is Gorgeous Inside and Out

While the vast majority of us are content to plod along with the squishy chiclet keyboards on our laptops, or the cheapest USB membrane keyboard we could find on Amazon, there’s a special breed out there who demand something more. To them, nothing beats a good old-fashioned mechanical keyboard, where each key-press sounds like a footfall of Zeus himself. They are truly the “Chad” of the input device world.

But what if even the most high end of mechanical keyboards doesn’t quench your thirst for spring-loaded perfection? In that case, the only thing left to do is design and build your own. [Matthew Cordier] recently unveiled the custom mechanical keyboard he’s been working on, and to say it’s an elegant piece of engineering is something of an understatement. It may even better inside than it does on the outside.

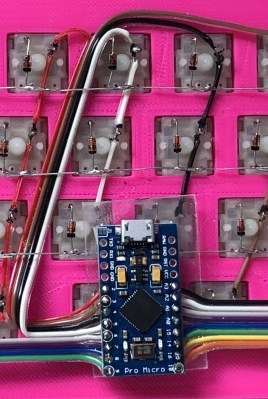
The keyboard, which he is calling z.48, is based around the Arduino Pro Micro running a firmware generated on kbfirmware.com, and features some absolutely fantastic hand-wiring. No PCBs here, just a rainbow assortment of wire and the patience of a Buddhist monk. The particularly attentive reader may notice that [Matthew] used his soldering iron to melt away the insulation on his wires where they meet up with the keys, giving the final wiring job a very clean look.

Speaking of the keys, they are Gateron switches with DSA Hana caps. If none of those words mean anything to you, don’t worry. We’re through the Looking Glass and into the world of the keyboard aficionado now.

Finally, the case itself is printed on a CR-10 with a 0.3 mm nozzle and 0.2 mm layers giving it a very fine finish. At 70% infill, we imagine it’s got a good deal of heft as well. [Matthew] mentions that a production case and a PCB are in the cards for the future as he hopes to do a small commercial run of these boards. In the meantime we can all bask in the glory of what passes for a prototype in his world.

We’ve seen some exceptionally impressive mechanical keyboards over the years, including the occasional oddity like the fully 3D printed one and even one that inexplicably moves around. But this build by [Matthew] has to be one of the most elegant we’ve ever come across.

[Thanks to DarkSim905 for the tip]

This device converts gestures into keystrokes

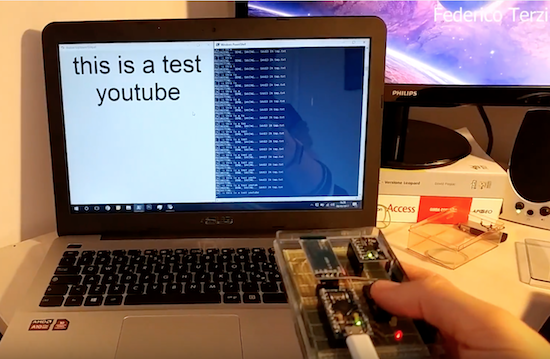
Engineering student Federico Terzi has built an impressive computer interface device reminiscent of a Wiimote.

When talking in person,  you can express meaning using facial expressions, and your hands. Usually this acts to add emphasis to a statement or perhaps to point out a certain object, but what if you could actually type letters based on how your hands move?

Terzi’s aptly named “Gesture Keyboard” does just this, using an Arduino Pro Micro, an MPU-6050 accelerometer, and an HC-06 Bluetooth module for sending signals to his laptop. A Python library using Scikit-learn’s SVM (Support Vector Machine) algorithm then translates the motion readings into characters that appear on the screen.

You can find the code and more information on Terzi’s GitHub page.

Turn an old mixer into a MIDI input fader with Arduino

Using an Arduino as an HID, Evan Kale turned a “gently used” analog mixer into a computer interface.

Older audio equipment may not have the interfaces that you need to make totally electronic music, but they can be very well-built, so are perhaps worth salvaging. In the video below, Kale salvages potentiometers from an old mixer, then hooks them up to a Pro Micro. This allows the Arduino to take these 12 inputs, and output them as a USB MIDI signal.

Along the way, Kale points out a few very important hacking tricks, including that the library may have a printer ready for you to use, and that analog slider pots many times are logarithmic (or close to it) and need to be calibrated. Also, around 5:25 he introduces viewers to analog multiplexers which can give you eight analog inputs at the cost of three digital and one analog pin.

You can check out more of Kale’s Arduino-based hacks on his YouTube channel here!