Posts with «attiny85» label

Mini Ultrasonic Levitation Kit is an Exercise in Sound Minimalist Design
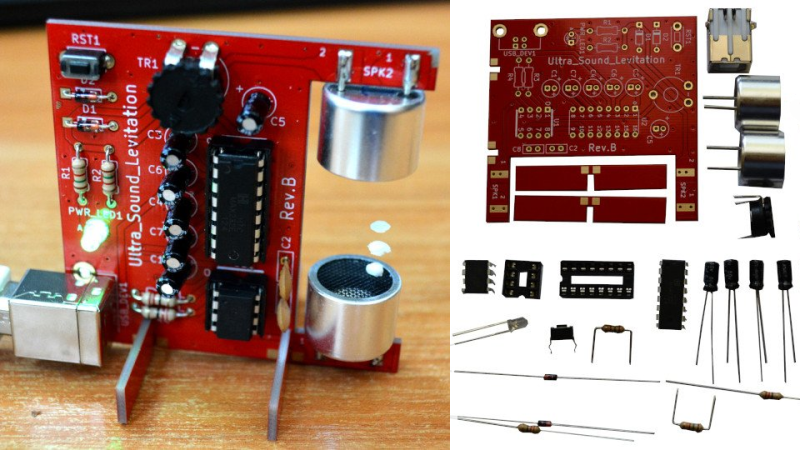
For those that haven’t heard, ultrasonic levitation is a process by which two or more ultrasonic transducers are set opposite to each other and excited in such a way as to create a standing wave between them. The sound is, as the name implies, ultrasonic — so outside the range of human hearing — but strong enough so that the small, light objects can be positioned and held fixed in mid-air where there’s a pressure minimum in the standing wave. [Olimex] has created a small ultrasonic levitation kit that exemplifies this phenomena.

The kit itself is made using through-hole components, with an ATTiny85 as the core microcontroller to drive two TCT40-16T ultrasonic speakers, and a MAX232 to provide a USB interface. Two slotted rectangular PCB pieces that solder connect to the main board, provide a base so that the device stands upright when assembled. The whole device is powered through the USB connection, and the ultrasonic speakers output in the 40KHz range providing enough power to levitate small Styrofoam balls.

The project is, by design, an exercise in minimalism, providing a kit that can be easily assembled, and providing code that can be easily flashed onto the device, examined and modified. All the design files, including the bill of materials, KiCAD schematics, and source code are provided under an open source hardware license to allow for anyone wanting to know how such a project works, or to extend it themselves, ample opportunity. [Olimex] also has the kit for sale for those not wanting to source boards and parts themselves.

We’ve featured ultrasonic levitation devices before, from bare bones system driven by a NE555 to massive phased arrays.

a Customizable Macropad to Make Anyone’s Tail Wag

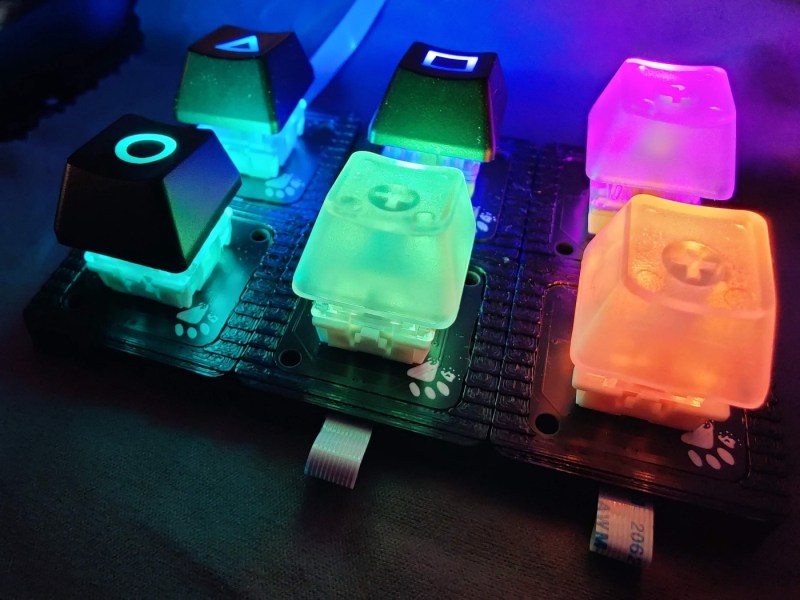
[Gili Yankovitch] has always wanted some kind of macro keypad for all those boss-slaying combos he keeps up the sleeve of his wizard robe while playing WoW. Seventeen years later, he finally threw down the gauntlet and built one. But really, this is an understatement, because Paws is kind of the customizable macropad to end all customizable macropads.

This thing is completely bespoke, and yet cookie cutter at the same time — but we mean that in the best possible way. Paws can be made in any shape or form, and quite easily. How is this even possible, you ask? Well, every single key has its own microcontroller.

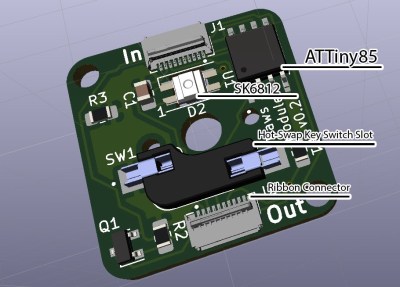
Yep, each key has an ATtiny85 and a cute little ribbon cable, and these form a token ring network that talks to an Arduino, which provides the keyboard interface to the computer. To make things even easier, [Gili] built a simple programming UI that automatically recognizes the configuration and number of keys, and lets the user choose the most important bit of all — the color of the LED.

[Gili] wanted to combine all the skills he’s learned since the worst timeline started in early 2020 — embedded software, CAD, electronics, and PCB design. We’d like to add networking to that list, especially since he figured out a nice workaround for the slowness of I²C and the limitations of communication between the ‘tiny85s and the Arduino. Though [Gili] may have started out with a tall order, he definitely filled it. Want to get your paws on the design files? Just claw your way over to GitHub.

If your customization interests lie more toward what program is in focus, be sure to check out Keybon, which was one of the many awesome winners of our Odd Inputs and Peculiar Peripherals contest.

I2C To The Max With ATtiny

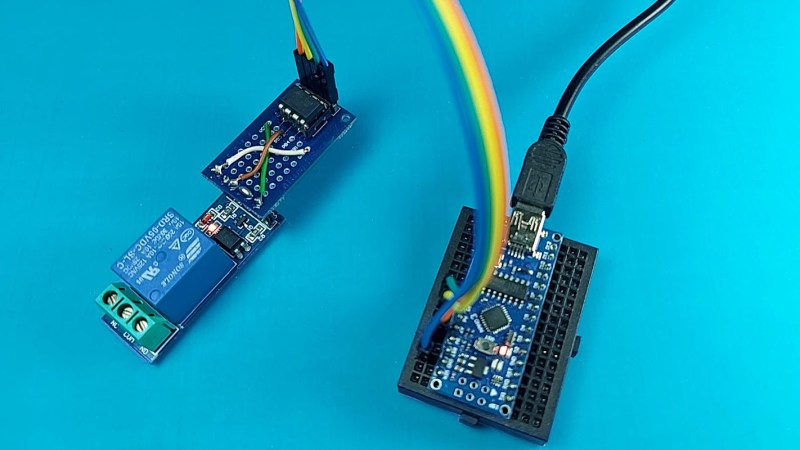
The Arudino is a powerful platform for interfacing with the real world, but it isn’t without limits. One of those hard limits, even for the Arduino MEGA, is a finite number of pins that the microcontroller can use to interface with the real world. If you’re looking to extend the platform’s reach in one of your own projects, though, there are a couple of options available. This project from [Bill] shows us one of those options by using the ATtiny85 to offload some of an Arduino’s tasks using I2C.

I2C has been around since the early 80s as a way for microcontrollers to communicate with each other using a minimum of hardware. All that is needed is to connect the I2C pins of the microcontrollers and provide each with power. This project uses an Arduino as the controller and an arbitrary number of smaller ATtiny85 microcontrollers as targets. Communicating with the smaller device allows the Arduino to focus on more processor-intensive tasks while giving the simpler tasks to the ATtiny. It also greatly simplifies wiring for projects that may be distributed across a distance. [Bill] also standardizes the build with a custom dev board for the ATtiny that can also double as a shield for the Arduino, allowing him to easily expand and modify his projects without too much extra soldering.

Using I2C might not be the most novel of innovations, but making it easy to use is certainly a valuable tool to add to the toolbox when limited on GPIO or by other physical constraints. To that end, [Bill] also includes code for an example project that simplifies the setup of one of these devices on the software end as well. If you’re looking for some examples for what to do with I2C, take a look at this thermometer that communicates with I2C or this project which uses multiple sensors daisy-chained together.

Tiny Machine Learning On The Attiny85

We tend to think that the lowest point of entry for machine learning  (ML) is on a Raspberry Pi, which it definitely is not. [EloquentArduino] has been pushing the limits to the low end of the scale, and managed to get a basic classification model running on the ATtiny85.

Using his experience of running ML models on an old Arduino Nano, he had created a generator that can export C code from a scikit-learn. He tried using this generator to compile a support-vector colour classifier for the ATtiny85, but ran into a problem with the Arduino ATtiny85 compiler not supporting a variadic function used by the generator. Fortunately he had already experimented with an alternative approach that uses a non-variadic function, so he was able to dust that off and get it working. The classifier accepts inputs from an RGB sensor to identify a set of objects by colour. The model ended up easily fitting into the capabilities of the diminutive ATtiny85, using only 41% of the available flash and 4% of the available ram.

It’s important to note what [EloquentArduino] isn’t doing here: running an artificial neural network. They’re just too inefficient in terms of memory and computation time to fit on an ATtiny. But neural nets aren’t the only game in town, and if your task is classifying something based on a few inputs, like reading a gesture from accelerometer data, or naming a color from a color sensor, the approach here will serve you well. We wonder if this wouldn’t be a good solution to the pesky problem of identifying bats by their calls.

We really like how approachable machine learning has become and if you’re keen to give ML a go, have a look at the rest of the EloquentArduino blog, it’s a small goldmine.

We’re getting more and more machine learning related hacks, like basic ML on an Arduino Uno, and Lego sortings using ML on a Raspberry Pi.

Energy Harvesting Design Doesn’t Need Sleep

Every scrap of power is precious when it comes to power harvesting, and working with such designs usually means getting cozy with a microcontroller’s low-power tricks and sleep modes. But in the case of the Ultra Low Power Energy Harvester design by [bobricius], the attached microcontroller doesn’t need to worry about managing power at all — as long as it can finish its job fast enough.

The idea is to use solar energy to fill a capacitor, then turn on the microcontroller and let it run normally until the power runs out. As a result, a microcontroller may only have a runtime in the range of dozens of microseconds, but that’s just fine if it’s enough time to, for example, read a sensor and transmit a packet. In early tests, [bobricius] was able to reliably transmit a 16-bit value wirelessly every 30 minutes using a small array of photodiodes as the power supply. That’s the other interesting thing; [bobricius] uses an array of BPW34 photodiodes to gather solar power. The datasheet describes them as silicon photodiodes, but they can be effectively used as tiny plastic-enclosed solar cells. They are readily available and can be arranged in a variety of configurations, while also being fairly durable.

Charging a capacitor then running a load for a short amount of time is one of the simplest ways to manage solar energy, and it requires no unusual components or fancy charge controllers. As long as the load doesn’t mind a short runtime, it can be an effective way to turn even indoor light into a figuratively free power source.

Debugging an Arduino with an Arduino

As every Hackaday reader knows, and tells us at every opportunity in the comments, adding an Arduino to your project instantly makes it twice as cool. But what if, in the course of adding an Arduino to your project, you run into a problem and need to debug the code? What if you could use a second Arduino to debug the first? That would bring your project up to two Arduinos, instantly making it four times as awesome as before you started! Who could say no to such exponential gains?

Debugging an ATTiny85

Not [Wayne Holder], that’s for sure. He writes in to let us know about a project he’s been working on for a while that allows you to debug the execution of code on an Arduino with a second Arduino. In fact, the target chip could even be another AVR series microcontroller such as a the ATTiny85. With his software you can single-step through the code, view and modify values in memory, set breakpoints, and even disassemble the code. Not everything is working fully yet, but what he has so far is very impressive.

The trick is exploiting a feature known as “debugWIRE” that’s included in many AVR microcontrollers. Unfortunately documentation on this feature is hard to come by, but with some work [Wayne] has managed to figure out how most of it works and create an Arduino Sketch that lets the user interact with the target chip using a simple menu system over the serial monitor, similar to the Bus Pirate.

[Wayne] goes into plenty of detail on his site and in the video included after the break, showing many of the functions he’s got working so far in his software against an ATTiny85. If you spend a lot of time working on AVR projects, this looks like something you might want to keep installed on an Arduino in your tool bag for the future.

Debugging microcontroller projects can be a huge time saver when your code starts running on real hardware, but often takes some hacking to get working.

[SOLVED] Arduino ATTiny85 does not blink LED. Programmed with Arduino nano

Hi!


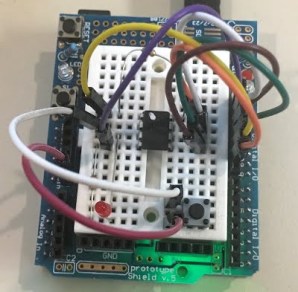
I have an ATTiny85 and I want to start with the blink LED sketch but it does not work. Attached is the wiring:

I followed these instructions: http://forums.4fips.com/viewtopic.php?f=3&t=1080 for wiring, burn both bootloader and LED blink sketch with an Arduino nano as programmer (excepting I'm using 1.8.1 nightly Arduino IDE), and everything looks like going fine:


read more

Let's Make Robots 18 Feb 10:04
arduino  attiny85  avr  nano  

Arduino ATTiny85 does not blink LED. Programmed with Arduino nano

Hi!


I have an ATTiny85 and I want to start with the blink LED sketch but it does not work. Attached is the wiring:

I followed these instructions: http://forums.4fips.com/viewtopic.php?f=3&t=1080 for wiring, burn both bootloader and LED blink sketch with an Arduino nano as programmer (excepting I'm using 1.8.1 nightly Arduino IDE), and everything looks like going fine:


read more

Let's Make Robots 18 Feb 10:04
arduino  attiny85  avr  nano  

Tiny Morse Code USB Keyboard

We’ve featured quite a few of [mitxela]’s projects here in the past, and many of them have the propensity to be labelled “smallest”. His Morse Code USB Keyboard Mk II adds to that list. It’s a Saturday afternoon project, with a few parts slapped onto a piece of perf-board, that allows using a Morse key as a USB keyboard. This project isn’t new or fresh, but we stumbled across it while trying to figure out a use for a Morse key lying in the author’s bin of parts. You can practise transmitting, by reading text and typing it out on the key, and then look it up on your computer to see if you made any mistakes. Or you can practise receiving, by asking a friend to punch it out for you. Either way, it’s a great way to hone your skills and prepare for your radio operators license exam.

The project is a follow up to his earlier one where he hooked up the Morse key via a RS-232 — USB converter directly to a computer and let the code do all the work. That turned out to be a very resource hungry, impractical project and made him do it right the next time around. The hardware is dead simple. An ATtiny85, a piezo buzzer, some decoupling capacitors, and a few resistors and zeners to allow a safe USB interface. The design accommodates a straight key, but there is one spare pin left over in the ATtiny to allow for iambic or sideswiper keys too. There is no speed adjustment, which is hardcoded at the moment. That isn’t very user friendly, and [mitxela] suggests adding a speed potentiometer to that last remaining pin on the ATtiny. This would prevent use of iambic/sideswiper keys. Or, you could use the RST pin on the ATtiny as a (weak) IO. The RST pin can read analog values between 5V and 2.5V, and will reset when voltage falls below 2.2V. Or just use another microcontroller as a last resort.

For the USB interface, [mitxela] is using the V-USB library after wasting some time trying to reinvent the wheel. And since this is designed to work as a HID, there are no drivers required – plug it in, and the OS detects it as a keyboard. He’s borrowed code from the EasyLogger project to use the internal oscillator and help free up the IO pins. And to detect the characters being typed, his code uses a long string of compare statements instead of a dictionary lookup. Writing that code was tedious, but it makes the identification quicker, since most characters can be identified in less that five comparisons (one dit = E, two dits = I, three dits = S and so on). This “tree” makes it easier to figure it out.

If you’d like to look up some of his other “tiny” projects, check out The smallest MIDI synthesizer, Smallest MIDI synth, again! and the ATtiny MIDI plug synth.


Filed under: peripherals hacks

DIY I2C Devices with ATtiny85

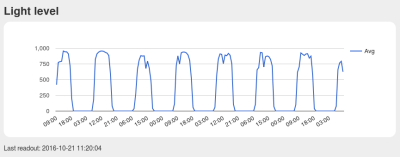
[Pawel] has a weather station, and its nerve-center is a Raspberry Pi. He wanted to include a light sensor but the problem is, the Pi doesn’t have a built-in ADC to read the voltage off the light-dependent resistor that he (presumably) had in his junk box. You can, of course, buy I2C ADC chips and modules, but when you’ve already got a microcontroller that has ADC peripherals on board, why bother?

[Pawel] wired up a tremendously simple circuit, downloaded some I2C slave-mode code, and added an LED for good measure. It’s all up on GitHub if you’re interested.

Bright by Day, Dark by Night!

We’re covering this because we rarely see people coding for I2C slave devices. Everyone and their mom uses I2C to connect to sensors, for which the Arduino “Wire” library or “i2c-tools” on the Pi do just fine. But what do you do when you want to make the I2C device? [Pawel]’s project makes use of TinyWireS, a slave-mode SPI and I2C library for AVR ATtiny Arduino projects.

Here, [Pawel] just wanted a light sensor. But if you’re building your own devices, the sky is the limit. What’s the most esoteric I2C sensor that you can imagine? (And is it really the case that we haven’t seen an I2C slave device hack since 2010?)


Filed under: ATtiny Hacks
Hack a Day 07 Nov 09:00