Posts with «school» label

Final Project for Better Sleep

It’s that time of year again, and students around the world are scrambling (or have already scrambled) to finish their final projects for the semester. And, while studying for finals prevents many from sleeping an adequate amount, [Julia] and [Nick] are seeking to maximize “what little sleep the [Electrical and Computer Engineering] major allows” them by using their final project to measure sleep quality.

To produce a metric for sleep quality, [Julia] and [Nick] set out to measure various sleep-related activities, specifically heart rate, motion and breath frequency. During the night, an Arduino Nano mounted to a glove collects data from the various sensors mounted to the user, all the while beaming the data to a stationary PIC for analysis and storage. When the user awakes, they can view their sleep report on a TFT display at the PIC base station. Ideally, users would use this data to test different habits in order to get the best nights sleep possible.

Interestingly, the group chose to implement their own heart rate sensor. With an IR transmitter, IR phototransistor and an OP amp, the group illuminates user’s fingers and measure reflection to detect heartbeats. This works because the amount of IR reflected from the user’s finger changes with blood pressure and blood oxygen level, which also happen to change when the heart is beating. There were some bumps along the road when it came to the heartbeat sensor (the need to use a finger instead of the wrist forced them to use a glove instead of a wristband), but we think it’s super cool and totally worth it. In addition to heart rate, motion is measured by an accelerometer and breath is measured by a flex sensor wrapped around the user’s chest.

With all of their data beamed back by a pair of nRF24L01s, the PIC computes the sleep “chaos” which is exactly what it sounds like: it describes just how chaotic the user slept by looking for acyclic and sudden movement. Using this metric, combined with information from breathing and heart rate, the PIC computes a percentage for good sleep where 100% is a great night and 0% means you might have been just as well off pulling an all-nighter. And, to top it all off, the PIC saves your data to an SD card for easy after-the-fact review.

The commented code that powers the project can be found here along with a parts list in their project write-up.

This device assumes that sleeping is the issue, but if waking up if your problem, we’ve already got you covered, aggressive alarm clock style. For those already on top of their sleep, you might want some help with lucid dreaming.

Video of the project explained by [Julia] and [Nick] after the break.

Thanks to [Nick] for sending this in!


Filed under: hardware

MIT's light-up robot garden teaches you how to code

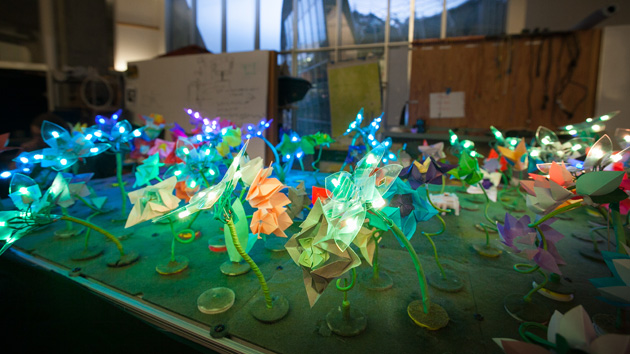
If you're teaching kids how to code, what do you do to show that software makes an impact in the real world? MIT has a clever idea: a robot garden. The project lets you control a grid of Arduino-linked "plants" through programming that makes them blossom and light up in pretty (and occasionally mesmerizing) ways. It'll even teach the virtues of distributed computing -- you can tell these leafy robots to bloom or change color in algorithm-driven sequences. The garden is just a demo for now, but it'll eventually turn into an easy-to-replicate curriculum for students who'd otherwise have to settle for seeing their results on-screen.

[Image credit: Jason Dorfman, CSAIL]

Filed under: Science, Software

Comments

Source: MIT News

Arduino Tetris on a Multiplexed LED Matrix

[Alex] needed a project for his microcomputer circuits class. He wanted something that would challenge him on both the electronics side of things, as well as the programming side. He ended up designing an 8 by 16 grid of LED’s that was turned into a game of Tetris.

He arranged all 128 LED’s into the grid on a piece of perfboard. All of the anodes were bent over and connected together into rows of 8 LED’s. The cathodes were bent perpendicularly and forms columns of 16 LED’s. This way, if power is applied to one row and a single column is grounded, one LED will light up at the intersection. This method only works reliably to light up a single LED at a time. With that in mind, [Alex] needed to have a very high “refresh rate” for his display. He only ever lights up one LED at a time, but he scans through the 128 LED’s so fast that persistence of vision prevents you from noticing. To the human eye, it looks like multiple LED’s are lit up simultaneously.

[Alex] planned to use an Arduino to control this display, but it doesn’t have enough outputs on its own to control all of those lights. He ended up using multiple 74138 decoder/multiplexer IC’s to control the LED’s. Since the columns have inverted outputs, he couldn’t just hook them straight up to the LED’s. Instead he had to run the signals through a set of PNP transistors to flip the logic. This setup allowed [Alex] to control all 128 LED’s with just seven bits, but it was too slow for him.

His solution was to control the multiplexers with counter IC’s. The Arduino can just increment the counter up to the appropriate LED. The Arduino then controls the state of the LED using the active high enable line from the column multiplexer chip.

[Alex] wanted more than just a static image to show off on his new display, so he programmed in a version of Tetris. The controller is just a piece of perfboard with four push buttons. He had to work out all of the programming to ensure the game ran smoothly while properly updating the screen and simultaneously reading the controller for new input. All of this ran on the Arduino.

Can’t get enough Tetris hacks? Try these on for size.


Filed under: Arduino Hacks, led hacks

Home Automation with a Custom Wireless Sensor Network

We’re no strangers to home automation projects around here, but it’s not often that you see one described in this much detail. [Paul] designed a custom home automation system with four teammates for an undergraduate thesis project.

The system is broken into two main components; the server and the peripherals. The team designed their peripherals from early prototypes of an upcoming ArduIMU v4 measurement unit. They removed all of the default sensors to keep costs down and reduce assembly time. The units can them be hooked up to various peripherals such as temperature sensors, mains relays, RGB color strips, etc.

The central management of the system is performed using a web-based user interface. The web server runs on Java, and interacts with the peripherals wirelessly. Basic messages can be sent back and forth to either read the state of the peripherals or to change the state. As far as the user is concerned, these messages appear as simple triggers and actions. This makes it very simple to program the peripherals using if, then, else logic.

The main project page is a very brief summary of what appears to be a very well documented project. The team has made available their 182 page final report (pdf), which goes into the nitty-gritty details of the project. Also, be sure to watch the demonstration video below.


Filed under: home hacks

Tuco 1.0: a digital door plate

In his blog, Andrea (a student in computer science from University of Napoli “Parthenope”) describes how to make a smart door plate with Arduino.

The goal of this project, which is part of the larger “Sebeto Project” (more information can be found on its homepage), is to provide dynamic information to the user, which can be updated remotely by using an Arduino ethernet shield and a modified Fonera wireless router.

A detailed tutorial on how to build your own Tuco (in Italian) can be found here.

[Via: Andrea Esposito's blog]

Butlers, lunar rovers, snakes and airboats: the best of Carnegie Mellon's Robotics Institute

How was your week? We got to spend a couple of days trekking around the Carnegie Mellon campus in Pittsburgh, PA to check out some of the latest projects from the school's world renowned Robotics Institute -- a trip that culminated with the bi-annual induction ceremony from the CMU-sponsored Robot Hall of Fame. Given all the craziness of the past seven days, you might have missed some of the awesomeness, but fear not, we've got it all for you here in one handy place -- plus a couple of videos from the trip that we haven't shown you yet. Join us after the break to catch up.

Continue reading Butlers, lunar rovers, snakes and airboats: the best of Carnegie Mellon's Robotics Institute

Butlers, lunar rovers, snakes and airboats: the best of Carnegie Mellon's Robotics Institute originally appeared on Engadget on Sat, 27 Oct 2012 12:45:00 EST. Please see our terms for use of feeds.

Permalink | Email this | Comments

Workshop on “Physical and Wearable Computing”: projects and outcomes

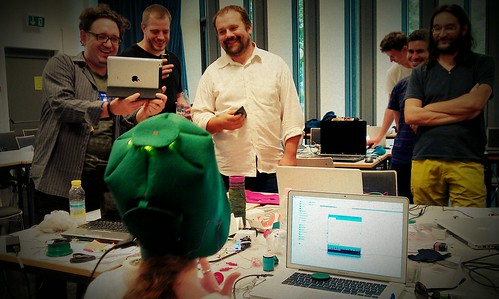
Last July 23-27 2012, the workshop on “Physical and Wearable Computing”, organized by SUPSI within the summer school in “Digital Fabrication and Interaction Design”, has took place involving about 20 participants. This workshop has proved to be a very good approach to introduce future makers to the concepts of digital fabrication, prototyping and design of interactive objects.
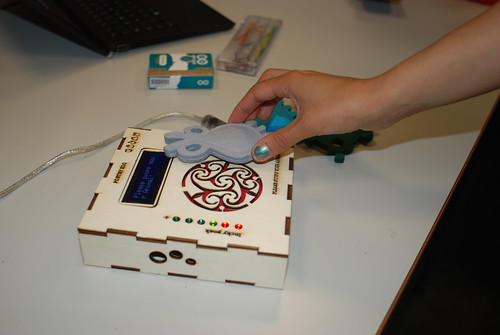
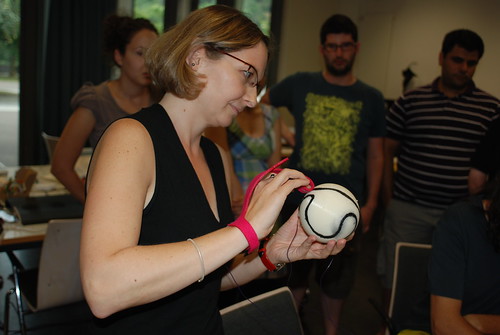
On the workshop’s homepage, several prototypes and artifacts manufactured during the workshop are presented. Among them, it’s worth to mention Poetry Zoo, a set of laser-cut and RFID-equipped animals that generate poetries, The Sound of a Line, where simple melodies can be performed by using a ball with conductive ink in combination with a special glove, and Superfluo Shoes, a pair of shoes that react based on movement.
The complete list of projects developed during the workshop can be found on its official home page, while a personal view of this experience by Zoe Romano, who has taught at the summer school together with Massimo Banzi, can be found here.

[Via: homepage of the workshop and Zoe Romano's blog]

Labview and Arduino: 3Dmicro Toolkit Arduino Expansion (beta)

3D SuperVision Systems is an italian spin-off from “Università Politecnica delle Marche“, whose mission is to design and to develop new solutions for embedded applications.
Few days ago, they published the latest release of 3Dmicro toolkit, a software add-on to NI Labview usable for firmware rapid prototyping on 32-bit PIC microcontrollers, by using Labview’s easy-to-use graphical programming language; along with this, an Arduino-oriented version has been released as well for academic beta testers, which allows users to make use of Arduino’s I/O, ADCs, timers, PWM and serial communication directly from Labview’s interface.


More information can be found here, while interested beta-testers can sign up this application form.

Castelao Barcamp Vigo 2012

Desde BricoGeek nos llega la noticia de la celebración de una nueva Barcamp, esta vez en Vigo. La reunión perfecta para cacharrear y debatir entre amigos sobre temas como el Open Hardware, Arduino o impresoras 3D entre otros muchos, y puede que con alguna que otra sorpresa.


Unas jornadas DIY muy interesantes que tendrán lugar en las instalaciones del CFP Daniel Castelao de Vigo en las que Alejandro Taracido presentará a su mítico robot ORUGAS con las últimas novedades añadidas.


Sin duda, un evento al que no se debe faltar!


Planning preliminar (sujeto a cambios):

  • Introducción al Open Harwdare
  • Orugas: Robot explorador basado en Arduino
  • Impresión 3D DIY. Crea objetos en tu casa
  • Workshop BricoGeek
  • Taller: DIY Soldadura SMD por refusión
  • Taller: Medidas PWM analógicas
  • Presentación proyecto RACE
  • Raspberry PI como servidor FTP de contenidos

Enlaces:

VIA | BricoGeek

Wearable Fabric on the Arduino Store

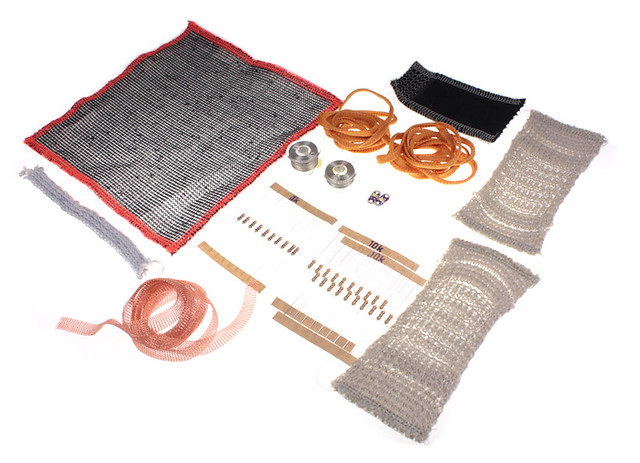
We are happy to announce the first wearable kit on the Arduino Store . This kit has been made by Plug’n'Wear specifically for us. All fabrics in this kit are produced in Italy, and strongly related to a textile family business. If you want to get deeper into the story of this product have a look at Riccardo Marchesi presentation (still in Italian, soon to be traslated!) at World Wide Rome 2012.

Read over for Kit’s features

This kit features:

  1. 1x Circular Stretch Sensor Designed by Hannah Perner-Wilson, this circular knit stretch sensor works perfect when you need to detect tension in many projects.
  2. 2x Textile push button to make easy digital inputs in cloth, scarfs o bags.
  3. 2x Spools of Conductive thread, ready to be hooked over a sewing machine
  4. 2x Soft potentiometer kit will let you import analog data into your wearable project: this kit includes 1 meter of knitted conductive tape and a metal ring. Watch it in action (see video)
  5. 10x 1k ohm resistor
  6. 10x 10k ohm resistor
  7. 1x Textile perfboard is going to change the way you think of wearable circuits. You can sew or even solder components (SMD & through-hole) on this . It can be easily cut or sewn with a standard sewing machine. Washable. Size: 15 cm x 15 cm (6″ x 6″) / Pitch: 2.54 mm (0.1″)
  8. 1x Knitted Coated Copper Tape. Small conductive tape made of coated copper fine wire (112 micron). Flexible, easy to cut, sewable with a standard sewing machine, It can be easily welded ( The coating will melt and tape will be soldered). The surface of this tape has a good insulation thrughout its lenght. Resistance: 107 Ohm/m. Width: 9 mm (0.35″)
  9. 1x Analog Textile Press Button, working with a resistive principle (resistance goes down when you press it). It works as a bend sensor as well. By connecting more sensors together it is possible to make a matrix analog switch. Sensitive area 40mm x 40mm (1.57″x1.57″)
  10. 2x LilyPad LED Bright White A simple, very bright, 250mcd, white LED LilyPad

source: [arduino store]