Posts with «school» label

Schools projects with Arduino: Flow Meter
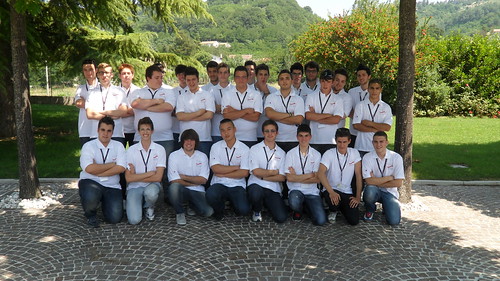
Loccioni Group, is an italian company that sponsors every year a project internship entitled “Classe Virtuale”, dedicated to young students coming from local technical schools.

This year, “Classe Virtuale 2012″ has been composed by 27 students with different backgrounds, selected among 120 candidates. After a stating training period, during the three-weeks internship the team worked on a very nice Arduino-based project: Flow Meter.

Here you may find a brief interview we had with Daniele Caschera, one of the components of “Classe Virtuale 2012″, about Flow Meter and on how Arduino helped in its design.

Alessandro: Daniele, could you describe us what “Classe Virtuale” is, in practice?

Daniele: “Classe Virtuale”, the partnership between Loccioni Group and local technical education institutions, has began in 2001 when Mr. Loccioni decided to invest on young students, by offering training periods and stages inside his company. In 2010 the project, which occours on annual basis, expanded to three more scools and in 2012 it has reached the 12-th edition.

The goal of this collaboration is to train and educate young technicians, by serving as a bridge between school and a real employment.

A: Could you briefly describe us the “Flow Meter” project?

D: “Flow Meter” is a real flow measurer: it has been designed to measure the flow of all the students who have attended to the previous editions of “Classe Virtuale”, starting from the first edition.

First, we have designed a PHP web application usable to collect the information reagarding all the participants to the previous editions and, then, we used some Arduino boards to represent this amount of data into a visible form, by means of several LEDs.
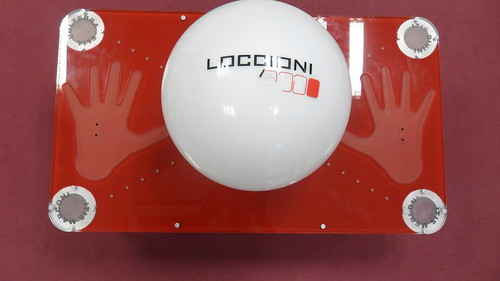
More in details, Flow Meter can be turned on by laying the hands on it, which can be detected by means of some proximity sensors located on the surface.

Then, it begins to show the collected data, starting from the first edition of “Classe Virtuale”, by turning on a set of LEDs, arranged in three rows inside a semi-transparent, white sphere. The first row, composed by red LEDs, represents how many students are currently employed at Loccioni, while the second one, composed by blue LEDs, shows how many people work or study in Italy; the last row (again composed by red LEDs) presents how many people work or study abroad.

By leaving the hands on Flow Meter, it is possible to scroll through all the editions of “Classe Virtuale”.
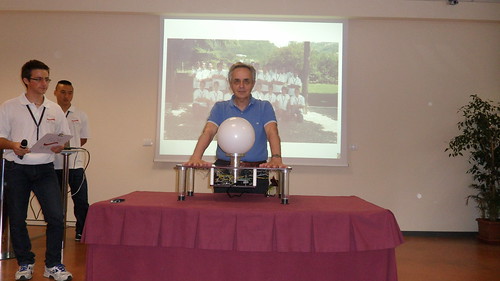
Finally, four small pillars, placed at the corners of the structure, represent the four schools involved in the 2012 edition of the project: a set of LEDs is used to show how many students come from each institution per year.

A: How Arduino contributed to this Flow Meter?

D: Many of us did not know Arduino at the beginning of “Classe Virtuale 2012″. The board has been introduced us during the initial training period by some electronic engineers at Loccioni. Then, we started to find out more information about it and how to adopt it in our project on the web, on books and so on.

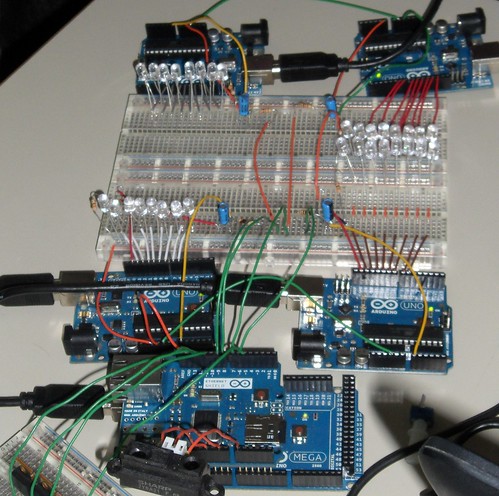
Arduino has been fundamental in our project, simply because it composes the “brain” of Flow Meter, by means of a set 4 Arduino Uno and an Arduino Mega, and because it is used to activate the LEDs composing its “visual” interface.
 

A: How do you evaluate this internship experience?

D: This experience has been very positive for us, mainly because it gave us the chance to work on a real project together with very skilled people and technicians. Moreover, since the team has been divided into small working groups (e.g., those working on mechanical parts and those working on electronics and programming), we have gained experience on topics that you typically won’t study at school. Everyone has learned a lot during “Classe Virtuale”!

This very nice project, which has been presented on July 19 (the streaming of the event will be available here), represents another example of how open-source solutions can be used as effective enabling technologies, even for educational purposes.

Great job “Classe Virtuale” and thanks for this interview!

Arduino Blog 10 Jul 14:54

Arduino based Milling Machine

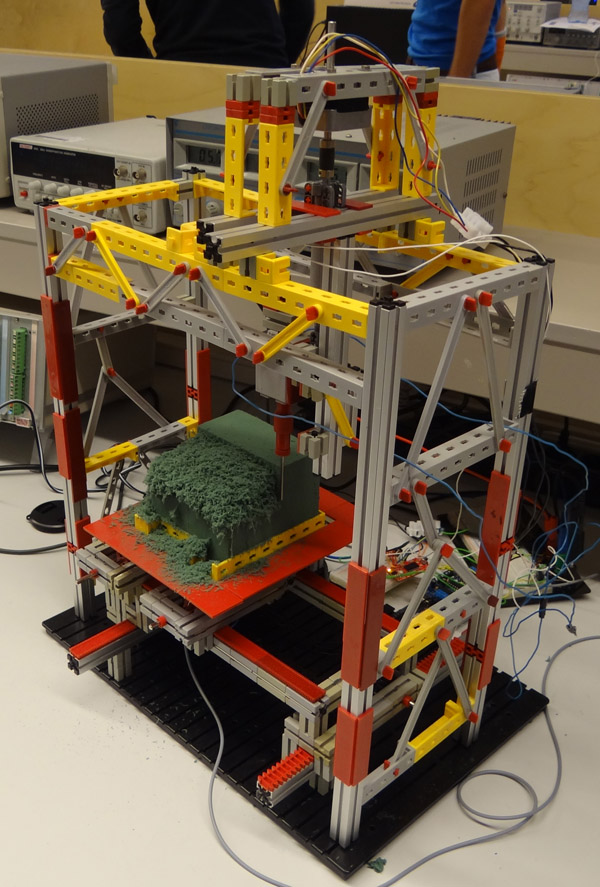
This is a working model of an Arduino based Milling Machine created using FischerTechnik. For those of you who are unaware of FischerTechnik, it is similar to the LEGOTM Building Blocks.

A group of four Mechanical Engineering students at the Delft University of Technology (Netherlands) created this project as part of their Mechatronics class in their Second year of Bachelor of Sciences (B.Sc.) Program.

Laurens Valk, one of the creators, explains the essence of Arduino in the project:

“The system uses the Adafruit motor shield to run two stepper motors, and the Sparkfun EasyDriver for the third stepper motor. The Arduino runs code that listens to Matlab commands over USB. We expanded that code a little to make it possible to add the third stepper motor and some other commands. Most of the actual code was programmed in Matlab, with the Arduino as the interface between computer and motors/sensors.”

We had a little chat with Laurens. Here is the excerpt:


When did you first hear about Arduino, and when did you first start using it?
I’ve seen a lot of Arduino projects over the years, but this was the first time we used it in a project. Personally, I usually build robots with MINDSTORMS NXT, but this felt like a good opportunity to combine mechanical work (the printer hardware) with real electronics (Arduino).
How did you end up making a Milling Machine/ 3D Printer for your project?

We chose to come up with our own design challenge and decided not to do the standard exercise. Initially we thought about making a (2D) plotter or scanner. Then quickly we started thinking about the same things, except in 3D. One of the projects that inspired us was the LEGO Milling Machine by Arthur Sacek. Both a scanner and printer would still be doable in 3D, but the time was limited, so we settled with the printer idea.

All construction had to be done in one workweek for logistical reasons. To make sure we were able to finish in time, we prepared much of the electronics and software outside the lab. We finished just in time, but unfortunately we could do only one complete print before we had to take it apart. Not surprisingly, it was very exciting to wait for the result of the one and only complete test run. We couldn’t see the result until we used the vacuum cleaner to remove the dust.

Here is a video showing the working of this machine. [And the Vacuum Cleaner Laurens is talking about]:

This gives an Insight into the many feats that an Arduino can accomplish.


XOrduino: an Arduino-compatible board for the OLPC XO laptop

Dr. Scott Ananian, from the One Laptop Per Child (OLPC) project, conceived an Arduino Leonardo-compatible board especially designed for the OLPC XO laptop, with the goal to cut down its price as much as possible, to foster its adoption even in developing countries. From Scott’s blog:

The board uses mostly through-hole parts, with one exception, and there are only 20 required components for the basic Arduino functionality, costing about $5 (from digikey, quantity 100). It is reasonable for local labor or even older kids to assemble by hand.

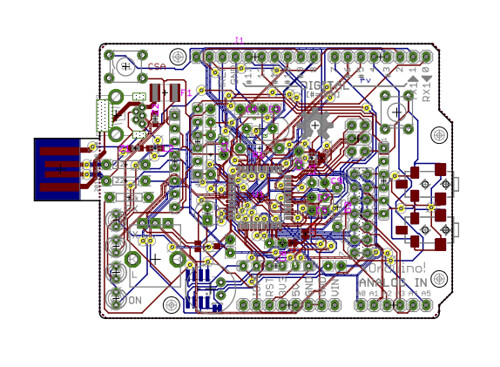
The board, named XOrduino, is open hardware (schematics and pcb files can be found on github), and can be directly plugged into the XO’s USB ports, which allowed Scott to save the money required for the USB connector. Moreover, its design has been inspired by other open hardware projects, such as SparkFun’s ATmega32U4 breakout board and SparkFun’s Scratch Sensor Board-compatible PicoBoard.

Scott designed also a second board, which is even cheaper than the first one, called XO Stick:

It’s based on the AVR Stick using the ATtiny85 processor and costs only $1/student. It’s not quite as user-friendly as the Arduino-compatible board, but it can also be used to teach simple lessons in embedded electronics.

A longer description can be found here, while detailed release notes can be found on github.

It’s very exciting to see how open technologies, such as open hardware and open source software, contribute to the way education and creativity can take place around the world, especially regarding their promotion in developing countries.

[Via: Ossblog, OLPC blog, Scott Ananian's blog]