Posts with «mechanics» label

PWM on High Current(amp) Actuators

I'm trying to move up into the category I originally got into robotics for in the first place: bigger buddies!

I have a Raspberry Pi I'd like to use to control some linear actuators, which are 12v and lift about 225lbs. I'm unaware of their amp usage: a search for similar rated ones said ~4-5A. They were purchased from an online auto parts place, so it's unlikely they'd know.

read more

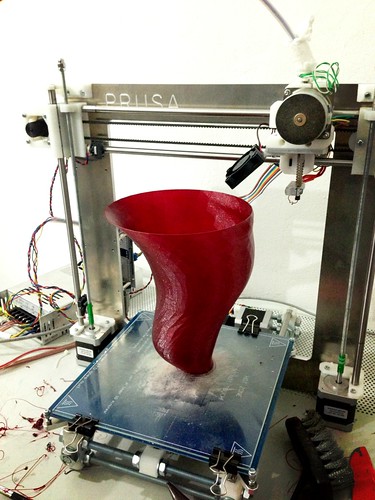
#RepRap Workshop a Officine Arduino

Picture from Josef Prusa’s Flickr Photostream

We are happy to announce the upcoming Josef Prusa’s and Alessandro Ranellucci’s workshop @ Officine Arduino / Fablab Torino, on February 16th and 17th. This two days workshop will cover the making & fine-tuning of the latest Prusa I3 with Prusa nozzle AND Ranellucci’s how-to slic3r lesson on Sunday.

If you ever want to jump on the reprap world, this may be the best opportunity. If you don’t feel like buying the printer but just want to follow the workshop taking notes & make questions, we do also offer a spectator admittance.

The workshop is part of the celebration of the first year of Officine Arduino and Fablab, soon more details about the complete program (stay tuned).

read the full description of the workshop on the [Arduino Store] or read the (italian) post on the fablabtorino website.

servo for mini hexapod

Hello,

I want to build a mini hexapod and i would like a suggestion from you for a cheap servomachine (de kserw an to grafw kala auto) to use, which will be sufficient for this project.. I have found these here on my own:

HobbyKing HK15148

HobbyKing 928BB

sg90

mg90

sg91s

Let's Make Robots 04 Dec 19:11
arduino  hexapod  mechanics  mini  robot  servos  ssc32  

Arduino based Milling Machine

This is a working model of an Arduino based Milling Machine created using FischerTechnik. For those of you who are unaware of FischerTechnik, it is similar to the LEGOTM Building Blocks.
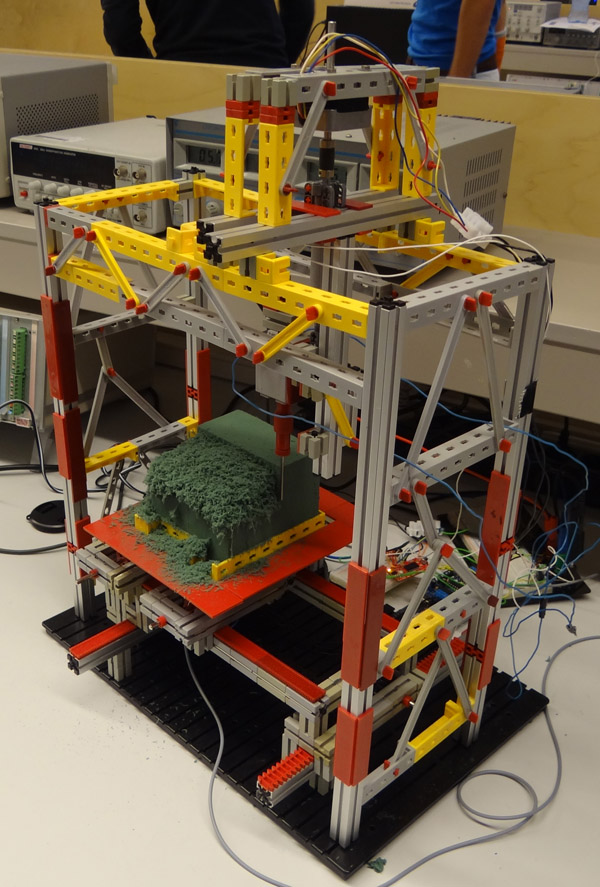
A group of four Mechanical Engineering students at the Delft University of Technology (Netherlands) created this project as part of their Mechatronics class in their Second year of Bachelor of Sciences (B.Sc.) Program.

Laurens Valk, one of the creators, explains the essence of Arduino in the project:

“The system uses the Adafruit motor shield to run two stepper motors, and the Sparkfun EasyDriver for the third stepper motor. The Arduino runs code that listens to Matlab commands over USB. We expanded that code a little to make it possible to add the third stepper motor and some other commands. Most of the actual code was programmed in Matlab, with the Arduino as the interface between computer and motors/sensors.”

We had a little chat with Laurens. Here is the excerpt:


When did you first hear about Arduino, and when did you first start using it?
I’ve seen a lot of Arduino projects over the years, but this was the first time we used it in a project. Personally, I usually build robots with MINDSTORMS NXT, but this felt like a good opportunity to combine mechanical work (the printer hardware) with real electronics (Arduino).
How did you end up making a Milling Machine/ 3D Printer for your project?

We chose to come up with our own design challenge and decided not to do the standard exercise. Initially we thought about making a (2D) plotter or scanner. Then quickly we started thinking about the same things, except in 3D. One of the projects that inspired us was the LEGO Milling Machine by Arthur Sacek. Both a scanner and printer would still be doable in 3D, but the time was limited, so we settled with the printer idea.

All construction had to be done in one workweek for logistical reasons. To make sure we were able to finish in time, we prepared much of the electronics and software outside the lab. We finished just in time, but unfortunately we could do only one complete print before we had to take it apart. Not surprisingly, it was very exciting to wait for the result of the one and only complete test run. We couldn’t see the result until we used the vacuum cleaner to remove the dust.

Here is a video showing the working of this machine. [And the Vacuum Cleaner Laurens is talking about]:

This gives an Insight into the many feats that an Arduino can accomplish.


Some advances in aerial vehicles: bat-inspired smart wings

Researchers from Centro de Automática y Robótica (Universidad Politécnica de Madrid) and from Brown University carried out a very deep research about the specific behavior of bat flight, whose ultimate goal is to replicate the capabilities of bat’s wings by means of an ad-hoc designed micro aerial vehicle (MAV).

From the home page of the project:

[...] this research is oriented towards the development of a biological inspired bat robot platform, that allows to reproduce the amazing maneuverability of these flying mammals. The highly maneuverability is achieved by reproducing the flapping and morphing capabilities of their wing-skeleton structure. This structure is composed by several joints and a membrane that generates the required lift forces to fly.

To mimmic the muscular system that moves the joints of the wing-bones, Shape Memory Alloys (SMA) NiTi wires are used as artificial-muscles. Several challenges in controlling this SMA-based actuation system are regarded in this research.

A lot of research work has already been carried out (see here for a list of publications) and a bat-like MAV prototype has been designed and implemented to both evaluate and validate the research outcomes. Among the other stuff, the core onboard electronic is made up of an arduino-based board, an IMU, a radio transceiver and a rechargeable LiPo battery.

More details on this project can be found here.

[Via: BaTboT project homepage]

Arduino Blog 06 Jun 13:52

Upgrade Your Office With An RFID Reading Door

Tired of dealing with keys to get into his office, Valentin Heun hacked together this door unlocker with a laser-cutter, Arduino, and some bits n’ bobs from SparkFun.  Full design files and parts list can be found on the linked page.