Posts with «cnc machine» label

Old CNC Brain Swapped With An Arduino
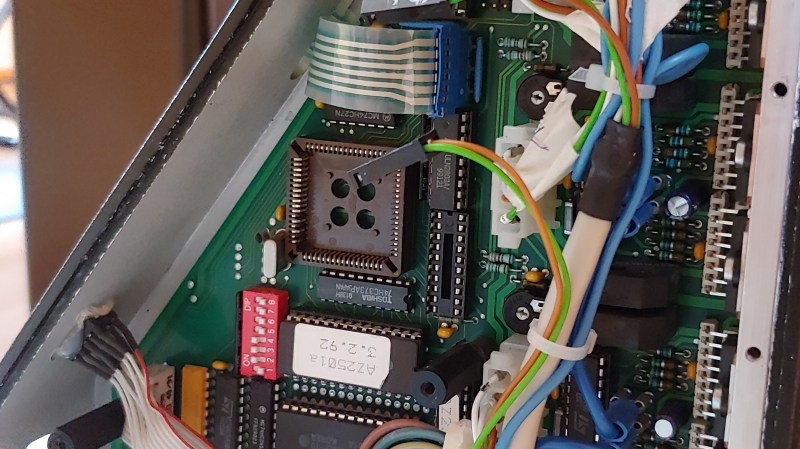
[Sebastian] and [Stefan Shütz] had a ISEL EP1090 CNC machine at home, sitting unused, and they decided to bring it to life. With pretty good mechanical specs, this CNC looked promising – alas, it was severely constrained by its controller. The built-in CPU’s software was severely outdated, had subpar algorithms for motor driving programmed in, and communication with the CNC was limited because the proprietary ISEL communications protocol that isn’t spoken by other devices.The two brothers removed the CPU from its PLCC socket, and went on to wiring a grbl-fueled Arduino into the controller box.
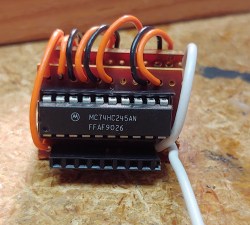
They reverse-engineered the motor driver connections – those go through a 74HC245 buffer between the original CPU and the drivers. Initially, they put an Arduino inside the control box of the CNC and it fit nicely, but it turned out the Arduino’s CPU would restart every time the spindle spun up – apparently, EMC would rear its head. So, they placed the Arduino out of the box, and used two CAT7 cables to wire up the motor and endstop signals to it.

For tapping into these signals, they took the 74HC245 out of its socket, and made an interposer from two small protoboards and some pin headers – letting them connect to the STEP and DIR lines without soldering wires into the original PCB. There’s extensive documentation, GRBL settings, and more pictures in their GitHub repo, too – in case you have a similar CNC and would like to learn about upgrading its controller board!

After this remake, the CNC starts up without hassles. Now, the brothers shall CNC on! Often, making an old CNC machine work is indeed that easy, and old controller retrofits have been a staple of ours. You can indeed use an Arduino, one of the various pre-made controller boards like Gerbil or TinyG, or even a Raspberry Pi – whatever helps you bridge the divide between you and a piece of desktop machinery you ought to start tinkering with.

Carve shapes out of foam with this Arduino-controlled hot wire cutter

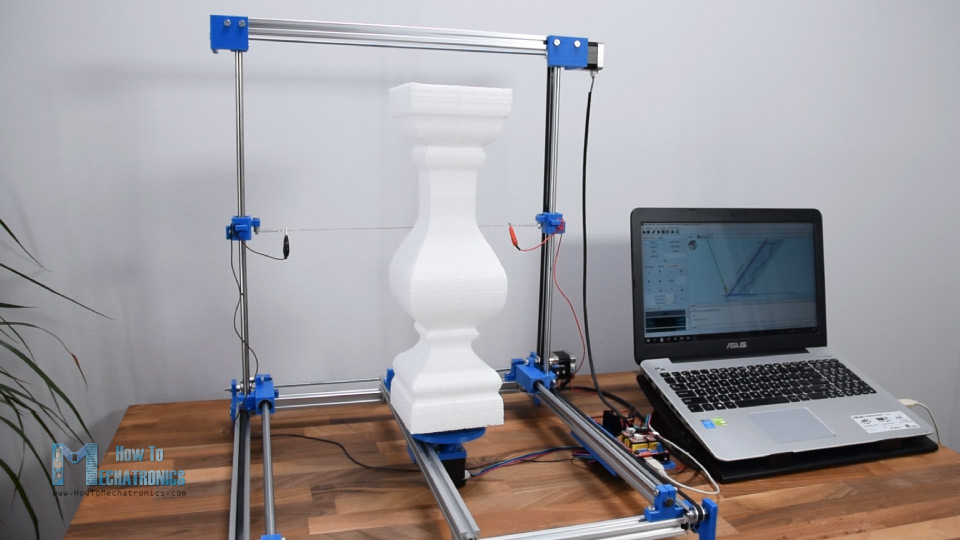
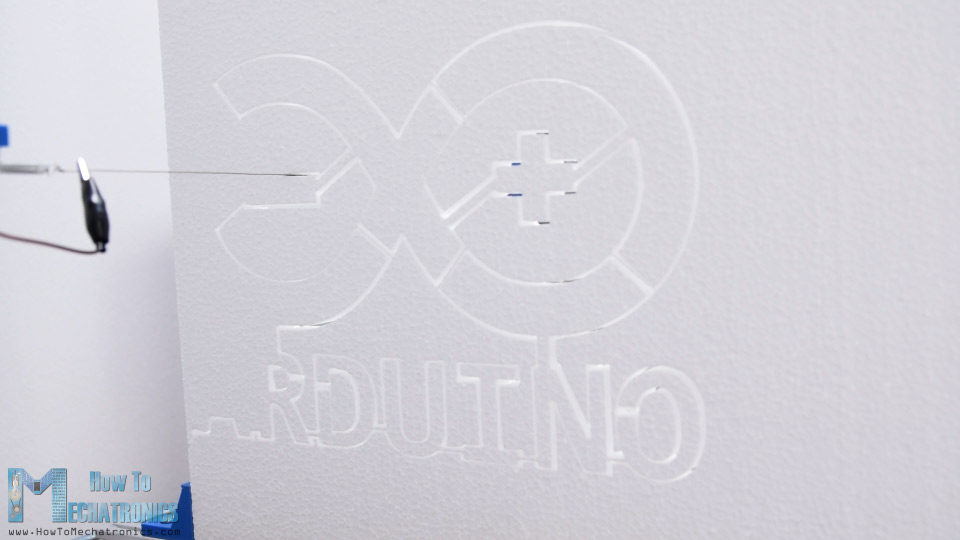
You may have a 3D printer or other “digital” tools like a laser engraver or CNC router, but what if you want to work with Styrofoam? As How To Mechatronics demonstrates in his latest project, many of the same techniques used there can be implemented to make your own Arduino-powered hot wire foam cutter.

This build is constructed with 20x20mm aluminum extrusion and 3D-printed parts, and uses an Uno board and CNC shield to drive three stepper motors. Two of these motors manipulate the wire in the horizontal and vertical directions, while the third controls a turntable that rotates the foam as needed.

As seen in the video below, it’s a brilliant design. Written instructions can be found in How To Mechatronics’ blog post, which walks you through the entire process from assembling the machine and connecting its components to preparing shapes and generate the G-code.  

Reviving an old CNC router with Arduino

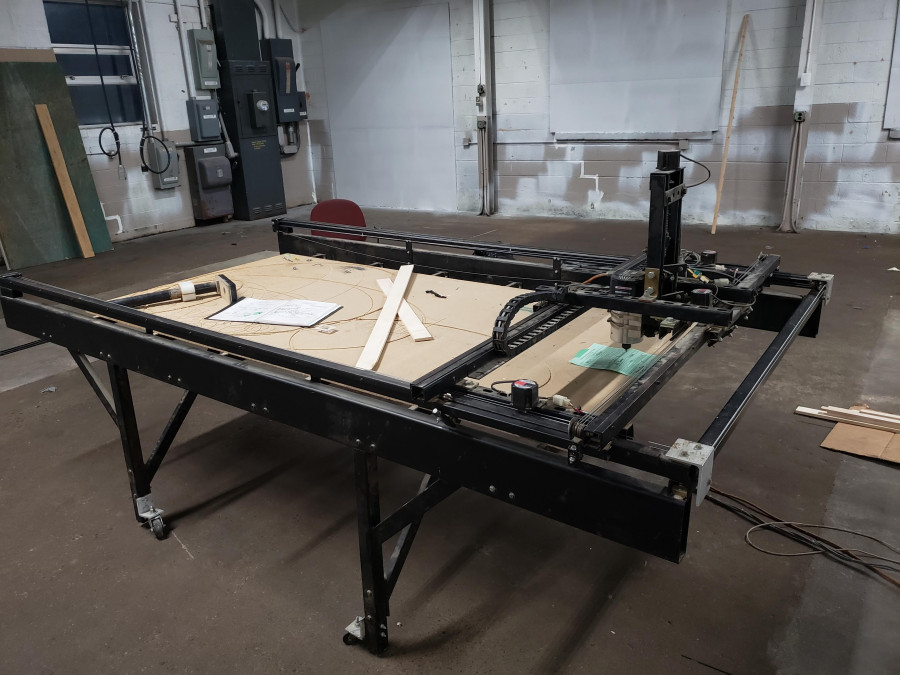
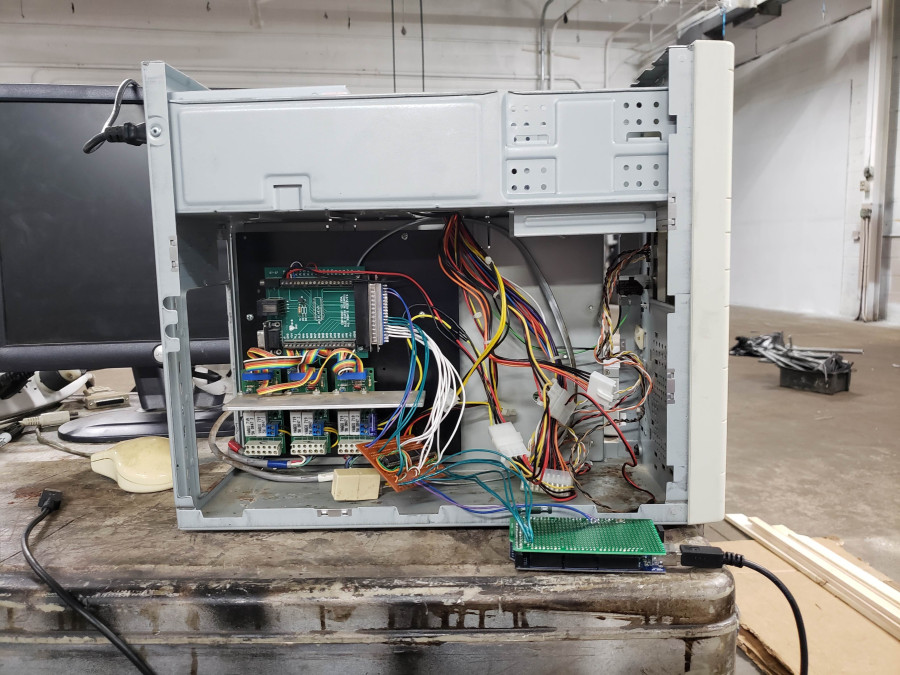
Makerspace i3Detroit was the recent recipient of a free yet non-functioning CNC router. While out of commission when received, the device’s mechanical components and motors appeared to be in operational condition, plus it had a large work surface. The decision was made to get the CNC up and running for now, with the eventual goal of turning it into a plasma cutter.

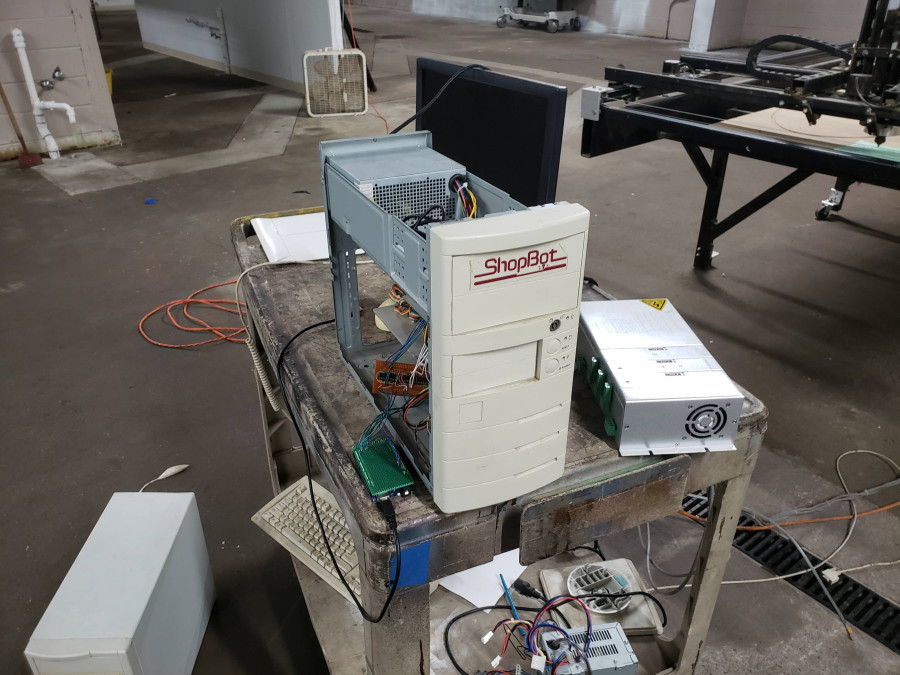
First, they booted up its (Windows 95) computer and replaced a power supply on the controller. An adapter board for the controller was then built using info from this Arduino Forum post, allowing the router to be controlled with an Arduino Mega running grbl firmware

Although there is still some work to do, it can be seen happily jogging along in the video below, and appears well on its way to becoming a usable machine!

This machine bends brass wire with precision

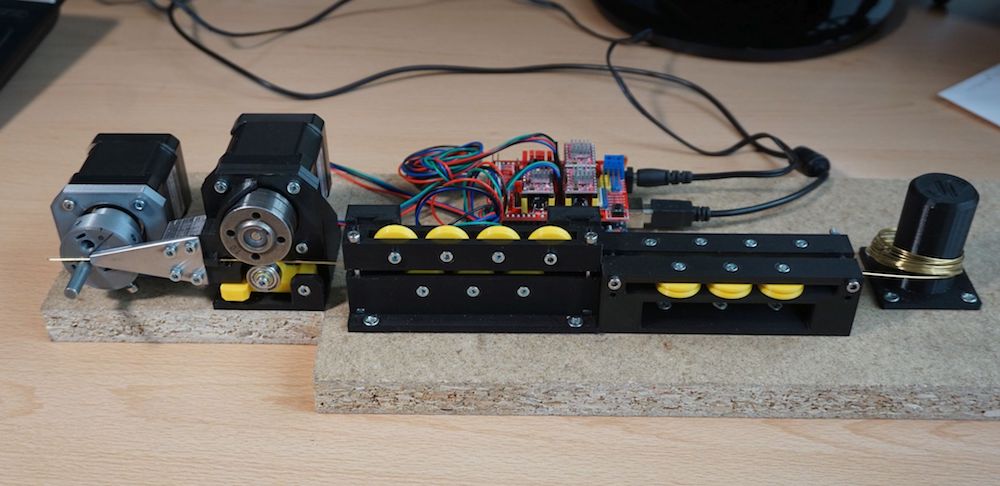
Jiri Praus enjoys using brass wire for his freeform sculptures, but isn’t a fan of making the same bends over again. To solve this problem, he designed a CNC machine to handle that task for him.

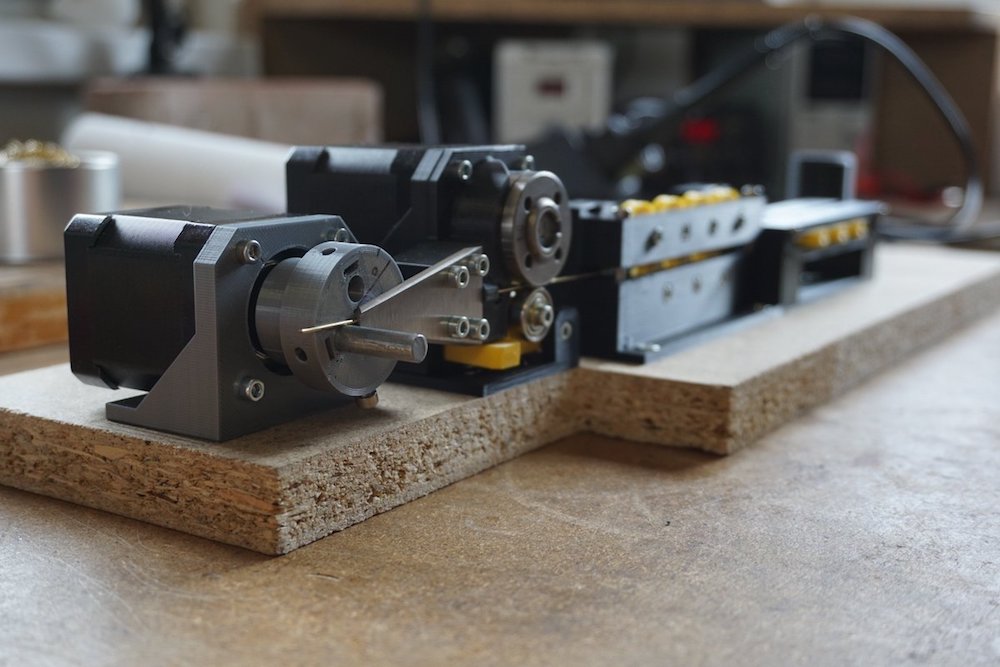
His device features a series of rollers to straighten out the wire, with a servo-driven puller that utilizes a roller normally used with a welding machine. A second servo then precisely bends the wire into shape, creating squares, hexagons and even springs under the control of an Arduino/CNC shield. 

You can see the project in action in the videos below, and if you want to build your own, the STL files for this mostly 3D-printed setup are up on GitHub.

Facere-Bot is a portable machine that draws iconic photos

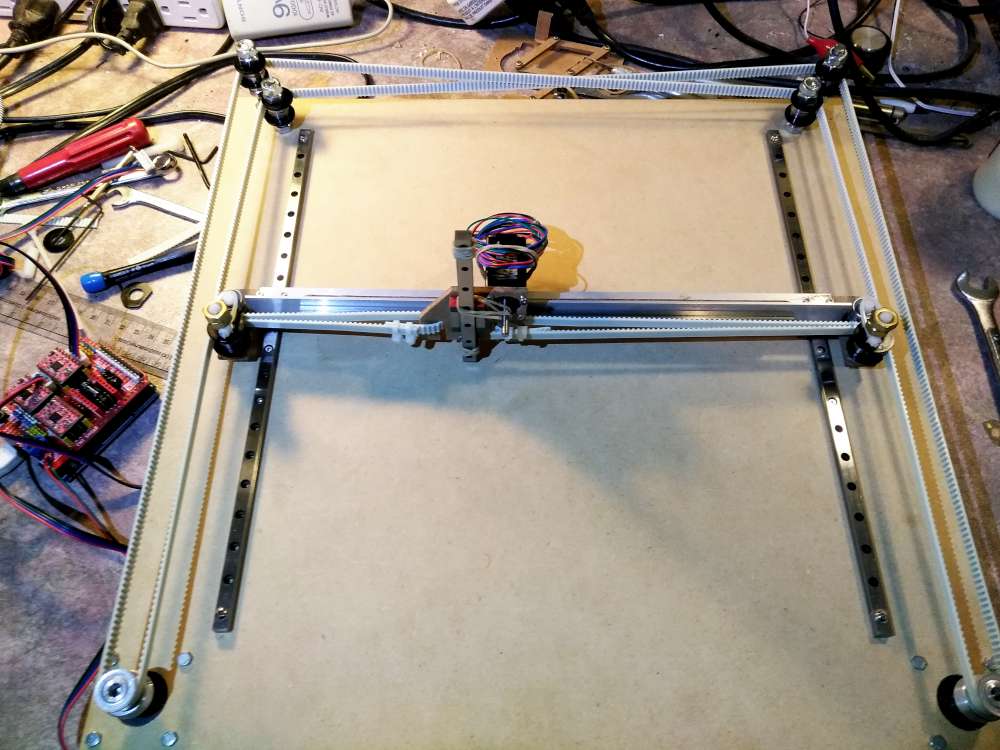
Inventor Artist Darcy Whyte wanted a drawing robot that was light enough to carry around, and could quickly produce drawings. Naturally, he turned to an Arduino Uno, along with a CNC shield and a trio of A4988 stepper drivers. These control a NEMA 8 and two NEMA17 stepper motors in a gantry-style artistic setup.

The build is able to drag a marker across a page, apparently varying pressure applied with the z-axis, and thus how much ink is applied. In another mode, a pen can be used, which wobbles back and forth to create volume when needed. 

Both methods, as seen in the clips below, can sketch a very recognizable—though certainly distinct—portrait of Marilyn Monroe, or presumably whatever other image you choose to program in.

Arduino Blog 10 Jul 00:45

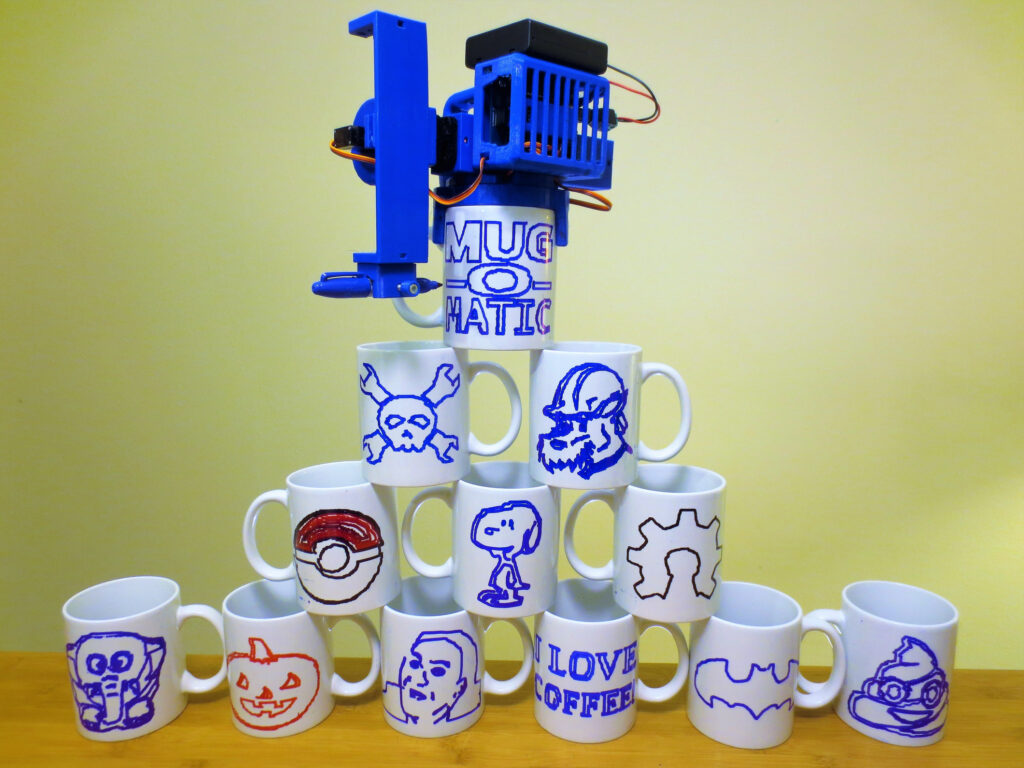
Customize your coffee cups with the Mug-O-Matic!

In order to inspire the next generation of scientists and engineers, Michael Graham (AKA EngineerDog) has come up with a robot that automatically draws on coffee mugs with a marker—and potentially much more. 

In its nominal configuration, the Mug-O-Matic is controlled by an Arduino Nano with a custom TinyCNC board, and uses a trio of small servo motors for cup plotting.

Additionally, the device can be reconfigured into a wide variety of robotic forms, and features 60+ compatible parts with which to do so. 

Mug-O-Matic is a 3-axis drawing robot that can customize coffee mugs! This capable little robot can draw anything you want via manual control, Bluetooth, calculated algorithms, or even g-code. So you can enjoy your custom mug creation, then wipe it clean. You could make it totally different every day for a year, and not make the same thing twice!

Its little buddy, the Desktop Sentry, is a pan-tilt turret that guards your desk! Also controlled via joystick, Bluetooth, algorithms, or G-code, this device can automatically guard your space with a laser or a rubber band launcher, or be used for light writing.

The intent of this project is to produce fun and accessible educational tools. We want to encourage people to engage in tinkering and making things, because the creative process is a powerful way to learn.

If you’d like to get to work on your own Mug-O-Matic, more info can be found here, including a parts list for the build. It is also slated for a release on Crowd Supply, which will likely make things easier and less expensive if you’re willing to wait!

Three-axis rotary machining with Arduino

For many years CNC machining was the purview of well-equipped shops and manufacturing facilities. With the availability of inexpensive control hardware, such as Arduino-based GRBL packages, this type of control has come to the (technically inclined) masses, enabling us to create complicated 2D and 3D shapes automatically.

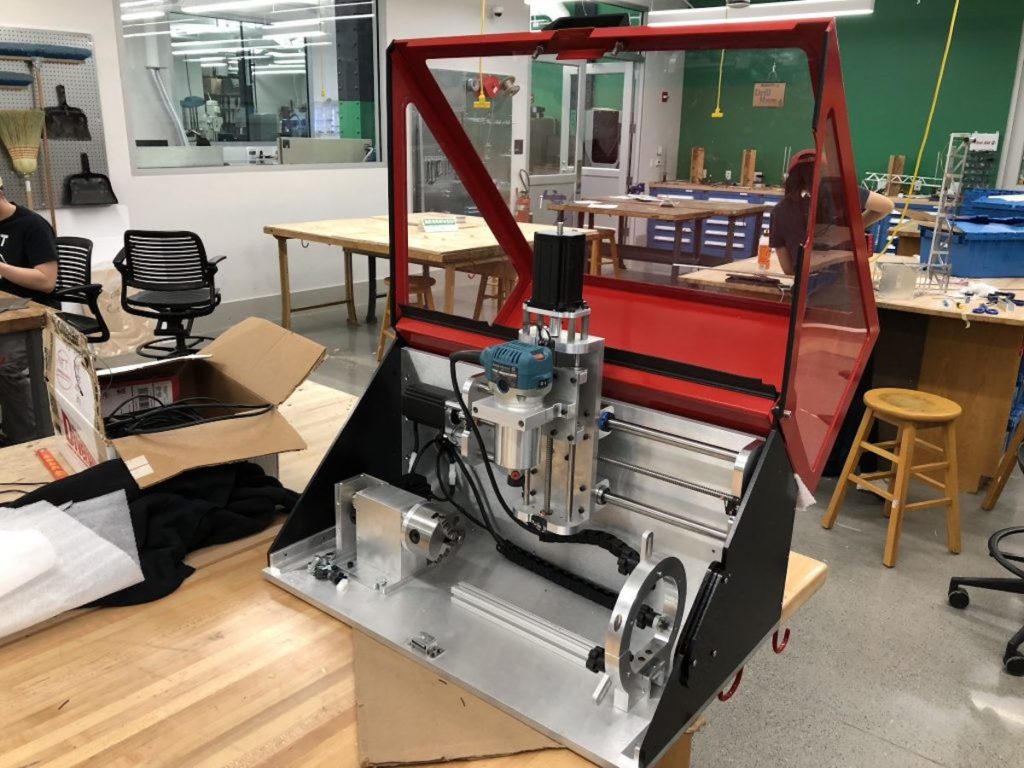
Normally, this means X, Y, and Z axes that control a cutting head, and if you wanted to much further in complexity and cost, you could add a fourth or even a fifth axis to tilt things as needed. The RotoMill, however, seen at World Maker Faire in New York, puts a different “spin” on things, substituting a stepper-controlled spindle for the Y axis. The result is a machine with unique machining capabilities, driven by an Arduino Uno running custom GRBL firmware.

As for now, the CNC can easily mill parts out of softer materials like plastic, wood, and foam, although it is designed to cut aluminum as well.

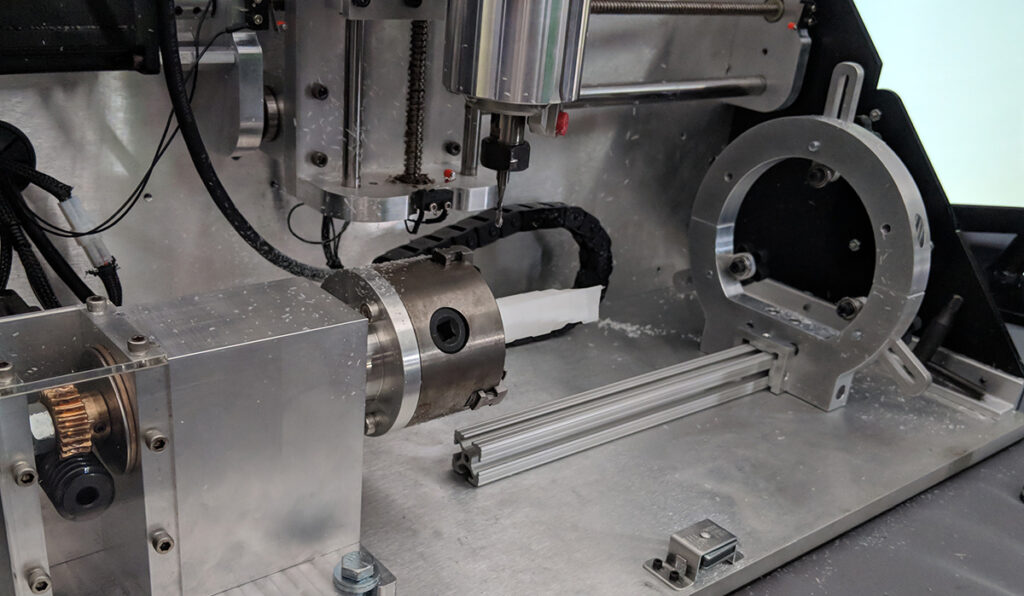
A three-axis rotary CNC built for the Mechanical Engineering senior design capstone course at Carnegie Mellon University by a team of engineering students. The CNC uses NEMA24 motors for each of the axes, with the X and Z axes actuated by lead screws, and the A (rotary) axis actuated by a worm gear. The spindle is an off-the-shelf Makita hand router, which allows for any router bit to be used.

Each motor is controlled by a stepper motor driver, which are all coordinated by an Arduino Uno running a customized version of the GRBL firmware. This is in turn controlled by a laptop running open-source GCode sending software.

To generate the GCode, we would create a 3D model of the part that we wanted to machine. We then “unwrapped” about the A axis. This basically takes the part and converts it from Cartesian coordinates to Cylindrical coordinates.

To generate the GCode, we would create a 3D model of the part that we wanted to machine. We then “unwrapped” about the A axis. This basically takes the part and converts it from Cartesian coordinates to Cylindrical coordinates.

At this point, we could take the unwrapped part and load it into Autodesk HSM, a popular industrial CAM package. This allowed us to generate a toolpath for machining the part. We basically “fooled” the CNC into thinking that it was a normal, three-axis Cartesian CNC. The trick, however, is that the Y axis is wrapped around and becomes the A axis.

Additional information and photos can be found on RotoMill’s page or Hackaday’s recent write-up.

Make masterpieces with a homemade CNC painting machine

Longtime artist Jeff Leonard has built a pair of Arduino-driven CNC painting machines with the motivation to grow his toolbox and expand the kinds of marks he could make simply by hand. By pairing the formal elements of painting with modern-day computing, the Brooklyn-based Maker now has the ability to create things that otherwise would’ve never been possible.

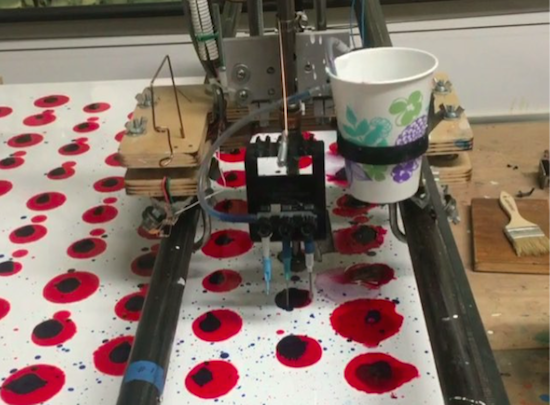
Machine #1 consists of a 5’ x 7’ table and is capable of producing pieces of art up to 4’ x 5’ in size. The device features a variety of tools, including a Beugler pinstriping paint wheel, a brush with a peristaltic pump syringe feed, an airbrush with a five-color paint feed system and five peristaltic pumps from Adafruit, a squeegee, and pencils, pens, markers and other utensils.

In terms of hardware, it’s equipped with three NEMA 23 stepper motors, three Big Easy Drivers, as well as an Arduino Mega and an Uno. There are two servos and five peristaltic pumps on the carriage–the first servo raises and lowers the tool, while the second presses the trigger on the airbrush. An Adafruit motor shield on the Uno controls the pumps, and the AccelStepper library is used for the Big Easy Drivers.

According to Leonard:

I am coding directly into the Arduino. There are many different codes that I call and overlap and use as a painter overlaps techniques and ideas. There is a lot of random built into the code, I don’t know what the end result will be when I start. Typically on any kind of CNC machining the end result has been made in the computer and the machine executes the instructions. I am building a kind of visual synthesizer that I can control in real-time. There are many buttons and potentiometers that I am controlling while the routines are running. I take any marks or accidents that happen and learn how to incorporate them into a painting.

I am learning Processing now and how to incorporate it into the image making.

Machine #2, however, is a bit different. This one is actually a standup XY unit that was made as a concept project. It paints using water on magic paper that becomes black when wet and disappears as it dries, used mainly as a way to practice calligraphy or Chinese brush painting. Not only does it look great, there’s no clean up either!

In terms of tools, the machine has a brush and an airbrush. Two NEMA 17 stepper motors are tasked with the XY motion. There are also three servos–one servo lifts and lowers the armature away from the paper since there is no Z-axis, another controls the angle of the brush, and the third presses the trigger of the airbrush. A peristaltic pump helps to refill the water cup, along with a small fan. The system is powered by an Arduino Uno with an Adafruit Motor Shield using the Adafruit Motor Shield Library v2.

As awesome as it all sounds, you really have to see these gadgets in action and their finished works (many of which can be found on Instagram).

FR4 Machine Shield Is A CNC Milling Machine From FR4 PCB

The people behind the PocketNC heard you like CNC PCB mills, so they milled you a PCB mill out of PCB. They announced their surprising new open source hardware product, a pocket sized 3-axis CNC machine entirely made out of FR4 PCB material, aptly named “FR4 Machine Shield”, at this year’s Bay Area Maker Faire.

We know the concept from quadcopters, little robots, and generally things that are small enough to make use of their PCBs as a structural component. But an entire CNC machine, soldered together from a few dozen PCBs certainly takes it to the next level.

There is no doubt that 2mm thick fiber reinforced epoxy can be surprisingly rigid, although the Achilles heel of this method might be the solder joints. However, it looks like all load bearing, mechanical connections of the machine are supported by tightly interlocking “dovetail”-joints, which may help protecting all the solder connections from the strain hardening effects of continuous stress and spindle vibrations.

As you might expect, most of the wiring is embedded into the FR4 frame construction, and to squeeze the maximum value out of the PCB material, the motor driver boards interface via card edge connectors with the (currently Arduino based) controller board. In addition to the milling head, which features a brushless DC motor and a tool coupler, the team wants to develop heads for circuit printing, microscopy, pneumatic pick and place, hot air reflow, and 3D printing.

With all those cost-driven design choices, from the one-step manufacturing process of the frame and wiring to the dismissal of screws and nuts from the frame assembly, the “FR4 Machine Shield” could indeed become one of the cheapest CNC machine kits on the market. The team targets an introduction price of $400 during a Kickstarter campaign in June 2016. Can they deliver? [Gerrit] check Pocket NC out at the Faire and ended up raving about how they run their business.

Enjoy their teaser video below!


Filed under: cnc hacks

3D Printing Pen and CNC Machine Yields Cheap 3D Printer

3D printers are ubiquitous now, but they’re still prohibitively expensive for some people. Some printers cost thousands, but even more inexpensive options aren’t exactly cheap. [Daniel] decided that this was unacceptable, and set out to make a basic 3D printer for under $100 by including only the bare essentials needed for creating anything out of melted plastic.

3D printers are essentially four parts: a bed, filament, and a hot end and extruder. In a previous project, [Daniel] used parts from old CD drives to create a three-axis CNC machine which he uses for the bed. To take care of the hot end and extruder, he is using a 3D printing pen which he mounts to the CNC machine and voila: a 3D printer!

It’s not quite as simple as just strapping a 3D printing pen to a CNC machine, though. The pen and the CNC machine have to communicate with each other so that the pen knows when to place filament and the CNC machine knows when to move. For that, [Daniel] went with a trusty Arduino in order to switch the pen on and off. Once it’s working, it’s time to start printing!

[Daniel] does note that this is a design that’s relatively limited in terms of print size and resolution, but for the price it can’t be beat. If you’re interested in getting started with 3D printing, a setup like this would be perfect. 3D pens are a pretty new idea too, and it’s interesting to see them used in different ways like this.


Filed under: 3d Printer hacks