Posts with «attiny» label

Arduino Measures Remaining Battery Power With Zero Components, No I/O Pin

[Trent M. Wyatt]’s CPUVolt library provides a fast way to measure voltage using no external components, and no I/O pin. It only applies to certain microcontrollers, but he provides example Arduino code showing how handy this can be for battery-powered projects.

The usual way to measure VCC is simple, but has shortcomings.

The classical way to measure a system’s voltage is to connect one of your MCU’s ADC pins to a voltage divider made from a couple resistors. A simple calculation yields a reading of the system’s voltage, but this approach has two disadvantages: one is that it constantly consumes power, and the other is that it ties up a pin that you might want to use for something else.

There are ways to mitigate these issues, but it would be best to avoid them entirely. Microchip application note 2447 describes a method of doing exactly that, and that’s precisely what [Trent]’s Arduino library implements.

What happens in this method is one selects Vbg (a fixed internal voltage reference that is temperature-independent) as Vin, and selects Vcc as the ADC’s voltage reference. This is essentially backwards from how the ADC is normally used, but it requires no external hookup and is only a bit of calculation away from determining Vcc in millivolts. There is some non-linearity in the results, but for the purposes of measuring battery power in a system or deciding when to send a “low battery” signal, it’s an attractive solution.

Being an Arduino library, CPUVolt makes this idea very easy to use, but the concept and method is actually something we have seen before. If you’re interested in the low-level details, then check out our earlier coverage which goes into some detail on exactly what is going on, using an ATtiny84.

Pocket Radio Powered By Tiny Microcontroller

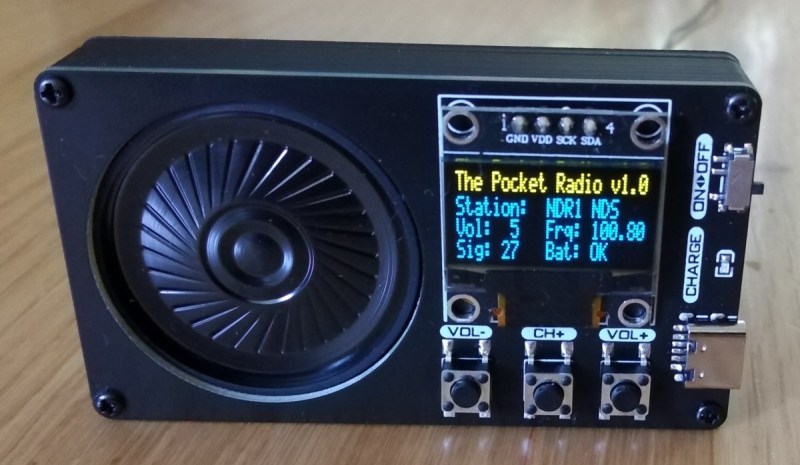
Before the days of MP3 players and smartphones, and even before portable CD players, those of us of a certain age remember that our cassette players were about the only way to take music on-the-go. If we were lucky, they also had a built-in radio for when the single tape exhausted both of its sides. Compared to then, it’s much easier to build a portable radio even though cassettes are largely forgotten, as [wagiminator] shows us with this radio design based on an ATtiny.

The build is about as compact as possible, with the aforementioned ATtiny 402/412 as its core, it also makes use of an integrated circuit FM tuner,  an integrated audio amplifier with its own single speaker, and a small OLED display. The unit also boasts its own lithium-polymer battery charger and its user interface consists of only three buttons, plenty for browsing radio stations and controlling volume.

The entire build fits easily in the palm of a hand and is quite capable for a mobile radio, plus all of the schematics and code is available on the project page. While it doesn’t include AM capability, just the fact that FM is this accessible nowadays when a few decades ago it was cutting-edge technology is quite remarkable. If you’re looking for an even smaller FM receiver without some of the bells and whistles of this one, take a look at this project too.

Hack a Day 06 Jul 21:00
arduino  attiny  audio  code  fm  oled  radio  radio hacks  schematics  speaker  

I2C To The Max With ATtiny

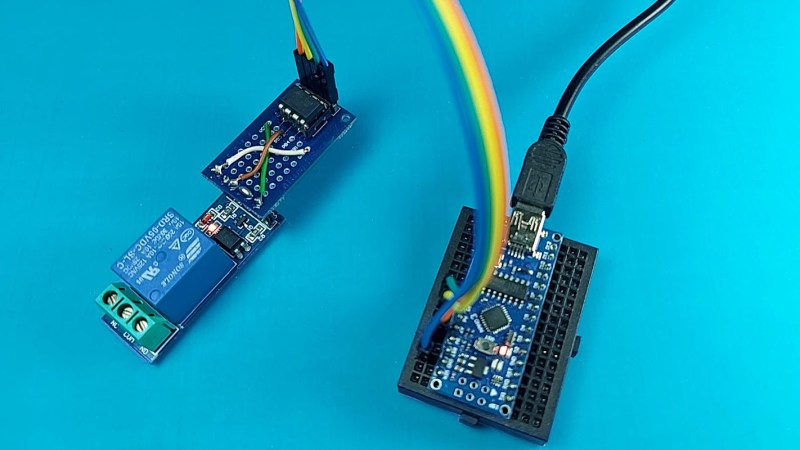
The Arudino is a powerful platform for interfacing with the real world, but it isn’t without limits. One of those hard limits, even for the Arduino MEGA, is a finite number of pins that the microcontroller can use to interface with the real world. If you’re looking to extend the platform’s reach in one of your own projects, though, there are a couple of options available. This project from [Bill] shows us one of those options by using the ATtiny85 to offload some of an Arduino’s tasks using I2C.

I2C has been around since the early 80s as a way for microcontrollers to communicate with each other using a minimum of hardware. All that is needed is to connect the I2C pins of the microcontrollers and provide each with power. This project uses an Arduino as the controller and an arbitrary number of smaller ATtiny85 microcontrollers as targets. Communicating with the smaller device allows the Arduino to focus on more processor-intensive tasks while giving the simpler tasks to the ATtiny. It also greatly simplifies wiring for projects that may be distributed across a distance. [Bill] also standardizes the build with a custom dev board for the ATtiny that can also double as a shield for the Arduino, allowing him to easily expand and modify his projects without too much extra soldering.

Using I2C might not be the most novel of innovations, but making it easy to use is certainly a valuable tool to add to the toolbox when limited on GPIO or by other physical constraints. To that end, [Bill] also includes code for an example project that simplifies the setup of one of these devices on the software end as well. If you’re looking for some examples for what to do with I2C, take a look at this thermometer that communicates with I2C or this project which uses multiple sensors daisy-chained together.

Digging into an ATtiny Simulator Bug with GDB

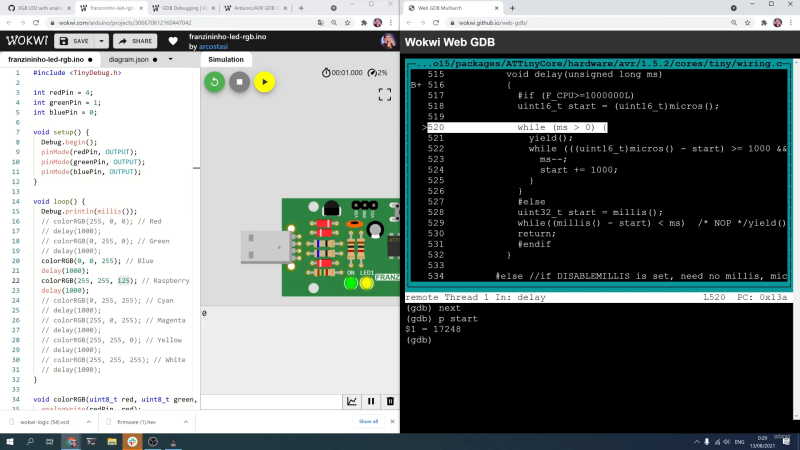
Being able to track down a bug in a mountain of source code is a skill in its own right, and it’s a hard skill to learn from a book or online tutorial. Besides the trial-by-fire of learning while debugging your own project, the next best thing is to observe someone else’s process. [Uri Shaked] has given us a great opportunity to brush up on our debugging skills, as he demonstrates how to track down and squish a bug in the Wokwi Arduino simulator.

A user was kind enough to report the bug and include the offending Arduino sketch. [Uri]’s first step was to reduce the sketch to the smallest possible program that would still produce the bug.

Once a minimal program had been produced, it was time to check whether the problem was in one of the Arduino libraries or in the Wokwi simulator. [Uri] compiled the sketch, loaded it onto a ATtiny85, and compared the behavior of the simulator and the real thing. It turns out the code ran just fine on a physical ATtiny, so the problem must have been in the Arduino simulator itself.

To track down the bug in the simulator, [Uri] decided to break out the big gun—GDB. What follows is an excellent demonstration of how to use GDB to isolate a problem by examining the source code and using breakpoints and print statements. In the end, [Uri] managed to isolate the problem to a mis-placed bit in the simulation of the timer/counter interrupt flag register.

If you’d like to see more of [Uri]’s debugging prowess, check out his dive into an ATtiny’s write protection and configuration fuses. If you’ve been wowed by the power of GDB and want to learn more, check out this quick tutorial!

Hack a Day 27 Aug 06:01

A Tiny LED Matrix is Better With Friends

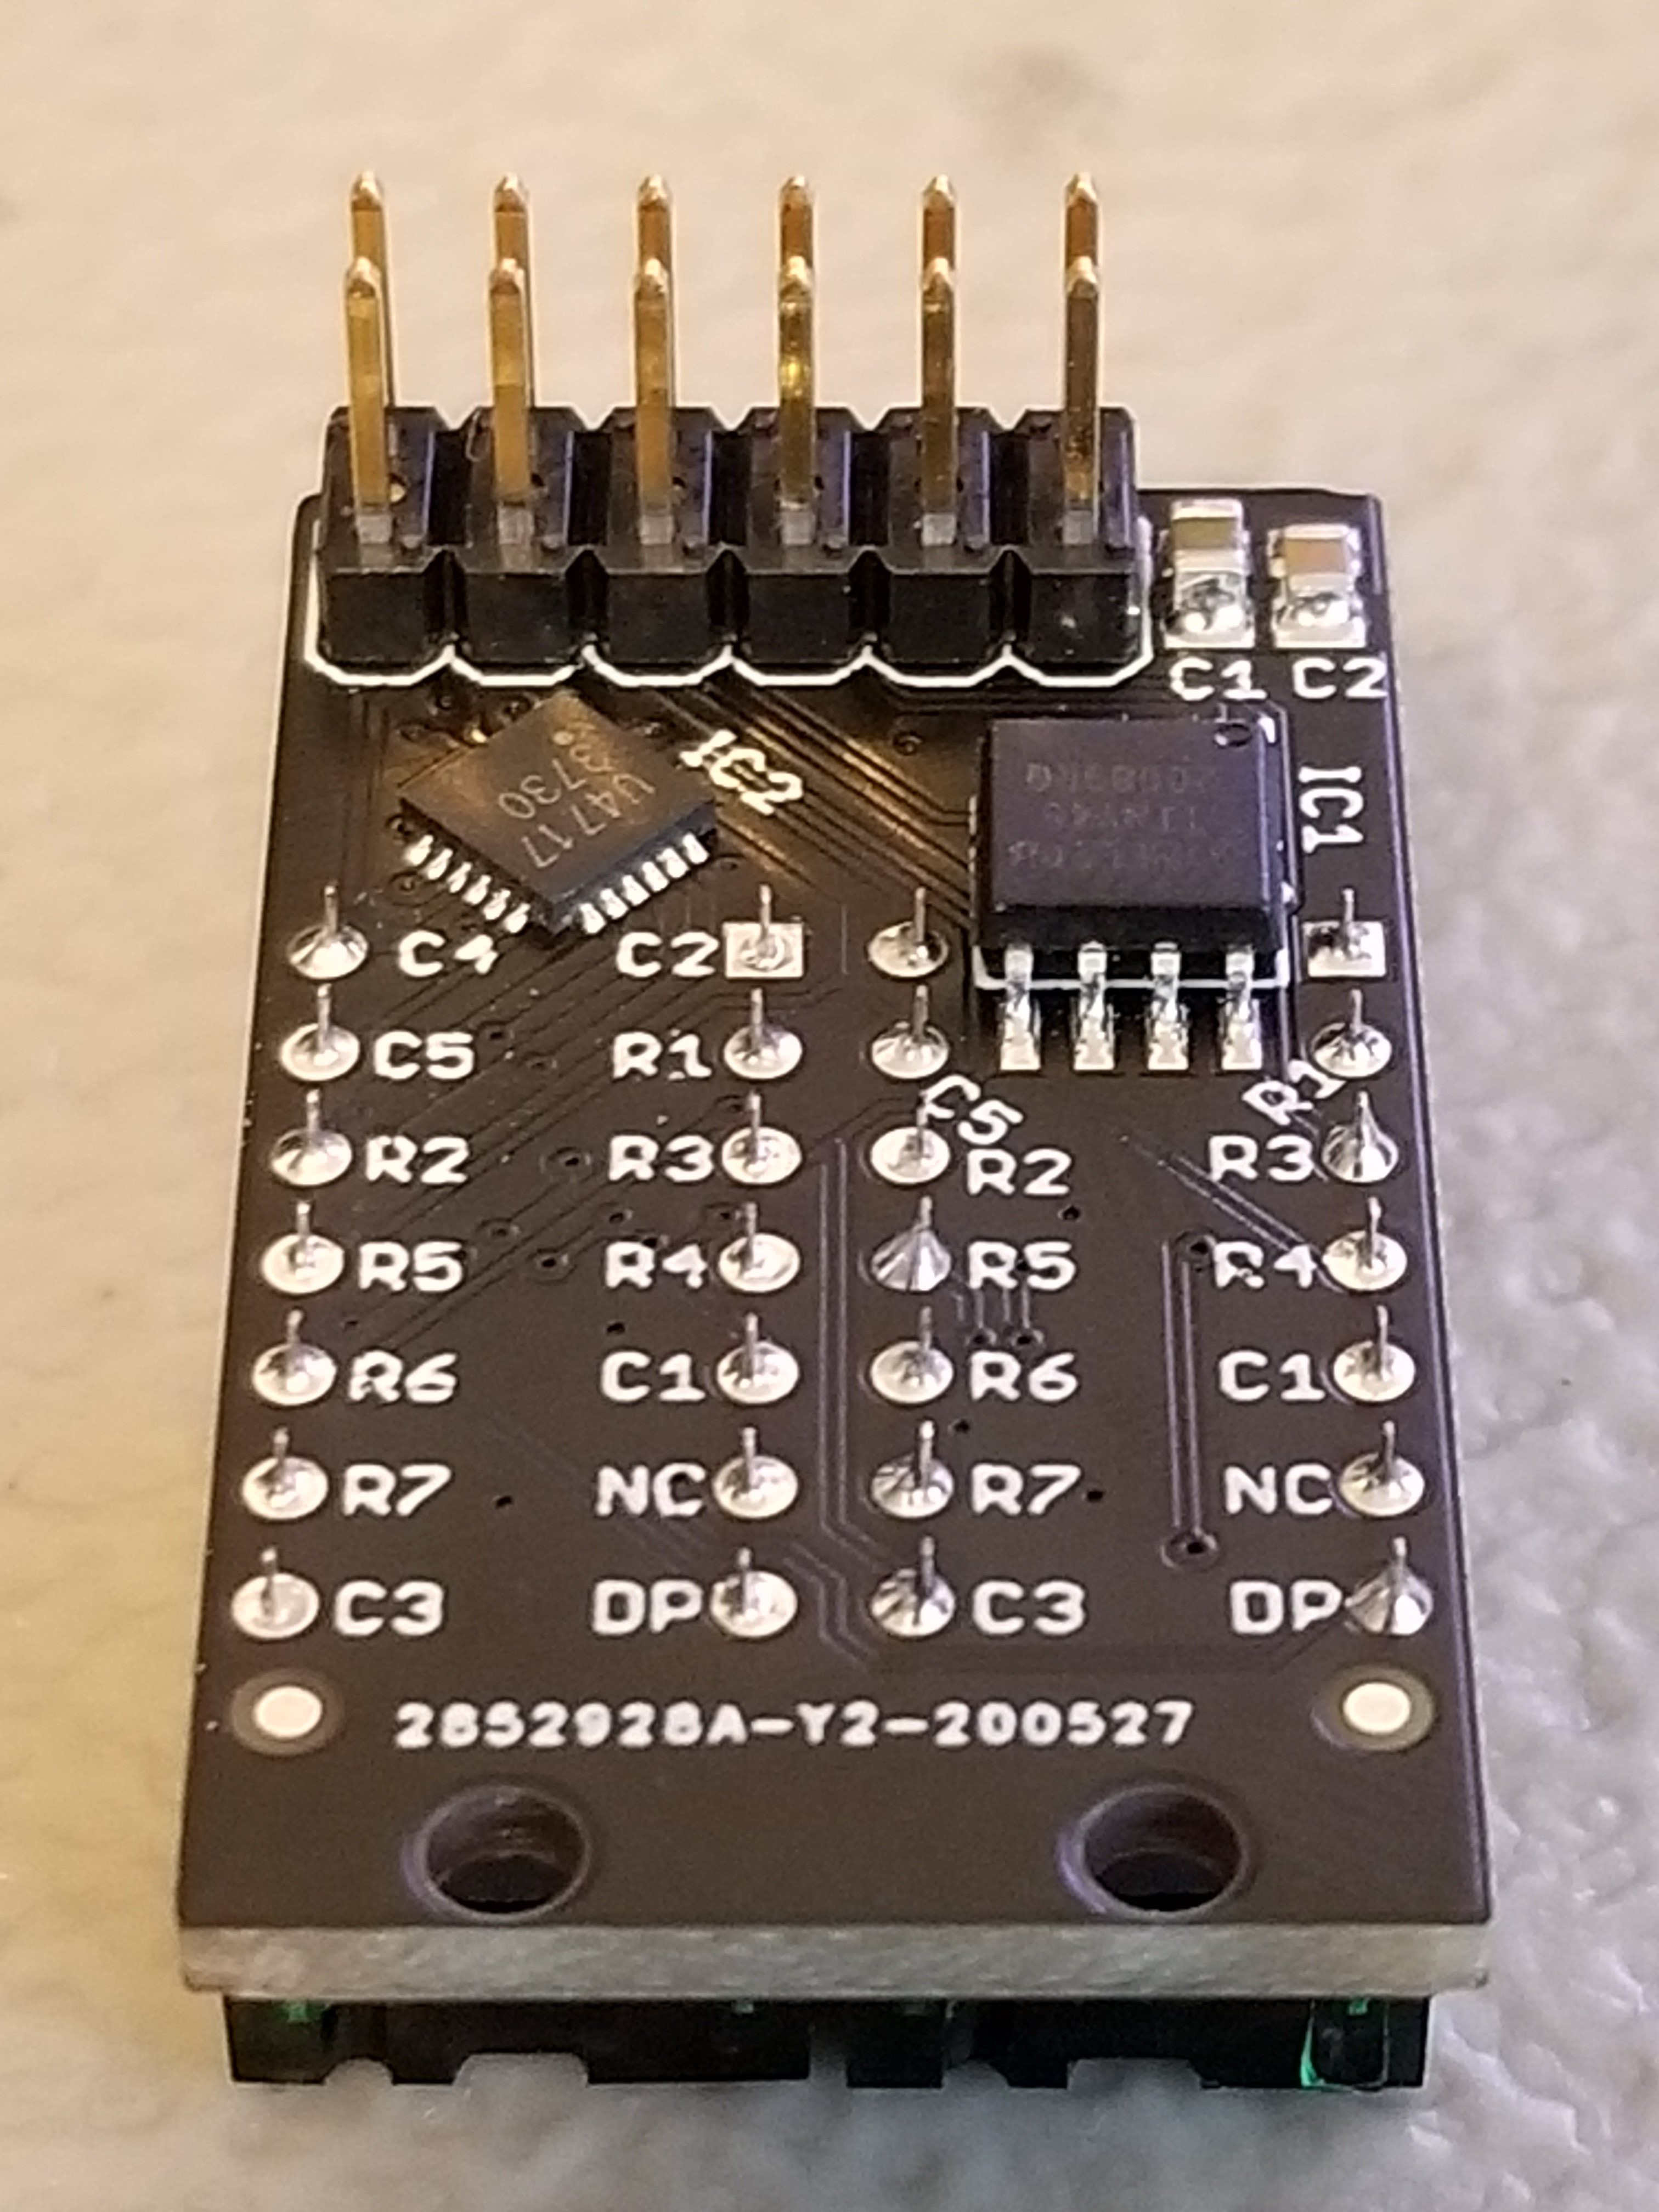
When we last heard from [lixielabs] he was building Nixie tube replacements out of etched acrylic and LEDs. Well he’s moved forward a few decades to bring us the Pixie, a chainable, addressable backpack for tiny LED matrix displays.

Each Pixie module is designed to host two gorgeous little Lite-On LTP-305G/HR 5×7 LED dot matrix displays, which we suspect have been impulse purchases in many a shopping cart. Along with the displays there is a small matrix controller and an ATTINY45 to expose a friendly electrical interface. Each module is designed to be mounted edge to edge and daisy chained out to 12 or more (with two displays each) for a flexible display any size you need. But to address the entire array only two control pins are required (data and clock).

[lixielabs] has done the legwork to make using those pins as easy as possible. He is careful to point out the importance of a good SDK and provides handy Arduino libraries for common microcontrollers and a reference implementation for the Raspberry Pi that should be easy to crib from to support new platforms. To go with that library support is superb documentation in the form of a datasheet (complete with dimensions and schematic!) and well stocked GitHub repo with examples and more.

To get a sense of their graphical capabilities, check out a video of 6 Pixie’s acting as a VU meter after the break. The Pixie looks like what you get when a hacker gets frustrated at reinventing LED dot matrix control for every project and decided to solve it once and for all. The design is clean, well documented, and extremely functional. We’re excited to see what comes next!

ESP32 with an I2S mic running FFT with 1024 cells, with each octave overlaid to make a 12-note chromagram, being rendered live by Pixies!https://t.co/0nWQfX0W6W pic.twitter.com/UZgh5ymWAw

— Lixie Labs (@lixielabs) September 22, 2020

Tiny Machine Learning On The Attiny85

We tend to think that the lowest point of entry for machine learning  (ML) is on a Raspberry Pi, which it definitely is not. [EloquentArduino] has been pushing the limits to the low end of the scale, and managed to get a basic classification model running on the ATtiny85.

Using his experience of running ML models on an old Arduino Nano, he had created a generator that can export C code from a scikit-learn. He tried using this generator to compile a support-vector colour classifier for the ATtiny85, but ran into a problem with the Arduino ATtiny85 compiler not supporting a variadic function used by the generator. Fortunately he had already experimented with an alternative approach that uses a non-variadic function, so he was able to dust that off and get it working. The classifier accepts inputs from an RGB sensor to identify a set of objects by colour. The model ended up easily fitting into the capabilities of the diminutive ATtiny85, using only 41% of the available flash and 4% of the available ram.

It’s important to note what [EloquentArduino] isn’t doing here: running an artificial neural network. They’re just too inefficient in terms of memory and computation time to fit on an ATtiny. But neural nets aren’t the only game in town, and if your task is classifying something based on a few inputs, like reading a gesture from accelerometer data, or naming a color from a color sensor, the approach here will serve you well. We wonder if this wouldn’t be a good solution to the pesky problem of identifying bats by their calls.

We really like how approachable machine learning has become and if you’re keen to give ML a go, have a look at the rest of the EloquentArduino blog, it’s a small goldmine.

We’re getting more and more machine learning related hacks, like basic ML on an Arduino Uno, and Lego sortings using ML on a Raspberry Pi.

The Smaller, Tinier Arduino Platform

While many of the Arduino platforms are great tools for gaining easy access to microcontrollers, there are a few downsides. Price and availability may be the highest on the list, and for those reasons, some have chosen to deploy their own open-source Arduino-compatible boards.

The latest we’ve seen is the Franzininho, an Arduino Gemma-like board that’s based on the ATtiny85, a capable but tiny microcontroller by Atmel in a compact 8-pin configuration. This board has everything the Gemma has, including a built-in LED and breakout pins. One of the other perks of the Franzininho over the Gemma is that everything is based on through-hole components, making the assembly much easier than the surface mount components of the Gemma.

It’s worth noting that while these boards are open source, the Arduinos are as well. It’s equally possible to build your own 100% identical Arduino almost as easily. If you want more features, you can add your own by starting from one of these platforms and do whatever you want with it, like this semi-educational Atmel breakout board.

Thanks to [Clovis] for the tip!

False Claims On Kickstarter: What’s New?

Kickstarter and its ilk seem like the Wild West when it comes to claims of being “The world’s most (Insert feature here) device!” It does add something special when you can truly say you have the world record for a device though, and [MellBell Electronics] are currently running a Kickstarter claiming the worlds smallest Arduino compatible board called Pico.

We don’t want to knock them too much, they seem like a legit Kickstarter campaign who have at time of writing doubled their goal, but after watching their promo video, checking out their Kickstarter, and around a couple of minutes research, their claim of being the world’s smallest Arduino-compatible board seems to have been debunked. The Pico measures in at an impressive 0.6 in. x 0.6 in. with a total area of 0.36 sq.in. which is nothing to be sniffed at, but the Nanite 85 which we wrote up back in 2014 measures up at around 0.4 in. x  0.7in. with a total area of around 0.28 sq.in.. In this post-fact, fake news world we live in, does it really matter? Are we splitting hairs? Or are the Pico team a little fast and loose with facts and the truth?

There may be smaller Arduino compatible boards out there, and this is just a case study between these two. We think when it comes to making bold claims like “worlds smallest” or something similar perhaps performing a simple Google search just to be sure may be an idea.


Filed under: Arduino Hacks, Crowd Funding

The Flowing Pixels of Time Wait for No Man

The hourglass dramatically depicts the flow of time; gravity pulling grains of sand inevitably downward. So it is with the Bits of Time project by [Frank Andre]. The pixels drop, stopping only when the battery dies. Or, when your eggs are ready. (Pssst, it’s also on Hackaday.io.)

Look, Ma! No GIF!

The project starts with a couple of [Frank’s] PixBlocks. A processor is added to one PixBlock to serve as the controller for both after they are connected via the serial bus. A tilt switch, with a debouncing circuit, is connected to an IO pin. This tells the processor the orientation of the box and therefore which way the pixels should flow.

Two  switches set the duration of the timer in 15 second increments. A third starts the timer. When the box is rotated the pixels start flowing in the opposite direction. With code available on GitHub the system can be programmed for other effects such as changing colors, flickering, or even text display.

You’ll agree this is a bit less intimidating than the MacGyver-ish kitchen timer we covered last year.


Filed under: clock hacks, led hacks

There Is No Spoon; Automatic Self Stirring Mug

Sometimes it’s helpful to realize the truth that there is no spoon. At least, not with [Ronaldo]’s automatic self-stirring mug. At first it was just a small propeller in the bottom of the mug that turned on by pushing a button in the handle, but this wasn’t as feature-rich as [Ronaldo] hoped it could be, so he decided to see just how deep the automatic beverage-mixing rabbit hole goes.

The first thing to do was to get a microcontroller installed to handle the operation of the motor. The ATtiny13a was perfect for the job since it’s only using one output pin to control the motor, and can be configured to only draw 0.5 microamps in power-saving mode. This ensures a long life for the two AAA batteries that power the microcontroller and the motor.

As far as operation goes, the motor operates in different modes depending on how many times the button in the handle is pushed. It can be on continuously or it can operate at pre-determined intervals for a certain amount of time, making sure to keep the beverage thoroughly mixed for as long as the power lasts. Be sure to check out the video below for a detailed explanation of all of the operating modes. We could certainly see some other possible uses for more interesting beverages as well.


Filed under: cooking hacks
Hack a Day 24 Jan 21:00