Posts with «synth» label

Cheap stereo line out I2S DAC for CircuitPython / Arduino synths

I am a big fan of these PCM5102A I2S DAC boards (3 for $15! affilliate) for playing around with audio synthesis, for example in this video about new `synthio` CircuitPython library or this repository about Mozzi Arduino synthesis. They have pretty high-quality audio output up to at least 16-bit @ 44.1kHz and separate out all …

Continue reading "Cheap stereo line out I2S DAC for CircuitPython / Arduino synths"

Todbot 16 May 22:41

Touchscreen Makes For A Neat Wavetable Synth

A popular tool in chiptune software like LSDJ allows the user to draw a waveform and use it as the basis for a wavetable synth. It’s fun and it can produce some great bleeps and bloops. [Kevin] has created a similar tool using an Arduino and a touchscreen.

You can draw the waveform! That’s neat.

The build is based on the Arduino Uno, the humble mainstay of the Arduino line. It’s hooked up to an ILI9488 color touchscreen display, which acts as the primary user interface. Using a stylus, or presumably a finger, the user can draw directly on the screen to specify the desired waveform for the synth to produce. The Arduino reads the step-by-step amplitude values of the drawn waveform and uses them to synthesize audio according to MIDI messages received over its serial port. Audio output is via PWM, as is common in low-cost microcontroller projects.

It’s a fun build and we’re sure [Kevin] learned plenty about wavetable synthesis along the way. We’ve seen his work on other Arduino synthesis projects before, too! Video after the break.

Homebrew Grain Synth Has A Rad Step Sequencer

In the world of homebrew synthesizers, there are plenty of noiseboxes and grooveboxes that make all kinds of wacky and wild noises. However, common projects like the Auduino and Atari Punk Console are often limited in that they can’t readily be programmed to play multiple notes or any sort of discernable rhythm. [Nick Poole] changes this with his Auduino step sequencer build.

The build takes the Auduino grain synthesizer, and modifies it by adding a step sequencer. This is possible as the Auduino code, which runs on the old-school ATMEGA-based Arduinos, is incredibly fast, leaving plenty of processing time for extra features to be added. [Nick] adds eight LEDs and eight buttons to the build, allowing the user to select one of eight steps to modify. Then, the sound parameters for the step can be altered with the standard Auduino controls. This lets the user quickly and easily build up 8-step melodies, something that was previously impossible with the Auduino.

It’s a fun build, and one that makes a great intro into the world of DIY synth builds. The techniques learned here will serve any aspiring maker well if they dive further into the world of modular synthesis and associated arcana. Video after the break.


Auduino software synth

Hack a Day 19 Mar 19:30

Procedural Barcode Synth is as Simple as Black and White

We are no stranger to peculiar and wonderful musical instruments here at Hackaday. [James Bruton] has long been fascinated with barcode scanners as an input source for music and now has a procedural barcode-powered synth to add to his growing collection of handmade instruments. We’ve previously covered his barcode guitar, which converts a string of numbers from the PS/2 output to pitches. This meant having a large number of barcodes printed as each pitch required a separate barcode. As you can imagine, this makes for a rather unwieldy and large instrument.

Rather than looking at the textual output of the reader, [James] cracked it open and put it to the oscilloscope. Once inside, he found a good source that outputs a square wave corresponding to the black and white lines that the barcode sees. Since the barcodes [James] is using don’t have the proper start and stop codes, the barcode reader continuously scans.  Normally it would stop the laser to send the text over the USB or PS/2 connection. A simple 5v to 3.3v level shifter feeds that square wave into a Teensy board, which outputs the audio.

A video showcasing a similar technique inspired [James] with this project. The creators of that video have a huge wall of different patterns of black and white lines. [James’s] next stroke of brilliance was to have a small HDMI display to generate the barcodes on the fly. A Raspberry Pi 4 reads in various buttons via GPIO and displays the resulting barcode on the screen. A quick 3d printed shell rounds out the build nicely, keeping things small and compact. All the code and CAD files are up on GitHub.

Thanks [James Bruton] for the awesome project!

Wearable synth plays programmed or random tunes

Unless you’re very good, personal synths are fun for you — though often quite annoying for onlookers. After making his own wristwatch-based synth in 2016, Clem Mayer decided to build a new version that’s larger and louder than ever, and programmable via an Arduino controller.

Mayer chose the MKR WiFi 1010 here to take advantage of its LiPo charging abilities. This enables the device to be entirely self-contained in its custom housing, with a variety of switches and sliders for an interface. 

Users can program their own “tune” to be played back, or even take advantage of a random sequence generated on startup, then modify the sound as it plays live.

Don’t Forget Your Mints When Using This Synthesizer

While synthesizers in the music world are incredibly common, they’re not all keyboard-based instruments as you might be imagining. Especially if you’re trying to get a specific feel or sound from a synthesizer in order to mimic a real instrument, there might be a better style synth that you can use. One of these types is the breath controller, a synthesizer specifically built to mimic the sound of wind instruments using the actual breath from a physical person. Available breath controllers can be pricey, though, so [Andrey] built his own.

To build the synthesizer, [Andrey] used a melodica hose and mouthpiece connected to a pressure sensor. He then built a condenser circuit on a custom Arduino shield and plugged it all into an Arduino Mega (although he notes that this is a bit of overkill). From there, the Arduino needed to be programmed to act as a MIDI device and to interact with the pressure sensor, and he was well on his way to a wind instrument synthesizer.

The beauty of synthesizers is not just in their ability to match the look and sound of existing instruments but to do things beyond the realm of traditional instruments as well, sometimes for a greatly reduced price point.

Synthbike Rolls To The Beat

Modular synthesizers are some of the ultimate creative tools for the electronic musician. By experimenting with patch leads, knobs and switches, all manner of rhythmic madness can be conjured out of the æther. While they may overflow with creative potential, modular synths tend to fall down in portability. Typically built into studio racks and composed of many disparate modules, it’s not the sort of thing you can just take down the skate park for a jam session. If only there was a solution – enter the madness that is Synth Bike.

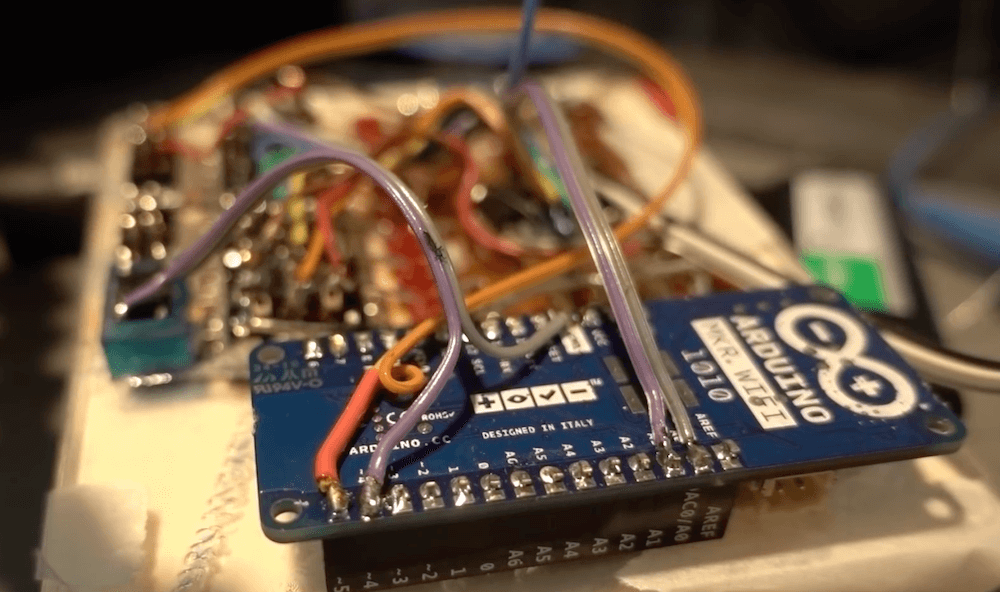
Synth Bike, here seen in the 2.0 revision, impresses from the get go, being built upon a sturdy Raleigh Chopper chassis. The way we see it, if you’re going to build a synth into a bicycle, why not do it with some style? From there, the build ratchets up in intensity. There’s a series of sequencer modules, most of which run individual Arduino Nanos. These get their clock from either a master source, an external jack, or from a magnetic sensor which picks up the rotation of the front wheel. Your pace dictates the tempo, so you’ll want to work those calves for extended raves at the park.

The features don’t stop there – there are drums courtesy of a SparkFun WAV Trigger, an arcade button keyboard, and a filter board running the venerable PT2399 digital delay chip. It’s all assembled on a series of panels with wires going everywhere, just like a true modular should be.

The best thing is, despite the perplexing controls and arcane interface, it actually puts out some hot tunes. It’s  not the first modular we’ve seen around these parts, either.


DIY Tiny Single-PCB Synthesizer

[Jan Ostman] has been pushing the limits of sound synthesis on the lowly AVR ATMega microcontrollers, and his latest two project is so cute that we just had to write it up. The miniTS shares the same basic sound-generation firmware with his previous TinyTS, which we’ve covered here before, but adds a lot more keys, an OLED, and MIDI, while taking away some of the knobs.

Both feature keyboards that are just copper pads placed over a ground plane, and the code does simple capacitive-sensing to figure out if they’re being touched or not. The point here is that you could pick up a PCB from [Jan] on the cheap, and experiment around with the code. Or you could just take the code and make a less refined version for yourself with a cheapo Arduino and some copper plates.

Either way, we like the combination of minimal materials and maximum tweakability, and think it’s cool that [Jan] shares the code, if not also the PCB designs. Anyone with PCB layout practice could get a clone worked up in an afternoon, although it’s going to be cheaper to get these made in bulk, and you’re probably better off just buying one from [Jan].


Filed under: musical hacks

Hackaday Links: October 11, 2015

[Kratz] just turned into a rock hound and has a bunch of rocks from Montana that need tumbling. This requires a rock tumbler, and why build a rock tumbler when you can just rip apart an old inkjet printer? It’s one of those builds that document themselves, with the only other necessary parts being a Pizza Hut thermos from the 80s and a bunch of grit.

Boot a Raspberry Pi from a USB stick. You can’t actually do that. On every Raspberry Pi, there needs to be a boot partition on the SD card. However, there’s no limitation on where the OS resides,  and [Jonathan] has all the steps to replicate this build spelled out.

Some guys in Norway built a 3D printer controller based on the BeagleBone. The Replicape is now in its second hardware revision, and they’re doing some interesting things this time around. The stepper drivers are the ‘quiet’ Trinamic chips, and there’s support for inductive sensors, more fans, and servo control.

Looking for one of those ‘router chipsets on a single board’? Here you go. It’s the NixCoreX1, and it’s pretty much a small WiFi router on a single board.

[Mowry] designed a synthesizer. This synth has four-voice polyphony, 12 waveforms, ADSR envelopes, a rudimentary sequencer, and fits inside an Altoids tin. The software is based on The Synth, but [Mowry] did come up with a pretty cool project here.


Filed under: Hackaday Columns, Hackaday links

Hackaday Links: July 19, 2015

Everybody needs an external USB drive at some time or another. If you’re looking for something with the nerd cred you so desperately need, build a 5 1/4″ half height external drive. That’s a mod to an old Quantum Bigfoot drive, and also serves as a pretty good teardown video for this piece of old tech.

The Woxun KG-UV2D and KG-UV3D are pretty good radios, but a lot of amateur radio operators have found these little handheld radios eventually wear out. The faulty part is always a 24C64 Flash chip, and [Shane] is here to show you the repair.

Last year there was a hackathon to build a breast pump that doesn’t suck in both the literal and figurative sense. The winner of the hackathon created a compression-based pump that is completely different from the traditional suction-based mechanism. Now they’re ready for clinical trials, and that means money. A lot of money. For that, they’re turning to Kickstarter.

What you really need is head mounted controls for Battlefield 4. According to [outgoingbot] it’s a hacked Dualshock 4 controller taped to a bike helmet. The helmet-mounted controller has a few leads going to another Dualshock 4 controller with analog sticks. This video starts off by showing the setup.

[Jan] built a modeling MIDI synth around a tiny 8-pin ARM microcontroller.  Despite the low part count, it sounds pretty good. Now he’s turned his attention to the Arduino. This is a much harder programming problem, but it’s still possible to build a good synth with no DAC or PWM.


Filed under: Hackaday Columns, Hackaday links