Posts with «home hacks» label

Custom Dog Door Prevents Culinary Atrocities

Riley, an 8 lb pug, has more beauty than brains, and a palate as unrefined as crude oil. While we hate criticizing others’ interests and tastes, his penchant for eating cat poop needed to stop. After a thorough exploration of a variety of options, including cat food additives that make its excrement taste worse (HOW? WHY? Clearly taste wasn’t the issue!), automatic litter boxes that stow the secretions, and pet doors that authenticate access to the room with the litter box, [Science Buddies] eventually settled on a solution that was amenable to all members of the family.

The trick was in creating a door mechanism with a blacklist of sorts rather than a whitelist. As the cat didn’t like to push the door open itself, the solution needed to have the pet door open by default. A magnet on Riley’s collar would trip a sensor attached to an Arduino that would control servos to swing the door shut immediately if he attempted to access the defecated delights. Of course safety was a consideration with the door swinging in Riley’s face.

We’ve covered a few pet screeners, including one for the same purpose that used IR sensors (but a much bigger dog also named Riley), and a flock of solutions for chickens. We’ve also seen [Science Buddies] in previous posts, so they’re not on the tips line blacklist.

Trigger Your Home Automation Routines With Home Buttons

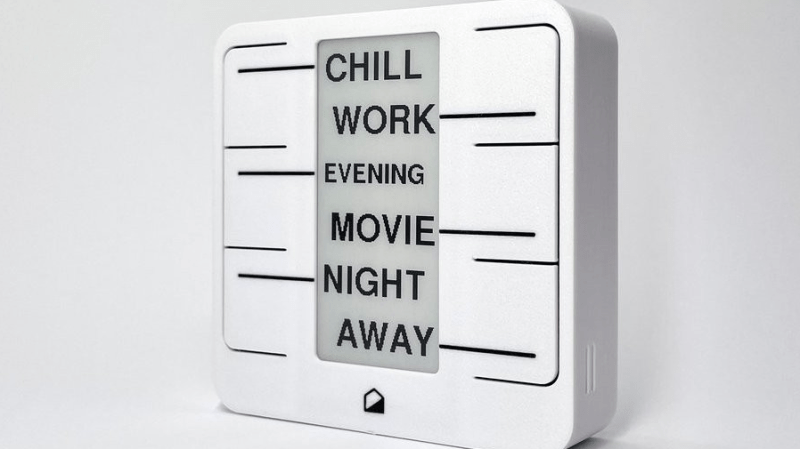
Home automation systems are all well and good, so long as the person who built it all is around to drive it. Let’s face it, they’re quite often a complex web of interconnected systems, all tied to the specifics of one’s home — and someone less familiar with it all could get a little irritated if, on a chilly day, the interface to the boiler is via a Python script, and something won’t work. Just saying. Home Buttons by [Matej Planinšek] over on Hackaday.IO is a nicely polished project, which aims to take some of the hackiness out of such automation by providing a sleek front end to those automation routines, enabling anyone to rock on over and set one in action without hassle.

The PCB is based around the ESP32-S2-mini which deals with WiFi connectivity and integration with Home Assistant using the usual MQTT protocol. We expect integration with other flavors of home automation would not be difficult to achieve. The center of the unit holds a simple E-Ink display, for that low-standby power. Specifically, the unit chosen is a Good Display GDEY029T94 2.9″ which this scribe can confirm is easy to interface and pretty cheap to purchase from the usual Chinese online vendors. This was matched up with six clicky Alps SKRB-series low-profile tact switches, which sit on either side of the display, and corresponds to a flexure-type affair on the 3D printed front casing. Neat and simple.

The PCB design was provided in Altium format, which you can find on the project GitHub page. This shows a straightforward design, with a few nice little details here and there. The internally mounted 186550 cell is reportedly good for at least a year of operation, but when time, it can be charged via USB. A Xysemi XB8608AF (PDF) protection chip provides appropriate limiting for the 186550 cell, shielding it from the perils of overcharging, discharging, and whatnot. Not that that is likely in this current setup. A Sensiron SHTC3 humidity and temperature sensor is also in there, hanging off the I2C bus, which makes sense for this application.

Home Automation hacks are plenty on these pages, like this scroll-wheel interface, for instance. If all this stuff is looking quite overbearingly complicated to get into, how about starting with a Pico W?

Impressive Off-Grid Hydroelectric Plant Showcases The Hacker Spirit

We all know the story arc that so many projects take: Build. Fail. Improve. Fail. Repair. Improve. Fail. Rebuild. Success… Tweak! [Kris Harbour] is no stranger to the process, as his impressive YouTube channel testifies.

An IOT charge controller makes power management easier.

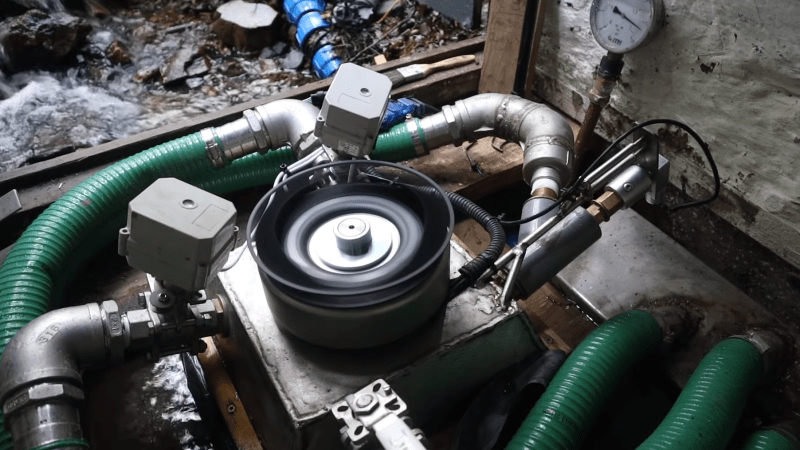
Among all of [Kris’] off-grid DIY adventures, his 500 W micro hydroelectric turbine has us really pumped up. The impressive feat of engineering features Arduino/IOT based controls, 3D printed components, and large number of custom-machined components, with large amounts of metal fabrication as well.

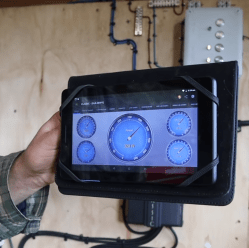
[Kris] Started the build with a Pelton wheel sourced from everyone’s favorite online auction site paired with an inexpensive MPPT charge controller designed for use with solar panels. Eventually the turbine was replaced with a custom built unit designed to produce more power. An Arduino based turbine valve controller and an IOT enabled charge controller give [Kris] everything he needs to manage the hydroelectric system without having to traipse down to the power house. Self-cleaning 3D printed screens keep intake maintenance to a minimum. Be sure to check out a demonstration of the control system in the video below the break.

As you watch the Hydro electric system playlist, you see the hacker spirit run strong throughout the initial build, the failures, the engineering, the successes, and then finally, the tweaking for more power. Because why stop at working when it can be made better, right? We highly recommend checking it out- but set aside some time. The whole series is oddly addictive, and This Hackaday Writer may have spent inordinate amounts of time watching it instead of writing dailies!

Of course, you don’t need to go full-tilt to get hydroelectric power up and running. Even at a low wattage, its always-on qualities mean that even a re-purposed washing machine can be efficient enough to be quite useful.

Thanks to [Mo] for alerting us to the great series via the Tip Line!

Home Automation for Fans of Quick-and-Dirty Solutions

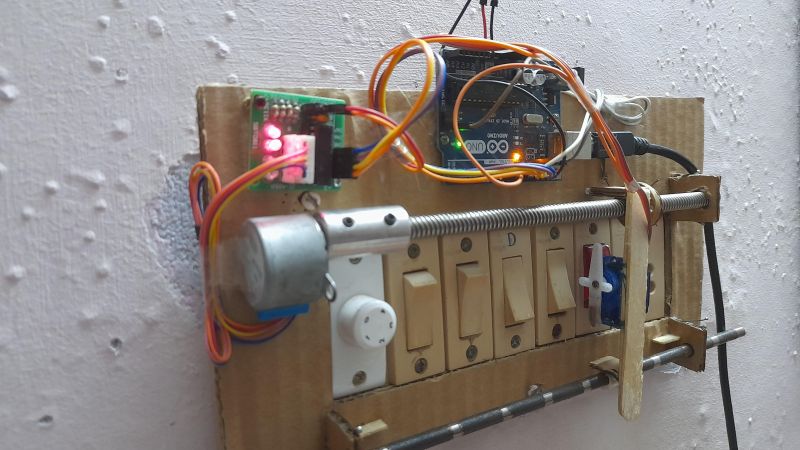
At Hackaday, we celebrate all kinds of projects, but we’ll have to admit that the polished and professional-looking builds tend to catch our eye a lot more than perhaps they should. There’s plenty of love to be had for the rougher builds, though, of which this quick-and-dirty home automation system is a perfect example.

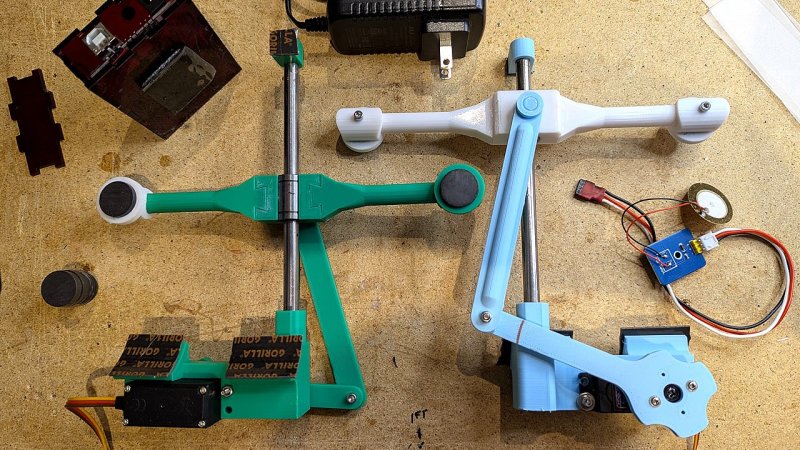
Before anyone rushes to state the obvious with, “Should have used some relays,” consider that [MAKE_IT_WITH_ME]’s stated goal was to get the basics of a home automation system built with pretty much nothing but what can be found in one of those Arduino starter kits. And further, consider that landlords might not look kindly on tenants who wire a bunch of SSRs or Sonoff switches into the walls of their building. So this minimalist build is perfect for certain use cases. Its interface to the building’s electrical system is 100% mechanical, via a servo that travels along the bank of switches on a stepper-driven leadscrew. The servo has a modified horn to properly flick the rocker-style switches, and although changing from switch to switch is a bit slow, it works surprisingly well. The video below shows it in action.

While we can see it possibly working as-is for Decora-style switches that are seen in some markets, we’d think some mods would be in order for the more standard toggle-style switch — perhaps a finger extending out from the horn, along with a second servo to tilt the whole assembly away from the wall to allow it to clear the switch bats.


Stray Cat Shelter is Nicer Than Our First Apartment

There are a lot of stray cats roaming around [Red Tie Projects’] neighborhood, and no one seems to care much about what happens to them. Fortunately for the cats, [Red Tie Projects] cares quite a lot, as evidenced by this colossal cat condo they built. The cats retain their freedom, but get food and a warm, sheltered bed whenever they decide to grace [Red Tie Projects] with their presence.

[Red Tie Projects] built this sturdy shelter from pallet wood and did a fine job of it, sealing all the seams and screws up with wood putty and waterproofing it with silicone. Inside there’s a heated pillow, a light, and a remote-controlled camera so RTP] can pan around and keep an eye on the cats. All the wires run out through a weatherproof junction box attached to the side and over to a control box made from an ATX power supply.

Most of the build is made from scrap, including the best part — an Arduino-driven motorized zip line for delivering food from the balcony to the cat porch. Details on the control box and the food delivery system are coming soon, as [Red Tie Projects] teases in the video after the break. We’re looking forward to seeing those. Oh, and don’t worry — there’s more than enough footage to cover the cat tax.

If [Red Tie Projects] ever takes any of those cats in, their demands will only increase. Maybe they can handle the sound of a motorized chair that follows the sun, since they’re tough street cats and all.

Never Forget To Turn On The Cooker Hood Again

The cooker hood is a wonderful invention for removing excess fumes and steam from the kitchen. But like all electrically-powered devices, it only works when it is turned on. This was the problem facing [Peter], whose family are enthusiastic cooks who frequently forget to hit that switch. His solution? An automatic cooker hood switch that comes on when the cooker is in use, and stays on long enough afterwards to fully dissipate the fumes.

At its heart is a current transformer on the 3-phase stove power line, and we’re treated to a lesson in reading from these devices with an Arduino. They have a shunt resistor across which to produce a voltage, and their AC output is placed upon a reference DC voltage to supply the microcontroller pin. The impedance is quite high, so when the sensor had to be placed a distance from the microcontroller it necessitated an op-amp buffer. The readings then cause the Arduino to trigger a pair of relays to switch on or off the cooker hood. We can imagine that the family kitchen is thus a much pleasanter environment for it.

Cookers can also provide quite a hazard when they are left on. To that end, we’ve also featured a cooker alarm in the past.

Header image: Pbroks13, CC BY-SA 3.0.

How an Engineer Designs a DIY Energy Recovery Ventilator

We have no idea whether [Nick Goodey] is a trained engineer or not. But given the detailed design of this DIY energy recovery ventilator for his home HVAC system, we’re going to go out on a limb and say he probably knows what he’s doing.

For those not in the know, an energy recovery ventilator (ERV) is an increasingly common piece of equipment in modern residential and commercial construction. As buildings have become progressively “tighter” to decrease heating and cooling energy losses to the environment, the air inside them has gotten increasingly stale. ERVs solve the problem by bringing fresh, unconditioned air in from the outside while venting stale but conditioned air to the outside. The two streams pass each other in a heat exchanger so that much of the energy put into the conditioned air is transferred to the incoming unconditioned air.

While ERV systems are readily available commercially, [Nick] decided to roll his own after a few experiments with Coroplast and some extensive calculations convinced him it would be a viable idea. One may scoff at the idea of corrugated plastic for the heat exchanger, but the smooth channels through the material make it a great choice. He built up a block of Coroplast squares with the channels in alternate layers oriented orthogonally, letting stale inside air pass very close to fresh outside air to exchange heat without every mixing directly. The entire system, including fans, an Arduino for control, sensors galore, and the Hubitat home automation hub, is powered by DC, so no electrician was needed. [Nick] has a ton of detail in his build log, including all the tools and calculators he used to design the system.

Given the expense of ERV systems, we’re surprised we haven’t seen more stories about DIY versions. We have talked about HVAC systems a lot, though — after all, HVAC techs are hackers who make housecalls.

Electric Window Mechanism Into A Electric Screen Door

In many parts of the world leaving open a door or window is a good way to get a house full of bugs. Remembering to close doors behind them can be surprisingly hard for members of the human race, so the [DuctTape Mechanic] used the components from a car’s electric window to automate his sliding screen door.

After the excess pieces were cut of the rail, the motor and rail were mounted on top of the door frame. A long bolt is attached to the moving plate on the rail, which pushes on the pack of the door to close it. After closing, the mechanism returns to its open position, allowing the door to be opened by hand. The motor is controlled by an Arduino running a very simple sketch, which senses if the door is closed with a microswitch and starts a 10 second countdown once opened. Two relays are used to create an H-bridge circuit to drive the motor in both directions.

It doesn’t look like there is any provision to detect if it is obstructed. A simple solution could be to make the push rod spring-loaded, so it can slide over the door if there is excessive resistance. This project is successful as a proof of concept, but making the wiring neater and covering everything would be a welcome upgrade.

If you only want to let certain creatures into your house, we have no shortage of automated pet door for your hacking pleasure.

433 On A Stick

Cheap 433 MHz wireless switches are a tempting way to enter the world of home automation, but without dedicated hardware, they can be less easy to control from a PC. That’s the position [TheStaticTurtle] was in, so the solution was obvious. Build a USB 433 MHz transceiver.

At the computer end is a CH340 USB-to-serial chip and the familiar ATmega328 making this a compact copy of the Arduino. At the RF end are a pair of modules for transmit and receive, unexpectedly with separate antennas. This device is a second revision, after initial experiments with a single antenna connector and an RF switch proved not to work. On the software side the Arduino uses the rc-switch library, while on the PC side there’s a Python library to make sense of it all. The code and hardware files are all on GitHub, should you wish to experiment.

The problem of making a single antenna transceiver is not for the faint-hearted RF engineer, as while diode switches seem on paper to deliver the goods, they can be extremely difficult to get right and preserve linearity. We’re curious that a transceiver module wasn’t used instead, but we’re guessing that cost played a significant part in the equation.

Over the years we’ve featured quite a few fascinating 433 MHz projects, like this TP-Link router conversion.

Hack a Day 28 Jun 03:00

LoRa Tutorials For The DIY Masses

LoRa is the go-to tech for low power, long range wireless sensor networks. Designing with off-the-shelf modules can be a boon or a bane depending on the documentation and support. Luckily, [Renzo] has prepared a set of tutorials to get you started.
In his seven part series of write-ups, [Renzo] starts by connecting the E32 module from AliExpress to an Arduino as well as an ESP8266 to demonstrate essential communications. Then he discusses the configuration options and the library he created to make like a bit easier. Following that is a series of posts discussing transmission types as well as power saving methods including sleep modes and wake-on-radio.
The information will be extremely handy for someone starting off with the SX1276/SX1278 Wireless Modules which are relatively inexpensive as opposed to more standardized development kits. We love the abundance of fritzing diagrams, arduino code and helper library and hope someone will build on it. You can get the library from Github for your tinkering pleasure.
If you are looking for ideas for this newly discovered skill, have a look at LoRa Enabled Mailbox as well as Electric Fence Monitoring with The Things Network for a bit of IoT action.