Posts with «microcontroller» label

Custom Calculator Brings Us Back To The 70s

There are certain design aesthetics from every era that manage to survive the fads of their time and live throughout history. Ancient Greek architecture is still drawn upon for design inspiration in modern buildings, the mid-century modern style from the 60s still inspires various designs of consumer goods, and the rounded, clean looking cars from the 90s are still highly desirable qualities in automotive design. For electronics, though, we like this 70s-inspired calculator that [Aaron] recently built.

The calculator hearkens back to the days of calculators like the HP-29C with its large buttons and dot-matrix display. [Aaron] built the case out of various woods with a screen angled towards the user, and it uses a LCD display similar to those found in antique calculators. The brain of the calculator is an Arduino which fits easily into the case, and [Aaron] also built the keyboard from scratch with Cherry MX-style mechanical keys soldered together into a custom shape.

The software to run the calculator is fairly straightforward, but we are most impressed with the woodworking, styling, and keyboard design in this build. [Aaron] is also still ironing out some bugs with the power supply as it uses a DC-DC converter to power the device from a single lithium battery. For those who are more fond of early 2000s graphing calculators instead, be sure to take a look at this graphing calculator arcade cabinet.

I2C To The Max With ATtiny

The Arudino is a powerful platform for interfacing with the real world, but it isn’t without limits. One of those hard limits, even for the Arduino MEGA, is a finite number of pins that the microcontroller can use to interface with the real world. If you’re looking to extend the platform’s reach in one of your own projects, though, there are a couple of options available. This project from [Bill] shows us one of those options by using the ATtiny85 to offload some of an Arduino’s tasks using I2C.

I2C has been around since the early 80s as a way for microcontrollers to communicate with each other using a minimum of hardware. All that is needed is to connect the I2C pins of the microcontrollers and provide each with power. This project uses an Arduino as the controller and an arbitrary number of smaller ATtiny85 microcontrollers as targets. Communicating with the smaller device allows the Arduino to focus on more processor-intensive tasks while giving the simpler tasks to the ATtiny. It also greatly simplifies wiring for projects that may be distributed across a distance. [Bill] also standardizes the build with a custom dev board for the ATtiny that can also double as a shield for the Arduino, allowing him to easily expand and modify his projects without too much extra soldering.

Using I2C might not be the most novel of innovations, but making it easy to use is certainly a valuable tool to add to the toolbox when limited on GPIO or by other physical constraints. To that end, [Bill] also includes code for an example project that simplifies the setup of one of these devices on the software end as well. If you’re looking for some examples for what to do with I2C, take a look at this thermometer that communicates with I2C or this project which uses multiple sensors daisy-chained together.

Run UNIX On Microcontrollers With PDP-11 Emulator

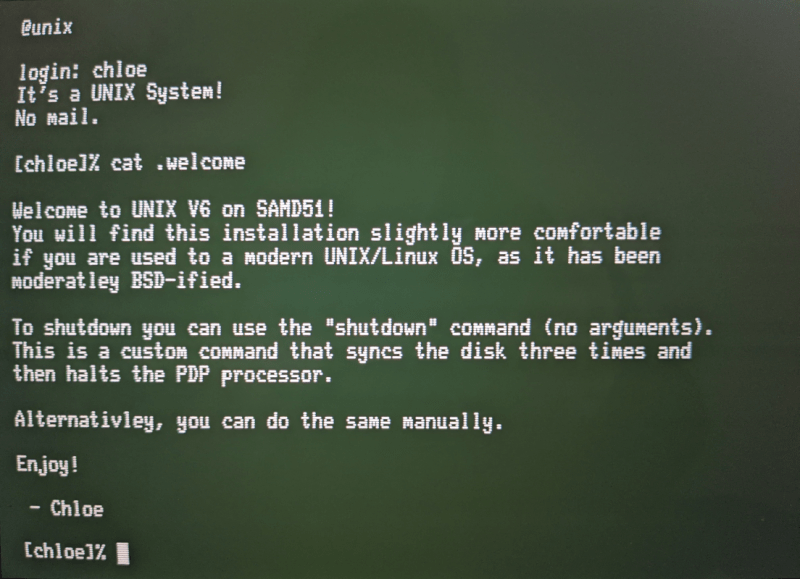
C and C++ are powerful tools, but not everyone has the patience (or enough semicolons) to use them all the time. For a lot of us, the preference is for something a little higher level than C. While Python is arguably more straightforward, sometimes the best choice is to work within a full-fledged operating system, even if it’s on a microcontroller. For that [Chloe Lunn] decided to port Unix to several popular microcontrollers.

This is an implementation of the PDP-11 minicomputer running a Unix-based operating system as  an emulator. The PDP-11 was a popular minicomputer platform from the ’70s until the early 90s, which influenced a lot of computer and operating system designs in its time. [Chloe]’s emulator runs on the SAMD51, SAMD21, Teensy 4.1, and any Arduino Mega and is also easily portable to any other microcontrollers. Right now it is able to boot and run Unix but is currently missing support for some interfaces and other hardware.

[Chloe] reports that performance on some of the less-capable microcontrollers is not great, but that it does run perfectly on the Teensy and the SAMD51. This isn’t the first time that someone has felt the need to port Unix to something small; we featured a build before which uses the same PDP-11 implementation on a 32-bit STM32 microcontroller.

This Old Mouse: Building a USB Adapter for a Vintage Depraz Mouse

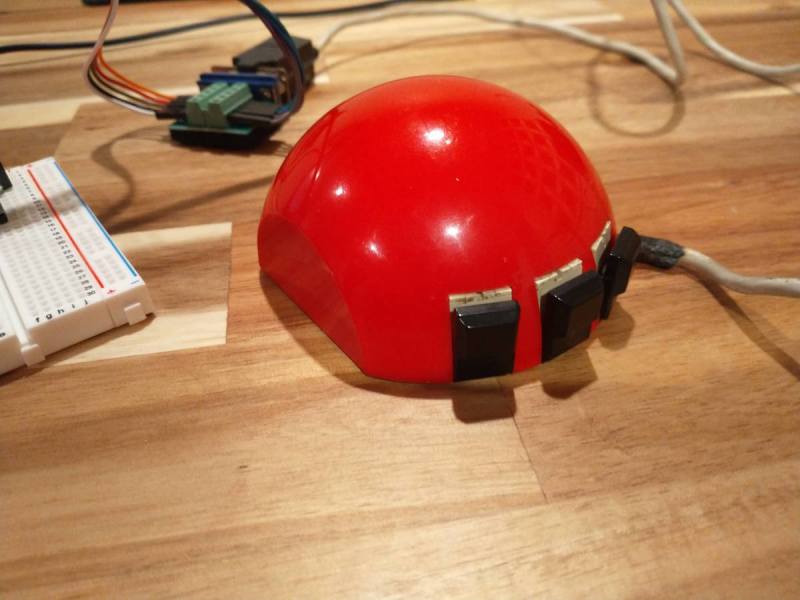
When [John Floren] obtained a vintage Depraz mouse, he started out being content to just have such a great piece of history in his possession. But if you’re like him, you know it’s not enough to just have something. What would it be like to use it?

To find out, [John] embarked on a mission to build a USB adapter for his not so new peripheral.
Originally used in very early terminals with a Unix GUI, the Depraz mouse utilizes an unusual male DE9 connector rather than the more familiar female DB9 used in RS232 serial mice. Further deviating from the norm, he found that the quadrature encoders were connected directly to the DE9 connector.

Armed with an Arduino Pro Mini and some buggy sample code, he got to work. The aforementioned buggy code was scrapped and a fresh sketch for the Arduino Pro Mini gave the Depraz mouse the USB interface it lacked. [John] also found that he wasn’t the first hardware hacker to have modified the mouse for their use. Be sure to read to the end the article to find out about the vintage surprise lurking in the mouse shell itself! A demonstration of the mouse in action can be seen in the video below the break.

Looking for a fun mouse hack? Perhaps you’d like to use your more modern USB mouse on a retro computer, or try your hand at recreating an early Apple mouse for use in modern computers.

AVR Reverse Engineering Hack Chat

Join us on Wednesday, April 21 at noon Pacific for the AVR Reverse Engineering Hack Chat with Uri Shaked!

We’ve all become familiar with the Arduino ecosystem by now, to the point where it’s almost trivially easy to whip up a quick project that implements almost every aspect of its functionality strictly in code. It’s incredibly useful, but we tend to lose sight of the fact that our Arduino sketches represent a virtual world where the IDE and a vast selection of libraries abstract away a lot of the complexity of what’s going on inside the AVR microcontroller.

While it’s certainly handy to have an environment that lets you stand up a system in a matter of minutes, it’s hardly the end of the story. There’s a lot to be gained by tapping into the power of assembly programming on the AVR, and learning how to read the datasheet and really run the thing. That was the focus of Uri Shaked’s recent well-received HackadayU course on AVR internals, and it’ll form the basis of this Hack Chat. Then again, since Uri is also leading a Raspberry Pi Pico and RP2040 course on HackadayU in a couple of weeks, we may end up talking about that too. Or we may end up chatting about something else entirely! It’s really hard to where this Hack Chat will go, given Uri’s breadth of interests and expertise, but we’re pretty sure of one thing: it won’t be boring. Make sure you log in and join the chat — where it goes is largely up to you.

Our Hack Chats are live community events in the Hackaday.io Hack Chat group messaging. This week we’ll be sitting down on Wednesday, April 21 at 12:00 PM Pacific time. If time zones have you tied up, we have a handy time zone converter.

Click that speech bubble to the right, and you’ll be taken directly to the Hack Chat group on Hackaday.io. You don’t have to wait until Wednesday; join whenever you want and you can see what the community is talking about.

Honey, I Shrunk the Arduino Core

High-level programming languages do a great job of making a programmer’s job easier, but these languages often leave a lot of efficiency on the table as a compromise. While a common thought is to move into a lower-level language like assembly to improve on a program’s speed or memory use, there’s often a lot that can be done at the high level before resorting to such extremes. This, of course, is true of the Arduino platform as well, as [NerdRalph] demonstrates by shrinking the size of the Arduino core itself.

[NerdRalph] had noticed that the “blink” example program actually includes over 1 kB of extraneous code, and that more complicated programs include even more cruft. To combat this issue, he created ArduinoShrink, which seeks to make included libraries more modular and self-contained. It modifies the some of the default registers and counters to use less memory and improve speed, and is also designed to improve interrupt latency as well by changing when the Arduino would otherwise disable interrupts.

While there are some limits to ArduinoShrink, such as needing to know specifics about the pins at compile time, for anyone writing programs for Arduinos that are memory-intensive or need improvements in timing this could be a powerful new tool. If you’d prefer to go in the opposite direction to avoid ever having to learn C or assembly, though, you can always stick with running Python on your embedded devices.

Ultrasonic Sonar Detects Hidden Objects

While early scientists and inventors famously underestimated the value of radar, through the lens of history we can see how useful it became. Even though radar uses electromagnetic waves to detect objects, the same principle has been used with other propagating waves, most often sound waves. While a well-known use of this is sonar, ultrasonic sensors can also be put to use to make a radar-like system.

This ultrasonic radar project is from [mircemk] who uses a small ultrasonic distance sensor attached to a rotating platform. A motor rotates it around a 180-degree field-of-view and an Arduino takes and records measurements during its trip. It interfaces with an application running on a computer which shows the data in real-time and maps out the location of all of the objects around the sensor. With some upgrades to the code, [mircemk] is also able to extrapolate objects hidden behind other objects as well.

While the ultrasonic sensor used in this project has a range of about a meter, there’s no reason that this principle couldn’t be used for other range-finding devices to extend its working distance. The project is similar to others we’ve seen occasionally before, but the upgrade to the software to allow it to “see” around solid objects is an equally solid upgrade.

Planetary Escape (-Room in a Box)

The trick to a fun escape room is layers. For [doktorinjh]’s Spacecase, you start with an enigmatic aluminum briefcase and a NASA drawstring backpack. A gamemaster reads the intro speech to set the mood, and you’re ready to start your escape from the planet. The first layer is the backpack with puzzles you need to solve to get into the briefcase. In there, you discover a hidden compartment and enough sci-fi references to put goofy smiles on our faces. We love to see tools reused as they are in one early puzzle, you use a UV LED to reveal a hidden message, but that light also illuminates puzzle clues later.

All the tech in Spacecase makes it a wonder of mixed media. The physical layer has laser engraved wood featuring the font from the 1975 NASA logo, buttons, knobs, LEDs, toggle switches, and a servo. Beneath the visible faceplate is an RGB sensor, audio player, speaker, and at the center is an Arduino MEGA. We’d love to get our hands on Spacecase for a game, and we’re inspired to pull out all the stops and build games with our personal touches. Maybe something with a mousetrap.

This isn’t the first escape room hardware we’ve seen and [doktorinjh] similarly made a bomb diffusing game.

Supersized Weather Station Uses Antique Analog Meters

For most of us, getting weather information is as trivial as unlocking a smartphone or turning on a computer and pointing an app or browser at one’s weather site of choice. This is all well and good, but it lacks a certain panache that old weather stations had with their analog dials and stained wood cases. The weather station that [BuildComics] created marries both this antique aesthetic with modern weather data availability, and then dials it up a notch for this enormous analog weather station build.

The weather station uses 16 discrete dials, each modified with a different label for the specific type of data displayed. Some of them needed new glass, and others also needed coils to be modified to be driven with a lower current than they were designed as well, since each would be driven by one of two Arduinos in this project. Each are tied to a microcontroller output via a potentiometer which controls the needle’s position for the wildly different designs of meter. The microcontrollers themselves get weather information via the internet, which allows for about as up-to-date information about the weather as one could gather first-hand.

The amount of customization of these old meters is impressive, and what’s even more impressive is the project’s final weight. [BuildComics] reports that it took two people just to lift it onto the wall mount, which is not surprising given the amount of iron in some of these old analog meters. And, although not as common in the real world anymore, these old antique meters have plenty of repurposed uses beyond weather stations as well.

Raspberry Pi Announces $4 “Pico” Microcontroller with Custom Chip, Collaborations with Arduino, Adafruit, and Others

Raspberry Pi enters the microcontroller world with its first custom-chip board, and they're bringing in a number of other companies to use it too.

Read more on MAKE

The post Raspberry Pi Announces $4 “Pico” Microcontroller with Custom Chip, Collaborations with Arduino, Adafruit, and Others appeared first on Make: DIY Projects and Ideas for Makers.