Boards Guide 2024: Boards Are Back
From Make: Vol. 87: New evolutions in dev boards make this a metamorphic period for Makers.


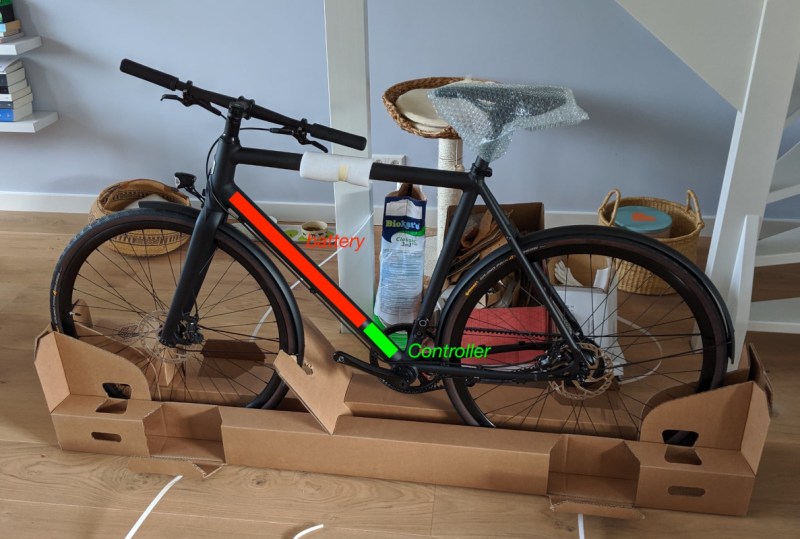
DIY e-bikes are often easy to spot. If they’re not built out of something insane like an old washing machine motor, the more subtle kits that are generally used still stand out when compared to a non-assisted bike. The motors tend to be hub- or mid-drive systems with visible wires leading to a bulky battery, all of which stand out when you know what to look for. To get a stealthy ebike that looks basically the same as a standard bicycle is only possible with proprietary name-brand solutions that don’t lend themselves to owner repair or modification, but this one has at least been adapted for use with an open source motor controller.
The bike in use here is a model called the Curt from Estonian ebike builder Ampler, which is notable in that it looks indistinguishable from a regular bicycle with the exception of the small 36-volt, 350-watt hub motor somewhat hidden in the rear wheel. [BB8] decided based on no reason in particular to replace the proprietary motor controller with one based on VESC, an open-source electric motor controller for all kinds of motors even beyond ebikes. Installed on a tiny Arduino, it fits inside the bike’s downtube to keep the stealthy look and can get the bike comfortably up to around 35 kph. It’s also been programmed to turn on the bike’s lights if the pedals are spun backwards, and this method is also used to change the pedal assist level, meaning less buttons and other user-interface devices on the handlebars.
[BB8] has been working on this for a while, and although the bulk of a working ebike controller is there, it still doesn’t support the torque sensing pedals included with this bike. We’re presuming that this is still a work-in-progress as the Arduino and associated code easily interfaces with all the other sensors available on this bike. Hopefully this open-source motor controller finds its way into other proprietary systems as well, since a lot of these ebikes can turn into massive paperweights if the companies who originally built them go out of business or simply decide to stop supporting older models. Of course, you can avoid this issue entirely by building your own ebike from spare parts.
Thanks to [Arnoud] for the tip!
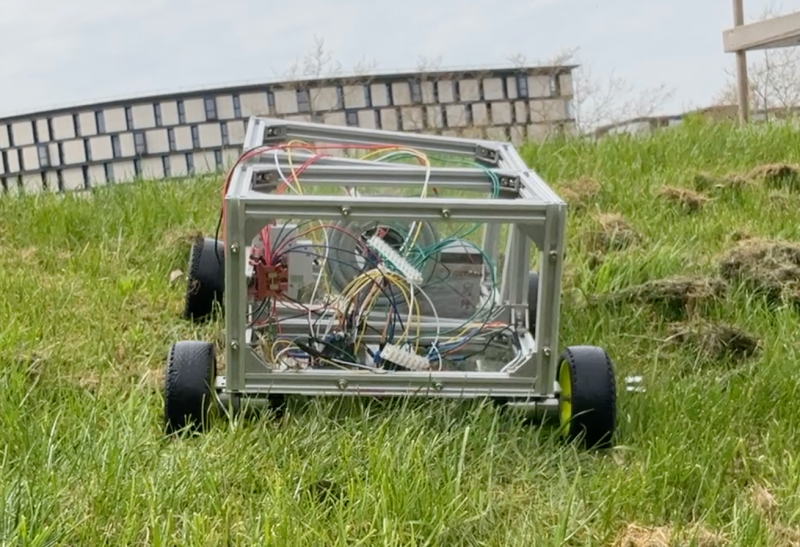
Having a 3D printer or a CNC machine available for projects is almost like magic. Designing parts in software and having them appear on the workbench is definitely a luxury. But for a lot of us, these tools aren’t easily available and projects that use them can be out-of-reach. That’s why one of the major design goals of this robotics platform was to use as many off-the-shelf components as possible.
The robot is called the OpenScout and, as its name implies, intends to be a fully open-source robotics platform for a wide range of use cases. It uses readily-available aluminum extrusion as a frame, which bolts together without any other specialized tools like welders. The body of the robot is articulating, helping it navigate uneven terrain outdoors. The specifications also call for using an Arduino to drive the robot, although there is plenty of space in the robot body to house any robotics platform you happen to have on hand.
For anyone looking to get right into the useful work of what robots can do, rather than spending time building up a platform from scratch, this is an excellent project. It’s straightforward and easy to build without many specialized tools. The unique articulating body design should make it effective in plenty of environments. If you do have a 3D printer, though, that opens up a lot of options for robotics platforms.
A set of helping hands is a nice tool to have around the shop, especially if soldering or gluing small components is a common task. What we all really want, though, is a robotic arm. Sure, it could help us set up glue or solder but it can do virtually any other task it is assigned as well. A general-purpose tool like this might be out of reach of most of us, unless we have a 3D printer to make this open-source robotic arm at home.
The KAUDA Robotic Arm from [Giovanni Lerda] is a five-axis arm with a gripping tool and has a completely open-source set of schematics so it can be printed on any 3D printer. The robot arm uses three stepper motors and two servo motors, and is based on the Arduino MEGA 2560 for control. The electrical schematics are also open-source, so getting this one up and running is just an issue of printing, wiring, and implementing some software. To that end there are software examples available, and they can easily be modified to fit one’s robotic needs.
A project like this could be helpful for any number of other projects, or also just as a lesson in robotics for yourself or even in a classroom, since many schools now have their own 3D printers. With everything being open-source, this is a much simpler endeavor now than other projects we’ve seen that attempted to get robotic arms running again.
 The Open Source Hardware Association (OSHWA) runs a free program that allows creators to certify that their hardware complies with the community definition of open source hardware. Whenever you see the certification logo, you know that the certified hardware meets this standard. The certification site includes a full list of […]
The post December 2019 Certified Open Source Hardware appeared first on Make: DIY Projects and Ideas for Makers.
While many of the Arduino platforms are great tools for gaining easy access to microcontrollers, there are a few downsides. Price and availability may be the highest on the list, and for those reasons, some have chosen to deploy their own open-source Arduino-compatible boards.
The latest we’ve seen is the Franzininho, an Arduino Gemma-like board that’s based on the ATtiny85, a capable but tiny microcontroller by Atmel in a compact 8-pin configuration. This board has everything the Gemma has, including a built-in LED and breakout pins. One of the other perks of the Franzininho over the Gemma is that everything is based on through-hole components, making the assembly much easier than the surface mount components of the Gemma.
It’s worth noting that while these boards are open source, the Arduinos are as well. It’s equally possible to build your own 100% identical Arduino almost as easily. If you want more features, you can add your own by starting from one of these platforms and do whatever you want with it, like this semi-educational Atmel breakout board.
Thanks to [Clovis] for the tip!
There are few scenes in life more moving than the moment the solder paste melts as the component slides smoothly into place. We’re willing to bet the only reason you don’t have a reflow oven is the cost. Why wouldn’t you want one? Fortunately, the vastly cheaper DIY route has become a whole lot easier since the birth of the Reflowduino – an open source controller for reflow ovens.
This Hackaday Prize entry by [Timothy Woo] provides a super quick way to create your own reflow setup, using any cheap means of heating you have lying around. [Tim] uses a toaster oven he paid $21 for, but anything with a suitable thermal mass will do. The hardware of the Reflowduino is all open source and has been very well documented – both on the main hackaday.io page and over on the project’s GitHub.
The board itself is built around the ATMega32u4 and sports an integrated MAX31855 thermocouple interface (for the all-important PID control), LiPo battery charging, a buzzer for alerting you when input is needed, and Bluetooth. Why Bluetooth? An Android app has been developed for easy control of the Reflowduino, and will even graph the temperature profile.
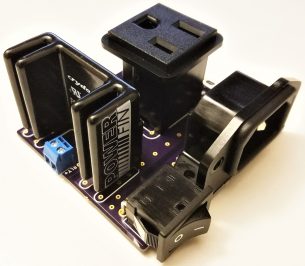
When it comes to controlling the toaster oven/miscellaneous heat source, a “sidekick” board is available, with a solid state relay hooked up to a mains plug. This makes it a breeze to setup any mains appliance for Arduino control.
We actually covered the Reflowduino last year, but since then [Tim] has also created the Reflowduino32 – a backpack for the DOIT ESP32 dev board. There’s also an Indiegogo campaign now, and some new software as well.
If a toaster oven still doesn’t feel hacky enough for you, we’ve got reflowing with hair straighteners, and even car headlights.
Effects pedals: for some an object of overwhelming addiction, but for many, an opportunity to hack. Anyone who plays guitar (or buys presents for someone who does) knows of the infinite choice of pedals available. There are so many pedals because nailing the tone you hear in your head is an addictive quest, an itch that must be scratched. Rising to meet this challenge are a generation of programmable pedals that can tweak effects in clever ways.
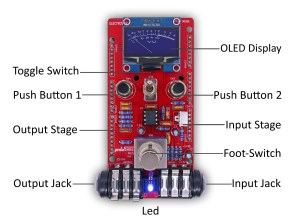
With this in mind, [ElectroSmash] are back at it with another open source offering: the pedalSHIELD MEGA. Aimed at musicians and hackers who want to learn more about audio, DSP and programming, this is an open-hardware/open-software shield for the Arduino MEGA which transforms it into an effects pedal.
The hardware consists of an analog input stage which amplifies and filters the incoming signal before passing it to the Arduino, as well as an output stage which does the DAC-ing from the Arduino’s PWM outputs, and some more filtering/amplifying. Two 8-bit PWM outputs are used simultaneously to make pseudo 16-bit resolution — a technique you can read more about in their handy forum guide.

The list of effects currently implemented covers all the basics you’d expect, and provides a good starting point for writing custom effects. Perhaps a library for some of the commonly used config/operations would be useful? Naturally, there are some computational constraints when using an Arduino for DSP, though it’s up to you whether this is a frustrating fact, or an opportunity to write some nicely optimised code.
[ElectroSmash] don’t just do pedals either: here’s their open source guitar amp.

Self-described “Inventor Dad” [pepelepoisson]’s project is called Stecchino (English translation link here) and it’s an Arduino-based physical balancing game that aims to be intuitive to use and play for all ages. Using the Stecchino (‘toothpick’ in Italian) consists of balancing the device on your hand and trying to keep it upright for as long as possible. The LED strip fills up as time passes, and it keeps records of high scores. It was specifically designed to be instantly understood and simple to use by people of all ages, and we think it has succeeded in this brilliantly.
To sense orientation and movement, Stecchino uses an MPU-6050 gyro and accelerometer board. An RGB LED strip gives feedback, and it includes a small li-po cell and charger board for easy recharging via USB. The enclosure is made from a few layers of laser-cut and laser-engraved material that also holds the components in place. The WS2828B LED strip used is technically a 5 V unit, but [pepelepoisson] found that feeding them direct from the 3.7 V cell works just fine; it’s not until the cell drops to about three volts that things start to glitch out. All source code and design files are on GitHub.
Games are great, and the wonderful options available to people today allow for all kinds of interesting experimentation like a blind version of tag, or putting new twists on old classics like testing speed instead of strength.
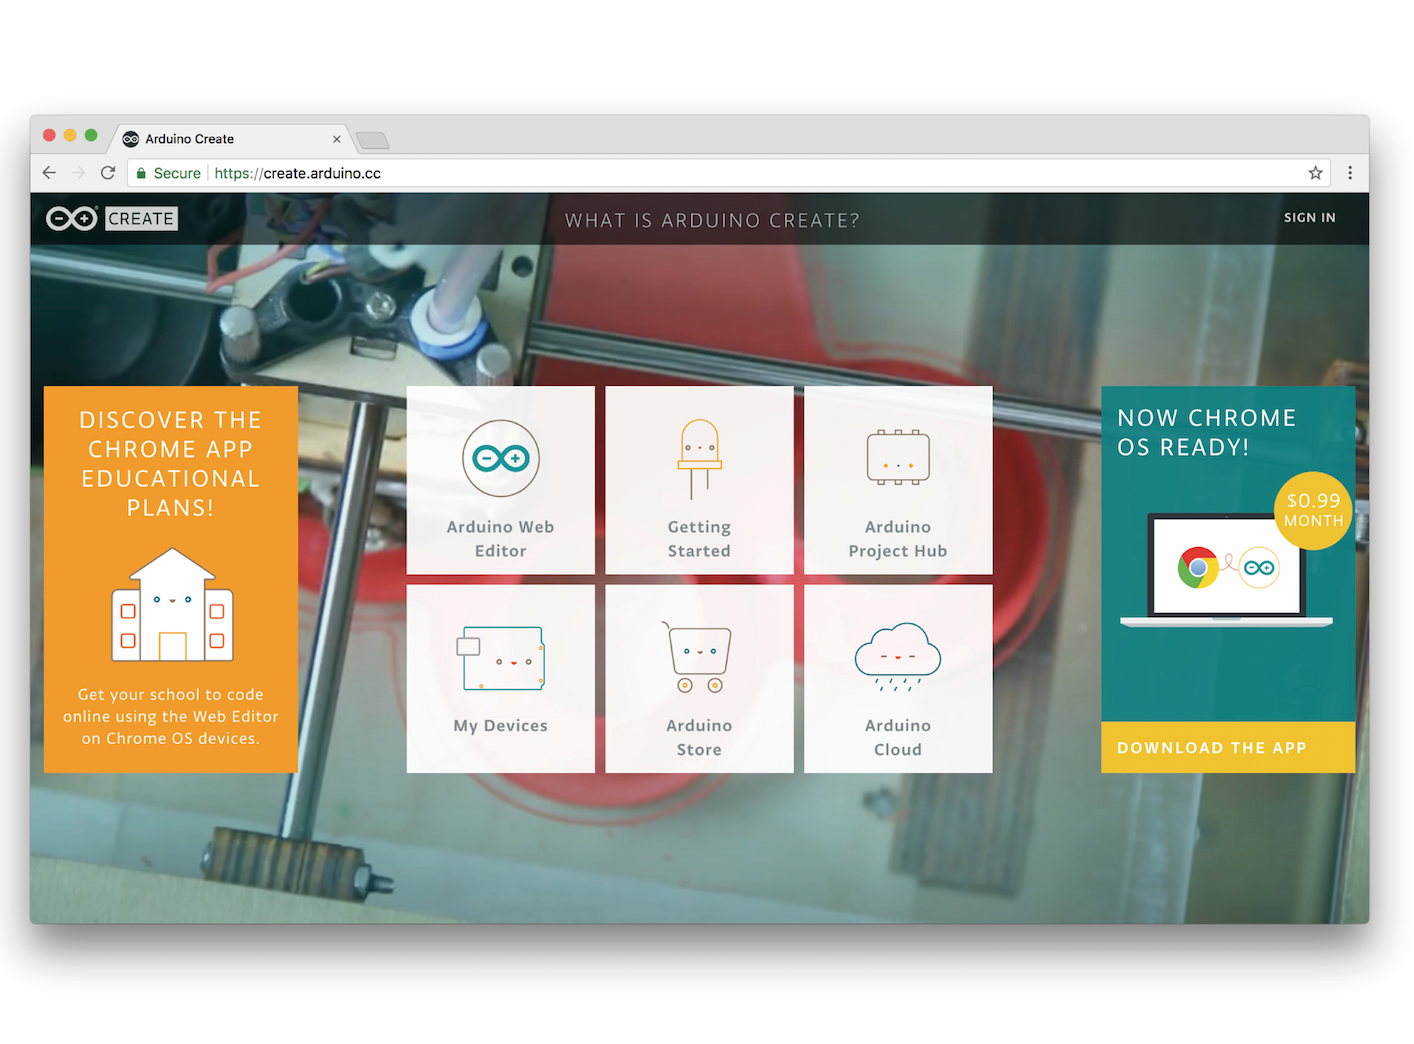
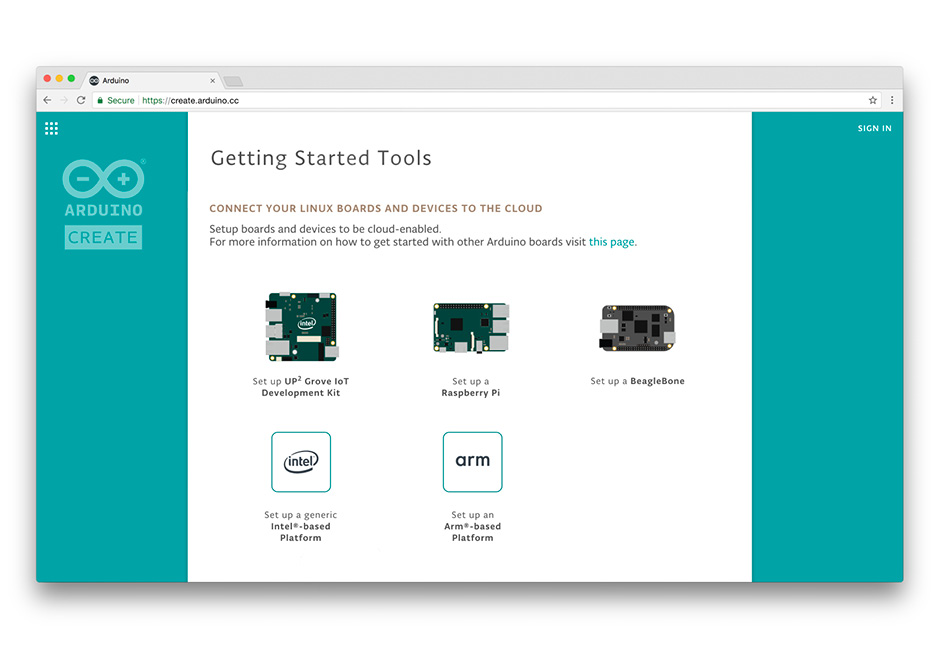
Today, at Embedded Linux Conference 2018, Arduino announced the expansion of the number of architectures supported by its Arduino Create platform for the development of IoT applications. With this new release, Arduino Create users can manage and program a wide range of popular Linux® single-board computers like the AAEON® UP² board, Raspberry Pi® and BeagleBone® as if they were regular Arduino boards. Multiple Arduino programs can run simultaneously on a Linux-based board and interact and communicate with each other, leveraging the capabilities provided by the new Arduino Connector. Moreover, IoT devices can be managed and updated remotely, independently from where they are located.
To further simplify the user journey, Arduino has also developed a novel out-of-the-box experience for Raspberry Pi and BeagleBone boards, in addition to Intel® SBCs, which enables anyone to set up a new device from scratch via the cloud without any previous knowledge by following an intuitive web-based wizard. Arduino plans to continue enriching and expanding the set of features of Arduino Create in the coming months.
“With this release, Arduino extends its reach into edge computing, enabling anybody with Arduino programming experience to manage and develop complex multi-architecture IoT applications on gateways,” said Massimo Banzi, Arduino CTO. “This is an important step forward in democratizing access to the professional Internet of Things.”
“At Arduino we want to empower anyone to be an active player in the digital world. Being able to run Arduino code and manage connected Linux devices is an important step in this direction, especially for IoT applications that need more computing power, like AI and computer vision,” added Fabio Violante, Arduino CEO.