Posts with «mpu-6050» label

Accessible Arduino Mouse Helps

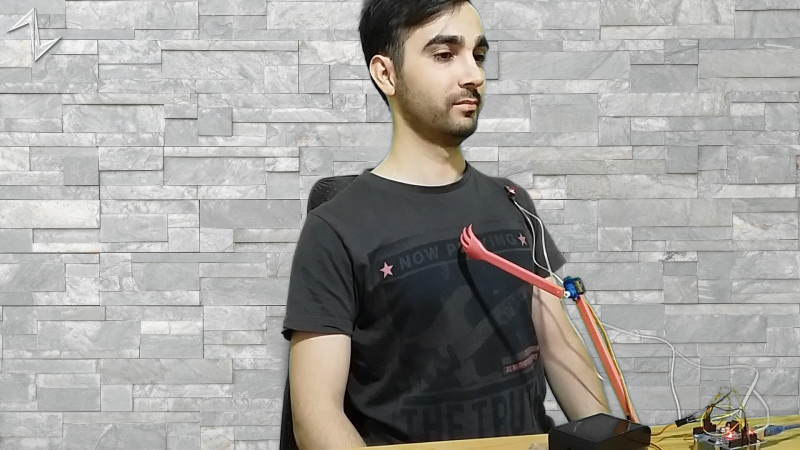
We enjoy access to cheap stuff because of the mass market for things like mice, keyboards, and cell phones. But if you need a device that doesn’t have mass appeal, you will have to pay a lot more if you can find it at all. However, with modern techniques like 3D printing and Arduino-like microcontrollers being cheap and simple to use, you now have the option to build that special one-of-a-kind device. Case in point: [Davy’s] mouse for people who have brain or nervous system disorders. This particular device is helping a 6-year-old who can’t manipulate a normal mouse.

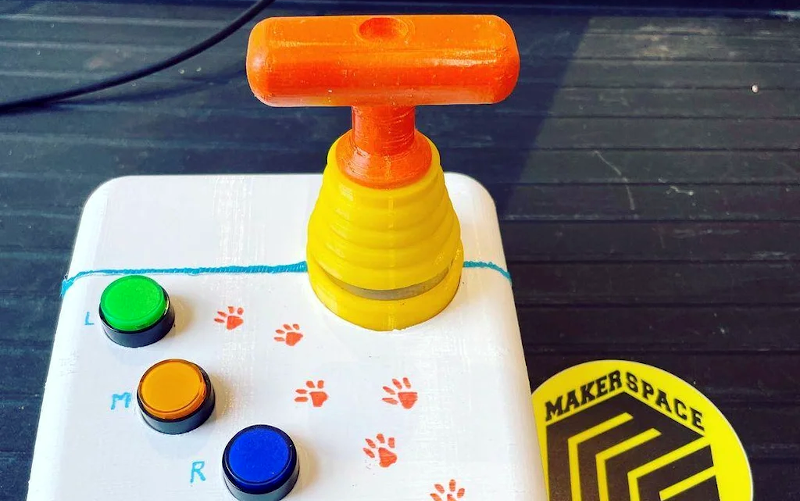
The device uses an Arduino Pro and an MPU-6050 accelerometer and gyroscope. The original design uses machined aluminum, but 3D printing should work, too. There’s something wrong with the link to the design files in the post, but it is easy to find the correct link.

If you do 3D print a similar enclosure, you might consider using heat-set threaded inserts instead of tapping the holes. They work great, are easy to install, and seem to be a bit more robust than trying to thread plastic. Then again, threaded plastic isn’t as bad as you might think.

There are, of course, many ways you could make this work, and besides, every special user will be a little different. But what a great feeling to help someone be able to do what most people take for granted.

Quit Hunching Over Your Screen With A Little Robotic Help

[Norbert Zare] has identified a problem many of us suffer from – chronically bad posture. Its very common to see computer users hunched forwards over a screen, which eventually will lead to back problems. He mentions that most posture correction devices are pretty boring, so the obvious solution to [Norbert] was to build a simple robot to give you a friendly nudge into the correct position.

This simple Arduino-based build uses the ubiquitous MPU-6050 which provides 3-axis acceleration and 3-axis gyro data all processed on-chip, so it can measure where you’re going, which way you are orientated and how fast you are rotating. This is communicated via the I2C bus, so hooking into an Arduino or Raspberry Pi is a simple affair. There are plenty of Open Source libraries to work with this very common device, which helps reduce the learning curve for those unfamiliar with programming a fairly complex device.

At the moment, he is mounting the sensor on his body, and hard-wiring it, so there’s already some scope for improvement there. The operating premise is simple, if the body angle is more than 55 degrees off vertical, move the servos and shove the body back in to the correct position.

The project GitHub has the code needed, and the project page over on Hackaday.io shows the wiring diagram.

We have seen quite a few projects on this subject over the years, like this one that sends you mobile notifications, an ultrasonic rangefinder-based device, and one that even uses a webcam to keep an eye on you. This one has the silliness-factor, and we like that round these parts. Keep an eye on [Norbert] we’re sure there more good stuff to come!

Hack a Day 21 Oct 00:00

Stecchino Game is all about Balancing a Big Toothpick

Stecchino demo by the creator

Self-described “Inventor Dad” [pepelepoisson]’s project is called Stecchino (English translation link here) and it’s an Arduino-based physical balancing game that aims to be intuitive to use and play for all ages. Using the Stecchino (‘toothpick’ in Italian) consists of balancing the device on your hand and trying to keep it upright for as long as possible. The LED strip fills up as time passes, and it keeps records of high scores. It was specifically designed to be instantly understood and simple to use by people of all ages, and we think it has succeeded in this brilliantly.

To sense orientation and movement, Stecchino uses an MPU-6050 gyro and accelerometer board. An RGB LED strip gives feedback, and it includes a small li-po cell and charger board for easy recharging via USB. The enclosure is made from a few layers of laser-cut and laser-engraved material that also holds the components in place. The WS2828B LED strip used is technically a 5 V unit, but [pepelepoisson] found that feeding them direct from the 3.7 V cell works just fine; it’s not until the cell drops to about three volts that things start to glitch out. All source code and design files are on GitHub.

Games are great, and the wonderful options available to people today allow for all kinds of interesting experimentation like a blind version of tag, or putting new twists on old classics like testing speed instead of strength.

DIY Dungeon Crawler Game Plays on Single LED Strip

A delightful version of a clever one-dimensional game has been made by [Critters] which he calls TWANG! because the joystick is made from a spring doorstop with an accelerometer in the tip. The game itself is played out on an RGB LED strip. As a result, the game world, the player, goal, and enemies are all represented on a single line of LEDs.

How can a dungeon crawler game be represented in 1D, and how is this unusual game played? The goal is for the player (a green dot) to reach the goal (a blue dot) to advance to the next level. Making this more difficult are enemies (red dots) which move in different ways. The joystick is moved left or right to advance the player’s blue dot left or right, and the player can attack with a “twang” motion of the joystick, which eliminates nearby enemies. By playing with brightness and color, a surprising amount of gameplay can be jammed into a one-dimensional display!

Code for TWANG! is on github and models for 3D printing the physical pieces are on Thingiverse. The video (embedded below) focuses mainly on the development process, but does have the gameplay elements explained as well and demonstrates some slick animations and sharp feedback.

Using a spring doorstop as a controller is neat as heck as well as intuitive, but possibly not quite as intuitive as using an actual car as a video game controller.

Scratch-built Camera Gimbal for Photographer with Cerebral Palsy

We so often hack for hacking’s sake, undertaking projects as a solitary pursuit simply for the challenge. So it’s nice to see hacking skills going to good use and helping someone out. Such was the case with this low-cost two-axis handheld camera gimbal intended to help a budding photographer with a motion disorder.

When [Tadej Strah] joined his school photography club, a fellow member who happens to have cerebral palsy needed help steadying cameras for clean shots. So rather than shell out a lot of money for a commercial gimbal, [Tadej] decided to build one for his friend. A few scraps of aluminum bar stock were bent into the gimbal frames and camera mount. Two hobby servos take care of the pitch and roll axes, controlled by an Arduino talking to an MPU-6050. Mounted to a handle from an angle grinder with the battery and electronics mounted below, the gimbal looks well-balanced and does a good job of keeping the camera level.

Hats off to [Tadej] for pitching in and solving a real world problem with his skills. We like to see people helping others directly, whether it’s building a gyroscopic spoon for Parkinson’s sufferers or vision enhancement for a nearly blind adventurer.

[via r/arduino]


Filed under: Medical hacks, misc hacks