Posts with «ham radio» label

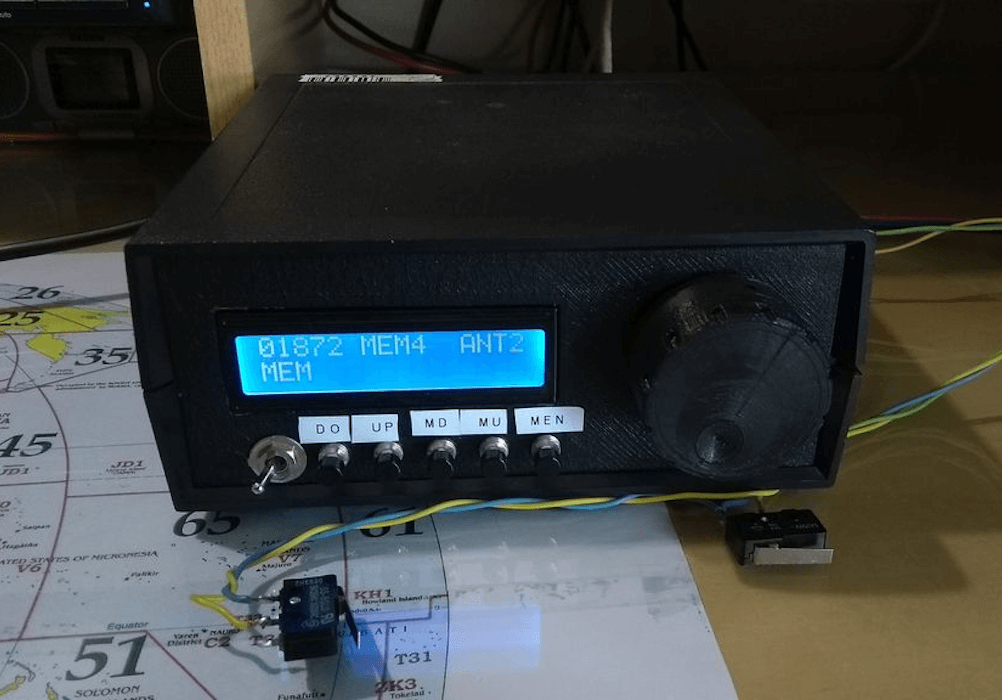
Ham Radio Gets Brain Transplant

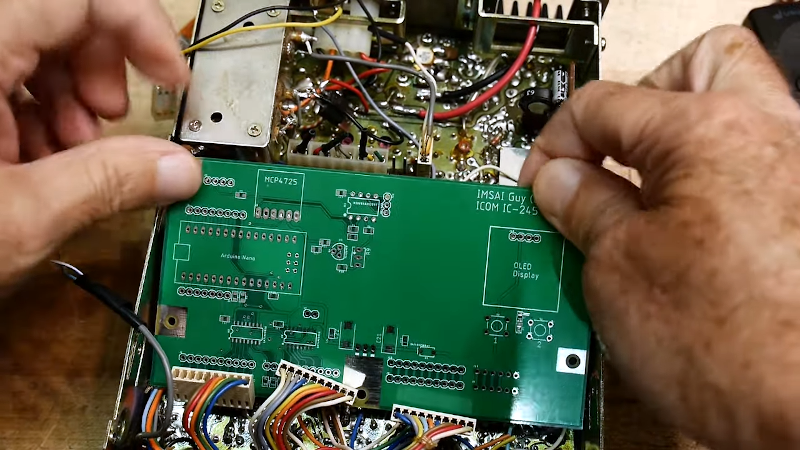
Old radios didn’t have much in the way of smarts. But as digital synthesis became more common, radios often had as much digital electronics in them as RF circuits. The problem is that digital electronics get better and better every year, so what looked like high-tech one year is quaint the next. [IMSAI Guy] had an Icom IC-245 and decided to replace the digital electronics inside with — among other things — an Arduino.

He spends a good bit of the first part of the video that you can see below explaining what the design needs to do. An Arduino Nano fits and he uses a few additional parts to get shift registers, a 0-1V digital to analog converter, and an interface to an OLED display.

Unless you have this exact radio, you probably won’t be able to directly apply this project. Still, it is great to look over someone’s shoulder while they design something like this, especially when they explain their reasoning as they go.

The PCB, of course, has to be exactly the same size as the board it replaces, including mounting holes and interface connectors. It looks like he got it right the first time which isn’t always easy. Does it work? We don’t know by the end of the first video. You’ll have to watch the next one (also below) where he actually populates the PCB and tests everything out.

Hack a Day 27 Nov 18:01

Arduino + Ham Radio = Texting

Over on the Spectrum web site, [Dale] — a relatively new ham radio operator — talks about his system for sending text messaging over VHF radios called HamMessenger. Of course, hams send messages all the time using a variety of protocols, but [Dale] wanted a self-contained and portable unit with a keyboard, screen, and a GPS receiver. So he built one. You can find his work on GitHub.

At the heart of the project is MicroAPRS, an Arduino firmware for packet radio. Instead of using a bigger computer, he decided to dedicate another Arduino to do everything but the modem function.

You can probably figure out the rest. A $10 GPS, a battery pack, a charge controller, and a few user interface parts like an OLED screen and a keyboard. In addition, there’s an SD card to store messages.

Of course, we couldn’t help but notice that our cell phone has a keyboard, screen, GPS, and storage. We might have been tempted to work out a way to connect the radio to it by Bluetooth. But we have to admit the little HamMessenger setup is cool-looking and probably lasts longer on a charge than our phone, too.

Bluepill Copies Code So You Don’t Have To

You really should learn to read Morse code. But if you can’t — or even if you can, and just want a break — you can always get a computer to do it. For example, [jmharvey1] has a decoder that runs on a cheap Bluepill dev board.

The device uses a touchscreen and a few common components. The whole thing cost about $16. You can see it at work along with a description of the project in the video below.

The code uses the Arduino-style setup for the Blue pill — something we’ve talked about before. As for the decoding method, the software employs the Goertzel algorithm which is akin to a single frequency Fourier transform. That is, while a full transform gives you information about the frequency component of a signal across a wide range, the Goertzel algorithm probes the signal for one or a small number of distinct frequencies.

The decoder table looks confusing at first until you realize that each “decode” value consists of a 1 as a start bit followed by a 1 for a dash and a zero for a dot. All bits to the left of the start bit don’t count. So an “E” codes as 02 hex — a start bit followed by a single zero or dot. A “C” is 1A hex (1 + -.-.). Once you find the matching code, you apply the same index to another table to look up the actual letter or string of letters.

If you buy a Bluepill to make one of these, you might as well get two and build something to send code, too.

Using an Arduino/CNC shield setup for ham radio control

Loop antennas for ham radios use heavy duty variable capacitors for tuning. Since such capacitors need to be physically turned for adjustment, radio enthusiast Jose B.O. made his own remote rig using an Arduino Uno and CNC shield.

The CNC setup allows stepper motors to rotate through a range of angles for frequency selection, and three antennas can be controlled via separate Pololu A4988 driver modules. An optical encoder is used for control, along with buttons for preset frequencies, and a 16×2 I2C LCD display provides visual feedback. Microswitches are implemented to set the upper and lower bounds for the stepper motors.

More info is available in the project’s write-up and the videos below show the system in action.

Arduino Blog 16 Mar 21:13
arduino  ham radio  uno  

CB Radio + Arduino = 6 Meter Ham Band

Somehow [hvde] wound up with a CB radio that does AM and SSB on the 11 meter band. The problem was that the radio isn’t legal where he lives. So he decided to change the radio over to work on the 6 meter band, instead.

We were a little surprised to hear this at first. Most radio circuits are tuned to pretty close tolerances and going from 27 MHz to 50 MHz seemed like quite a leap. The answer? An Arduino and a few other choice pieces of circuitry.

In particular, [hvde] removed much of the RF portion of the radio, leaving just the parts that dealt with the intermediate frequency at 7.8 MHz. Even the transmitter generates this frequency because it is easier to create an SSB signal at a fixed frequency. The Arduino drives a frequency synthesizer and an OLED display. A mixer combines the IF signal with the frequency the Arduino commands.

The radio had a “clarifier” which acts as a fine tuning control. With the new setup, the Arduino has to read this, also, and make small adjustments to the frequency. The RF circuits in the radio took some modifications, too. It is all documented, although we will admit this probably isn’t a project for the faint of heart.

As much as we admired this project, we think we will just stick with SDR. If you want to learn more about the digital synthesis of signals, check out [Bil Herd’s] post.

Hack a Day 06 Aug 03:00

Vintage ham radio transformed into epic party game prop

Maker Thomas Meston needed a “mysterious looking device” that allows players to enter codes obtained via an original party game. What he came up with is entitled “Dr. Hallard’s Dream Transmission Box,” and consists of an Arduino, a party light, a smoke machine, and other components stuffed into a broken National NC-33 ham radio.

This radio makes a really excellent enclosure for the electronics inside, and when the device is properly activated the winning team hears a special message via an Arduino Uno-controlled MP3 shield, accompanied by laser lights and smoke. 

How it works:

  • When the box is switched on you hear static and see a yellow light. The device is ready for the codes to be entered.
  • Once all three dials have been set, the player switches the bottom toggle to “send” state, the box will message back whether team blue or team red has entered any codes with a quick flash of either a red or blue led.
  • If all three dials are set to red codes, the red team wins and hears a special message through the speaker just for them. The laser lights and smoke machine will be activated at the same time.
  • If all three dials are set to blue, a different message will play as well as activating the smoke machine and laser lights.

More info on the project can be found here, and while it might seem like a shame to modify this kind of vintage equipment, Meston notes that he sees this as giving it a nice second life since it was previously non-functional.

Arduino Blog 02 Oct 13:30

Antenna Rotation Arduino Style

Back in the days when you didn’t pay for your TV programming, it was common to have a yagi antenna on the roof. If you were lucky enough to have every TV station in the area in the same direction, you could just point the antenna and forget it. If you didn’t, you needed an antenna rotator. These days, rotators are more often found on communication antennas like ham radio beams. For terrestrial use, the antenna only needs to swing around and doesn’t need to change elevation. However, it does take a stout motor because wind loading can put a lot of force on the system.

[SP3TYF] has a HyGain AR-303 rotator and decided to build an Arduino-based controller for it. The finished product has an LCD and is able to drive a 24 V motor. You can control the azimuth of the antenna with a knob or via the computer.

[Waldemar Lewandowski] built a variant of the rotor (taking some additional ideas from [SQ9OUB]) and made a video of the device in operation (see below). The video is a little quiet, but you’ll get the ideas and you can see the original [SP3TYF] version’s code and documentation.

If you want to work satellites, you need an additional rotation axis. And if you think about it, rotating an antenna and moving a solar panel, probably have a lot in common — the sun is floating around in space, too.


Filed under: Arduino Hacks

Morse Code: Paris in the Mint Box

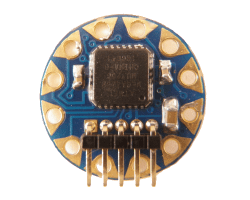
[Rob Bailey] likes to build things and he likes ham radio. We are guessing he likes mints too since he’s been known to jam things into Altoids tins. He had been thinking about building a code practice oscillator in a Altoids Smalls tin, but wasn’t sure he could squeeze an Arduino Pro Mini in there too. Then he found the TinyLily Mini. The rest is history, as they say, and 1CPO was born.

The TinyLily Mini is a circular-shaped Arduino (see right) about the size of a US dime. most of the pads are arranged around the circle and there is a small header that takes a USB programmer. A small rechargeable battery can run the device for a long time.

If you’ve ever written Morse code software, one challenge is to compute the actual sending speed in words per minute (WPM). If you are doing a serial port, for example, the speed is easy because the sent elements are the same length. However, with Morse code, some things are very short (like an E, for example) and some are much longer (like a zero). In fact, the code tries to reflect the frequency certain letters occur. E is the shortest character and the most common in English texts.

You might think [Samuel Morse] was responsible for this, but his original code was only numbers. The idea is you would get numbers and look them up in a code book. Presumably, some of the codes would have been single letters forming an early coding like ASCII, Baudot, or EBCDIC. [Alfred Vail] expanded the system to include letters and other characters and assigned lengths based on the examination of type cases at the local newspaper. That code also used dots, dashes, and long dashes, but it is almost recognizable as the Morse code in use today.

So [Rob] looked for a way to determine the speed and found that the ARRL uses the timing of the word PARIS as an average word. [Rob] wasn’t quite convinced that was the right way to go, so he compiled a list of the 1,000 most common English words, the 100 largest cities in the word, and a few other groups of words and computed the average element length of the words. PARIS has 50 elements total. The average of [Rob’s] list was 49.489. Pretty close.

If you think Morse code is dead, there are still a number of hams who enjoy it. Also, the US Air Force trains 10 Morse code operators every year. Morse has been used to transfer data over cell phones cheaply, and we’ve seen plenty of larger practice devices.


Filed under: Arduino Hacks

Homebrew Multimode Digital Voice Modem

There’s an old saying that the nice thing about standards is there are so many of them. For digital voice modes, hams have choices of D-Star, DMR, System Fusion, and others. An open source project, the Multimode Digital Voice Modem (MMDVM), allows you to use multiple modes with one set of hardware.

There are some kits available, but [flo_0_] couldn’t wait for his order to arrive. So he built his own version without using a PCB. Since it is a relatively complex circuit for perf board, [flo_0_] used Blackboard to plan the build before heating up a soldering iron. You can see the MMDVM in action below.

The build includes an Arduino, of course, and the neat perf board wiring makes for a good-looking project. We’ve covered digital voice that uses PCs before and even some digital ham modes that use an Arduino. Or check out the MMDVM project for more info.


Filed under: Arduino Hacks, radio hacks

Teensy 3.1 Controlled VFO

[Tom Hall], along with many hams around the world, have been hacking the Silicon Labs Si5351 to create VFOs (variable frequency oscillators) to control receivers and transmitters. You can see the results of his work in a video after the break.

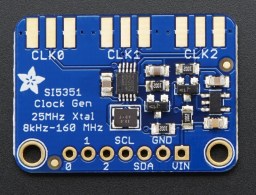
[Tom] used a Teensy 3.1 Arduino compatible board, to control the Si5351 mounted on an Adafruit breakout board. An LCD display shows the current frequency and provides a simple interface display for changing the output. A dial encoder allows for direct adjustment of the frequency. The ham frequency band and the frequency increment for each encoder step are controlled by a joystick. When you get into the 10 meter band you definitely want to be able to jump by kHz increments, at least, since the band ranges from 28 mHz to 29.7 mHz.

So what is the Si5351? The data sheets calls it an I2C-Programmable Any-Frequency CMOS Clock Generator + VCXO. Phew! Let’s break that down a bit. The chip can be controlled from a microprocessor over an I2C bus. The purpose of the chip is to generate clock outputs from 8 kHz to 160 kHz. Not quite any frequency but a pretty good range. The VCXO means voltage controlled crystal oscillator. The crystal is 25 mHz and provides a very stable frequency source for the chip. In addition, the Si5351 will generate three separate clock outputs.

[Tom] walks through the code for his VFO and provides it via GitHub. An interesting project with a lot of the details explained for someone who wants to do their own hacks. His work is based on work done by others that we’ve published before, which is what hacking is all about.


Filed under: Arduino Hacks, radio hacks