Posts with «dot matrix» label

A Tiny LED Matrix is Better With Friends

When we last heard from [lixielabs] he was building Nixie tube replacements out of etched acrylic and LEDs. Well he’s moved forward a few decades to bring us the Pixie, a chainable, addressable backpack for tiny LED matrix displays.
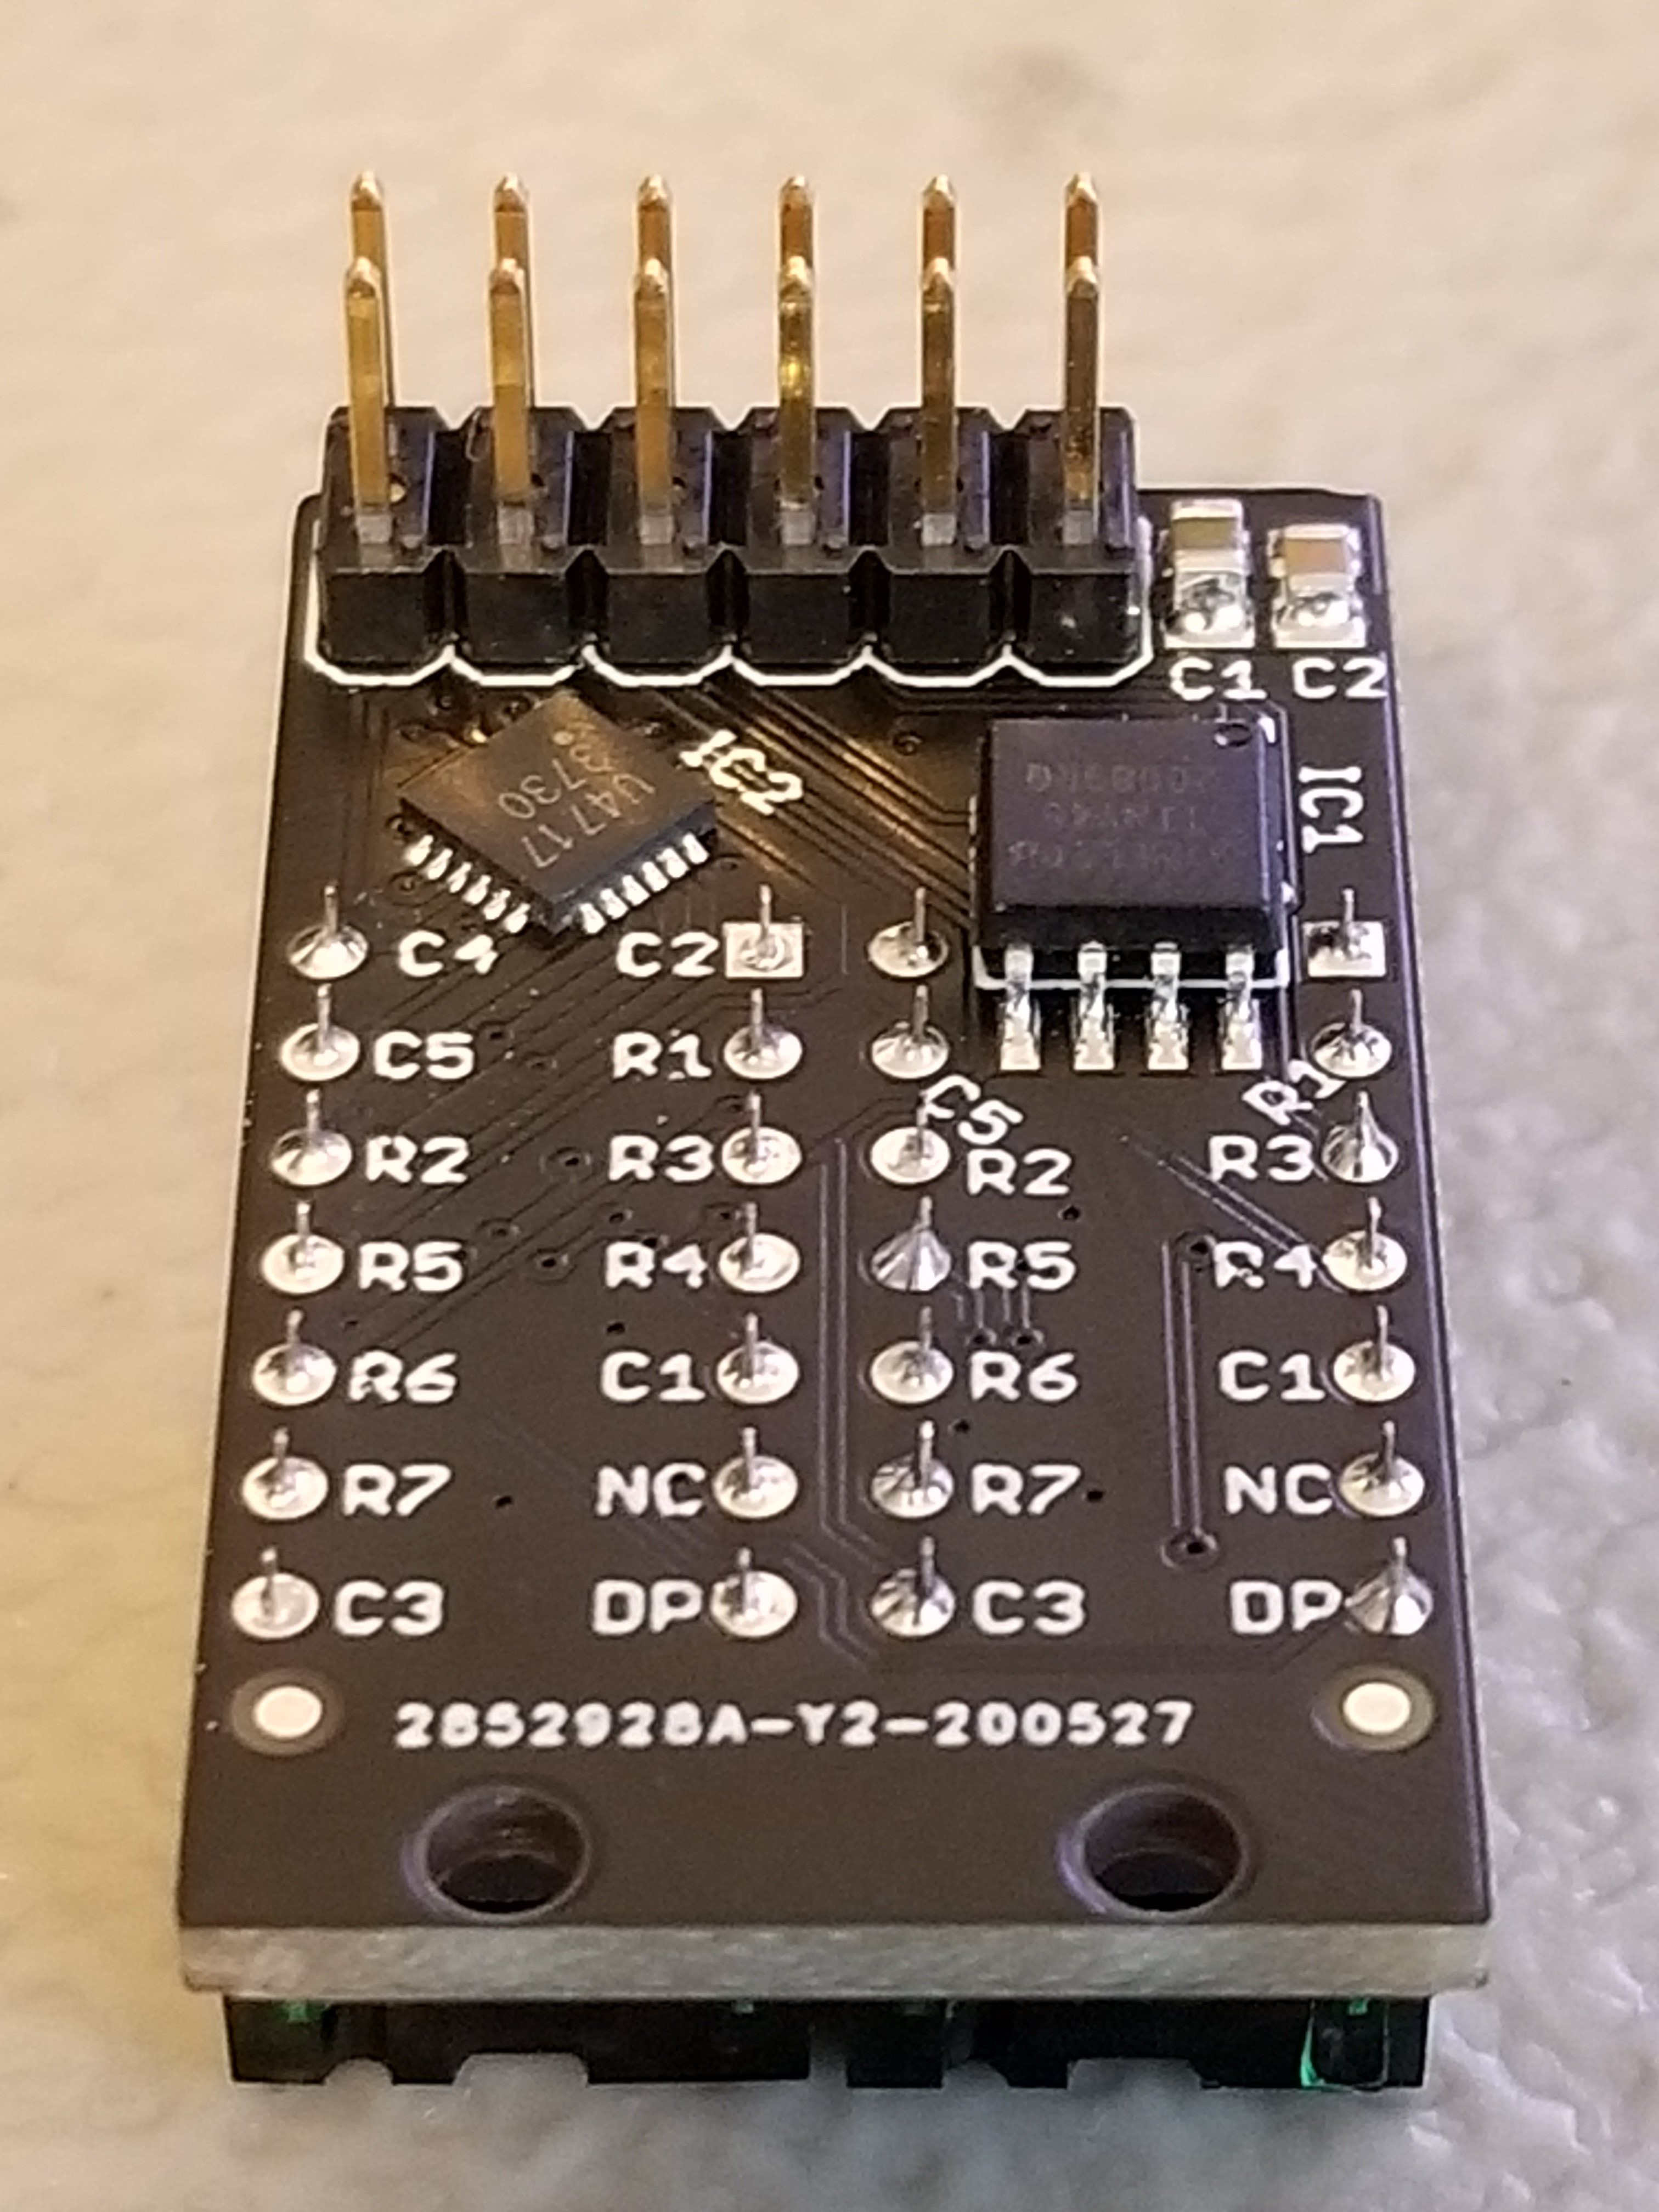
Each Pixie module is designed to host two gorgeous little Lite-On LTP-305G/HR 5×7 LED dot matrix displays, which we suspect have been impulse purchases in many a shopping cart. Along with the displays there is a small matrix controller and an ATTINY45 to expose a friendly electrical interface. Each module is designed to be mounted edge to edge and daisy chained out to 12 or more (with two displays each) for a flexible display any size you need. But to address the entire array only two control pins are required (data and clock).

[lixielabs] has done the legwork to make using those pins as easy as possible. He is careful to point out the importance of a good SDK and provides handy Arduino libraries for common microcontrollers and a reference implementation for the Raspberry Pi that should be easy to crib from to support new platforms. To go with that library support is superb documentation in the form of a datasheet (complete with dimensions and schematic!) and well stocked GitHub repo with examples and more.

To get a sense of their graphical capabilities, check out a video of 6 Pixie’s acting as a VU meter after the break. The Pixie looks like what you get when a hacker gets frustrated at reinventing LED dot matrix control for every project and decided to solve it once and for all. The design is clean, well documented, and extremely functional. We’re excited to see what comes next!

ESP32 with an I2S mic running FFT with 1024 cells, with each octave overlaid to make a 12-note chromagram, being rendered live by Pixies!https://t.co/0nWQfX0W6W pic.twitter.com/UZgh5ymWAw

— Lixie Labs (@lixielabs) September 22, 2020

Capture the Flag, Along with the Game Data

With events of all sizes on hold and live sports mostly up in the air, it’s a great time to think of new ways to entertain ourselves within our local circles. Bonus points if the activity involves running around outside, and/or secretly doubles as a team-building exercise, like [KarelBousson]’s modernized version of Capture the Flag.

Much like the original, the point of this game is to capture the case and keep it for as long as possible before the other team steals it away. Here, the approach is much more scientific: the box knows exactly who has it and for how long, and the teams get points based on the time the case spends in any player’s possession.

Each player carries an RFID tag to distinguish them from each other. Inside the case is an Arduino Mega with a LoRa shield and a GPS unit. Whenever the game is afoot, the case communicates its position to an external Raspi running the game server.

If you haven’t met LoRa yet, check out this seven-part introductory tutorial.

Air Bubble Characters Float Along This Unique Scrolling Display

We’ve seen a lot of unique large-format scrolling message boards on these pages, but most of them use some sort of established technology – LEDs, electromechanical flip-dots, and the like – in new and unusual ways. We’re pretty sure this air-bubble dot matrix display is a first, though.

While it may not be destined for the front of a bus or a train station arrivals and departures board, [jellmeister]’s bubble display shows some pretty creative thinking. It started with a scrap of multiwall polycarbonate roofing – Corotherm is the brand name – of the type to glaze greenhouses and other structures. The parallel tubes are perfect for the display, although individual tubes could certainly be substituted. A plastic end cap was fabricated; air nozzles in each channel were plumbed to an air supply through solenoid valves. An Arduino with a couple of motor driver hats allows pulses of air into each channel to create reasonably legible characters that float up the tube. The video below shows it in use at a Maker Faire, where visitors could bubble up their own messages.

It took some tweaking to get it looking as good as it does, but there’s plenty of room for improvement. We wonder whether colored liquid might help, or perhaps adding a Neopixel or even a laser to each channel to add some contrast. Maybe something to cloud the water slightly would help; increasing the surface tension with a salt solution might make the bubbles more distinct. We doubt it’ll ever have the contrast ratio of a flip-dot display, but it certainly has a charm all its own.

Dymo Rides Again With This Dot-Matrix Label Embosser

For a five-year-old future Hackaday scribe, there could be no greater day than that on which a Dymo label maker appeared in the house. With its spinny daisy-wheel to choose a character and its squeezy handle to emboss the letter into the plastic tape, there would follow a period of going nuts kerchunking out misspelled labels and slapping them on everything. Plus the things look like space guns, so there would have been a lot of pew-pewing too.

This Dymo dot-matrix label maker bears no resemblance to our long-lost label blaster, but it’s pretty cool in its own right. The product of collaborators [Felix Fisgus] and [Timo Johannes] and undertaken as a project for their digital media program, the only thing the labeler has in common with the Dymos of old is the tape. Where the manual labelers press the characters into the tape with a punch and die, their project uses a dot-matrix approach. Messages are composed on an old PS/2 keyboard through an Arduino and a 16×2 LCD display, and punched onto the tape a dot at a time. The punch is a large darning needle riding on the remains of an old CD drive and driven by a solenoid. When it comes time to cut the label, servo driven scissors do the job. It’s a noisy, crazy, Rube Goldberg affair, and we love it. Check it out in action in the video below.

We applaud [Felix] and [Timo] for carrying the torch of embossed label making. It’s a shame that we’ve turned to soulless thermal printers to handle most of our labeling needs; then again, we’ve seen some pretty neat hacks for those too.

Fail Of The Week: Arduino Sand Matrix Printer

NYC beaches are where tropical beaches addicted to meth go to die. So says [Vije Miller] in his write-up for his Arduino sand matrix printer. It’s a clever idea, five servo-operated cardboard plungers that indent a pattern of dots in the sand as the device is pulled forward, resulting in something not unlike a dot matrix printer that can write messages in the sand.

He’s submitted it to us as a Fail Of The Week, because it doesn’t do a very good job of writing in the sand, and it’s burned out a servo. But we feel this isn’t entirely fair, because whether or not it has delivered the goods it’s still an excellent build. Cardboard isn’t a material we see much of here at Hackaday, but in this case he’s mastered it in a complex mechanism that while it may have proved a little too flexible for the job in hand is nevertheless a rather impressive piece of work.

You can see a brief video below the break showing it in action. He tells us his motivation has waned on this project, and expresses the hope that others will take up the baton and produce a more viable machine.

This may be our first sand matrix printer, but it’s not our first sand 3D printer.


Fail of the Week is a Hackaday column which celebrates failure as a learning tool. Help keep the fun rolling by writing about your own failures and sending us a link to the story — or sending in links to fail write ups you find in your Internet travels.


Filed under: Arduino Hacks, Fail of the Week

The ChalkJET Writing Machine

“Way back” in 2009, students in the UC Berkley “ME 102″ class came up with this excellent automatic chalk-spraying machine. It uses 8 cans of spray-chalk to spray the message of your choosing onto the sidewalk or street as you push it along. This device is controlled by two Arduino […]

Read more on MAKE