Posts with «microphone» label

What to buy if you want to start producing music at home

These days it’s not necessary to go to a giant studio with overpriced, pro-grade gear to record a Grammy-winning record. You can do it right from the comfort of your own bedroom in fact, using tools priced for even the most casual of hobbyists. It's not news that the tools of creation or the avenues for distributing art are accessible to more people than ever. But the cultural institutions that have dominated popular music for so long can no longer ignore the bedroom producer or budding Soundcloud star.

Maybe you've been inspired to build your own home recording studio. And maybe, you're not quite sure where to start. Well, an audio interface, a good mic and a decent set of headphones will get you pretty far. But the first thing you'll need is probably staring you right in the face: a computer.

Computer and a DAW
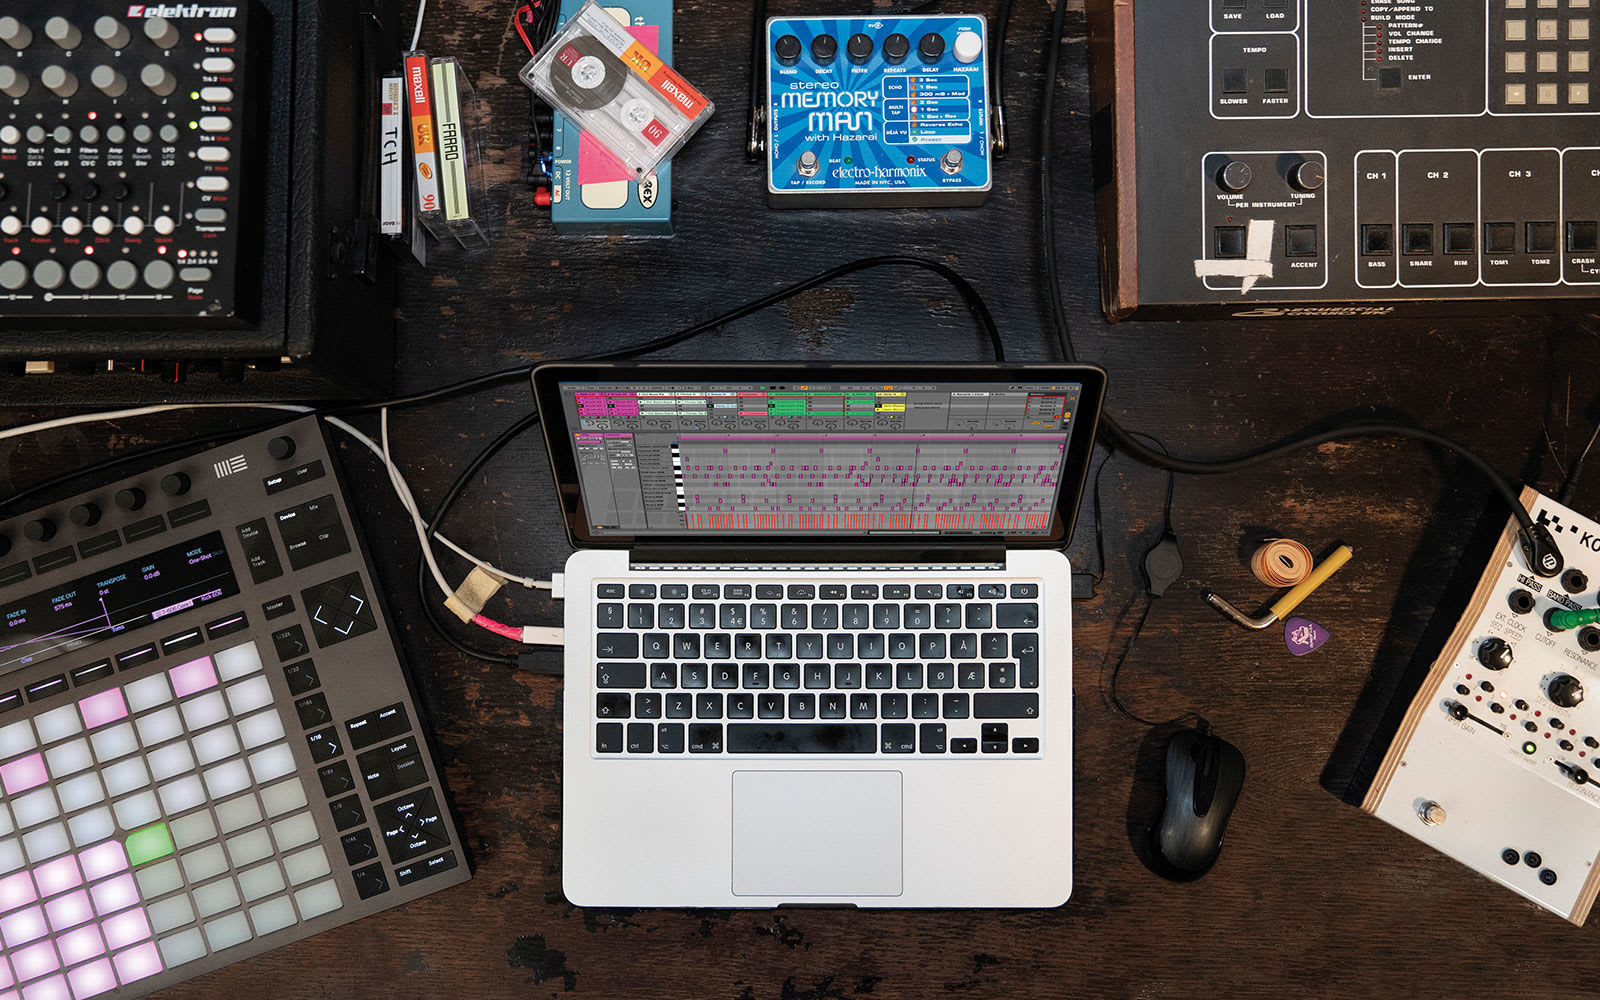
Justin DeLay, Director of Product and Category Marketing at Reverb, drives home just how important the computer is: "You can strip away everything else and as long as you have a computer you can still create music," he told me. He suggests you "spend the money on a good computer and get other gear — such as audio interfaces, mics, headphones, etc. — used or at reasonable price points."

But, truthfully, you can do quite a lot with whatever computer you have on hand. Joe Pecora, the engineer and producer at Red Room Studio, says your set up "could be as simple as an iPhone/iPad with Garage band." (I know someone who recorded an entire album this way.) While he agrees that the most important part is your computer, he argues it doesn't have to be super powerful. It doesn't even have to be a desktop. JDilla famously created many of his beats on a Roland SP303, and you can basically recreate that experience with an iPad and the $4 Koala Sampler for iOS. And don't forget that Gorillaz recorded an entire album on an iPad.

Which leads us to the next thing you'll need: a DAW, or digital audio workstation. If you're a Mac user, then you're lucky enough to have access to Garage Band, a surprisingly capable free option. And upgrading to Logic Pro X is only a $200 investment. If you're on Windows (or just don't like Logic), I often recommend Ableton Live (starting at $99). But honestly there are plenty of great options out there, like FL Studio, BitWig and Cubase all of which start at $99. And often, stripped down versions come free as part of a software bundle when you buy music-making hardware like MIDI controllers and audio interfaces.

Assuming you already have a computer and you just need the accessories to get recording, you can pick up everything you need for under $500 new. But, if you’re patient, you could build a well equipped bedroom studio with used gear for as little as $250.

MIDI controller
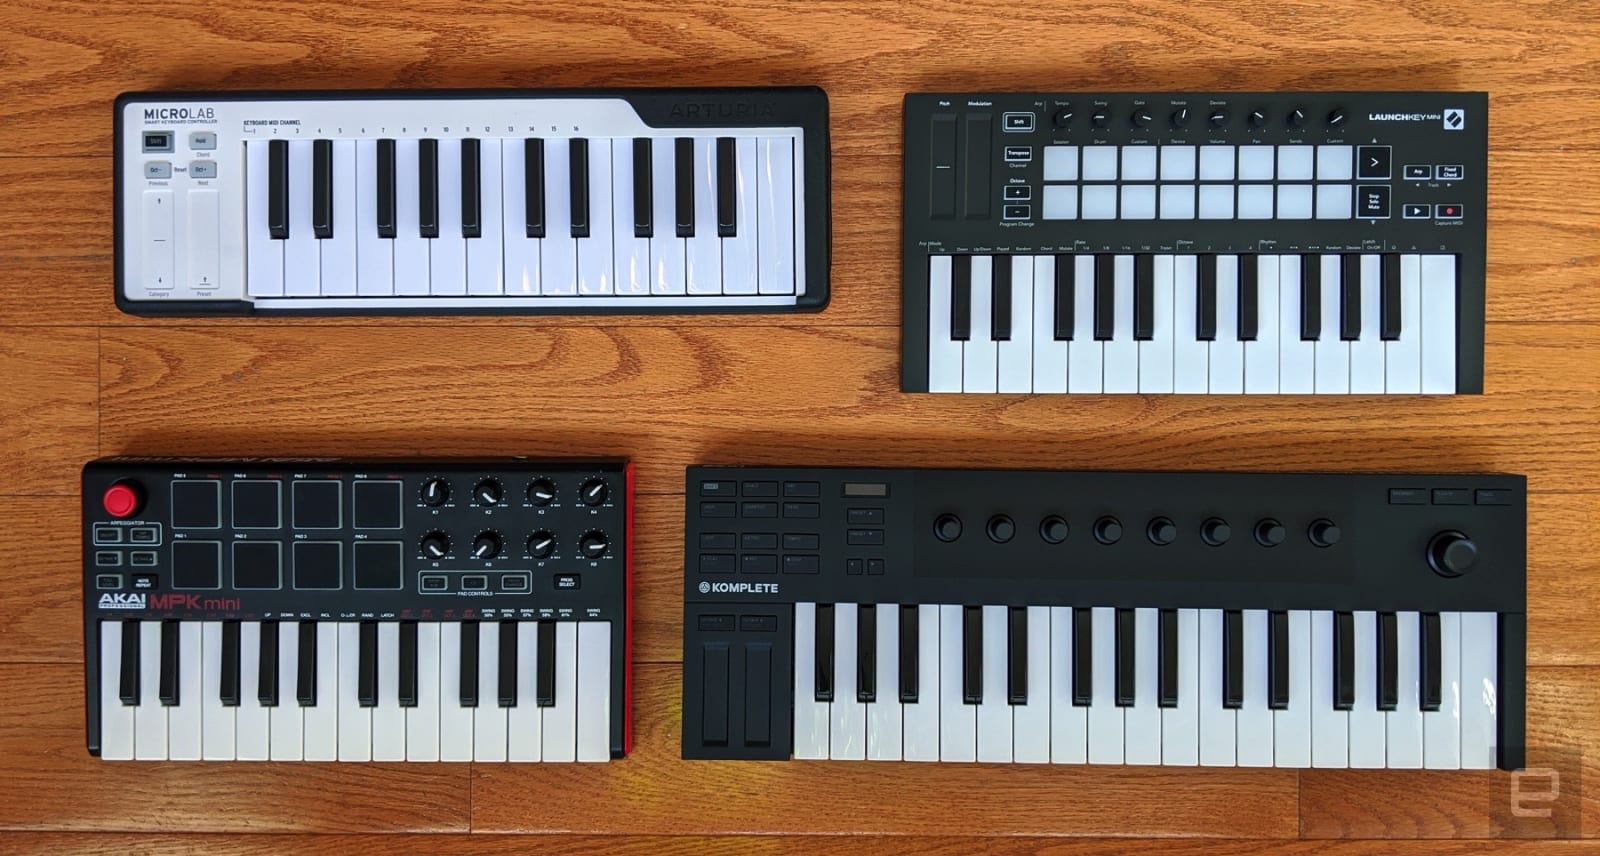
Speaking of which, one of the first additions to your studio should be a MIDI controller. DeLay says this is a piece of gear often overlooked by beginners. "It's not just for playing keyboard sounds," he explained, "it can be used to write drums and percussion, to control mixes and more. It's the creative interface of music production, and you don't have to play the piano in order to harness its power."

We've covered plenty of affordable and portable options before. But if you don't plan to make music on the go, I can't recommend the Arturia MiniLab 3 enough. It punches well above its weight, and even the pros love this thing. And if you have the space, it's not much more to upgrade to something like the Keylab Essential 49 ($269) or Novation Launchkey 49 ($229), which will give you a lot more controls to play with.

Microphone

Audio-Technica

Unfortunately there's no gear that will magically turn you into a breathy pop goddess, but a decent mic and audio interface can at least help you sound your best. Now, you could get a USB microphone, like Blue Microphones’ $130 Yeti, and it will certainly get the job done. Heck, that album I mentioned earlier was recorded using the wired headset that came with the iPhone.

But, honestly, your better bet is to get a regular XLR mic and an audio interface. Pecora specifically warns against splurging too much here. "People will look at their favorite artist and see that they use a certain mic or preamp or plugin and want to use the same thing thinking it will get them the same sound." On early singles like "Ocean Eyes" Billie Eilish used an Audio-Technica AT2020 condenser mic, which costs just $100. And I’ve stuck almost exclusively with cheap Shure SM58s and 57s ($100 new, $50-$75 used) whether I was recording demos with my band in college or voice over for review videos at Engadget.

If you fancy yourself a future pop sensation and want to make sure your vocals are the star of the show, you could consider using a significant chunk of your budget on something like the Rode NT1-A ($229) or Shure SM7B ($390). You will get better results with more flexibility for post production, but you can clearly get excellent results with more affordable options.

Audio interface
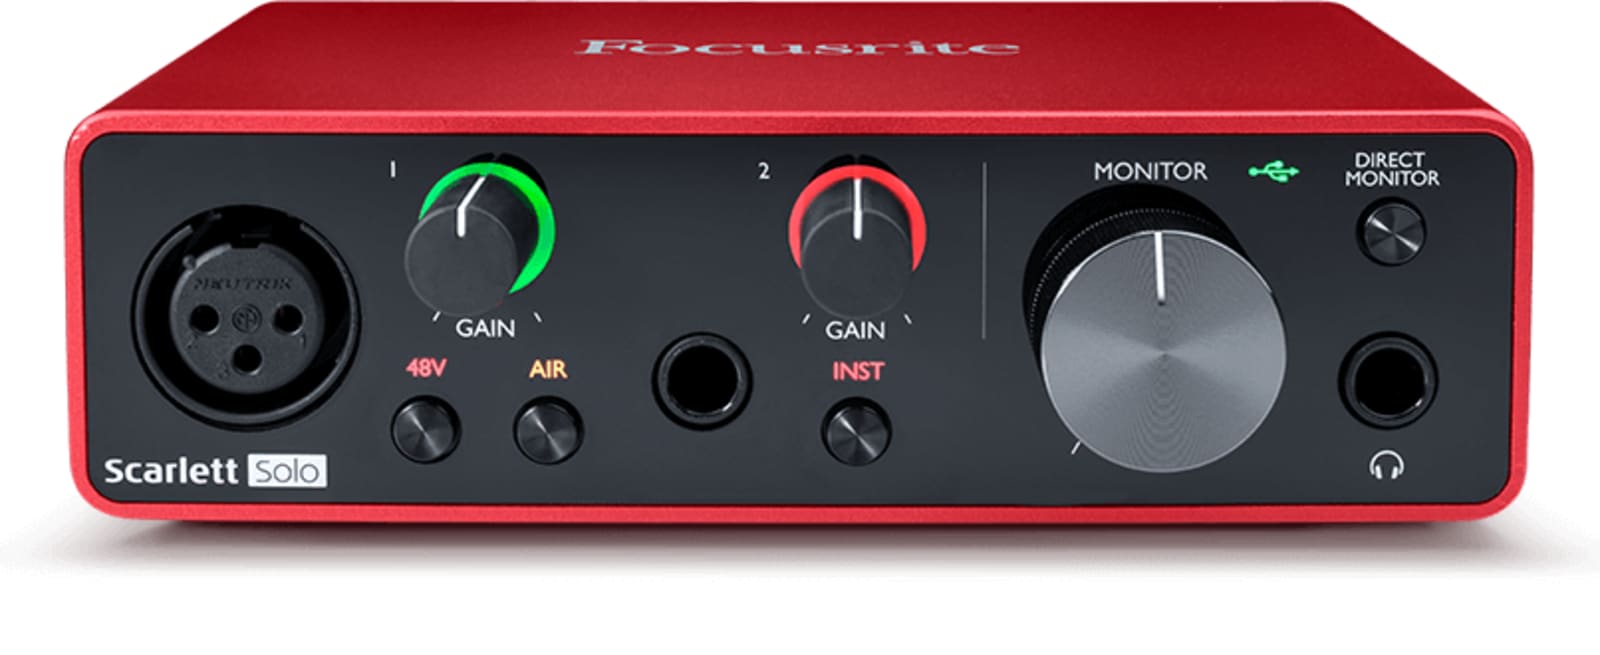
As for the interface, there are tons of great options out there. Companies like Focusrite, Arturia and Tascam make excellent ones. But our new favorites in the budget interface space are Universal Audio’s Volt series. If your budget allows for it we strongly recommend the $299 Volt 276. Though, the $189 Volt 2 is also excellent, it just doesn’t standout from the crowd quite as much.

If you’re trying to save a few bucks, it's hard to beat the Scarlett series from Focusrite (just make sure to get the second- or third-gen models). You can get the latest Scarlett 2i2 for around $130 used, but it's just $180 new (and includes a huge bundle of very useful software).

The reason to opt for an audio interface instead of a simple USB mic is because it offers you a lot more flexibility and room to grow. For one, it offloads a lot of the audio processing from the CPU. Second, it will allow you to connect not just mics (and swap in different ones for different purposes), but also instruments, turntables or anything with an audio-out jack. An audio interface is also necessary if you plan to connect a pair of studio monitors.

Studio monitors and headphones
This is an area that DeLay advises caution. While a good set of studio monitors will obviously be better than the speakers on your laptop and will result in a better mix, it's too easy to get caught up in what he calls monitor envy. "The reality is that monitors at a $300 price point are going to work just fine in most spaces," he says. Plus, your bedroom probably doesn't have the space to really make the most of large, powerful monitors. So, save your money.

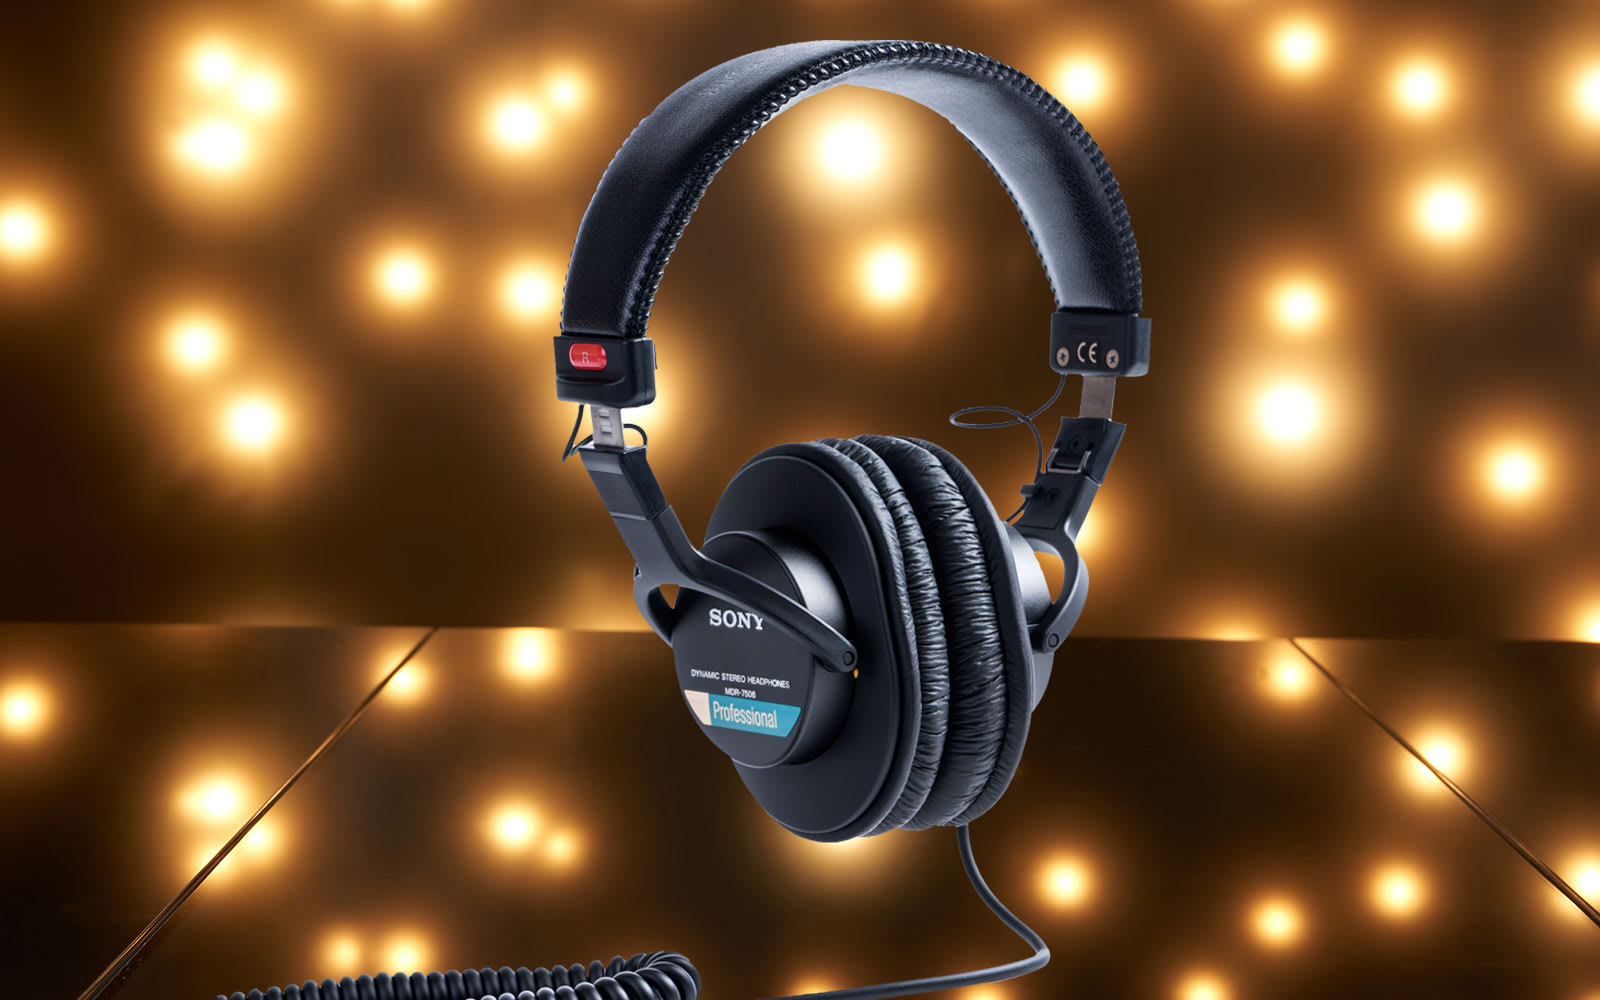
And if you're just starting out, you're probably better off getting a decent set of headphones. There're tons of amazing and affordable studio quality headphones out there for under $200, like the $179 Beyerdynamic DT990PRO (currently down to just $179 on Amazon). But one of our favorites is an old workhorse from Sony, the MDR-7506. They're well under $100 and actual pros have used them for decades to mix music.

One tip DeLay offers for novices: Double check your mixes in the real world. Headphones can over emphasize bass, while smaller studio monitors can have trouble delivering accurate bass response. So make sure to listen to your track on laptop speakers or in a car to get a sense of how it will sound in the wild.

And that's really the key — have the patience to develop your skills and make the most of the gear you have. It's really easy to catch a bad case of GAS (gear acquisition syndrome) when you're first starting out — trust me, I know. But there's no need to shell out thousands of dollars for high-end gear to start making music. You don't even need to buy new gear. Pecora suggests the only thing you absolutely should buy new are headphones. And, presumably, that's just because you don't want to be wearing years worth of someone else's sweat on your ears.

Images: Getty Creative (home studio); Ableton (Ableton Live running on laptop); Focusrite (Scarlett Solo); Will Lipman / Engadget (Arturia KeyStep, Sony MDR-7506)

Speaker Snitch Tattles on Privacy Leaks

A wise senator once noted that democracy dies with thunderous applause. Similarly, it’s also how privacy dies, as we invite more and more smart devices willingly into our homes that are built by companies that don’t tend to have our best interests in mind. If you’re not willing to toss all of these admittedly useful devices out of the house but still want to keep an eye on what they’re doing, though, [Nick Bild] has a handy project that lets you keep an eye on them when they try to access the network.

The device is built on a Raspberry Pi that acts as a middle man for these devices on his home network. Any traffic they attempt to send gets sent through the Pi which sniffs the traffic via a Python script and is able to detect when they are accessing their cloud services. From there, the Pi sends an alert to an IoT Arduino connected to an LED which illuminates during the time in which the smart devices are active.

The build is an interesting one because many smart devices are known to listen in to day-to-day conversation even without speaking the code phrase (i.e. “Hey Google” etc.) and this is a great way to have some peace-of-mind that a device is inactive at any particular moment. However, it’s not a foolproof way of guaranteeing privacy, as plenty of devices might be accessing other services, and still other devices have  even been known to ship with hidden hardware.

Eavesdropping Assistant Disturbs The Sound Of Silence

Unless you happen to be from Finland, this is just an all too familiar situation: you’re stuck in an inescapable situation with this one person who is really more of an acquaintance than a friend, and neither of you knows who should say something in hopes of keeping a conversation going. Awkward silence is inevitable, and the longer it lasts, the more excruciating the thought of opening your mouth becomes. Well, consider those days over, thanks to [Jasper Choi] and his friends, who blessed us with the System for Awkward Silence Solution and Interaction Enhancer, or SASSIE.

Built as a laser-cut rotating cylinder, and equipped with a pair of microphones, SASSIE detects and counts the duration of any ongoing silence in the room. Once a pre-defined time limit is reached, it rotates itself to a random direction, symbolically pointing a finger to one of the people present in the room to indicate its their turn to speak now. To break the silence right off the bat, the finger pointing is accompanied by some pre-recorded messages. Unfortunately the audio files exceeded the storage of the Arduino Uno used here, so the responsibilities had to be divided between two Arduinos, arranged with the help of some simple serial communication.

While this is obviously a tongue-in-cheek project, it might just be a welcoming relieve for people with social anxiety, and there is definitely potential to take the idea further. Maybe with some inspiration from this happy robot fellow, a future version might ease the conversation even further by suggesting a topic along the way.

Speech Recognition and Synthesis with Arduino

In my previous post, I showed how to control a few LEDs using an Arduino board and BitVoicer Server. In this post, I am going to make things a little more complicated.

read more

Speech Recognition with Arduino and BitVoicer Server

In this post I am going to show how to use an Arduino board and BitVoicer Server to control a few LEDs with voice commands. I will be using the Arduino Micro in this post, but you can use any Arduino board you have at hand.

The following procedures will be executed to transform voice commands into LED activity:

read more

Manipulate your voice with Mimic Monster and Intel Edison

It’s time to introduce you to another great tutorial made for  Intel Edison.  Mimic Monster is a project allowing you to record soundbites and playing them back manipulated.
In this step-by-step project, everyone who is interested in audio features and mods , can find useful information on how to manipulate audio files and create amazing effects from your voice.

Grawr! It’s a mimic monster! What did you say? Grawr! It’s the mimic monster!

Having landed on Earth, this little alien needs you to teach it how to speak. Speak into its audio antenna and it will repeat your words back. Press a button and change its pitch. In this tutorial, you will learn in more detail, how to work with a USB sound card, a microphone, and a speaker.


Before you begin, make sure you’ve followed through Intel® Edison Getting Started guide, and our previous tutorial, the Intel® Edison mini-breakout Getting Started Guide.

 Check the other tutorials of the series.

Converting Morse Code to Text with Arduino

Morse code used to be widely used around the globe. Before voice transmissions were possible over radio, Morse code was all the rage. Nowadays, it’s been replaced with more sophisticated technologies that allow us to transmit voice, or data much faster and more efficiently. You don’t even need to know Morse code to get an amateur radio license any more. That doesn’t mean that Morse code is dead, though. There are still plenty of hobbyists out there practicing for the fun of it.

[Dan] decided to take a shortcut and use some modern technology to make it easier to translate Morse code back into readable text. His project log is a good example of the natural progression we all make when we are learning something new. He started out with an Arduino and a simple microphone. He wrote a basic sketch to read the input from the microphone and output the perceived volume over a Serial monitor as a series of asterisks. The more asterisks, the louder the signal. He calibrated the system so that a quiet room would read zero.

He found that while this worked, the Arduino was so fast that it detected very short pulses that the human ear could not detect. This would throw off his readings and needed to be smoothed out. If you are familiar with button debouncing then you get the idea. He ended up just averaging a few samples at a time, which worked out nicely.

The next iteration of the software added the ability to detect each legitimate beep from the Morse code signal. He cleared away anything too short. The result was a series of long and short chains of asterisks, representing long or short beeps. The third iteration translated these chains into dots and dashes. This version could also detect longer pauses between words to make things more readable.

Finally, [Dan] added a sort of lookup table to translate the dots and dashes back into ASCII characters. Now he can rest easy while the Arduino does all of the hard work. If you’re wondering why anyone would want to learn Morse code these days, it’s still a very simple way for humans to communicate long distances without the aid of a computer.


Filed under: Arduino Hacks

Audio Input to Arduino

The easiest way to connect audio signal to your arduino, is build a simple 3 components (2 resistors plus cap) circuitry shown on the first drawings on right side. Disadvantage: as there is no amplifier, sensitivity would be low, hardly enough to work with headphones jack output.  For low level signals, like electret microphone, amplifier is necessary. Here is the kit, which included board, electronic components and NE5532 Operational Amplifier IC:

  Super Ear Amplifier Kit

Other option, from SparkFun Electronics:

  Breakout Board for Electret Microphone

Note: I don’t recommend to replace NE5532 OPA with popular  LM358 or LM324 due their pure frequency response above > 10 kHz.

Configuring AtMega328 ADC to take input samples faster:

void setup() {

   ADCSRA = 0×87; // freq = 1/128, 125 kHz. 13 cycles x 8     usec =  104 usec.
// ADCSRA = 0×86; // freq = 1/64,   250 kHz. 13 cycles x 4     usec =   52 usec.
// ADCSRA = 0×85; // freq = 1/32,   500 kHz. 13 cycles x 2     usec =   26 usec.
// ADCSRA = 0×84; // freq = 1/16 ,    1 MHz. 13 cycles x 1      usec =   13 usec.
// ADCSRA = 0×83; // freq = 1/8,       2 MHz. 13 cycles x 0.5   usec =  6.5 usec.
// ADCSRA = 0×82; // freq = 1/4,       4 MHz. 13 cycles x 0.25 usec = 3.25 usec.

ADMUX    = 0×40;                          // Select  Analog Input 0

ADCSRA |= (1<<ADSC);                 // Start Conversion

Timer1.initialize(T_PERIOD);           // Sampling with TimerOne library
Timer1.attachInterrupt(iProcess);

}

Reading and storing samples to array via ISR ( Timer Interrupt Subroutine ), Timer1 in this example:

void iProcess()
{
static uint8_t n_sampl;
if (ADCSRA & 0×10)
{
int16_t temp = ADCL;
         temp += (ADCH << 8);
          temp -= sdvigDC;    
    ADCSRA |= (1<<ADSC);
xin[n_sampl] = temp;
}

if (++n_sampl >= FFT_SIZE )
{
n_sampl = 0;
process = 1;
}

}

Don’t like to solder all this components from the drawings above? Here is easy way around, if you, by chance, have a spare USB speakers around. Something like this:

Note: Speakers should use USB port as a power source, not AC power outlet!

1.  Open box up, and look  what kind of chip (IC) Power Amplifier inside, on the PCB board:

2.  TEA2025 in this example, but could be different in yours. Not big deal, just write down the name, than go on-line and try to find a data sheet for your particular chip. My favorite links:  1   and   2.  From the data sheet you will find pin numbers of two outputs, for left and right channels. Just solder couple of wires to ground and to one of the output and that’s it!

3. If printing on the IC body is unreadable, or couldn’t find a data sheet, it is possible to trace two wires from the speaker to IC. Most likely, there would be an electrolytic cap installed in series, between chip output and speaker. Solder a signal wire on the chip’s side of the cap, or near IC. There is a slim chance, of course, that IC configured in bridge configuration, and wouldn’t be any caps. It’s even better, just use ether of two speaker’s wires as a signal line, and ground as ??? a ground.

Be careful, use different color of wires for ground line and signal line. There would be no protection, and wrong polarity could damage an analog input of the arduino board, and in some occasions Power Amplifier IC. To prevent this, I’d strongly advise to install 10 kOHm resistor in series with signal wire.


Salvius

Primary image

What does it do?

Salvius is my humanoid robotics project that I have been working on over the past year. The robot still requires work before it can move around on its own because I still need to get another motor controller. While I search for another Curtis 12v model: 1204 motor controller I continue to work on many other parts of the robot's design. The robot now has night vision and ultrasonic hearing. You can connect to the robot's computer using any wireless enabled device and control the robots actions.

Cost to build

$650,00

Embedded video

Finished project

Number

Time to build

Type

wheels

URL to more information

Weight

120000 grams

read more